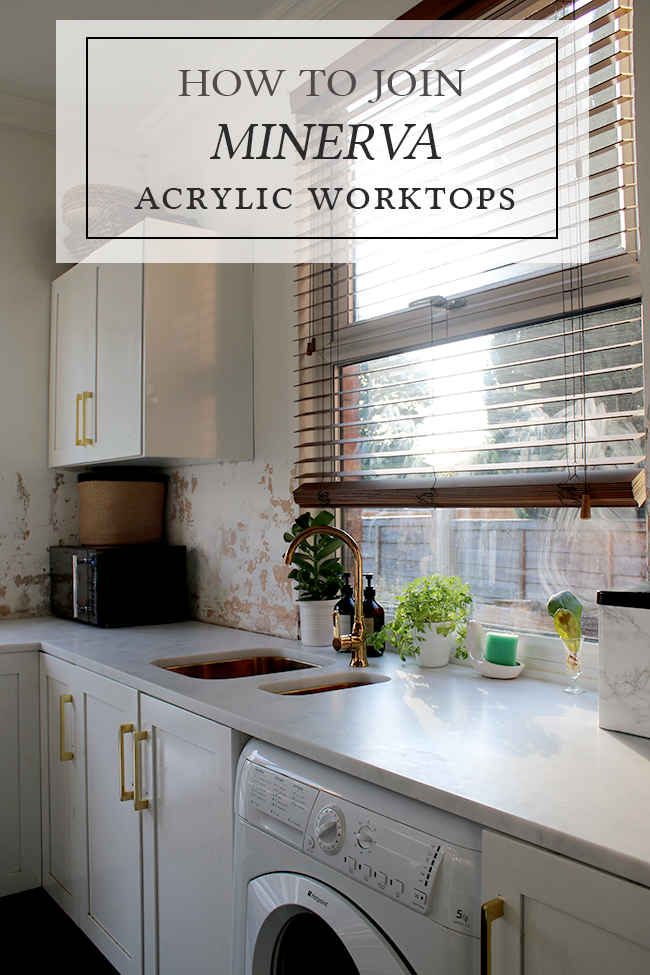
So the last you saw the kitchen, we had happily completed all the cutting we needed to do on the Carrara marble effect acrylic worktops from Minerva. Wayne did an awesome job of cutting out the sink and installing the tap as well (so screw you, Craig!) so all that was left was levelling everything off and joining the worktops. I figured I’d share exactly how we did it – I promise it wasn’t actually all that hard!
If you want to scroll down to see the end result, please feel free! For those who are considering using acrylic worktops in their own kitchens, I wanted to share the process so you can see that it can indeed be a pretty quick and painless DIY. In fact, we had all 4 joins completed within an afternoon!
Now, levelling the worktops was a bit of a pain because our walls are all uneven so nothing is really 100% square – the joy of an older house! For this we used a three pronged solution: Adjusting the feet of the cupboards, making adjustments and in some cases changing the placement of the screws holding the worktops to the walls and for very minor adjustments, we used plastic shims. Once we were confident the cupboards were all level, the process of joining could begin.
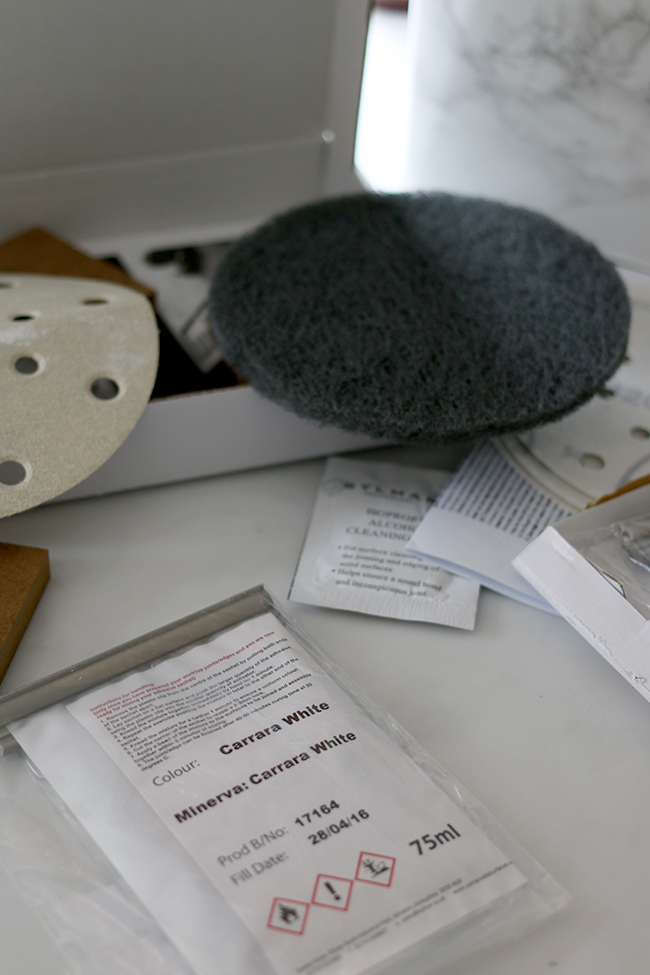
It was a relatively easy job and Minerva thankfully provide both the tools that are required as well as a video explaining the process which we watched about 20 times before starting.
Prepping the Joins
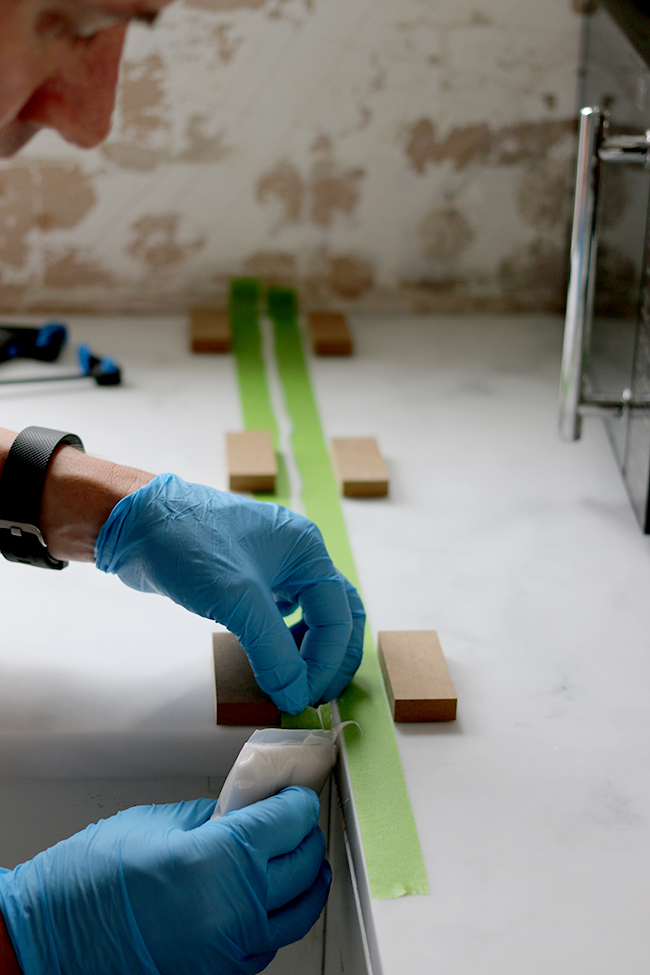
The first thing we did was sand the meeting edges down with 120 grit sandpaper and wiped them down with the isopropyl alcohol wipes provided in the joining kit.

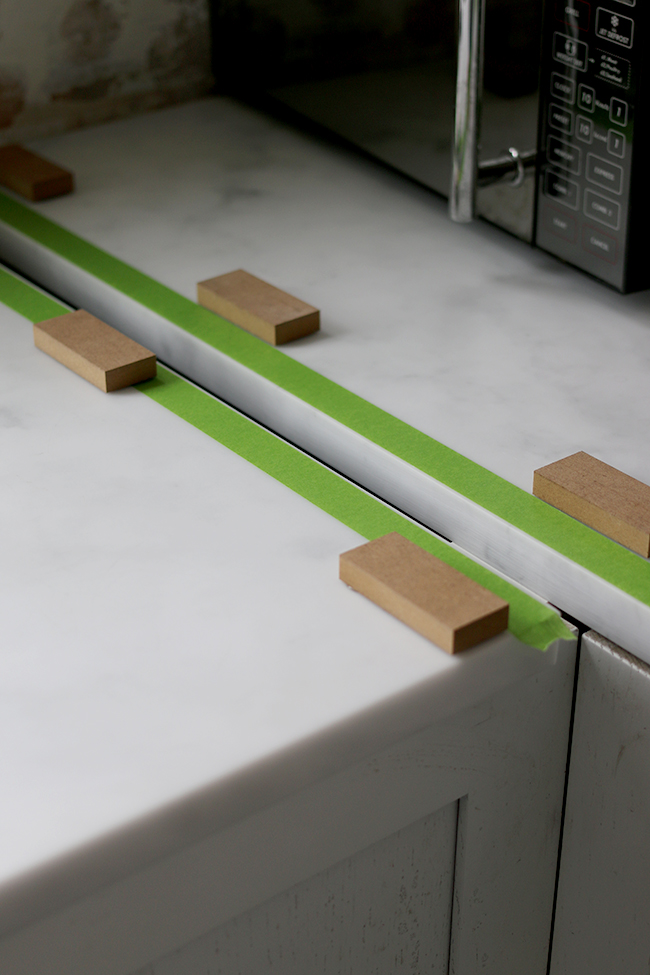
We then masked off the tops of the worktops leaving a 3mm edge exposed.
Next step was using the small MDF blocks (also provided) and used a glue gun to attach them to the worktops. This was slightly scary I admit because my worktops are pretty – I didn’t want to put glue all over them! – but it was fine to do! Whew!
Applying the Glue
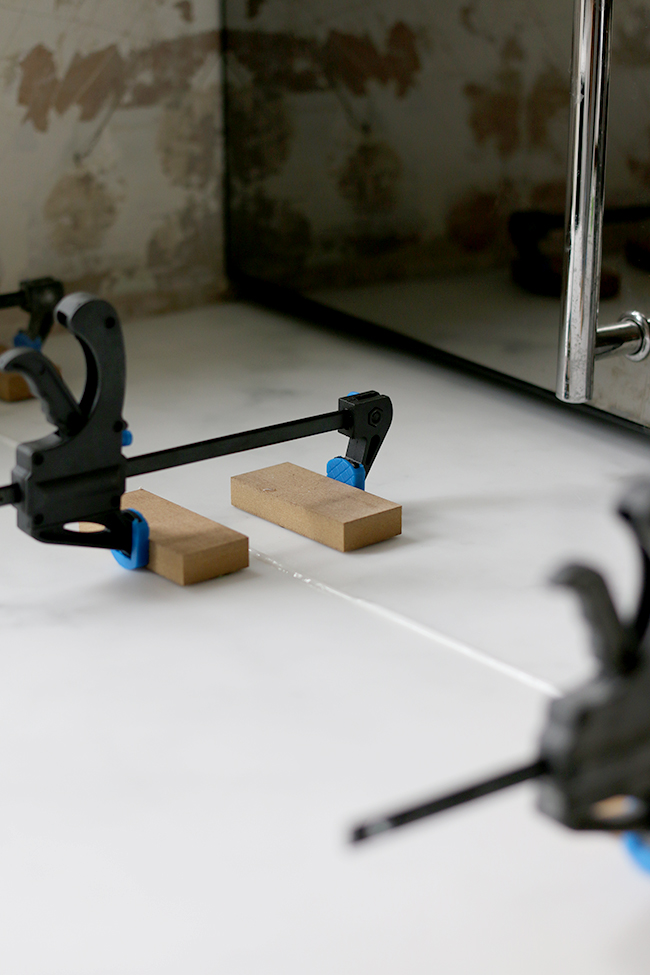
Once the surface is all prepped, it’s time for the jointing compound. It comes in a two part pack which you separate and then run the plastic piece over to mix the two compounds together. Once they are mixed, the chemicals start working so you have to act quickly after that.
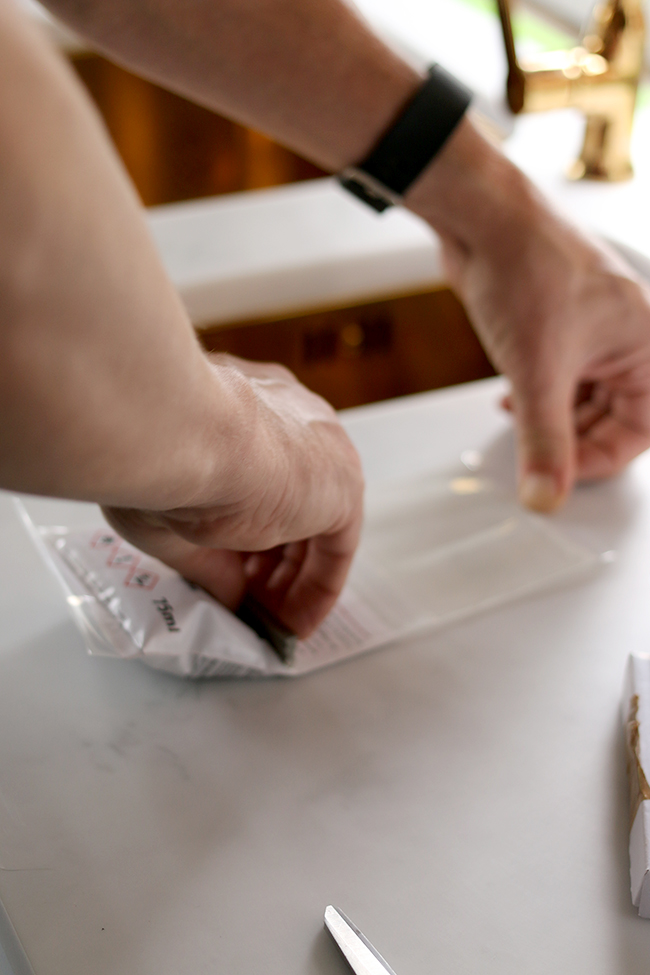
The glue is then placed along both cut sides, smoothed out (we used a little plastic spatula) so that it’s evenly applied and the worktops are pressed together. The strange part was that you are then meant to separate the worktops ever so slightly, leaving about a 1mm gap between the worktops. Another line of glue is applied to fill in any gaps in the bead.

We then attached the small clamps we already had, using the MDF blocks as leverage to pull the worktops together. The excess glue is then lightly removed from the join and left to dry for 45 minutes and the tape is removed.
Sanding and Buffing the Joins
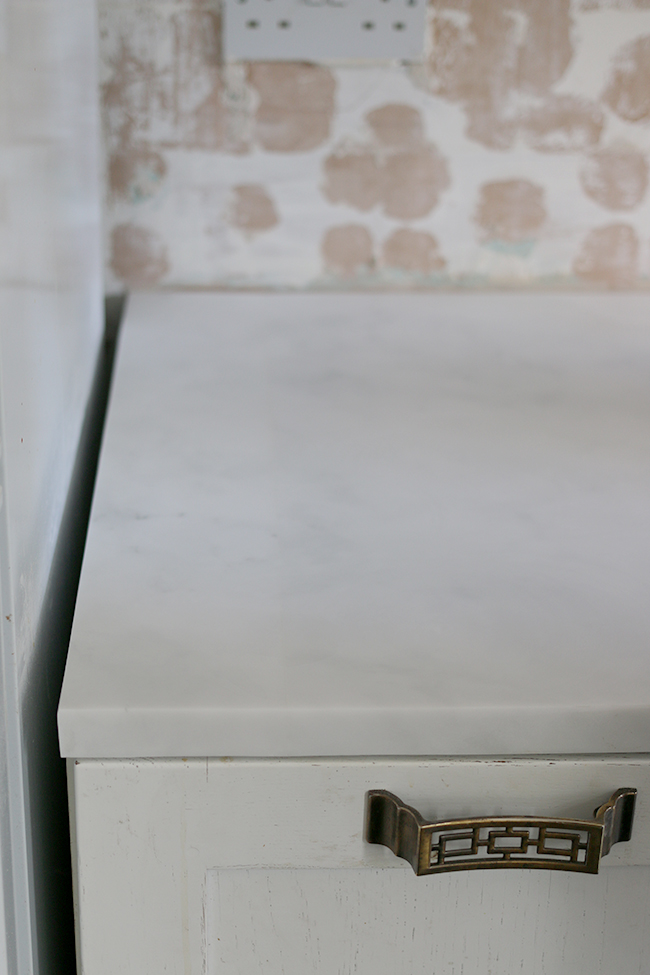
After the wait, the clamps are removed and a swift tap with a hammer will dislodge the blocks (the glue did no lasting damage – hurrah!). The join is then sanded three times. First, using the 120 grit, then the 240 grit and then, the 320 grit. Finally water is placed on the surface and using the red abrasive pad, it’s gone over one more time.
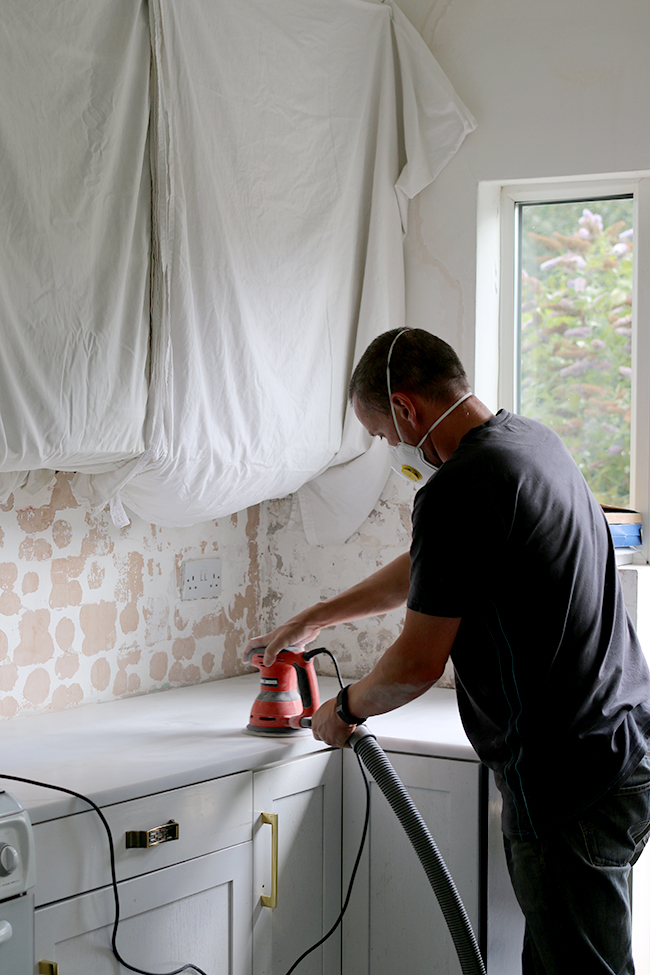
There were a few minor scratches in the surface of the worktops simply from when they were stored prior to installation and in their handling and these were all buffed out using the same method of sanding. They came out beautifully.
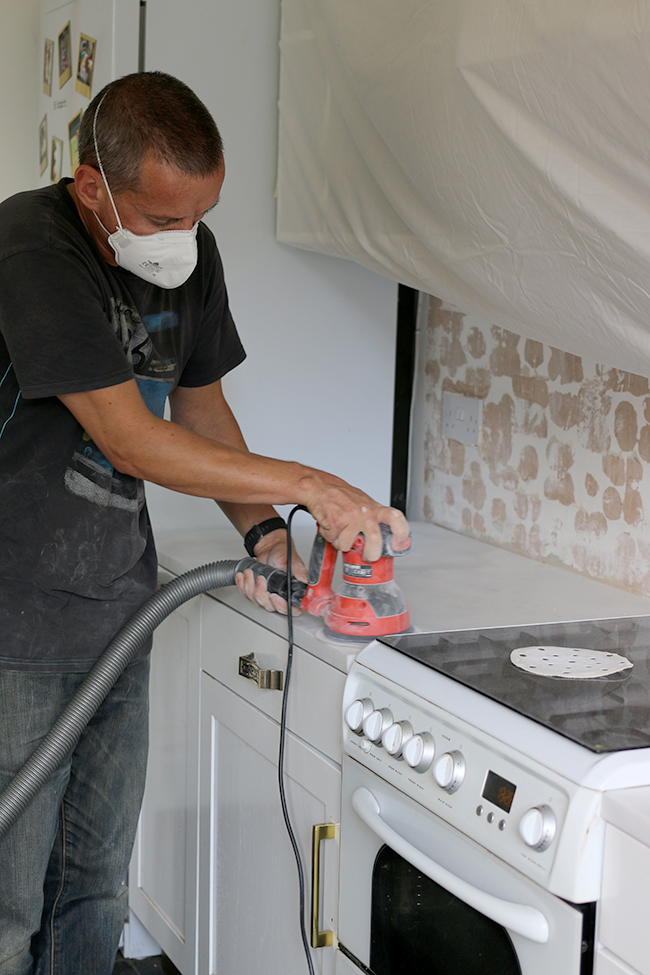
After that, once you’ve cleaned up the worktop of any dust, they are all done!
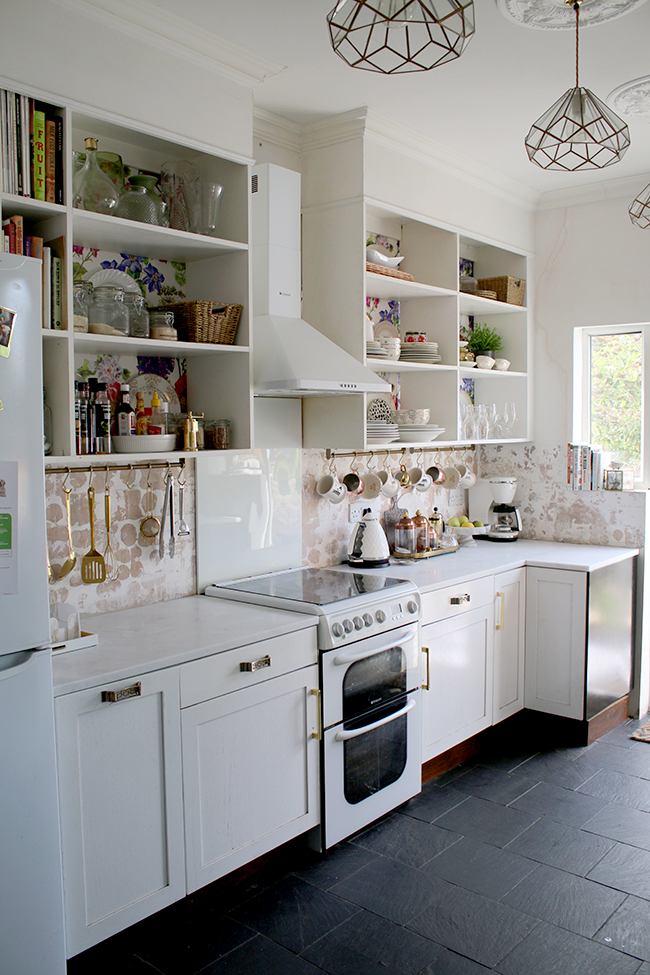
The final result
I have to say that the additional join we had to have due to the c*ck up of the retailer we ordered from (you can read about that here) was the one that ended up looking the best! It’s hardly noticeable at all unless you look for it.
Oh and I just wanted to reiterate, it wasn’t Minerva’s mistake but their retailer. If I was doing it all again, I would have ordered direct from Minerva but well, hindsight is always 20/20!
The two joins at the end are a little more obvious – not because we did anything wrong but just because the patterns don’t align quite as well and so you can see the difference in the pattern grain between them. To be completely honest, I’m okay with the slight differences as again, in person they really aren’t too noticeable.


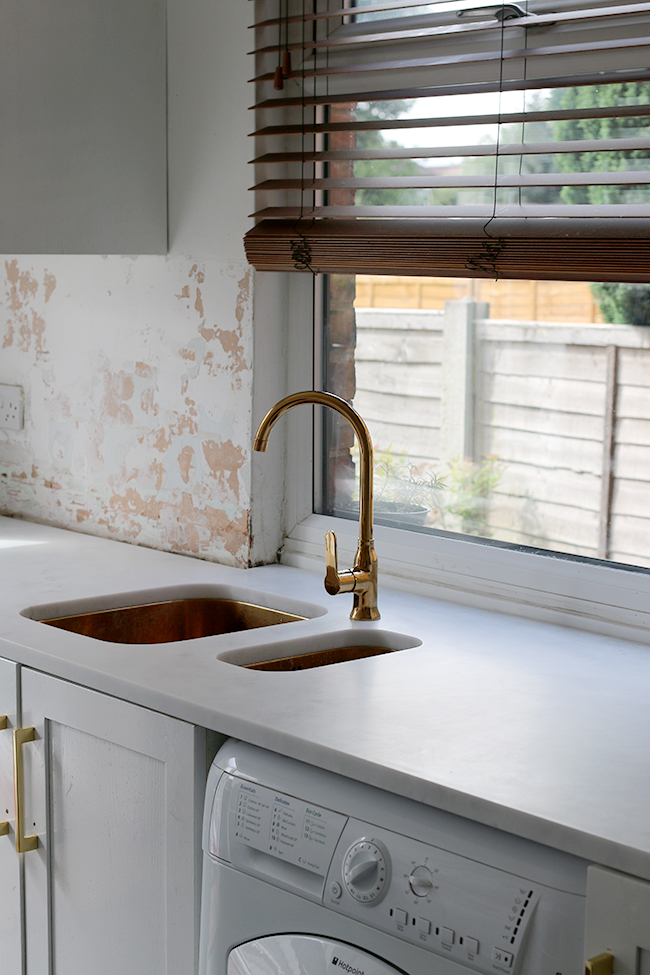
My favourite thing however has to be around the windowsill. Adding an additional piece of worktop into the windowsill has made the whole thing look SO much better than the ugly piece of plastic that used to be there before.
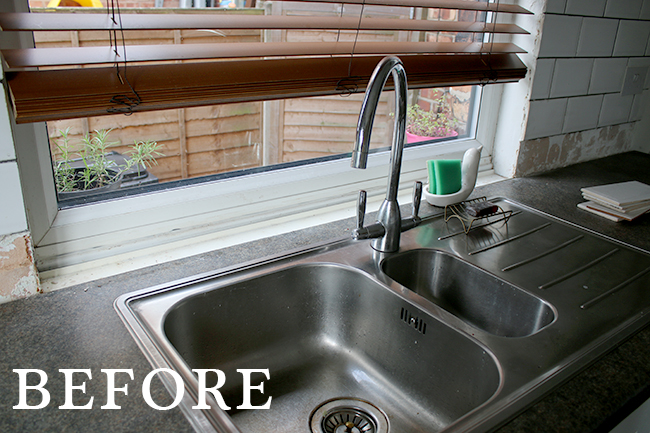
I now have a lovely area to add plants and my dish soap and other paraphernalia.
The verdict!
So after all the chaos of trying to get these fitted, I have to say how totally proud I am of Wayne for managing to tackle these. He did a fantastic job and I doubt highly that we could have had any better of a result hiring this one out. We also saved ourselves around £300 so that was just a bonus really!
I’m extremely happy I chose these Minerva worktops as well. They feel very luxurious to the touch and not at all like acrylic. I’ve had a few people see them since they’ve been installed and every one thought they were real marble. The laminate worktops I had before felt a bit cheap and plastic-y (although they held up well so I can’t fault them for that, they just really weren’t my taste in terms of the style) and were always room temperature to the touch. These actually feel a bit cooler like real marble and have a smoothness to them that feels wonderful. I run my hands over them all the time! #weirdoalert

In total, the worktops cost us around £1850 which was cheaper than real marble and similar to what granite worktops would have cost but more expensive than laminate or butcherblock. The thing I like about these are that they are stain-resistant and non-absorbent. We’ve not noticed any more scratches in the surfaces so far but if they do happen, at least we know now how easy they are to buff out as they are solid worktops (unlike Corian which has a timber core). They also clean beautifully and are very hard-wearing.
Our next step is painting the lower cabinet doors. At the moment, we’re doing them in stages as Wayne is having to fill the grain in each one before spray painting them at work. I’ll explain the hows and whys in a future post once those are complete! Stay tuned!
In the meantime, what do you think of the final worktops? Is this a job you think you can handle? (Hint: you can) ;)
**UPDATE!** Click here to see the worktops installed / Click here for the finished kitchen


Now that looks well, love how it fits ito the window . As usual good job by Wayne and saved £300, win,win. Nice job you 2 xxx
Thanks Pauline, I’m so happy with them!! xx
Wow! You guys are such a brilliant team! The worktops look fabulous, especially behind/around the sink – seamless and beautiful!
I am hoping for similar worktops in my future kitchen when we get around to the extension, so this could definitely be an option. I will have to see what our budget is like!
x
Aww thank you! I paid an additional £100 for the small piece for the windowsill and it was worth every penny! ;) I’d definitely recommend the material, I’m so happy with it! xx
Fan-bloody-tastic. You should be so proud. And what a wonderfully handy guy Wayne is. You’re so lucky he can do all this for you. Have you considered renting him out? That worktop is divine and looks wonderful. So sleek and stylish and luxurious. Can’t wait to see the whole thing finished.
Ha! I’ve been asked to rent him out on plenty of occasions ;) Thanks so much, I love them! Can’t wait til it’s finished too! xx
It’s coming along quite nicely! I still am in love with your sink and tap!! xo
Aww thanks lovely! It’s a slow process but I’m so happy with what we’ve done so far! If it looks half as pretty as yours does, I’ll be happy ;) xx
Wow, what a job! They are so beautiful and well-done!
Thanks so much Michelle! I’m really pleased with them! xx
Looking fab! Love how much light bounces off the new countertop! You guys are rock stars
Hahaha! Thanks so much Abi! xxx
Is it strange that I like the look of your unfinished backsplash? it makes me think you’ve moved into an historic home in spain that you’re r renovating or something and it’s just lovely old plaster showing through. Or something?! It’s looking wonderful.
It’s funny, I’ve had a few people say that! I think unfinished walls always look much prettier in pictures than they do in person ;) They are a bit of a mess in reality! lol xxx
That looks professional! And the windowsill is a great finishing touch. I hadn’t heard of this material before, but you’ve given me an idea where I might use it in our home.
Aww thanks Norma! I’m so happy I decided to pay for that additional piece for the windowsill, it just changes the whole look – worth every penny! I’d definitely recommend the material, I’m really pleased with it :) xxx
What a huge improvement!
Also, can we just talk about your sinks for a second. Davoon!
Just stunning.
Aww thanks so much Pat! I love my sinks too! ;) xxx
GO WAYNE!
Haha! Thanks Nadine, I will pass on your encouragement ;) xx
This looks amazing!! I definitely think you wouldn’t have got a better job using a professional – and you very well may have ended up with a worse finish. It looks incredible!
And that little extra join (due to the c*ck up) is hardly noticeable! Honestly, I was looking at that picture thinking “why has she put this picture here? I want to see the joins!”… it took me a while to realise that was a join picture! You definitely wouldn’t notice it if you weren’t looking for it – brilliant!
And having the worktop going into the windowsill makes all the difference!! It’s funny how small details like that can really add so much! It makes it look so sleek and sets off your pretty soaps and bits you have there. Totally worth spending the money on! In my bedroom there is a built in cupboard, that was the airing cupboard, but once I got a combi-boiler was turned into a wardrobe with hanging rails. The room had manky old carpet which stopped at the cupboard door, just leaving scabby old different flooring inside the cupboard. When I got the room carpeted, I got them to carry on the carpet seamlessly into the cupboard – and I love how much cleaner and neater and finished it makes it seem when you open the cupboard. I’m probably sounding deranged, wittering on about this – with you thinking, ‘what’s that got to do with my windowsill?!’ – but it just reminds me of it! That same kind of result in a way.
Anyway, I’ll stop my ramblings! Just know that I love what you’ve done here!! xx
Aww thank you hun!! Yeah I do wonder if paying someone to do it would have actually made any difference whatsoever! I think he did a really good job :) And I totally know what you mean about the carpet – it’s funny how little things like that make such a big difference even if you are the only one who notices lol xxx
Well, I don’t think I’ll ever need a tutorial on how to join these types of worktops but I’ll keep this post in mind!
You did an amazing job and they look so classy
Mel ★ http://www.meleaglestone.co.uk
Again WOW! Looks so good
Thanks so much for these posts! I’m trying to decide what to do for my work top as I love marble but don’t know if I’d be able to cope with the staining (or the expense!) I also REALLY love your sinks and taps – where are these from? ?
Thank you so much! I really love these worktops as you can tell ;) The sink and tap are from Olif!
Here’s a link: http://www.olif.co.uk/collections/monarch-bronze-sinks
And the tap:
http://www.olif.co.uk/collections/taps/products/alveus-monarch-slim-bronze-kitchen-mixer-tap
Hope that helps and good luck! xxx
Thanks. love the worktops!
I loved your kitchen top and the skills that you have put in it ..LOve your work ..continue your great work.Thanks for the share