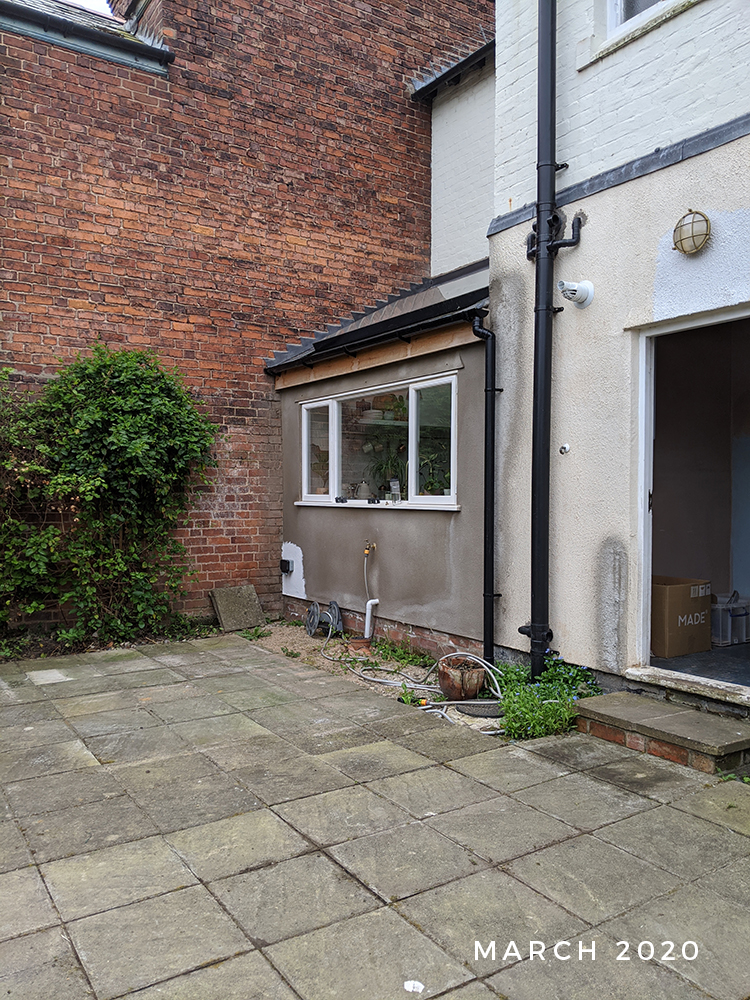
The back of our house has been a bugbear of mine for quite a long time. When we’d first moved in 2 years ago, it was certainly liveable (I knew we’d eventually want to repaint it) but it was only after we put in the small extension for the kitchen that the situation reached the point where it simply couldn’t be ignored. The amount of dirt and dust that the building work kicked up over the course of 5 months along with a wet winter meant it was dirty – really dirty.
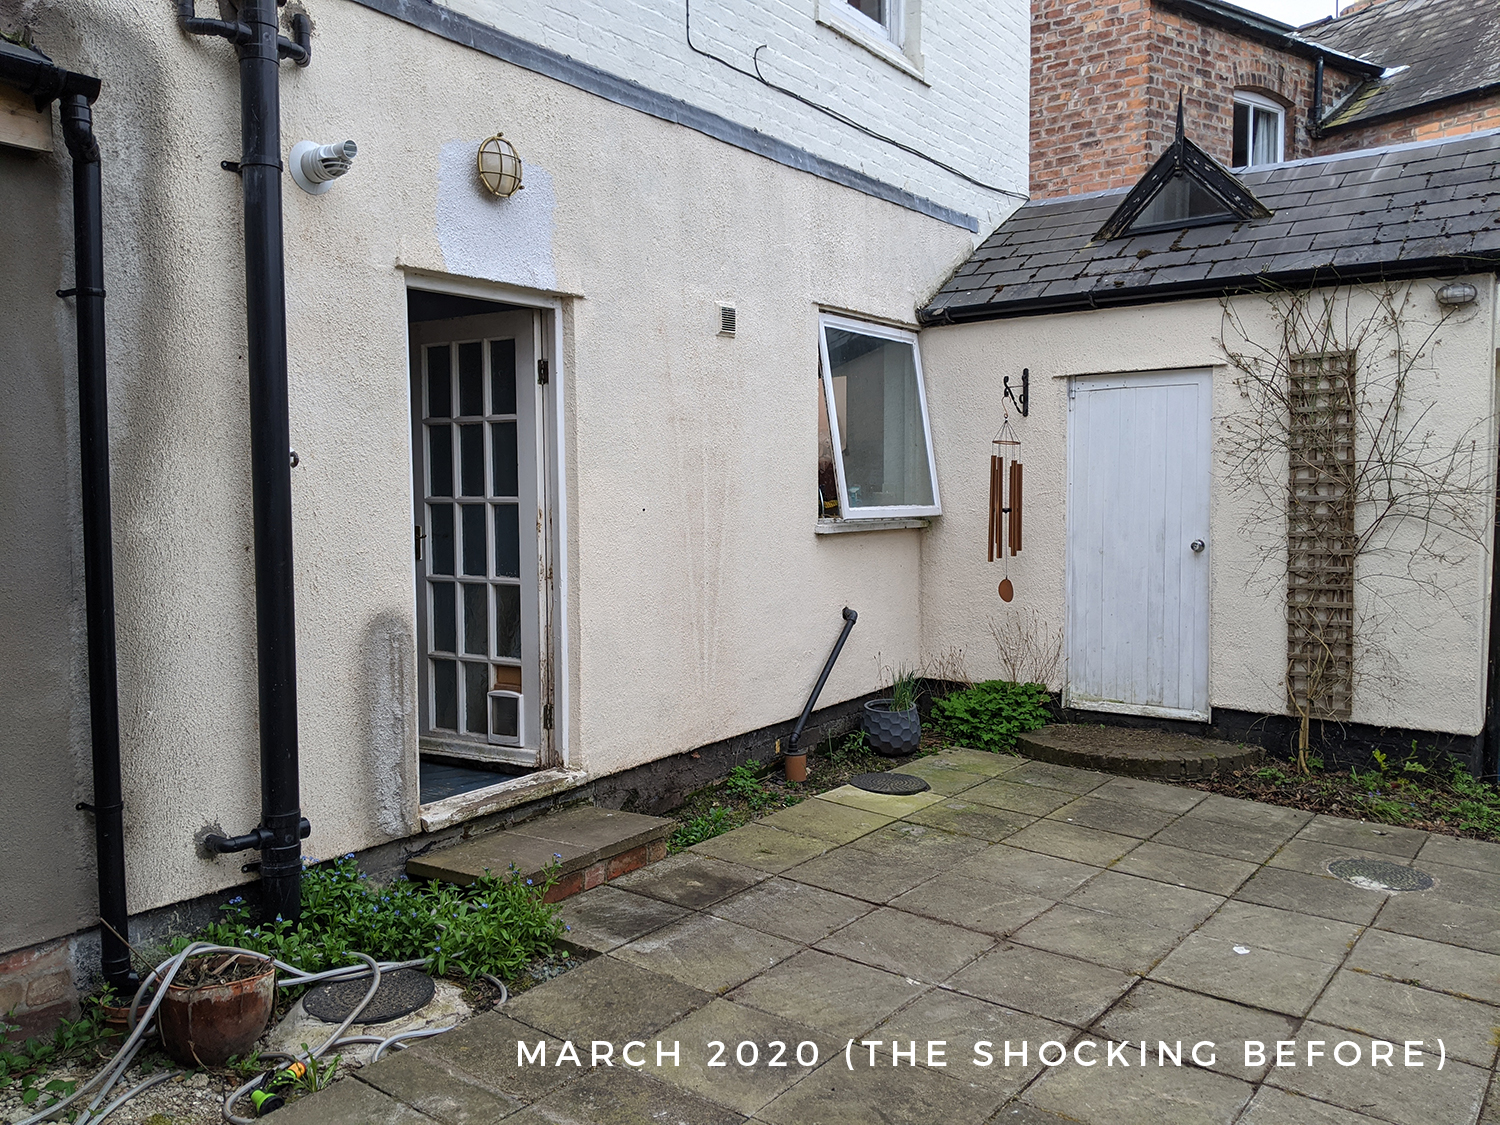
But not just that, the extension had never been painted and there had been some patchwork that had been done in certain areas as part of the work – it just looked a total mess.
At the time, we thought we’d be able to address the issues once building work was finished but then the kitchen was installed in August then finished in September, we got busy completing everything there and then moved on to the living room flooring and well, as it does that time of year, the weather turned and we never really got the chance. So when we finally got some great weather this Spring (and it really did start early this year here in the UK – a godsend when lockdown started), sitting on our little deck and facing the neglected back facade of the house became unbearable (#firstworldproblems).
The lucky thing was that I’d actually bought the masonry paint for the house last year as we’d expected to do it back then so five 5L tins of Little Green Paint Company masonry paint in the colour Down have been sat in my cellar for months now (this isn’t a sponsored post, I’d purchased them myself). So as soon as the weather started warming up, I knew this job absolutely had to get done as I couldn’t bear looking at it any longer.
What always happens happened, of course. You start one project and it just kicks off lots of other smaller projects and so over the course of the last couple of months, I’ve been on a mission to get the back of the house painted as well as just making the whole thing look a whole lot more presentable.
This post may contain some affiliate links which means if you click on a link and make a purchase, I may earn a small commission from the brand for the referral. I am not paid or asked to use these links. You’ll never pay more for clicking on these links.
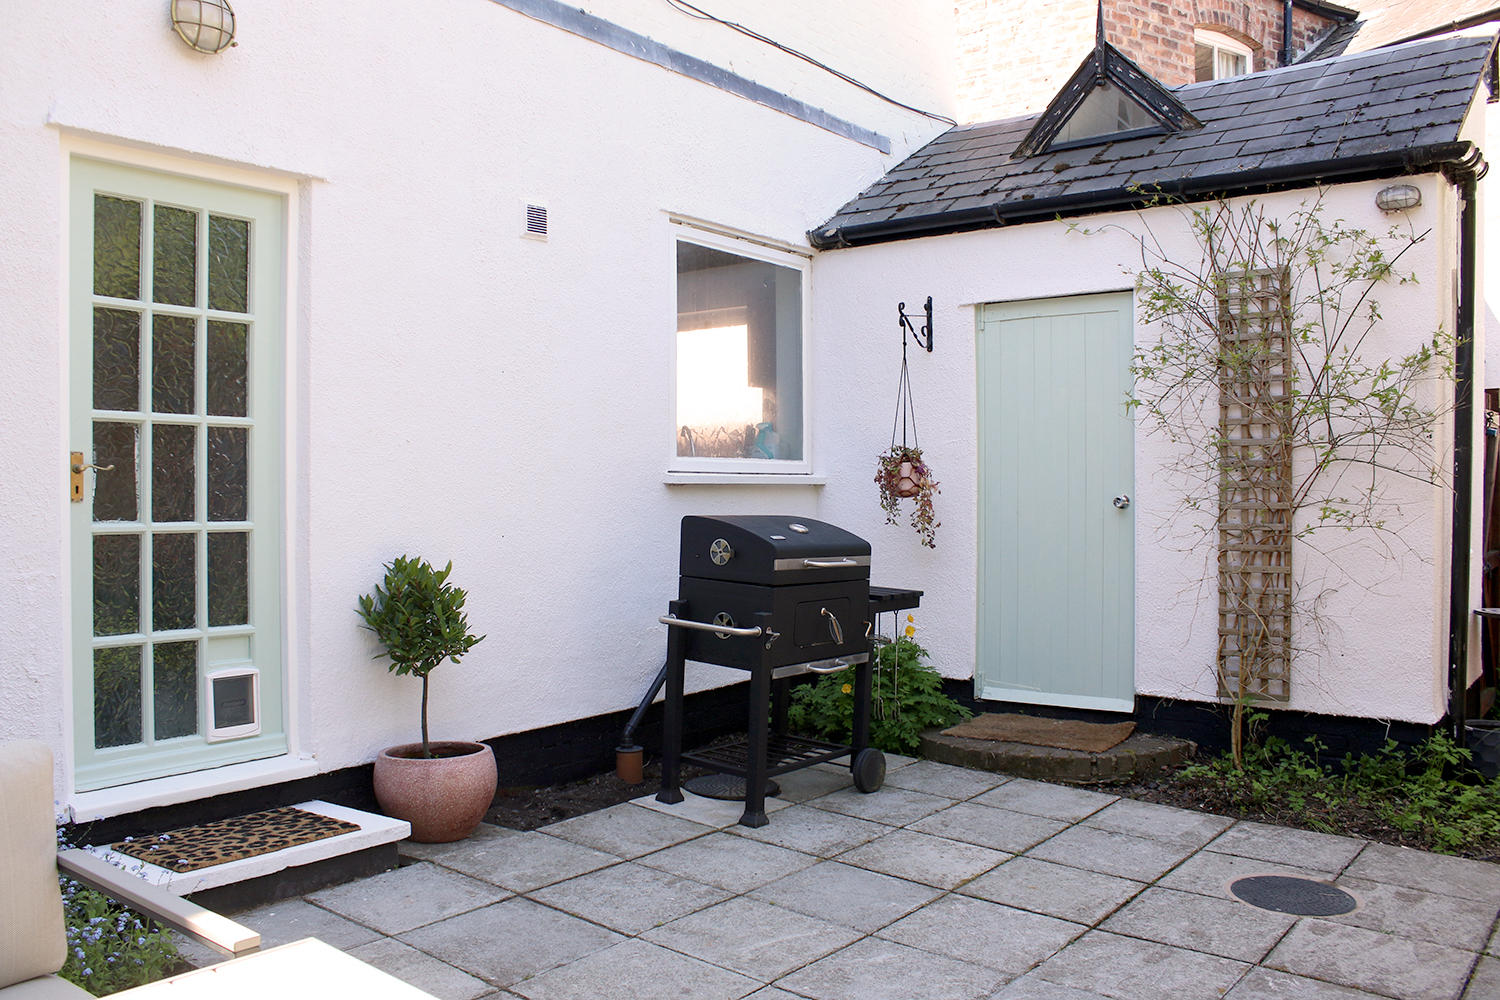
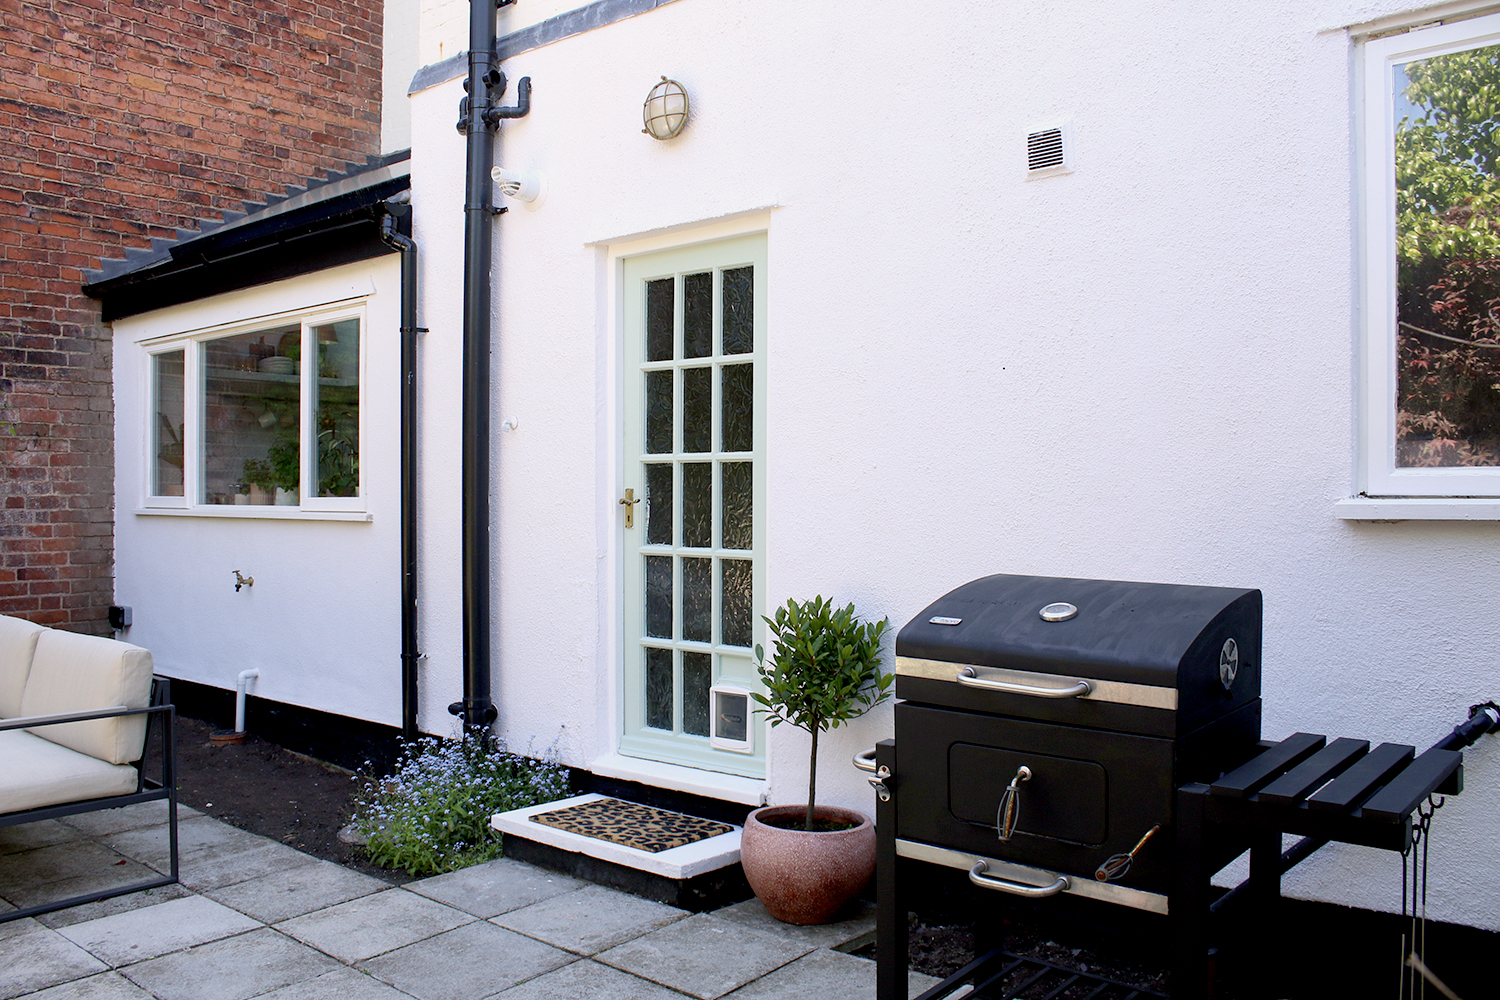
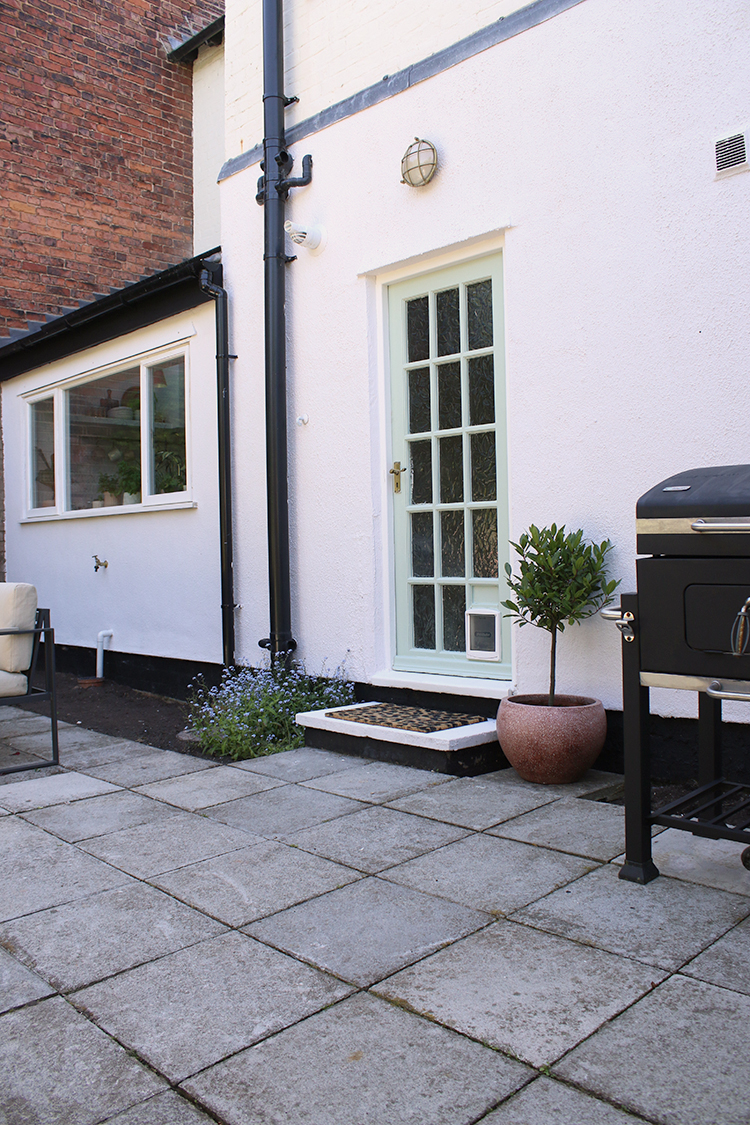
The very first thing we did was jet wash the slabs. They are old and aren’t in the best condition but at least our Karcher pressure washer gave us a bit of a ‘clean slate’ so to speak. As I’ve spoken about before, it was always my intention to create a sort of ‘courtyard’ effect just outside the back.
Eventually, when we have the money (and this could be in a number of years or when we hit the lottery, no idea when we’ll get around to it considering how many other things are higher on the priority list right now!), I’d love to replace them all with some gorgeous tiles. Last year, we salvaged what we could from what was already here on the property when we moved in, relocated a patch of slabs from another part of the garden to right in front of the extension to extend the whole thing across the full back of the house and well, I got at least a rough version of my courtyard until the time comes when we can do it all properly.
I might – maybe even later this summer – decide to paint them using a similar method to what Hayley Steward did on her own (which look absolutely glorious, you really need to check out that link). I’ve spoken with her since she put them in last year and in her highlights on Instagram, she talks of how they’ve held up after a year. I think her method looks sound as they have survived through winter remarkably well which was my only real hesitation as it’s a lot of work. But anyway, it’s something I’m considering for the future.

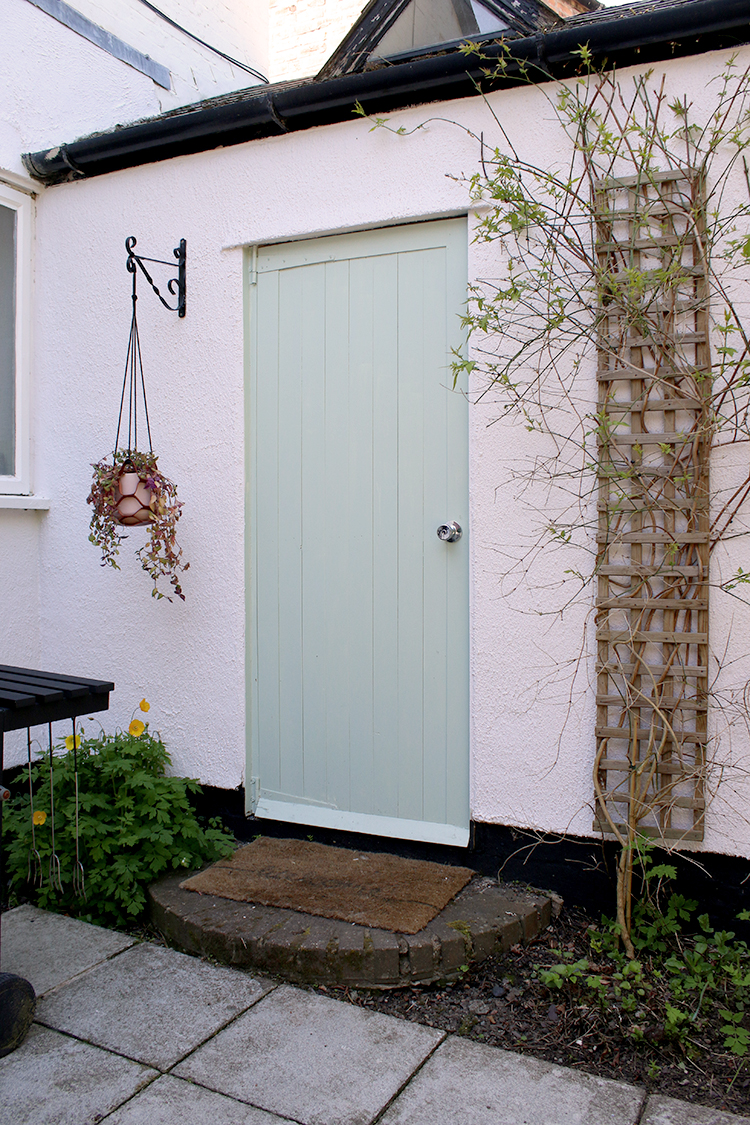
I then painted our little DIY raised planter (You can see that tutorial here), a job I’d intended to complete last year but again, didn’t get around to. I used Cuprinol’s Garden Shades Fresh Rosemary, loved the colour and also decided to paint the little back door on the side of the courtyard.
It was at this point that I decided I really loved this shade of green (it reminds me of a slightly lighter version of Farrow & Ball’s Mizzle which is the colour we’d gone for in the kitchen) and painted my decking which didn’t work out quite as well (you can read about that big DIY fail here if you want a laugh) but it is a gorgeous shade when used on a vertical surface!
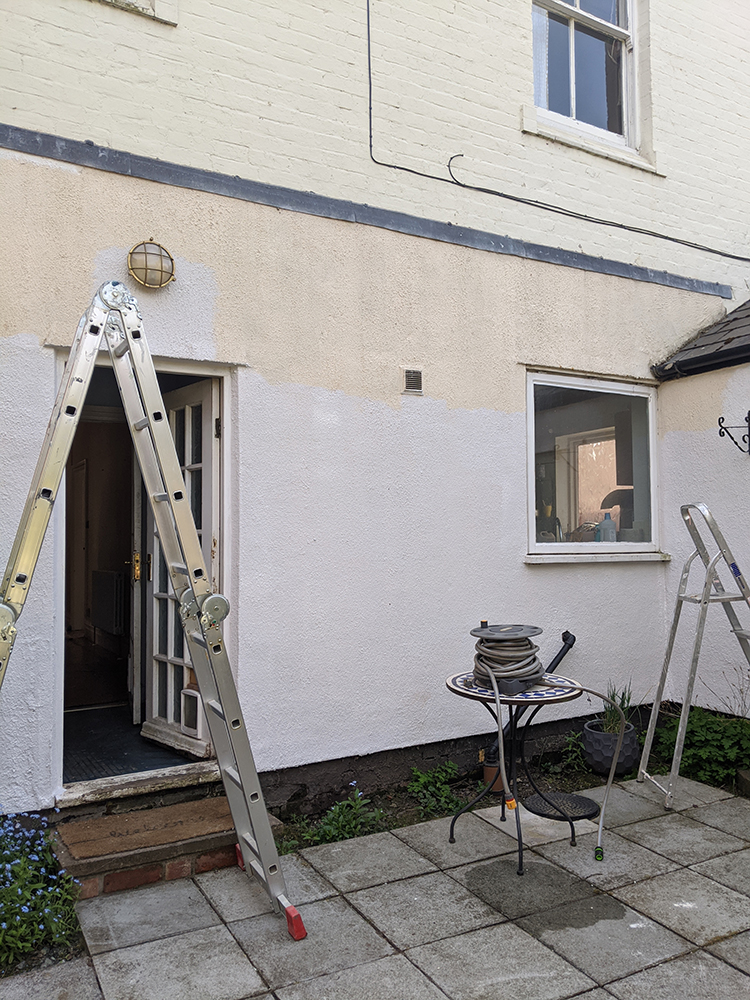
So now that those smaller jobs were out of the way, it was time to start painting the actual back of the house! Sadly, we knew we’d only be able to do the lower portion of the house. Even our highest ladder wouldn’t be able to manage getting to the very top peak of the house so that part we’re going to have to hire out but we knew we could at least get the bottom portion done ourselves. I did most of the work but Wayne did help me out with reaching the higher areas.
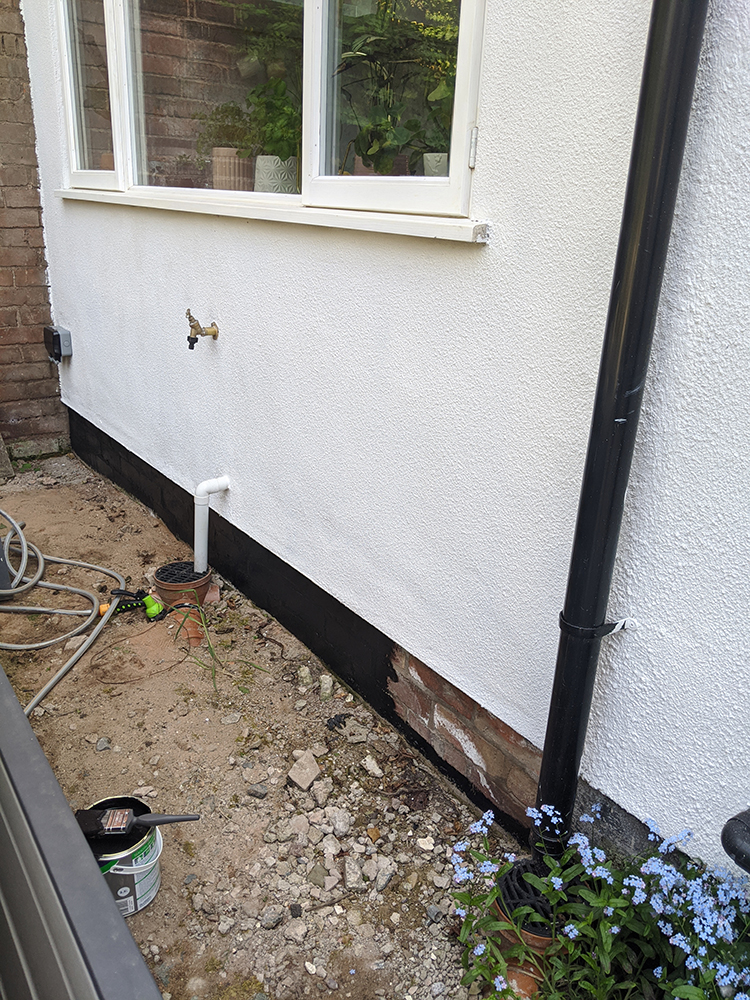
And then I was able to get a hold of some black masonry paint and after cleaning off all the moss and dirt, I repainted that bottom strip you can see above which just freshened everything up so much. I also painted the step – black for underneath and Little Green’s Down for the step itself.
Once that was done, I decided to tackle the area that’s directly in front of the extension – a strip of earth between the house and the patio that was in dire need of intervention. Essentially, that area of the house had been completely dug up during the building work. They’d dug big trenches here to fit the plumbing and waste but then instead of backfilling it with the earth and soil they’d removed they decided to fill it with clay and aggregate! I was so disappointed by that because I had intended on growing something there but my soil was completely gone and now I just had clay and lots of huge stones.
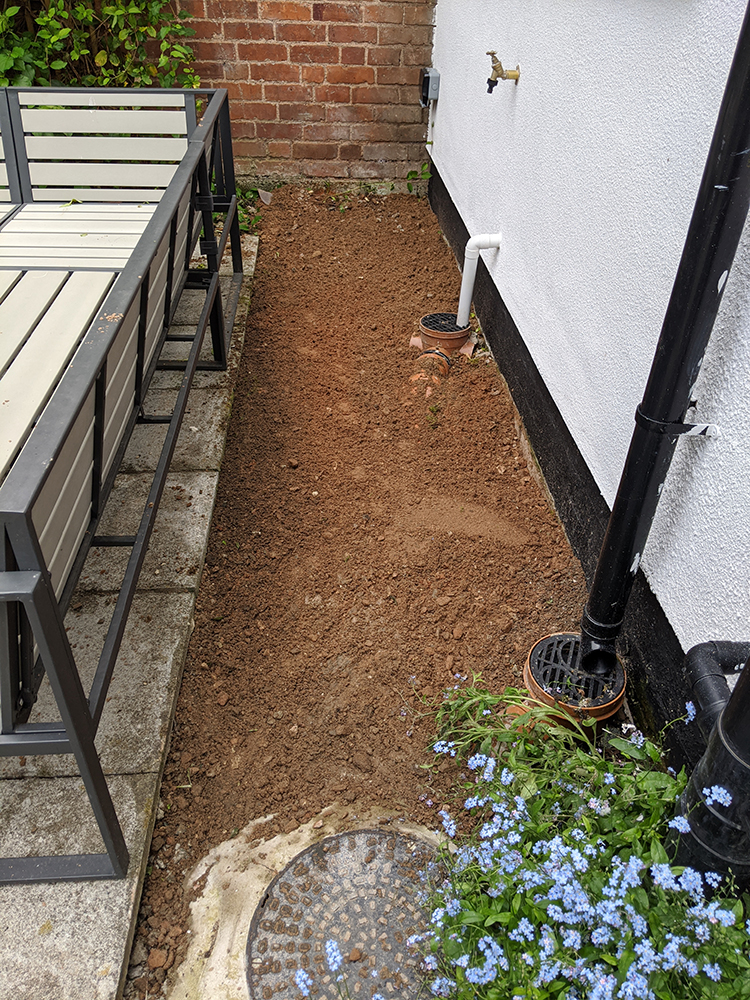
I talked about it over on Instagram and received so many suggestions of what might grow in clay soil that’s North-facing and receives zero sun – in fact, RHS has a great filter that will also help if you have more problematic growing areas. In the meantime, I broke up the clay, raked it all out to loosen it up and removed a huge wheelbarrow of stone as well as the top 1″ layer.
I then topped it all up with some compost which went a long way in just making it look a bit cleaner here.
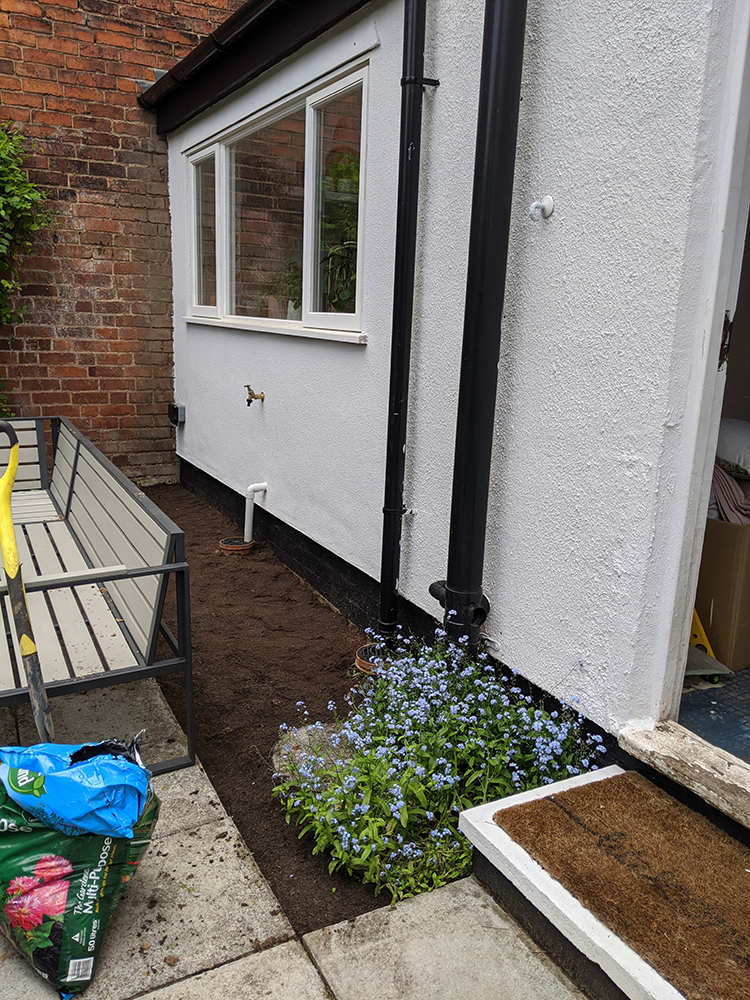
After exploring my options, responding to literally hundreds of DMs on Instagram, doing a lot of research and a lot of thinking, I have decided now what I’m going to do with this section (so thank you for the suggestions but I don’t need any more now!) as Wayne will be building me some raised planters to go here and I’ve also ordered in the most spectacular garden hose (I know, calling a garden hose spectacular is a bit strange but trust me, you’ll see).
**Update: See the raised bed planters and fabulous PINK AND LEOPARD PRINT garden hose here!**
I’ll also be using wood chips for the ground cover for now as I really have a tiny budget and I think it’ll just look a bit softer and more natural (again, I had so many messages from people with other suggestions and telling me not to use wood chips but I’m trying it for now and we’ll see how it goes! If I decide they aren’t working for me, I’ll change it in time). So yes, more progress to come!
On the other side, I dug up the soil, pulled the weeds out and I’d like to plant a few bits in that spot as the soil there is much better quality. Of course, getting a hold of plants whilst on lockdown has been challenging but I’m hoping to make a trip to B&Q in the future (praying the queues aren’t too bad) so I can pick up some supplies.
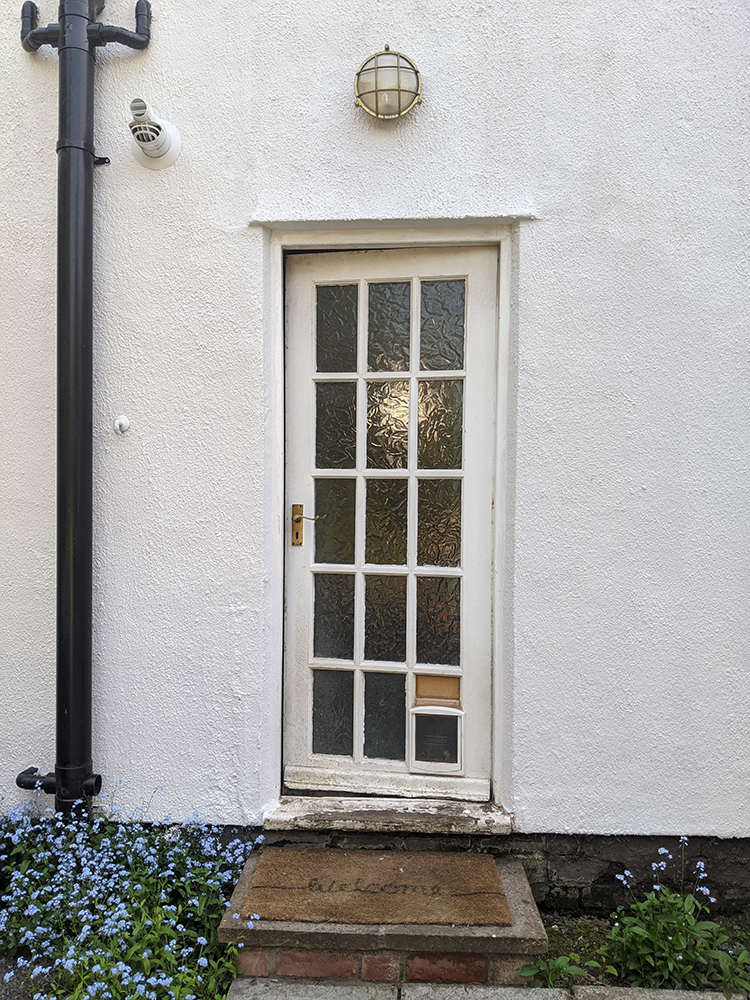
I then needed to tackle the back door which was in the most horrendous state – it was filthy and the step was in a sorry state, all chipped and peeling paint and we’d never painted out the filled-in section where we’d installed a cat flap when we’d moved in. I sanded down the step to get rid of all the loose paint, used a filler in some areas, gave the door a light sand all over and cleaned the glass.
I then primed it with Earthborn’s Multi-Purpose Primer, painted the step and doorframe with Earthborn’s White Clay (both of which I had leftover from a previous collaboration) and painted the door with the same Cuprinol Garden Shades Fresh Rosemary paint.
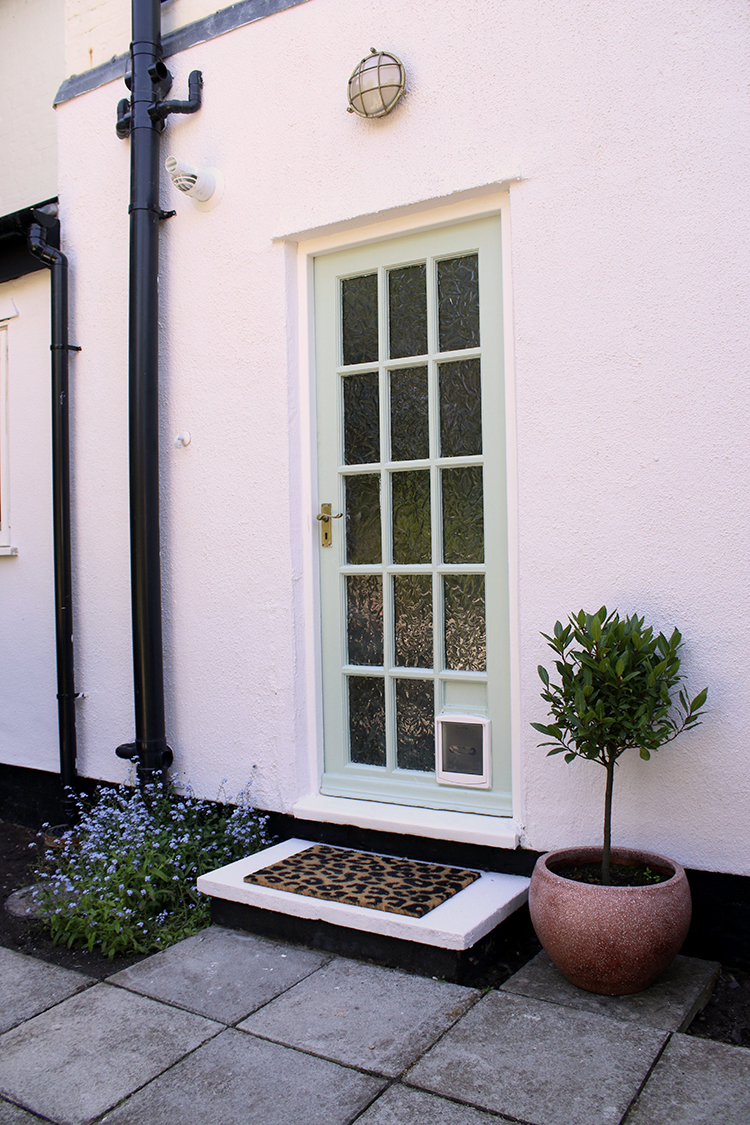
I finished it all off with the cutest leopard print doormat which I purchased from Mint & May. I also moved one of my potted Bay Trees over to the door just to dress it all up a bit! (The pot is from Made from a previous collaboration!)
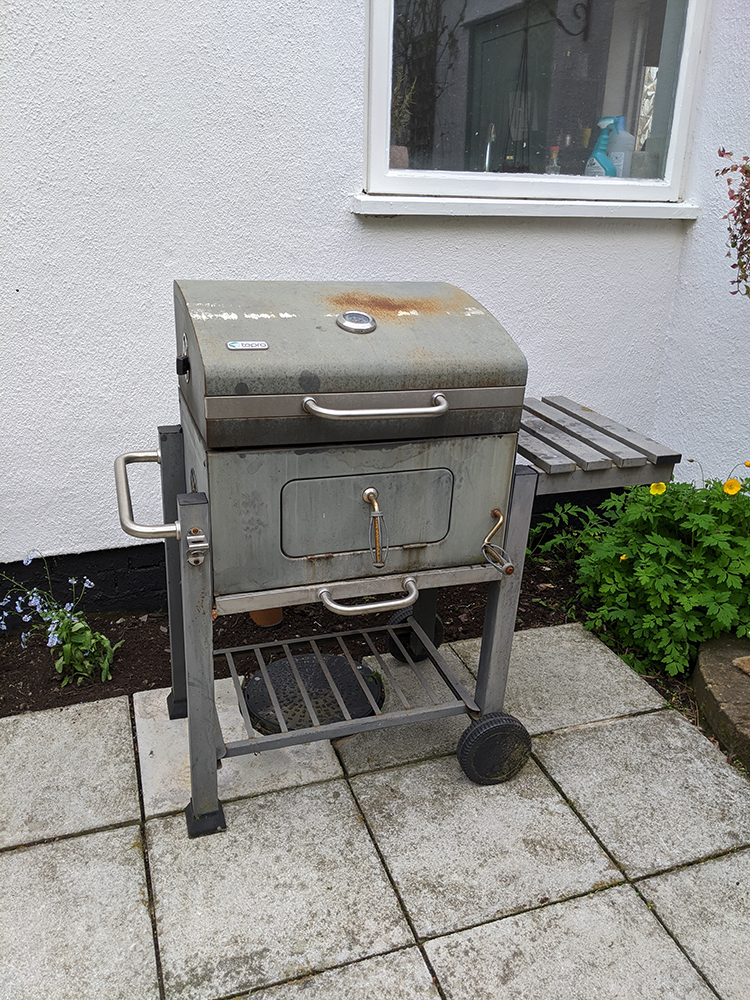
Lastly (for now anyway), I decided our old BBQ desperately needed a bit of a makeover. I had some leftover Ruskin’s Heat Resistant Black Paint from when I did the fireplace makeover so decided I’d try it on the BBQ and it came out so incredibly well.
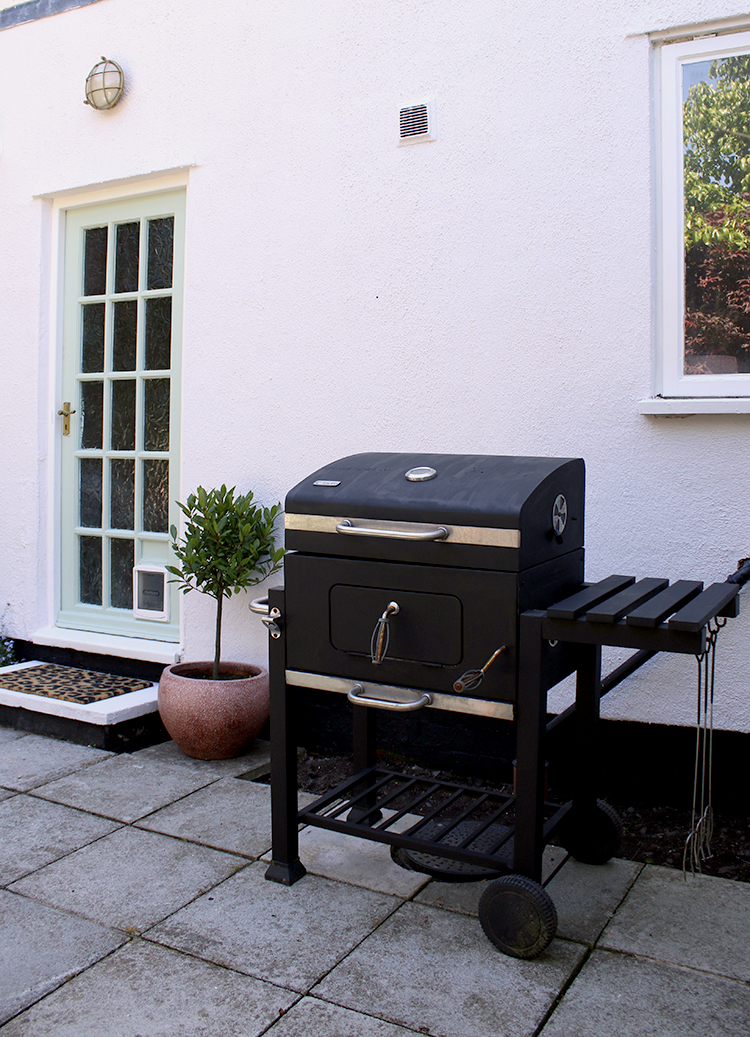
I couldn’t be more pleased with how well it came out. So as I said, I still have quite a few things I need to do out here and it’s not really been styled up or anything as it’s still totally a work in progress but I couldn’t not share how it’s looking now.
Let me remind you of what it looked like back in March of this year…
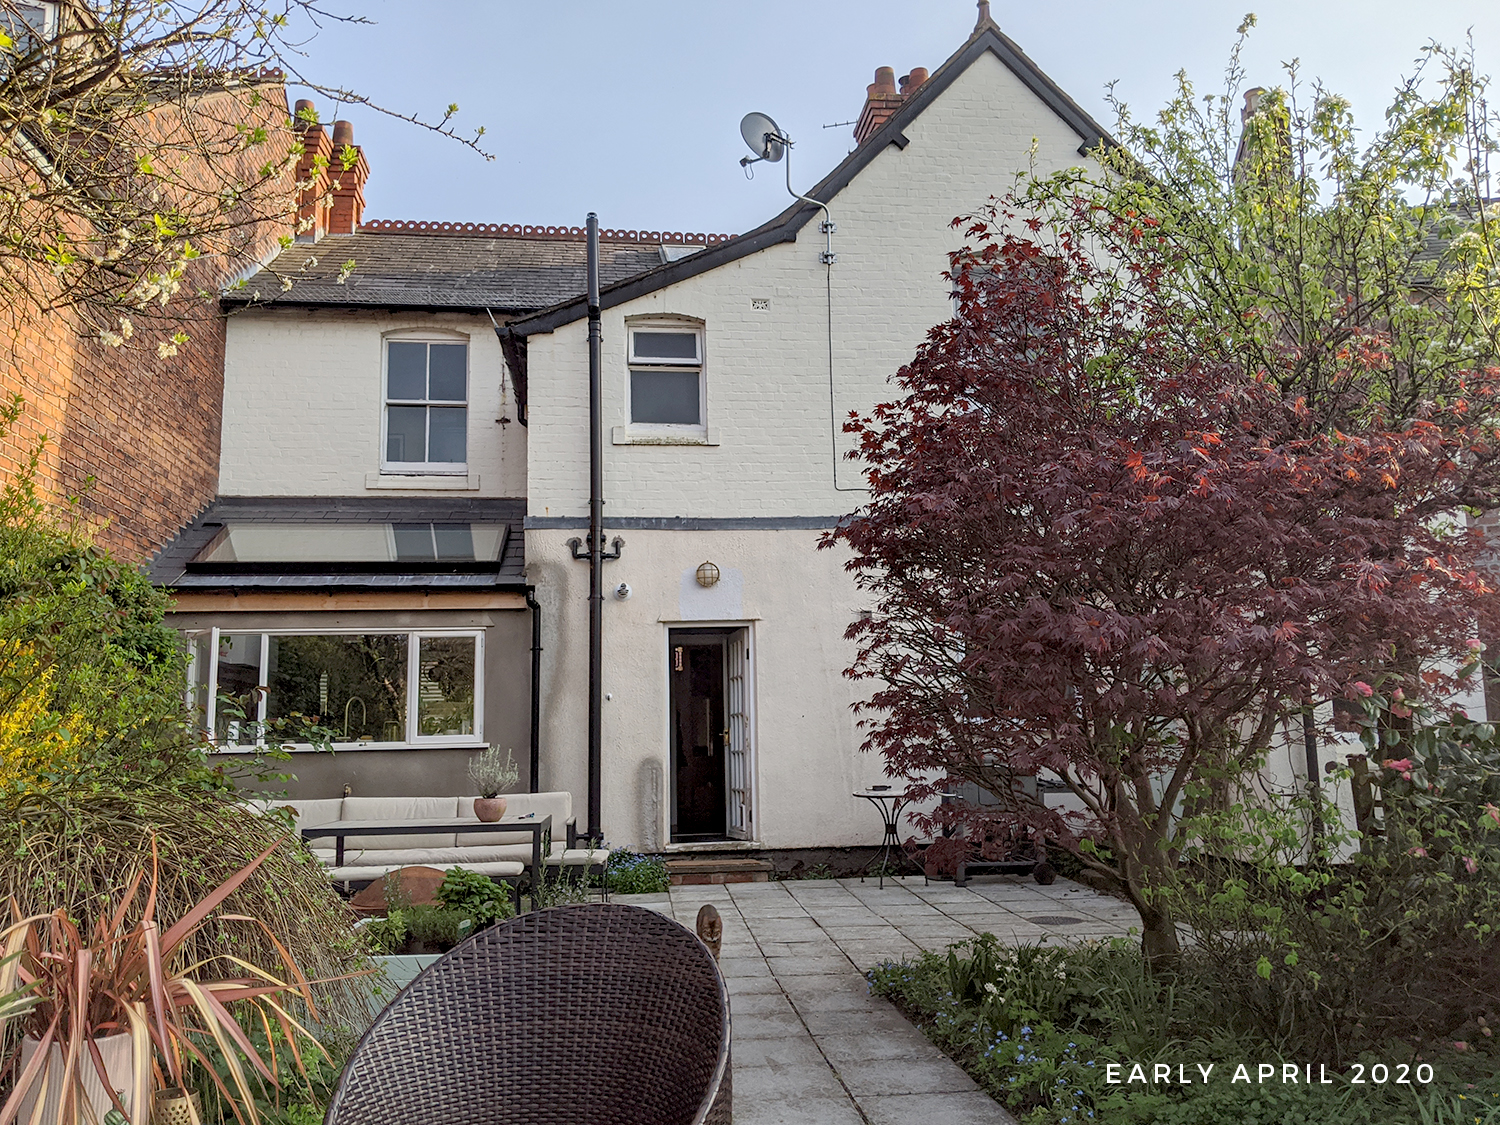
And this is what it’s looking like now. I mean, this is the power of paint right here.
I will never fail to be impressed with how transformative a lick of paint really is.
I still have lots of small jobs to do back here but at least now when we view the back of the house from the decked area in the garden, it no longer makes me sad! LOL!
So yes, that’s how it’s looking right now and I hope you agree it’s been worth the effort. I just chipped away at it whenever I had the chance and small jobs really do lead to big changes. I’m excited to getting those planters built and I’ll be getting my new fancy garden hose in this week and of course, I’ll eventually style up this area with plants and accessories but for now, I’m really enjoying just what a transformation it’s been. I hope you like what we’ve done so far but do let me know what kind of work you might be doing on your outside spaces right now? The comment box awaits!


Brilliant work Kimberly! A total transformation – it looks really smart, and very much in keeping with the gorgeous interior.
Lovely, and spirit lifting! Here in South Carolina we have worked a lot in the yard and have been enjoying our patio. Inside, we have painted the back halls-which we had put off forever, put down a nice amount of additional flooring in the attic, painted the attic stairway, installed better lighting in the attic and reorganized The storage up there. Painting the garage with paint that can be scrubbed is next on the list. We use that entry to the house a lot and it gets dirty. The flat paint there now is a mess. I like to have a bit of an entry vibe by the door. It will be better when it can be scrubbed.
This looks amazing. You are so right about how paint transforms
Wow you’ve been busy – it looks fantastic, well done to both of you. Make sure you get some time this weekend to sit out and enjoy it!
Looks amazing! Paint is magic and makes such a difference. You’re very right lots of little jobs add up to a big difference.
We are concentrating on taming our garden after years of neglect!
Great job, Kimberly, it looks so pretty, really country cottage which must be so pleasant & relaxing. This is great to inspire anyone with limited budget: clean-up + tidy-up + paint-up = result :o)
I love this! The before and after pictures really show how much prettier it looks – what great work! xx
Okay this is a legit amazing transformation. I really love the combination of the back door colour and the leopard print mat. It is so perfect! And the BBQ update (I think you showed the before photo on your Instagram stories) is SO BEYOND AMAZING. I love simple but amazing updates like that.
I can’t wait for #DrunkInteriors6 in your backyard xx
What a difference! It’s always good to take before photos to keep you motivated when you’ve just had enough of DIY and think it will never end! Brilliant job! Here’s to enjoying the garden this summer! ☀️