So first, I just wanted to say a huge thank you for all the positive messages I received on the newly refreshed living room! I’m so happy that so many of you seemed to really like the fresh new look – even those who said they were fans of the purple! Awesome.
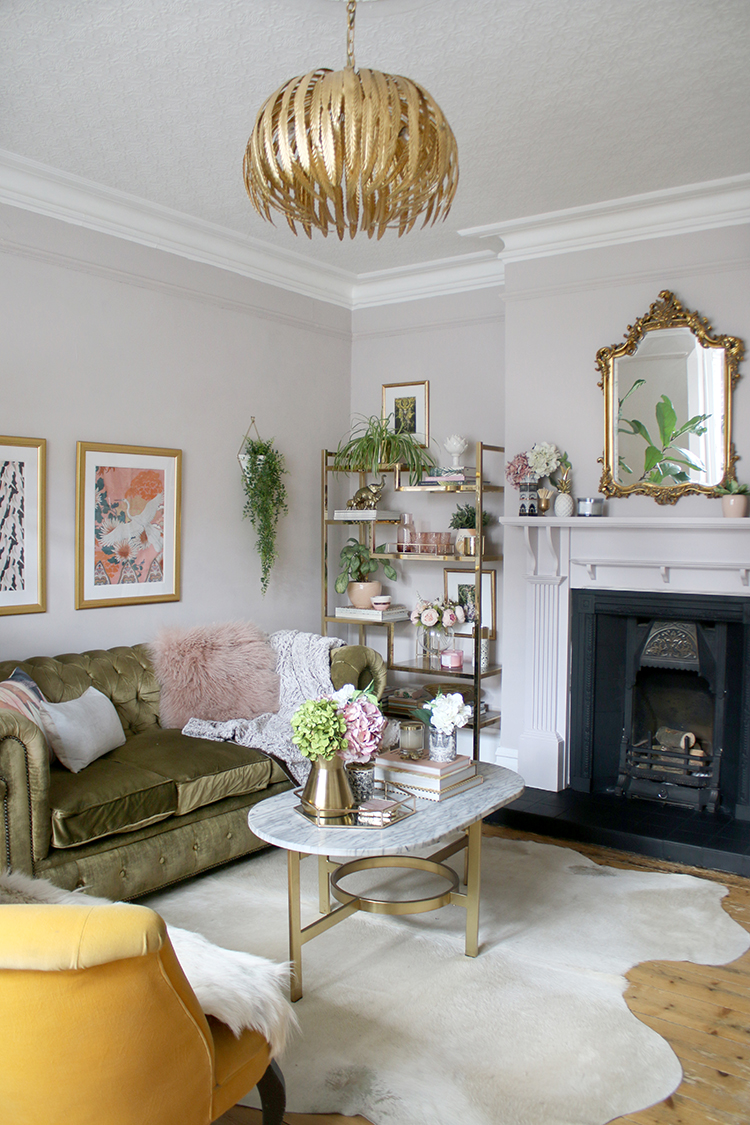
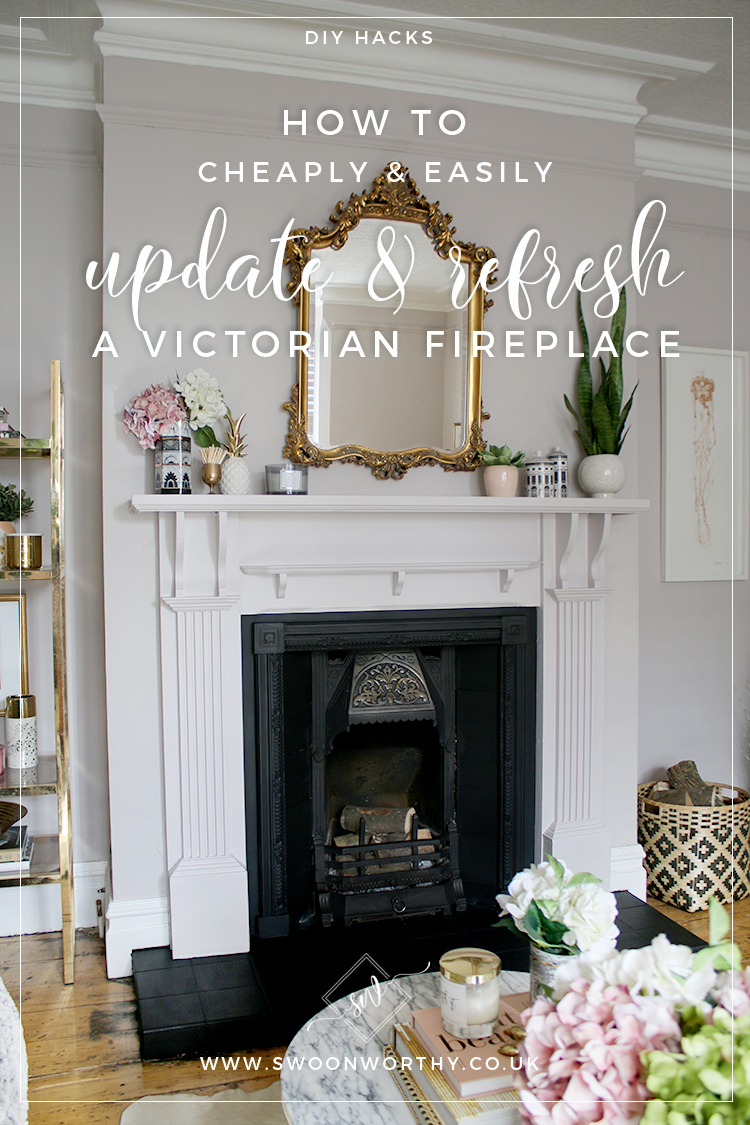
One of the biggest changes in this room – and one of the easiest – was updating my old Victorian fireplace. I really just wanted to update the whole thing – leave the original insert in place (that middle bit where the logs go and the frame itself) but change everything else around it. New tiles on the sides, a totally new hearth and replace the mantle as well. It would be a big job, however, so I figured I’d just give it a quick update for the time being and when we were ready to do the big changes in the room, I’d tackle it then.
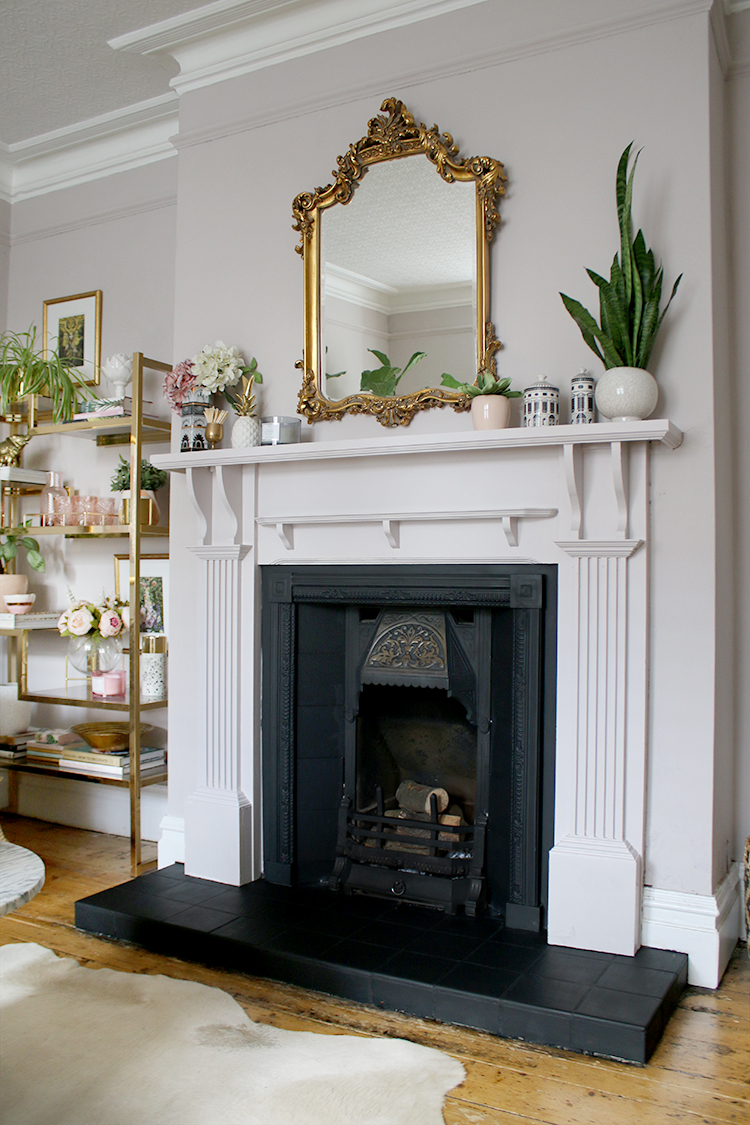
Well, the truth is, after this little refresh, all those plans for a replacement have pretty much gone out the window. In fact, I’m SO thrilled with the outcome of what was meant to be a quick and easy job that I’ve probably saved myself at least a few hundred pounds (maybe more) by deciding that I love it just as it is. And I figured if anyone out there has an old Victorian fireplace that needs a little love, my tips might help you too to save your cash and restore something of beauty in your period property – or just pin the image below to reference later!
This post may contain some affiliate links.
The Victorian Fireplace Before
So let’s step back to last summer and I’ll show you what it looked like originally if you need a reminder.
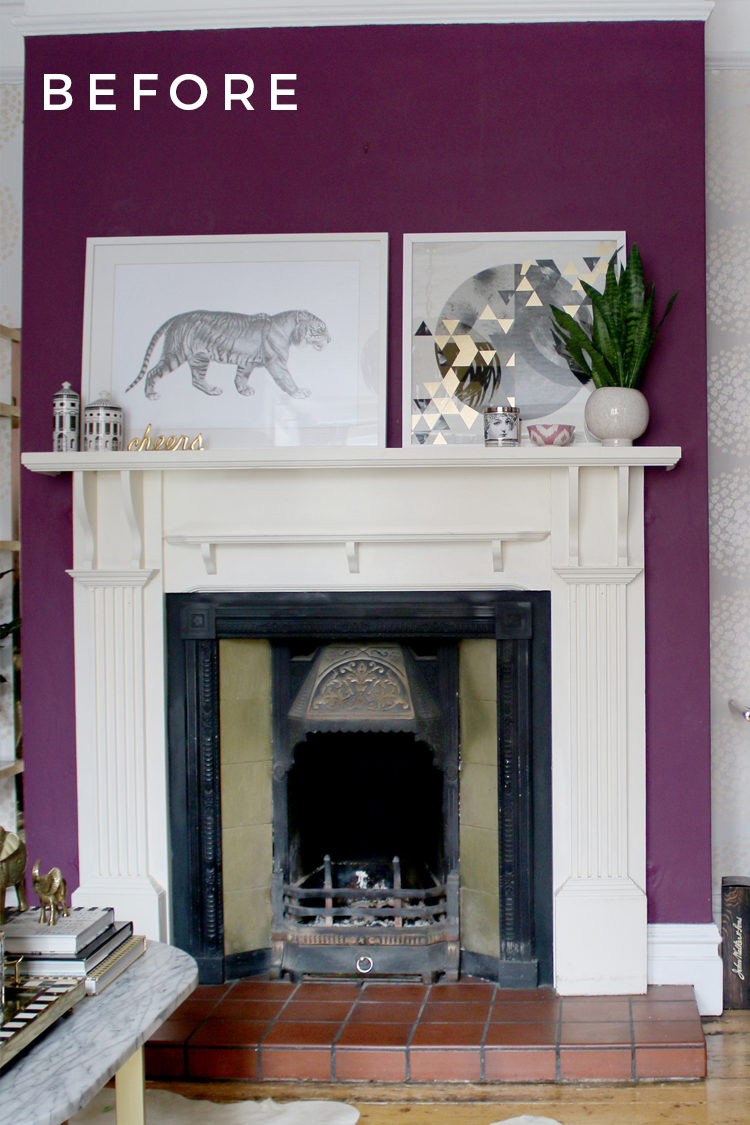
It’s probably not a huge surprise that I don’t actually have a lot of photos of this side of the room because I felt like this thing just let the whole room down – from the old-fashioned reddish tiles to those terrible painted green/gold tiles and just the fact it looked so dirty and tired.
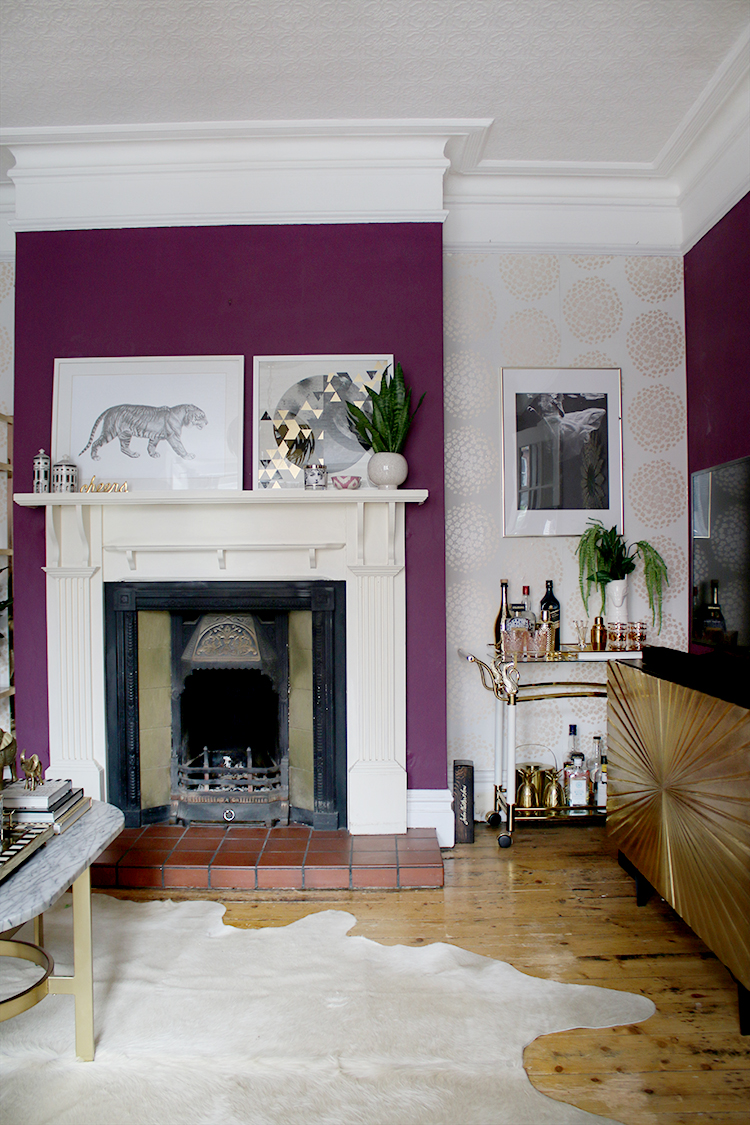
There was just so much going on with the different colours and finishes and despite the fact that I adore the fact we have an open fire in this house, I wasn’t too thrilled about its aesthetics.
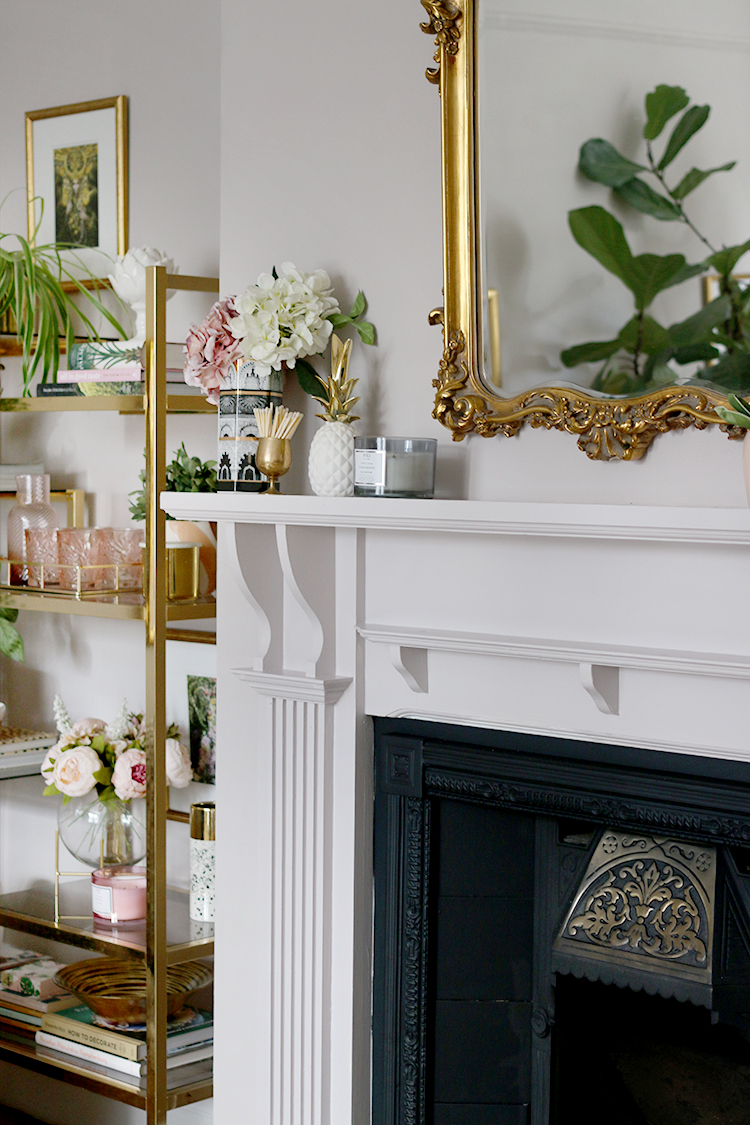
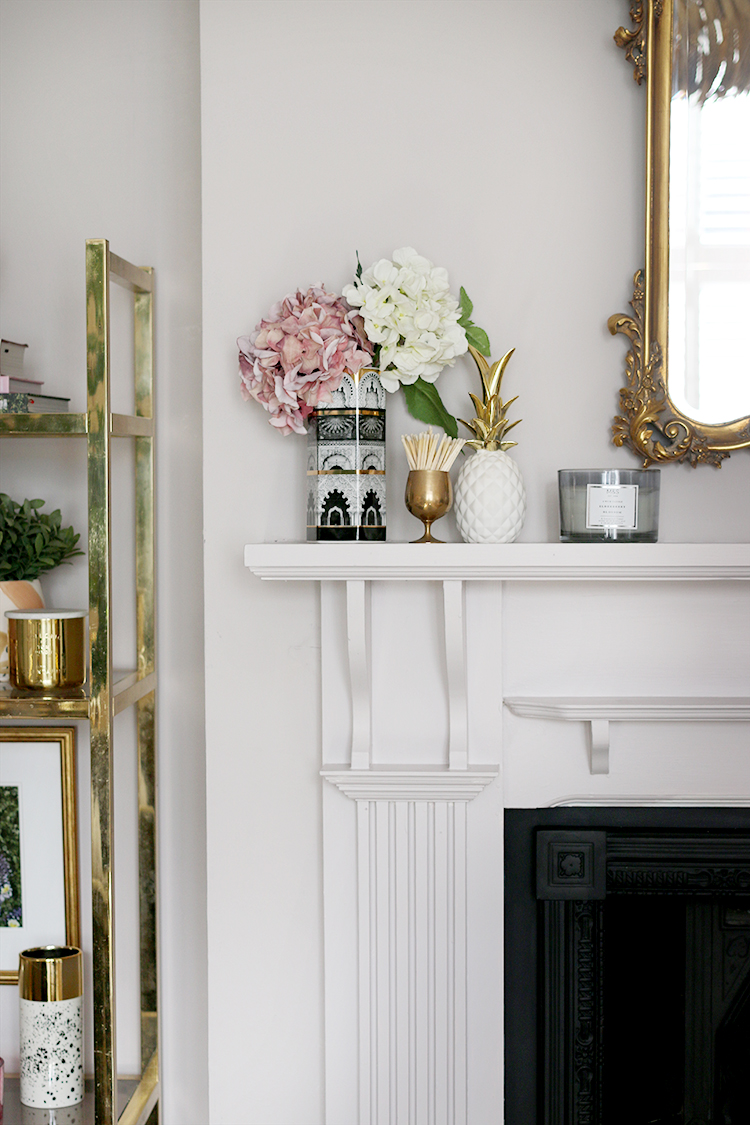
Painting the Victorian Fireplace Mantle
As I explained in my post about the living room makeover, I started by simply painting the fireplace mantle the same colour as the walls. I wanted a quieter look in here rather than having a strong contrast and I am thrilled with how well it came out.
The Products I Used:
- Earthborn Multi-Purpose Primer
- Earthborn No 17 Eggshell Paint for Wood in Paw Print
- 2 x 2″ Harris Synthetic Paint Brushes
- Fine Grit Sandpaper (optional)
The steps I took:
The mantle had been painted in a gloss white so I really just needed something that would allow the new paint colour to bond with it which is why I used a primer. I didn’t sand it first. Now, perhaps I should have but as this was just a temporary fix in my mind, I didn’t bother and there have not been any ill effects so far from skipping that bit. However, a light sand never hurts so you may want to start off with that before you apply the primer if you’re feeling extra enthusiastic! Just remember to go over it with a damp cloth to remove any remaining dust.
The primer goes on really easily. I used a 2″ synthetic brush (I like Harris brushes personally) but just don’t load your brush too heavily as it’s rather thin and you’ll end up with drips. So a light full coat is all you really need.
Leave the primer 4 hours before following it with 1 coat of the No 17 Eggshell paint using a clean 2″ brush. If you have a lot of small or ornate details on your mantle, a smaller 1/2″ brush will help get into all those nooks and crannies but I found the 2″ brush was just fine on mine.
Leave this coat to dry for another 4 hours (or overnight) and do your 2nd coat of No 17 Eggshell to finish. Let that dry completely for another 4 hours.
Painting the Victorian Fireplace Tiles & Hearth
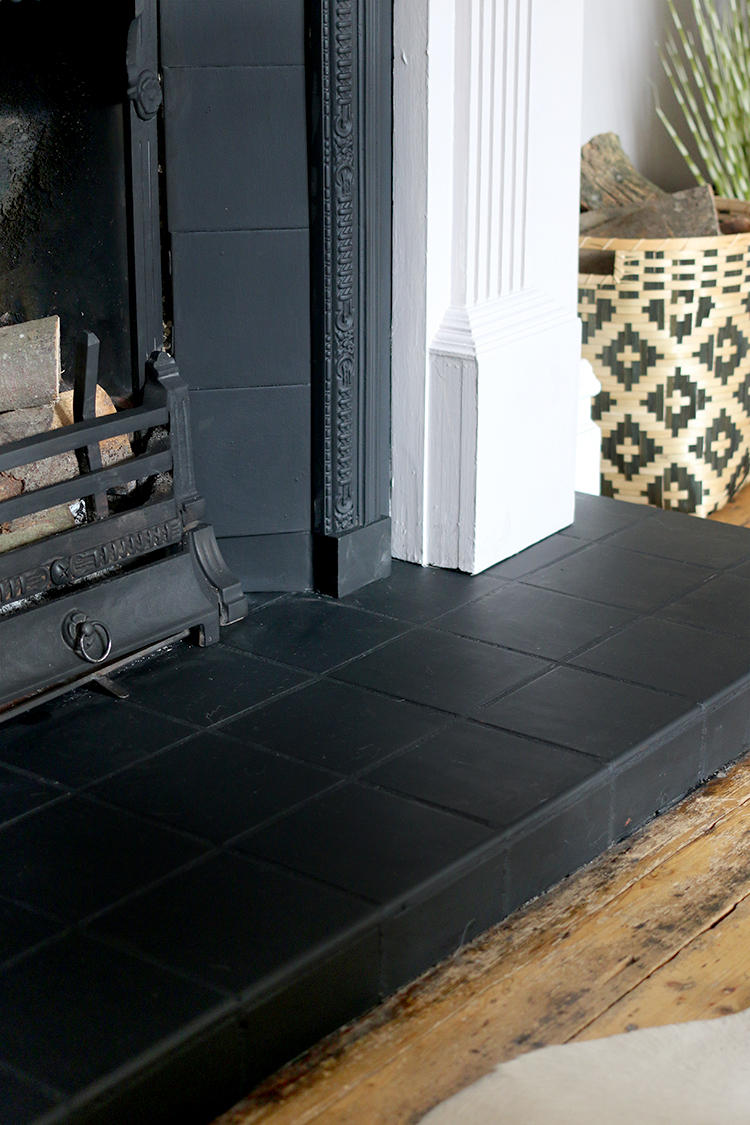
The next step was painting the red hearth tiles and the tiles in the fireplace itself. I wasn’t sure how well this would hold up but so far, it’s been remarkably resilient. At some point in time, I may just remove the original tiles in the fireplace and strip them to reveal what they may have originally looked like but because they had previously been painted, I didn’t feel that bad about painting over them again! If you do have beautiful original Victorian tiles in your fireplace, I’d consider keeping them as they are or, if you really do object to the original design, consider selling them and replacing them with a plain tile of the same size.
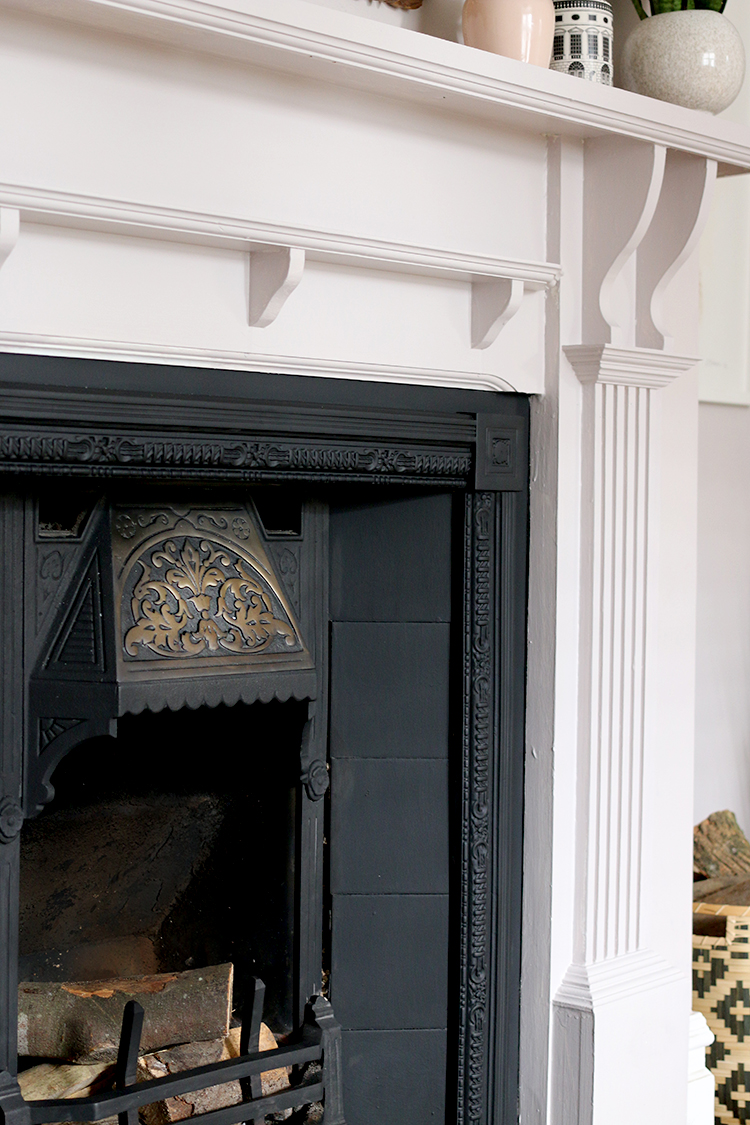
I used Rustins Heat Resistant Black Paint in Matt Finish on both areas and I rather love the way it looks. I didn’t do too much prep – I simply cleaned everything as best I could with a sponge, let it dry and then went over everything with 3 coats using a small 1″ brush, allowing the paint to dry for 2 hours in between coats. It’s very thin but has incredible opacity – that little tin goes a very long way!
I finished up by just painting the outside trim of the iron insert (the decorative trim that goes around the whole thing). I felt it was far enough away from any intense heat and it came up beautifully as well.
Polishing the Victorian Fireplace Insert
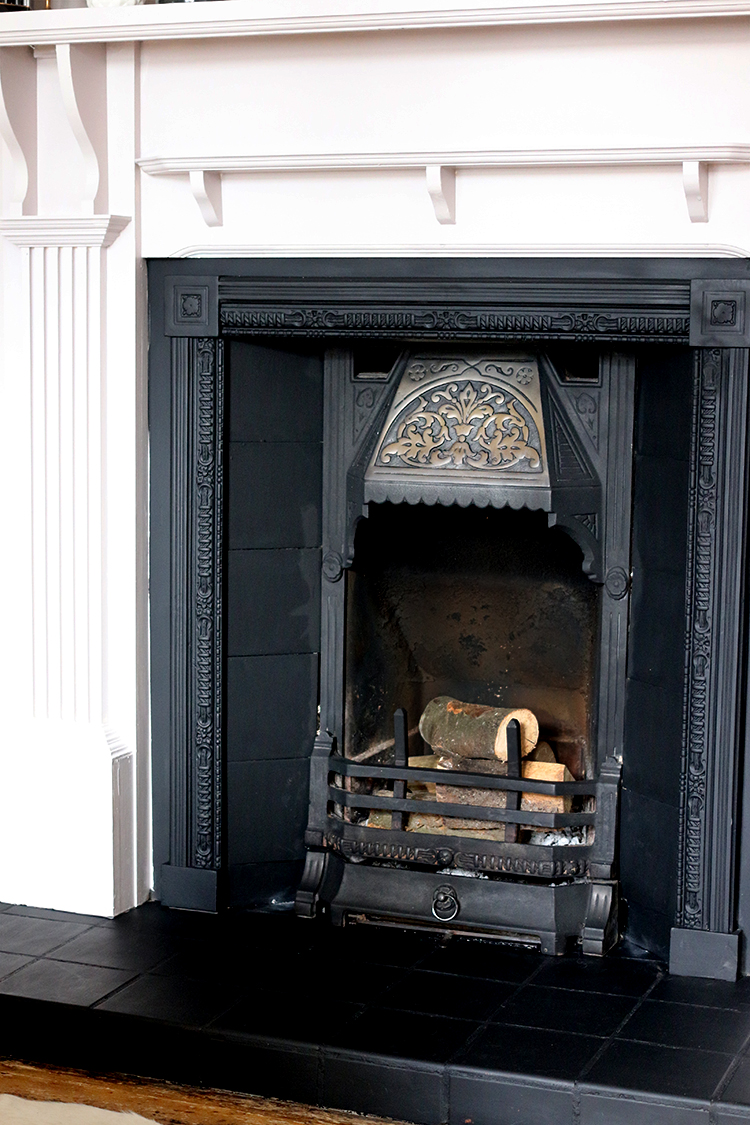
Now after all that work, I realised that the centre of the fireplace was really letting the rest of the team down! It was looking tired and grimy and so I bought one more product – Dirtbusters Black Stove and Grate Polish. It’s a thick gel and I used a sponge to apply it over the rest of the fireplace. It works a treat, creating a nice black matt finish which then forms a lasting coat which hardens once the fireplace is lit and it gets some heat into it.
My insert has a brass decorative piece at the very top and my initial thought was to use Brasso on it but because Brasso is flammable, I figured that wasn’t the best idea! So I simply used a microfibre cloth to polish it the best I could. If anyone knows of a fire or heat-resistant brass polish, please do let me know!
I haven’t yet gone over the very back wall of the insert but I may just have to try it there too. The nice thing is that none of the products – neither the Rustins Paint nor the Dirtbusters Polish – left any odour or smoke once the fire was lit. Both products worked wonderfully to restore my old Victorian fireplace to her former beauty.
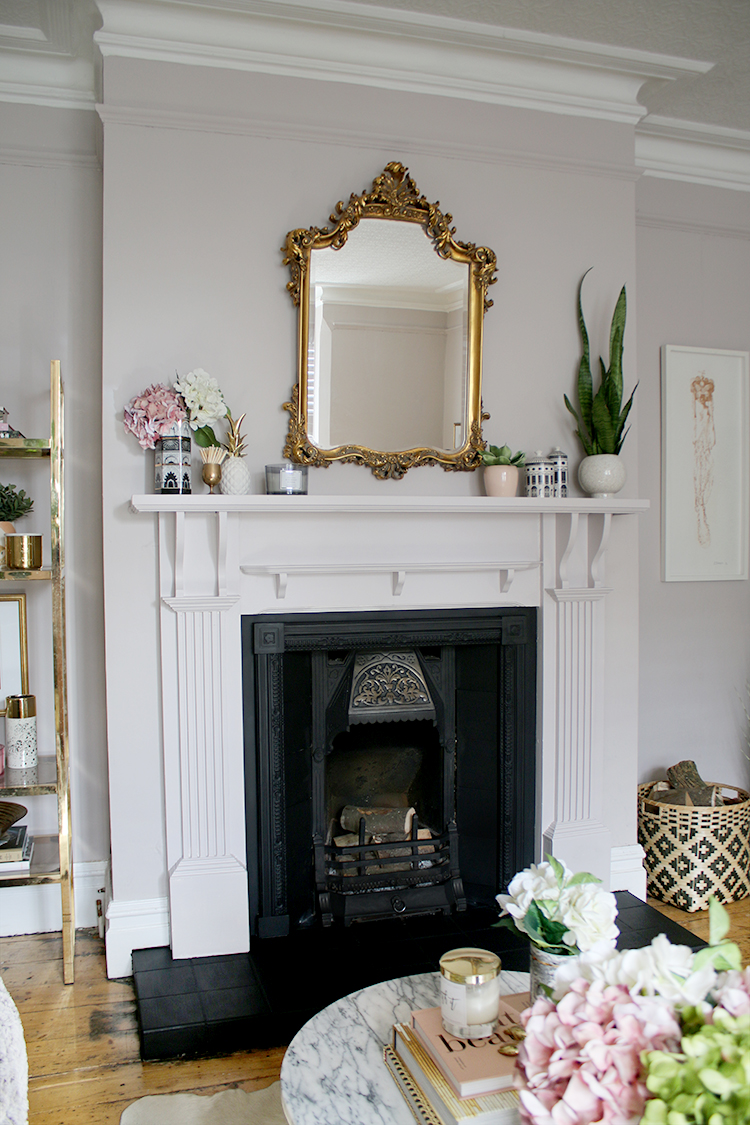
So that’s how I fully updated and refreshed my Victorian fireplace. I think the finished result speaks for itself but I genuinely couldn’t be happier about how well it came out. What do you think of the finished result? Not too bad for a bit of paint and polish, eh? Have you ever updated an old fireplace yourself? I’d love to hear from you if so!
Disclaimer: The Earthborn paints were provided to me free as part of the living room makeover although this post was not a part of that collaboration – I just wanted to share! All other products were purchased by me. Please read all manufacturing instructions to ensure any products recommended are suitable for your own requirements and note that use of any recommended products is at your own risk.


Just goes to show…..we spend and spend when all you need is paint and elbow grease. Awesome look and great job, suits the finished room. Congrats.
Thanks for sharing how you achieved this and the products you used.
This will sound bizzar. Tomato catsup. Best brass cleaner I’ve ever used. Protect the area from drips. Slather onto the brass. Let it sit for a bit. Wash it off. Ta da. I used it on old drawer hardware. Mind-blowing.
Oh my goodness Mary! You’re right – I’d completely forgotten about that option but I’ve heard it before :) Thank you so much for the reminder – I’m going to have to give it a go! xx
I cannot get over HOW MUCH BETTER it looks! What a money saver!
great job! I didn’t notice before that you’d painted hearth – makes such a difference, and I like the choice of matt black (like black slate). I’d planned to buy a wooden fire surround/mantle and paint it, then last minute was lucky enough to find a bargain marble one on ebay. Before that I lived with a beige tiled Thirties monstrosity – which I couldn’t bare to look at… but once painted white (like walls) became liveable. Yours looks fab, and you can always paint it another colour in future if you wanted a change.
Nice post. Congrats! I can see a white rug imitating piece near the Victorian fireplace. What is this? Is it a kind of rug? If it’s a rug then what material it is made from?
It is, yes! It’s white cowhide ;) xx