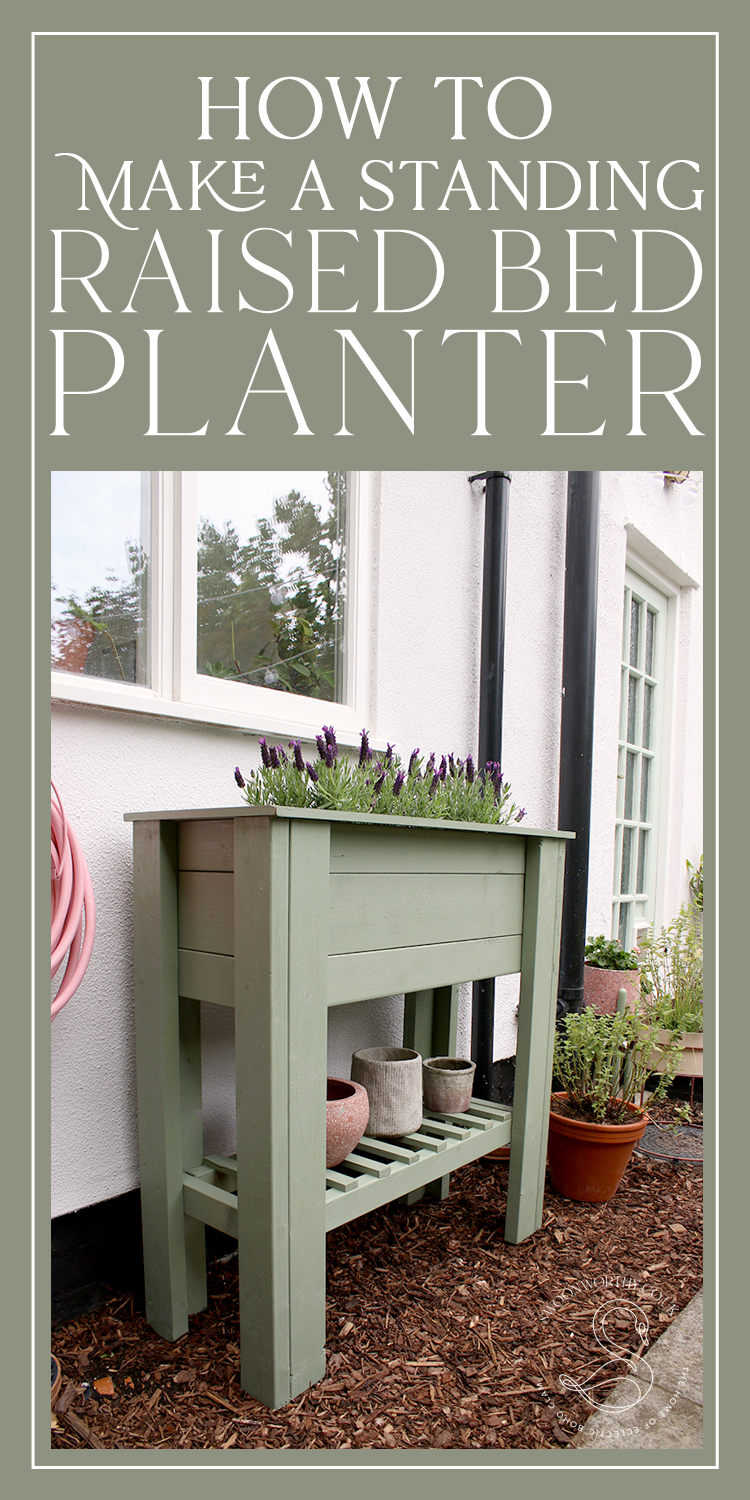
Emboldened by our attempts at making our own raised planter a couple of months ago, I knew we’d be able to tackle something a little bit more complicated – a pair of standing raised planters to sit in front of the kitchen window.
If you recall, we’ve been working on the back of the house now for the last few months as and when the weather permitted and it’s been such a satisfying process, despite how long it’s taken us. We’ve basically been working on it in stages after the building work last year left the entire back of the house looking rather sad and neglected. I was determined that this year, we would finally sort things out so that I had a nice view from the back of the garden!
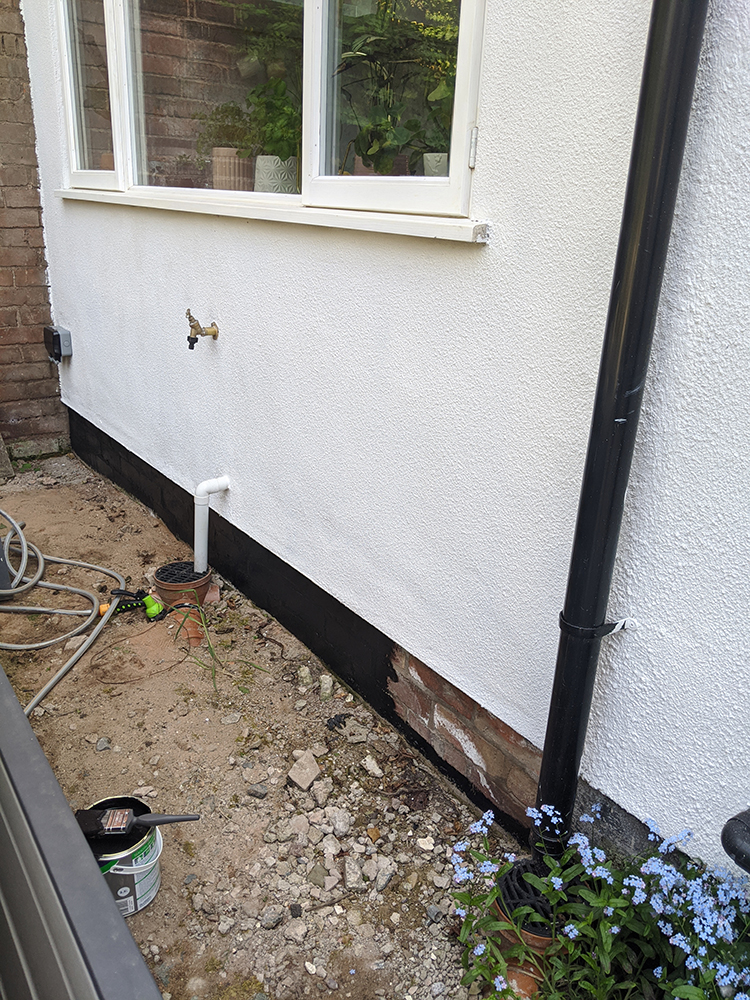
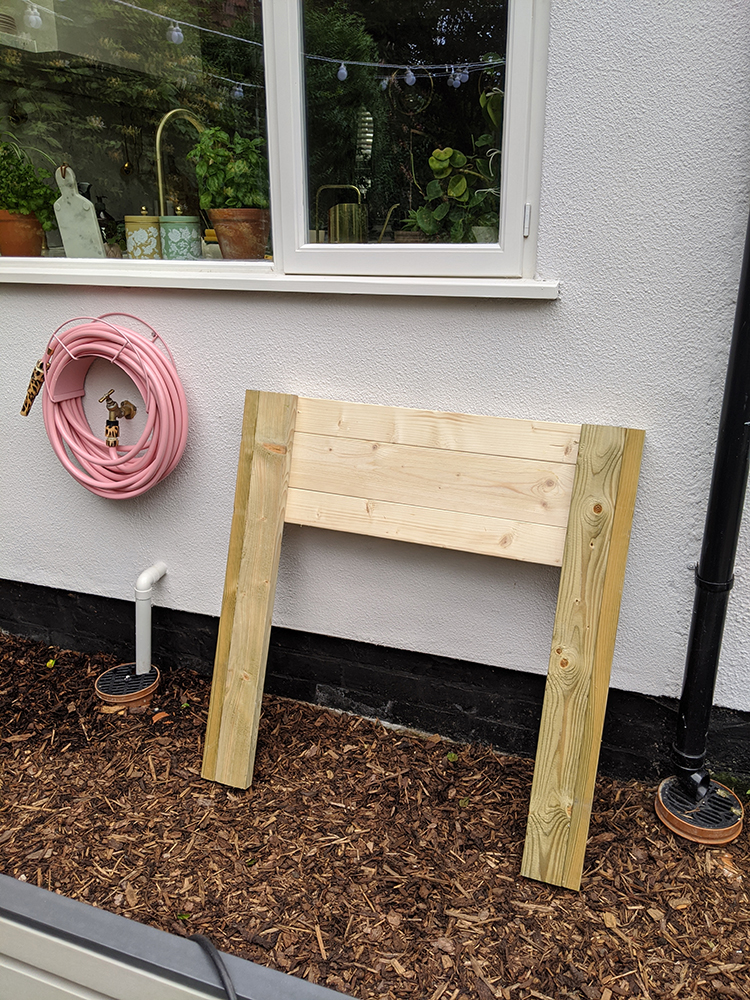
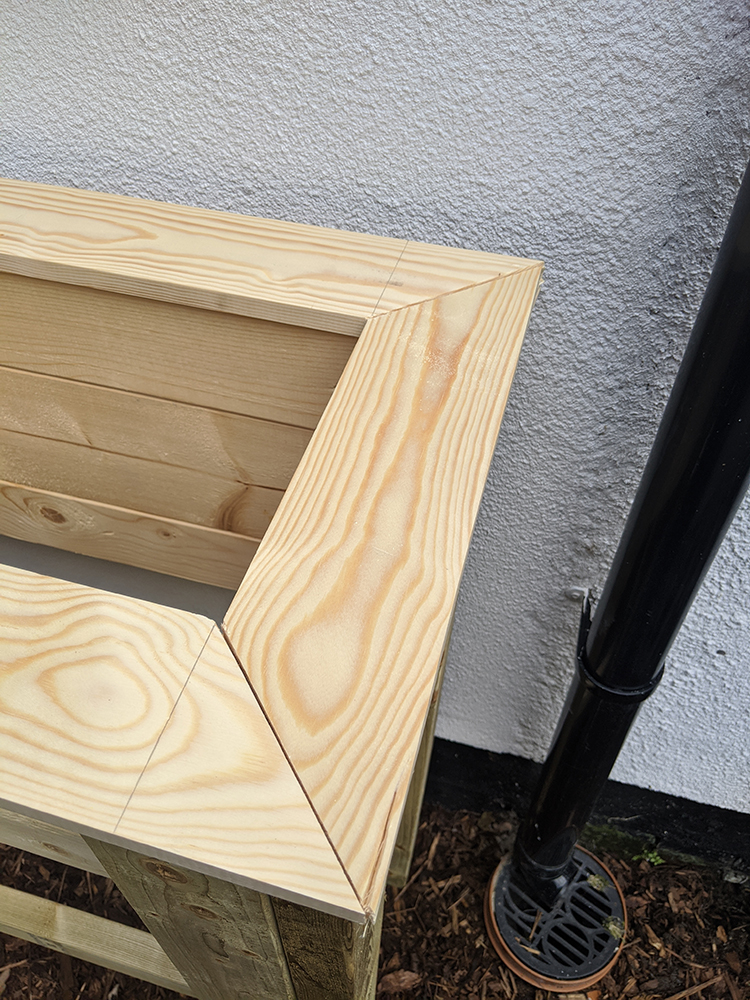
One of the more problematic elements was the small strip of space in between the new kitchen extension and where we laid slabs to extend our patio. The builders had to dig a huge trench in front of the extension when they were doing the work to lay plumbing and waste pipes but then instead of filling it back up with the earth they had removed, they decided to fill it with clay and aggregate. What I was left with is seen in the image above – gahhh!
I was a little horrified by this because it meant that very little would grow there in that shady north-facing spot.
After debating what I might do with this little problematic strip of earth and considering lots of options for planting, I came to the realisation that I needed something a little different than just sticking some plants in there and hoping for the best. The attachment for the hose pipe was bang in the centre of that wall and we’d had an electrical outlet in the corner – so whatever we did, we needed to be able to access both of those. After loads of research and thinking about what might be best, I came up with a plan to make the area look pretty, not really have to worry about the clay base we were working on and still give us easy access to the hose and electrical outlet.
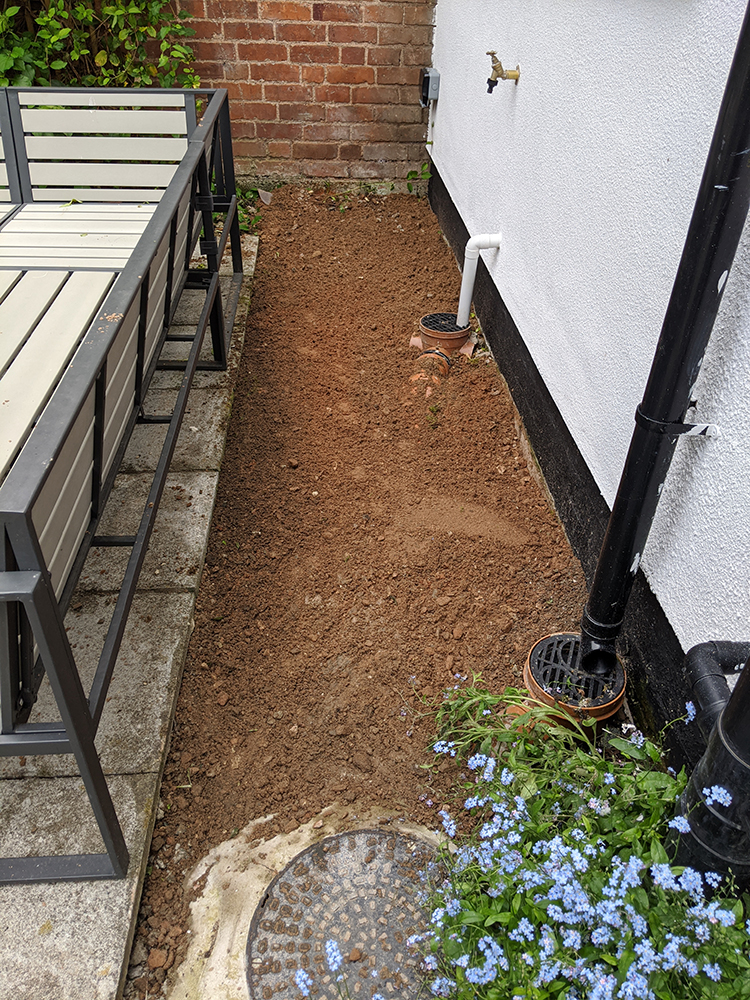
My first step was digging out a bit of the clay and the largest stones and raking it all over.
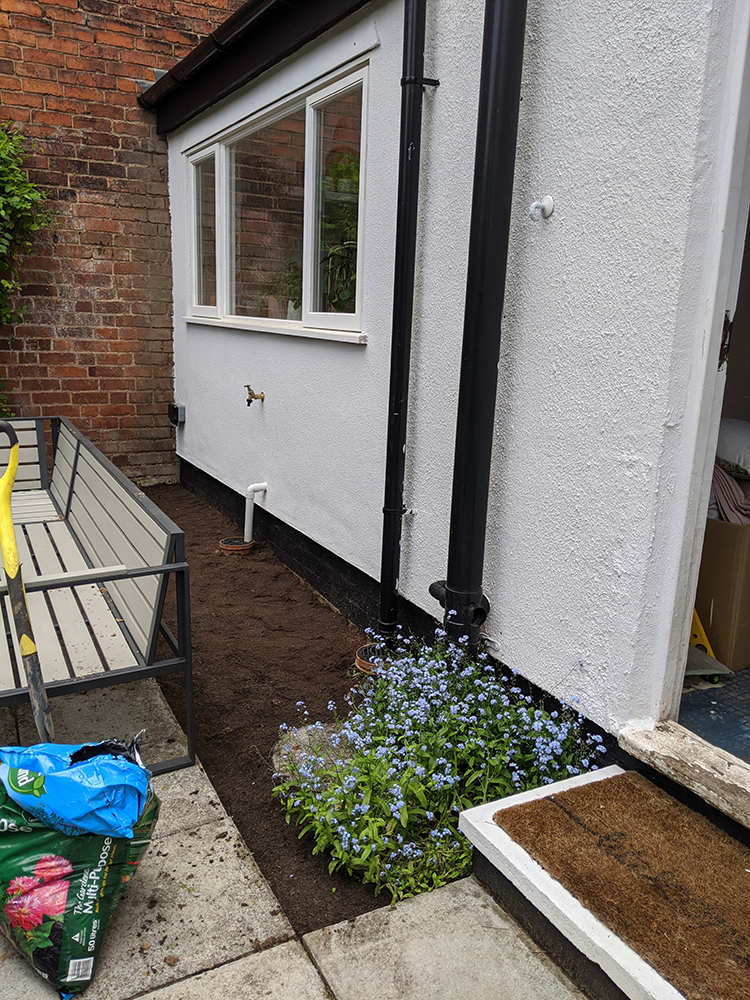
I then covered it with a layer of compost and then followed that with a layer of wood bark.
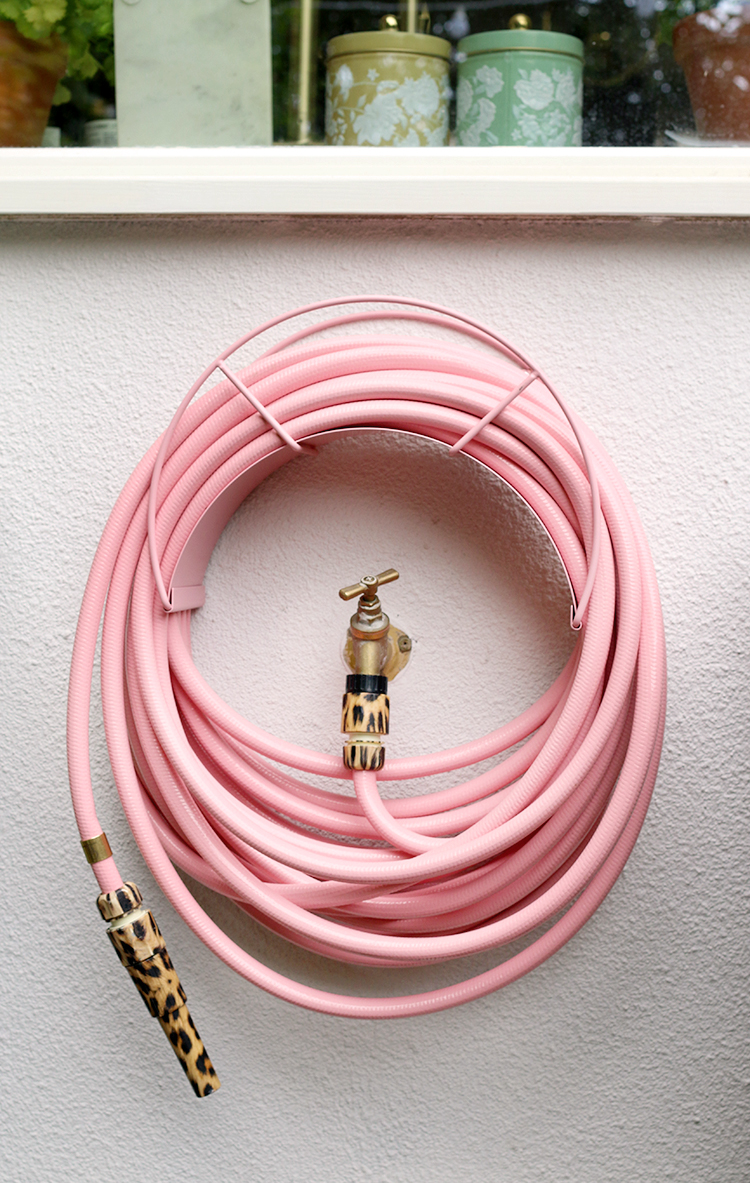
I also ordered in the most fantastic pink and leopard print hose pipe from Garden Glory – it really is quite special and I decided to splurge on that simply because the hose was so visible from pretty much any vantage point in the garden. I do truly love it and considering it combines something so utilitarian with such a beautiful design, it was the perfect addition to this spot.
My next step was going to be adding a couple of standing raised planters on either side of the hosepipe. I looked online for ready-made ones but for anything that looked like it was going to last longer than a season, the costs were pretty steep and for the most part, I couldn’t find ones that were quite tall enough or wide enough for that space. I wanted them to be visible when you were viewing the back of the house from further down the garden but because we have a corner dining set there, the sofa would have blocked the view of anything shorter than a metre high.
I knew at that point, we would have to simply make them ourselves. As I said at the start of this post, we’d already tackled a raised planter before (the kind that sits on the ground) so why couldn’t we do a couple of taller standing ones? Now, let me just say whilst we love a bit of DIY, we are not experienced in wood-working. We’ve never really made anything like this previously so I took to the internet for research, seeing how others built them, picking ideas from all over the place to create my own design.
Wayne and I then sat down and went through the Wickes website to see what materials may be best to use. We decided to order in the wood (there was quite a bit to buy and we didn’t think we’d get it in our car in one trip) for the base of the planters and then reassess what we’d need for finishing off the top and creating the little slatted shelf. In the end, it took one delivery and two trips to B&Q to finally finish them but as we were sort of winging it and making changes as we went, you definitely won’t need to do this!
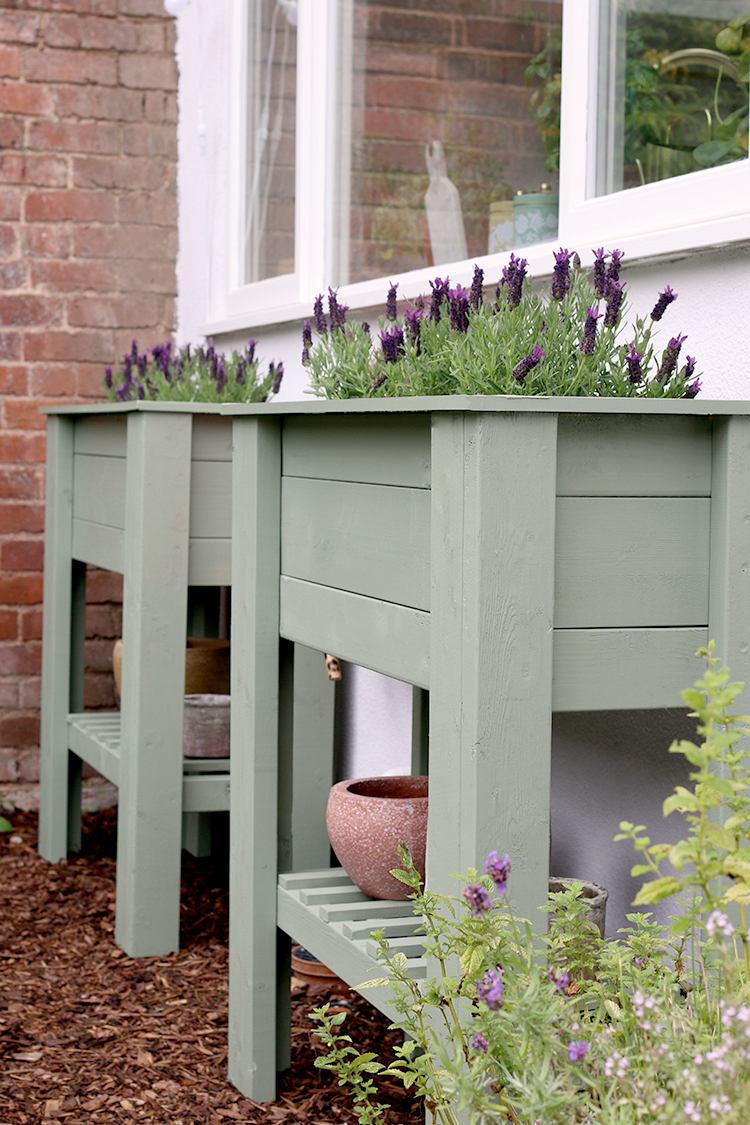
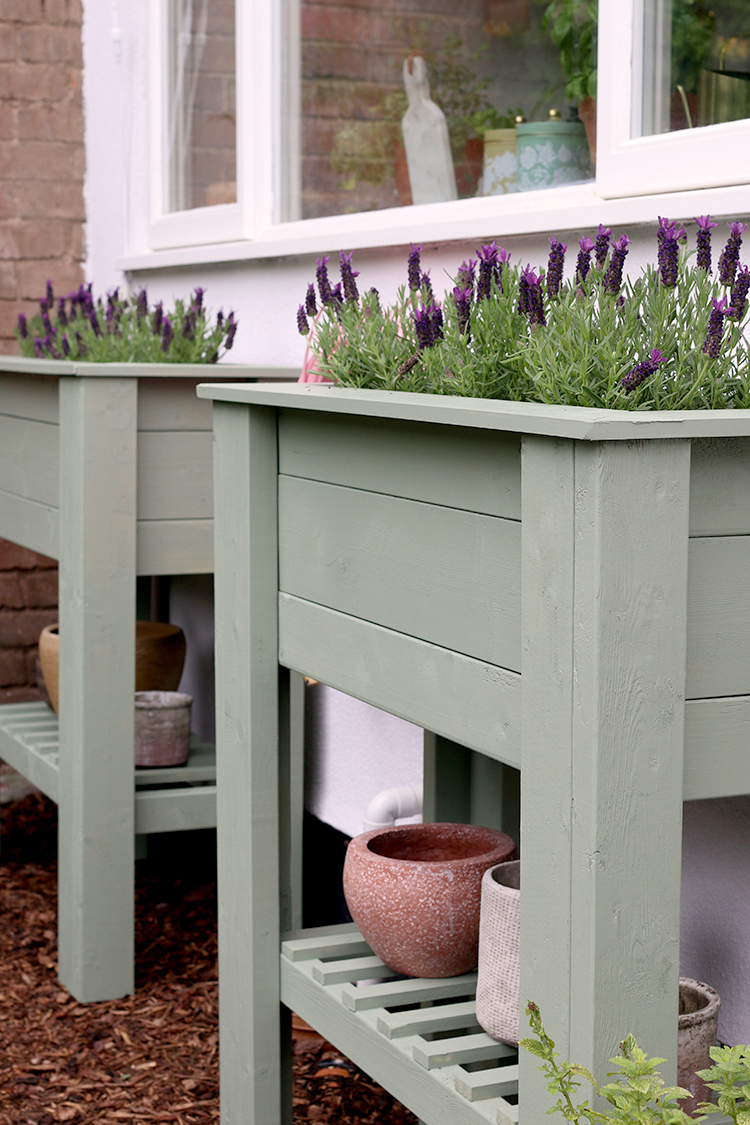
I have to say that they came out even better than I’d anticipated. They are a metre high as I mentioned so I can see them from anywhere I am in my garden but they are so strong and sturdy – I can see them lasting us a really long time. Not just that, but the design is so adaptable.
You can make them shorter if you wish or wider too. The shelf can be lower down or higher up. You can paint them any colour you wish. They would be perfect for those with just patios who want to grow some herbs or even if you just have a small balcony filled with flowers. They’d also be perfect for those who have issues with mobility as you can stand to tend to your plants – no bending required.
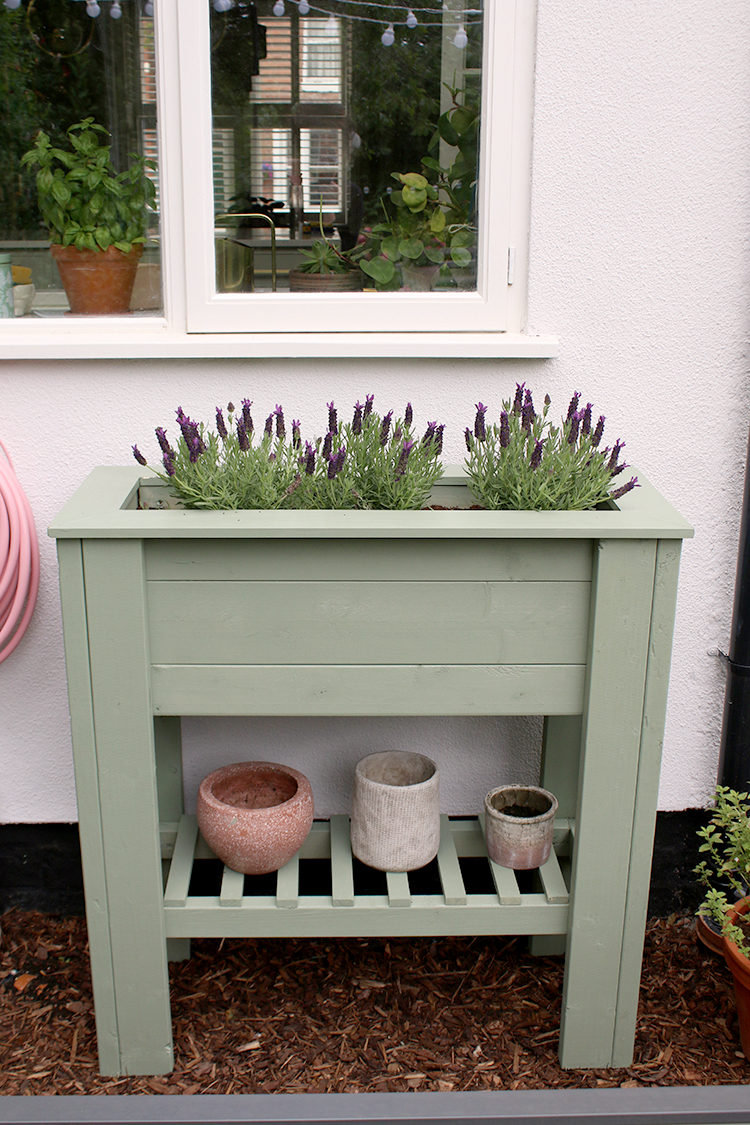
The best part is that they cost us less than £70 each – less than half the price of some of the nicer ones I’d seen online. That’s partly because we made two so our costs were halved on some of the materials – if you were only making one, expect it to cost just around the £100 mark – again, far less than the same quality purchased off the shelf.
You also won’t need a lot of complicated tools but a decent DIY kit will probably be necessary to make these. We didn’t have all the fancy equipment that some of the DIYs I’d found online required but an electric drill and electric screwdriver, our tabletop circular saw and a staple gun made this job a lot easier. However, a hand saw, normal screwdriver and mitre block will do the job too, it’ll just take a bit longer.
So let’s get into how to make your own standing raised bed planter…
Materials Required
- 2 lengths of 38mm x 89mm x 2.4M Studwork CLS Timber
- 1 length of 38mm x 140mm x 2.4M Studwork CLS Timber
- 4 lengths of 38mm x 89mm x 2.4M Treated CLS Timber
- 2 length of 38mm x 63mm x 2.4M Treated CLS Timber
- 2 lengths of 15mm x 92mm x 2.4M Pine Stripwood
- 1 length of 15mm x 36mm x 2.4M Pine Stripwood
- 600mm x 900mm x 25mm Galvanised Mesh Panel
- Weed Membrane
- Plastic for lining the sides of the planters (I just used 2 black bin bags cut in half)
- Decking and Wood Screws
- Wire staples
Cut List:
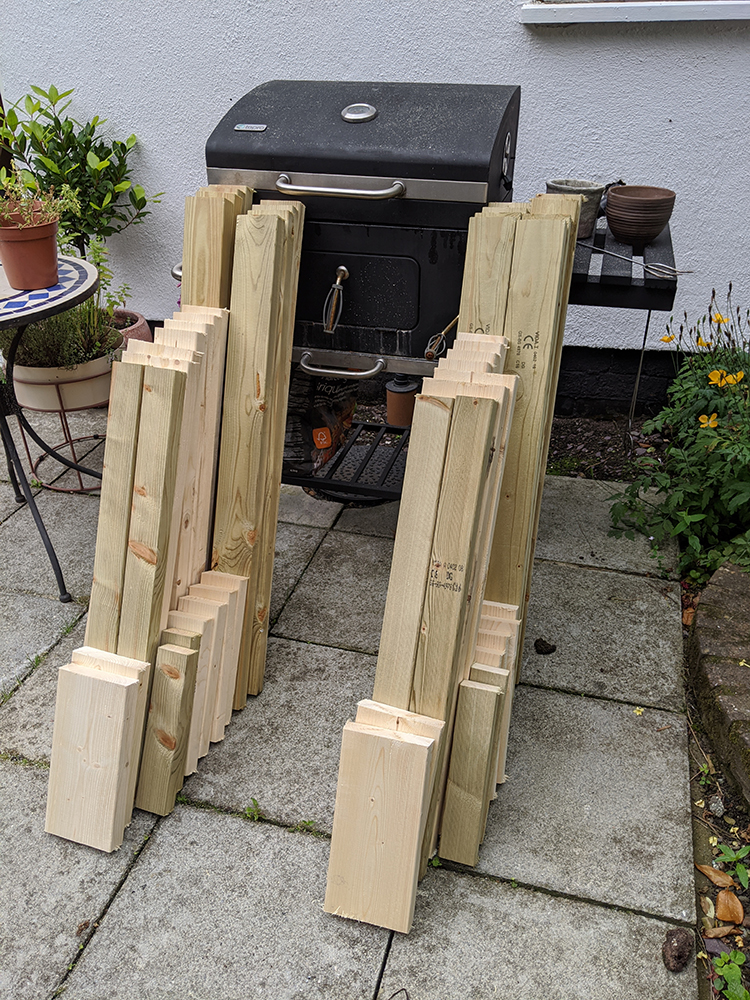
You’ll want to precut your wood to the following sizes (bear in mind what you see above is for two planters but the tutorial is for making just one!):
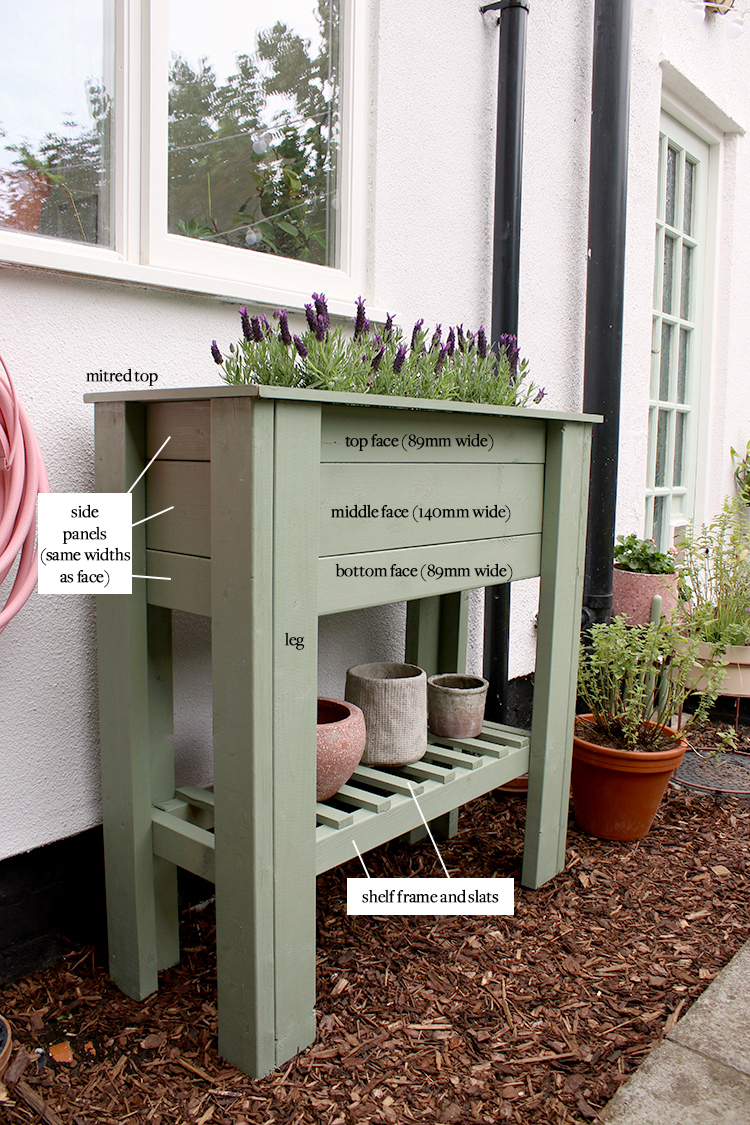
For the face and sides of the planter using the 38mm x 89mm x 2.4M lengths of wood:
- cut 4 pieces at 80cm long (this will form the top and bottom front face of the planter)
- cut 4 pieces at 30cm long (this will form the top and bottom side face of the planter)
For the face and sides of the planter using the 38mm x 140mm x 2.4M lengths of wood:
- cut 2 pieces at 80cm long (this will form the middle of the front face of the planter)
- cut 2 pieces at 30cm long (this will form the middle of the side face of the planter)
For the legs using 38mm x 89mm x 2.4M treated lengths of wood:
- cut 8 pieces at 1M long
For the shelf frame using 38mm x 63mm x 2.4M treated lengths of wood
- cut 2 pieces at 80cm
- cut 2 pieces at 30cm
For the mitred top using 15mm x 92mm x 2.4M lengths of wood:
- cut 2 pieces at 98cm at the longest point
- cut 2 pieces at 41.3cm at the longest point
For the slats using 15mm x 36mm x 2.4M lengths of wood:
- cut 8 pieces at 30mm long
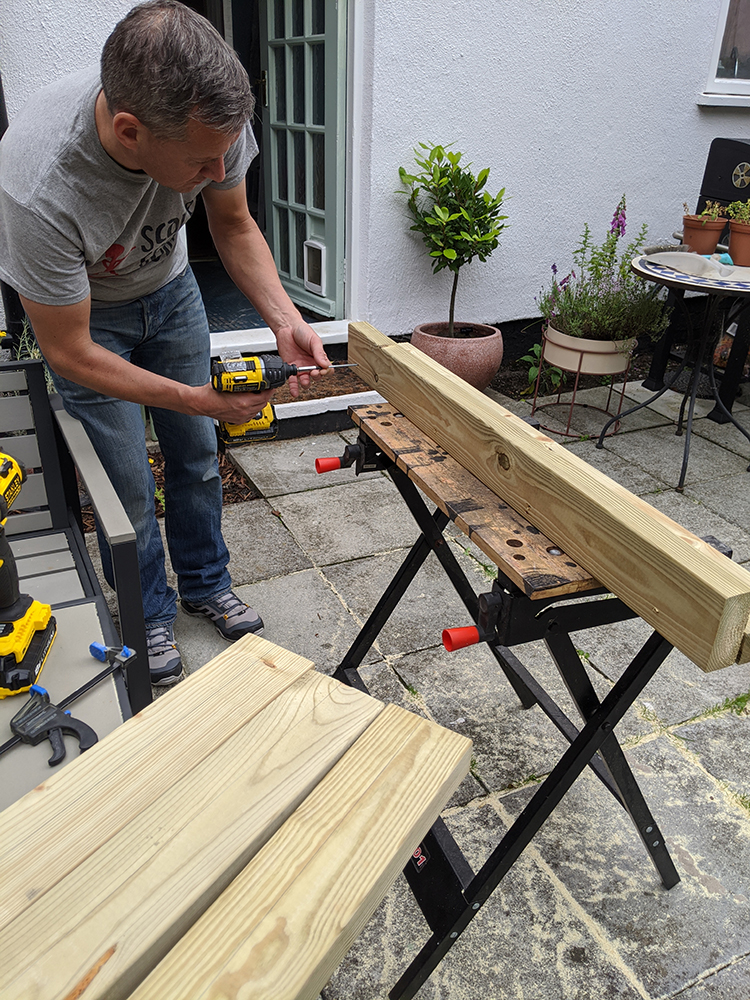
Constructing the Standing Raised Bed Planter
Remember that every time you screw pieces together, start with a pilot hole using the drill first so that you don’t split the wood. Ensure you countersink the screws slightly so that you can easily fill them if you will be painting the planter.
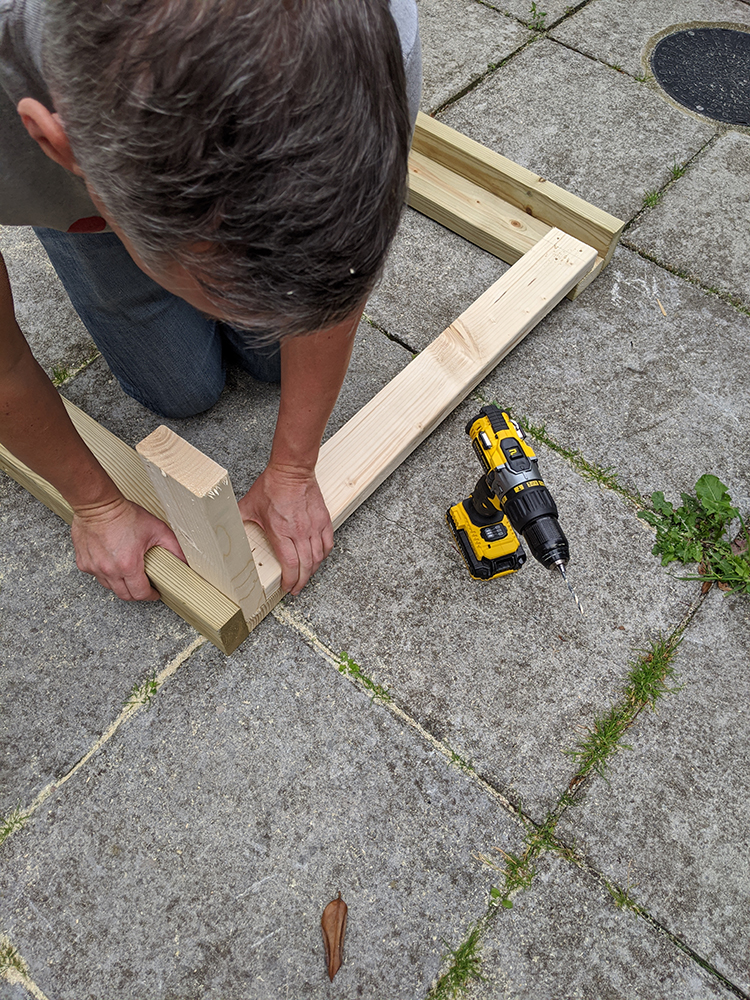
Step 1: Construct the Legs
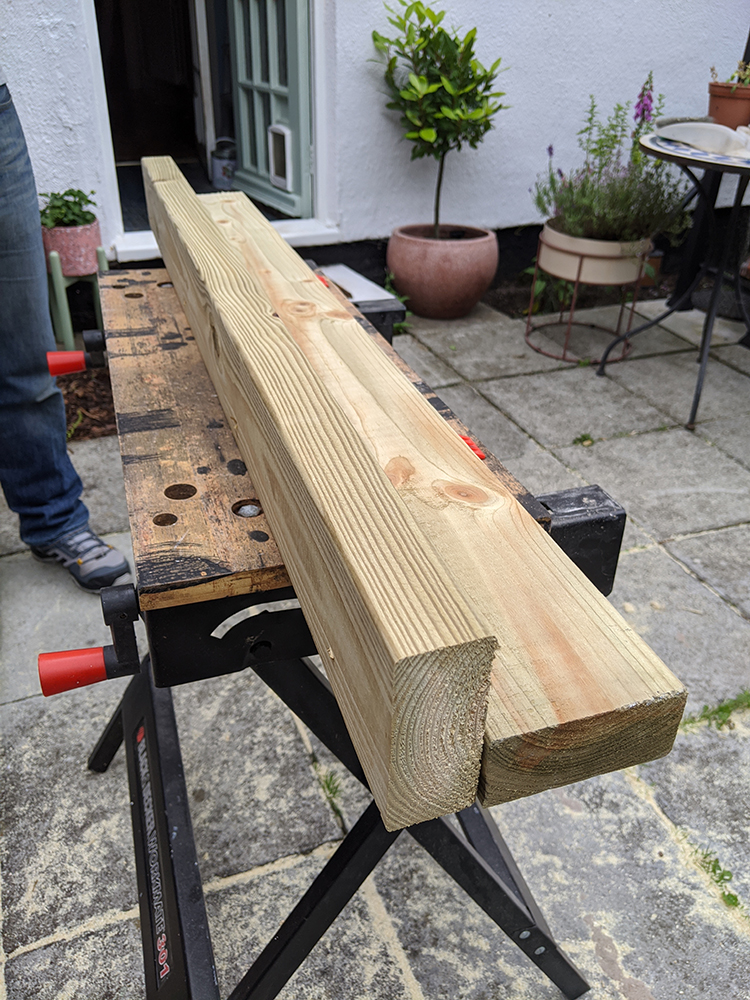
Butt two pieces of 38mm x 89mm x 1M treated lengths of wood lengthwise to create an L shape.
Pre-drill your holes and screw together at intervals along the length.

You’ll be making four of these, one for each leg.
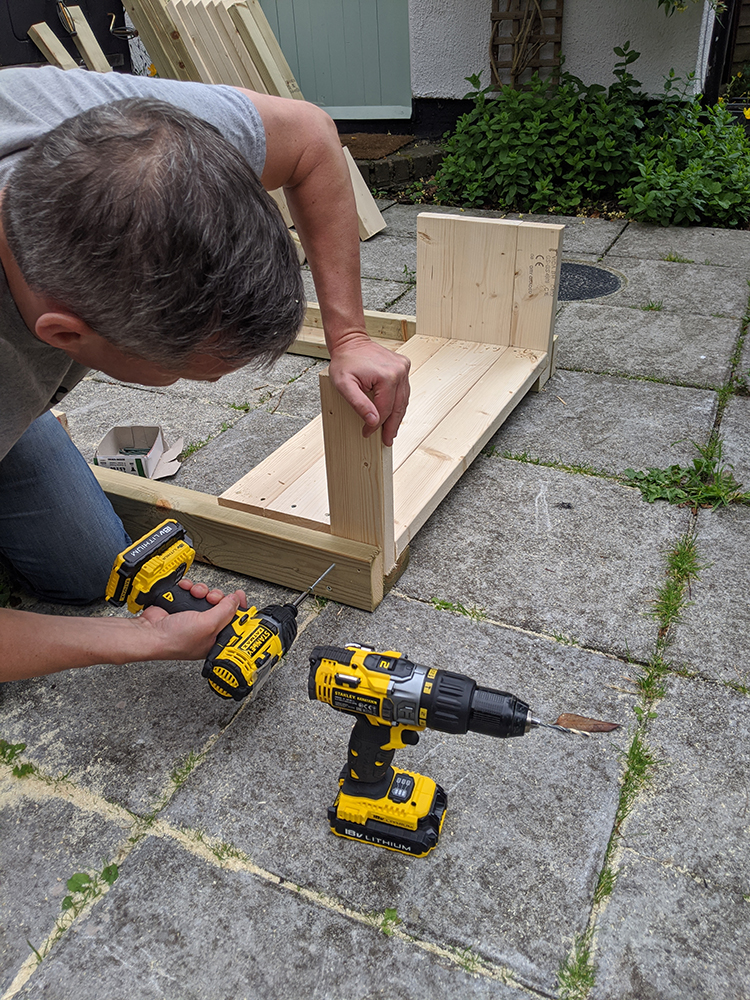
Step 2: Create the Front & Back Panels

Line up two of the legs so the front panel piece (38mm x 89mm x 80cm length) is on the ground and sits flush between the two legs and the widest face of your L shape is on the ground as above (don’t screw anything in yet).
Insert one of the side panel pieces (38mm x 89mm x 30mm) perpendicularly between the leg and the top face piece aligning everything, so you can see where to screw that front face panel into the leg at the right spot.
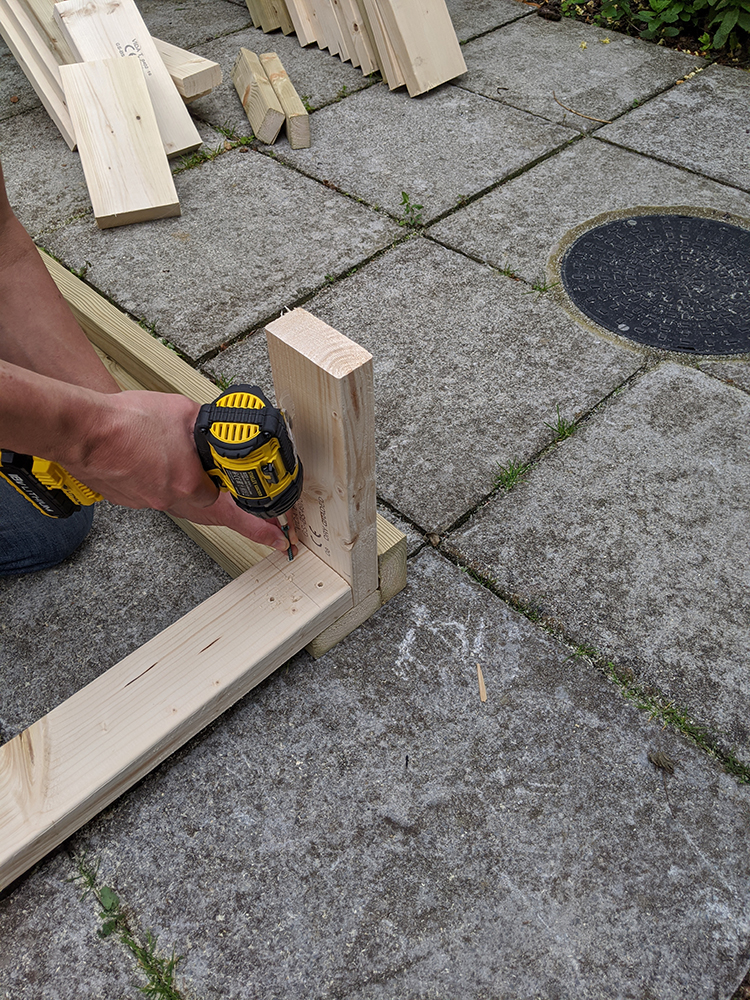
Screw the top face panel into the leg and then repeat this on the opposite side too (at this point, you aren’t attaching the perpendicular side piece yet).
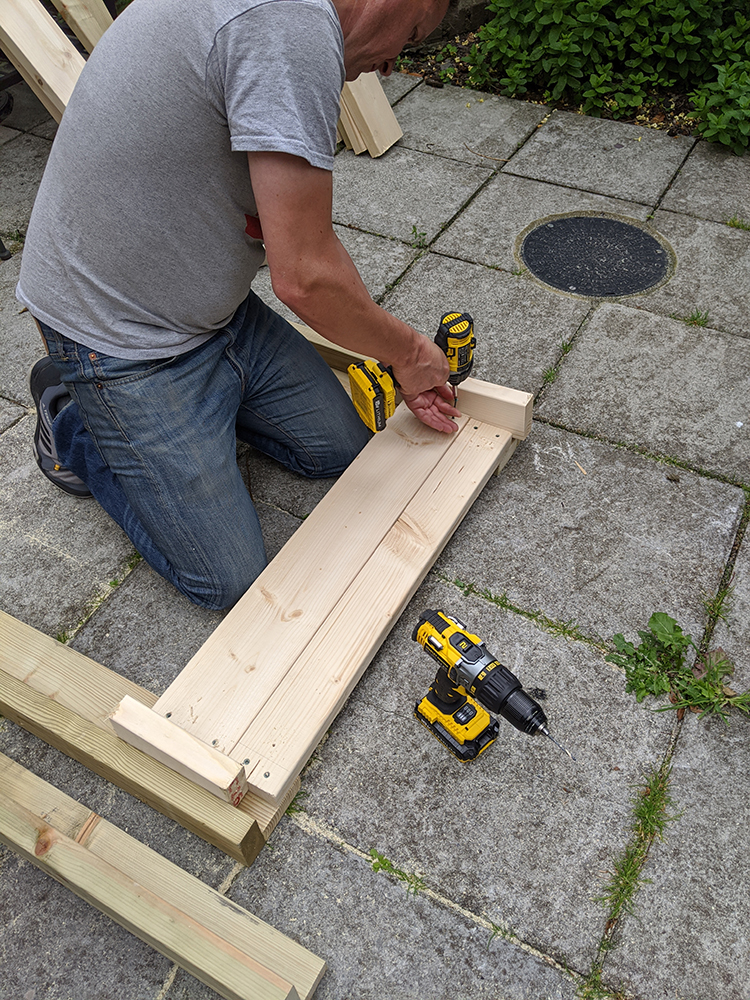
Underneath this, lay a 38mm x 140mm x 80mm piece and with the same side piece in place, predrill holes and screw into place so it’s flush with the piece above it.
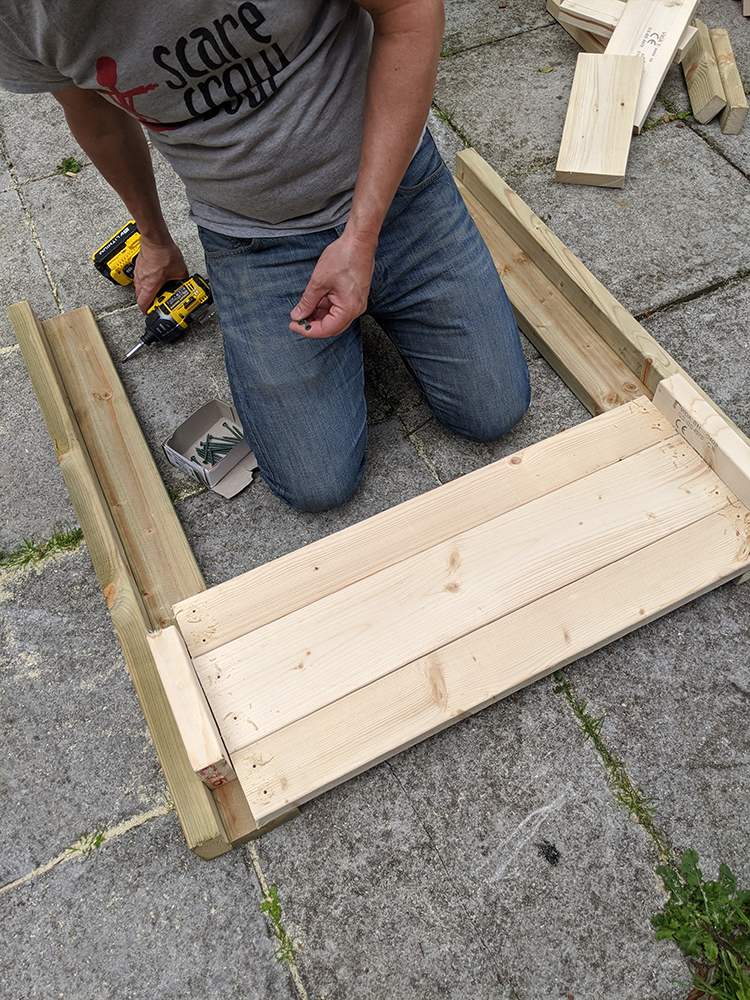
Finally, under this, lay another 38mm x 89mm x 80mm piece again with the same side piece in place, predrill holes and screw into place so it’s flush with the piece above it.
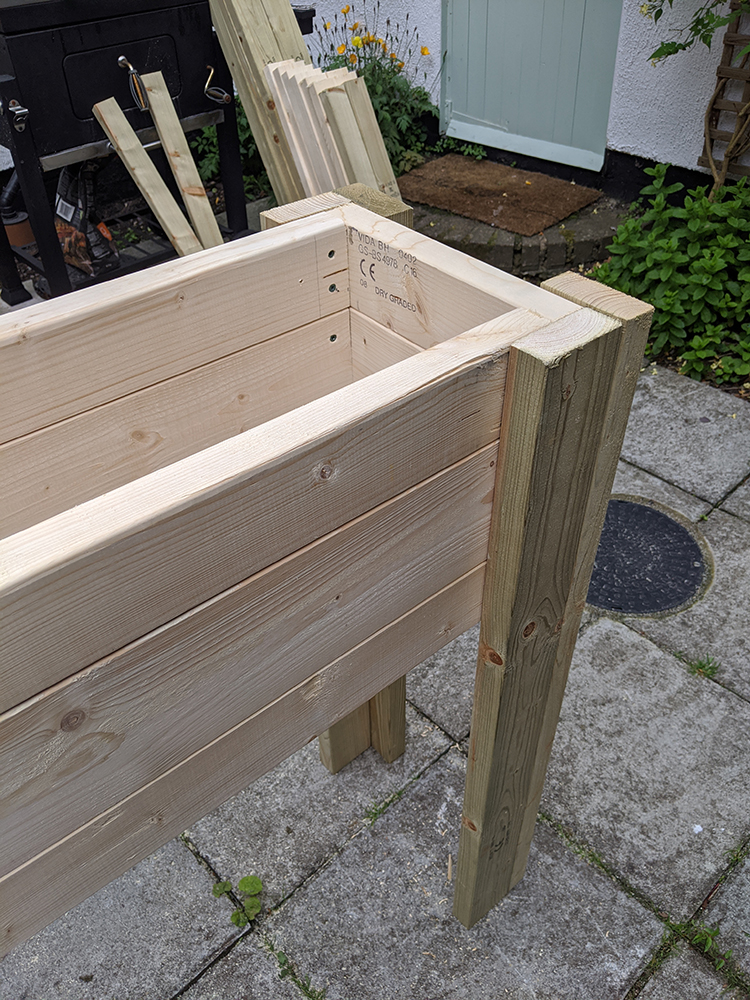
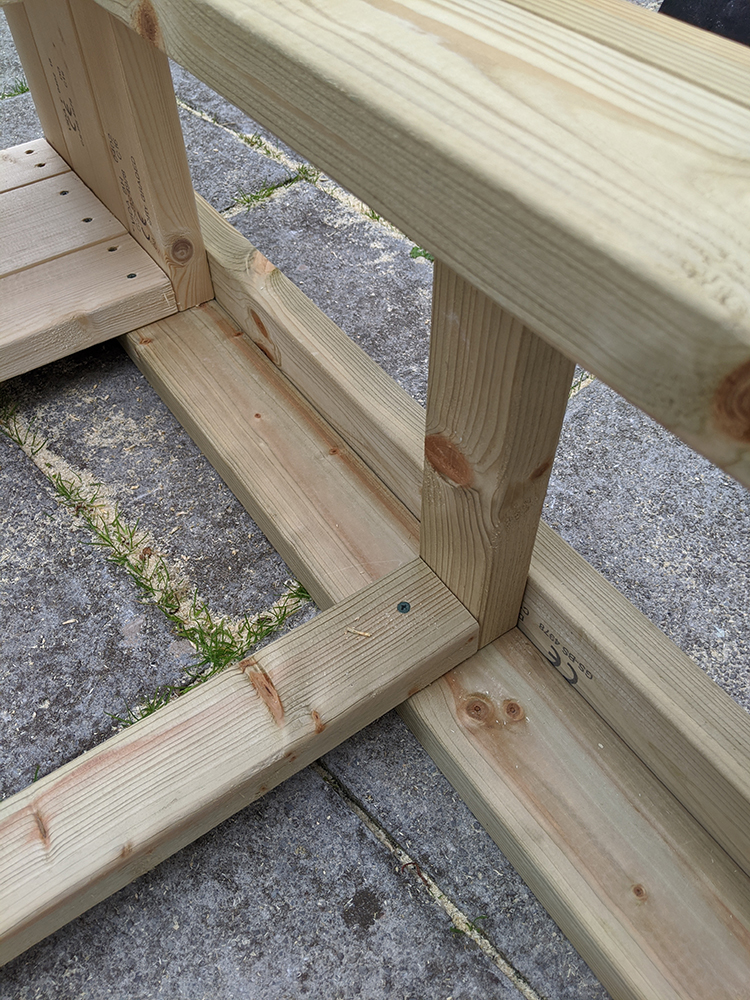
One side is now done, it should look like this.
Repeat this entire process again to create the other side of the planter so that you have two pieces that look like the above.
Step 3: Join the Front and Back Pieces
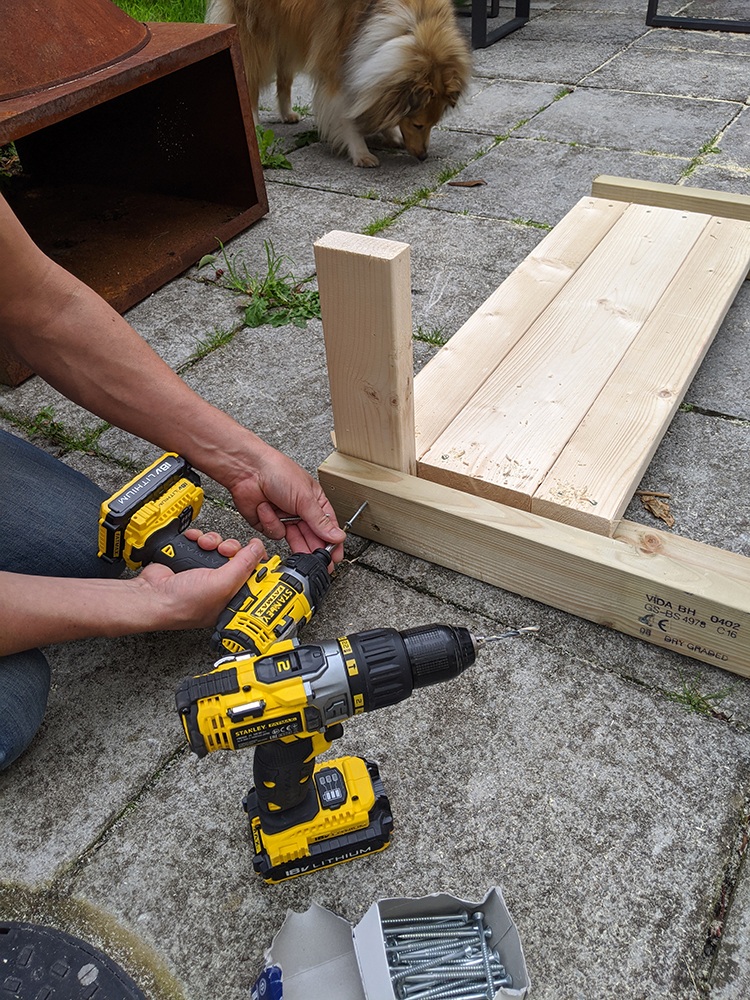
Using one of the 38mm x 89mm x 30mm pieces, set it perpendicular to one of the frames, flush with the top to create the top side piece of your planter. Predrill your holes and screw into place.
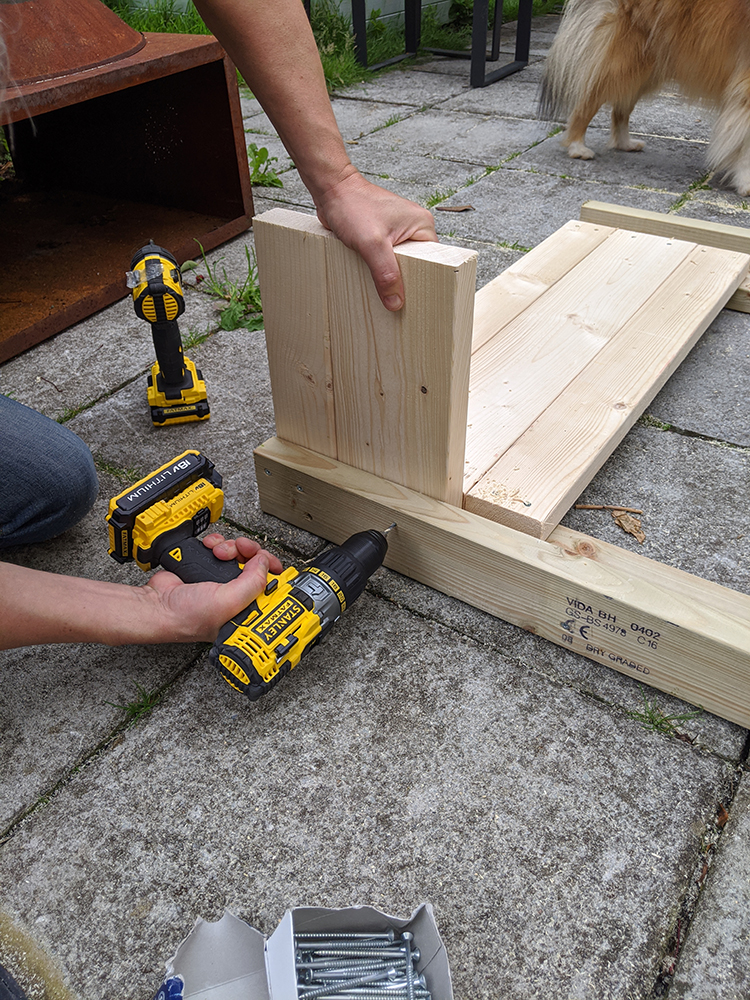
Next, set one of the 38mm x 140mm x 30mm pieces just below this, predrill and screw into place.
Finally, set one of the 38mm x 89mm x 30mm pieces just below this, predrill and screw into place.
Repeat this process on the opposite side to create both sides of your planter.
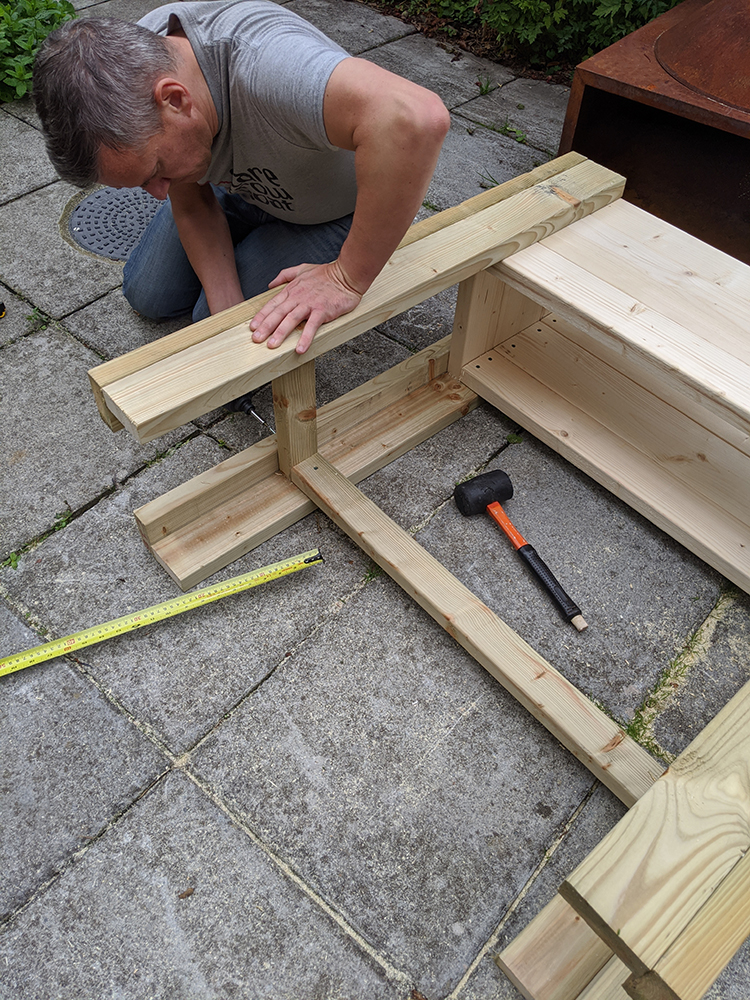
Next join this side to the other side of the frame. We pushed it together, it should all slot into each other with minimal force and you should be able to stand your planter upright.
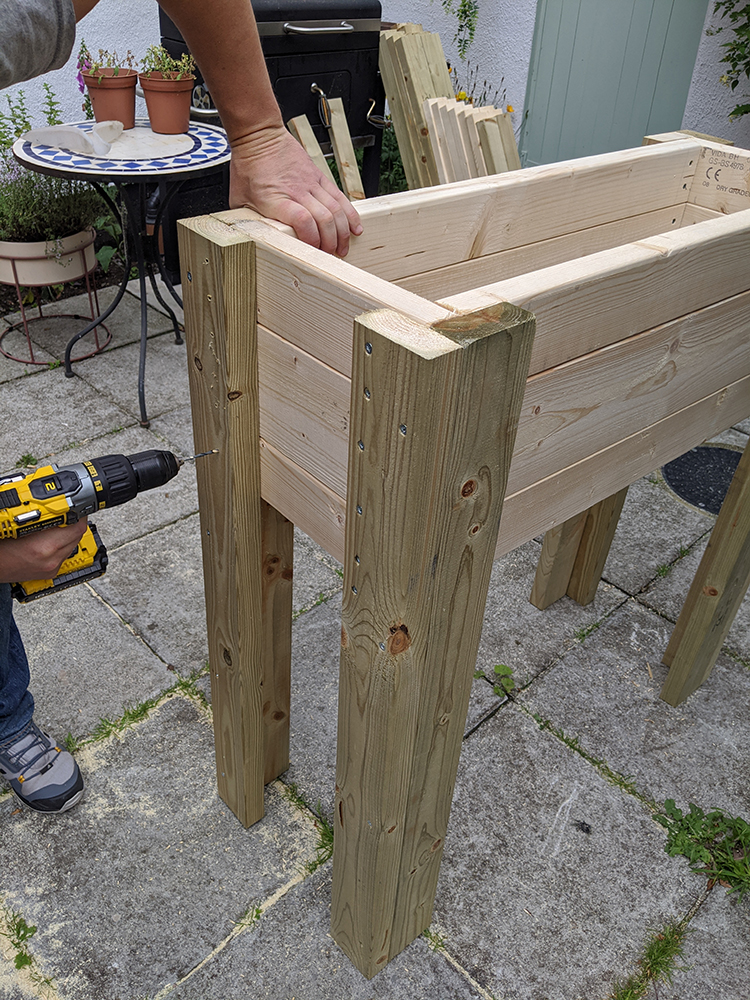
Predrill holes and screw together via the legs as shown above on both sides.
Step 4: Create the Frame for the Bottom Shelf
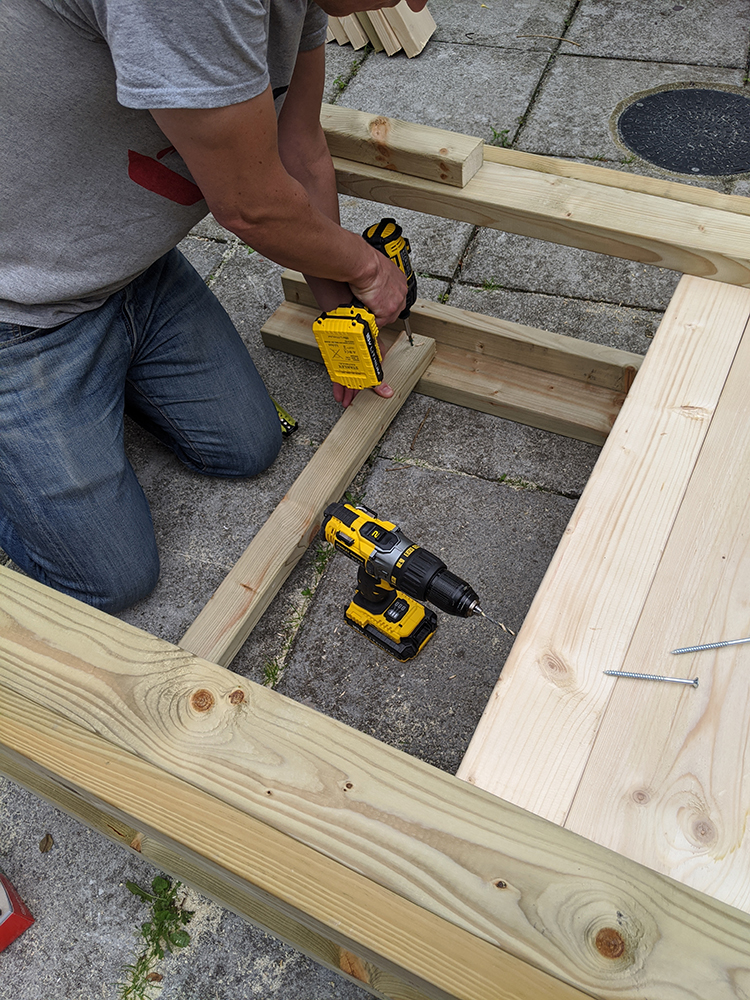
We attached the frame pieces at 36cm from the bottom but you can place it anywhere you wish. Attach your front longer piece first.
Use the same process as above by slotting your side pieces in first so that you can see where the longer front pieces need to be screwed in.
Insert your side pieces and screw into place via the outside leg.
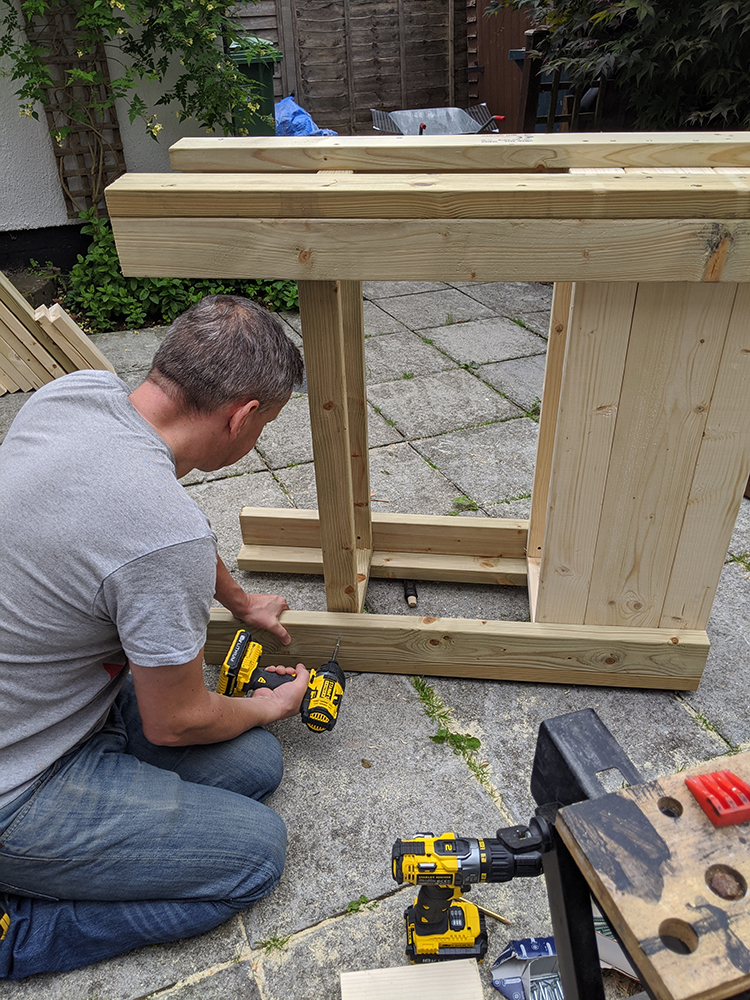
Finally attach the other longer piece and screw into place to create the frame.
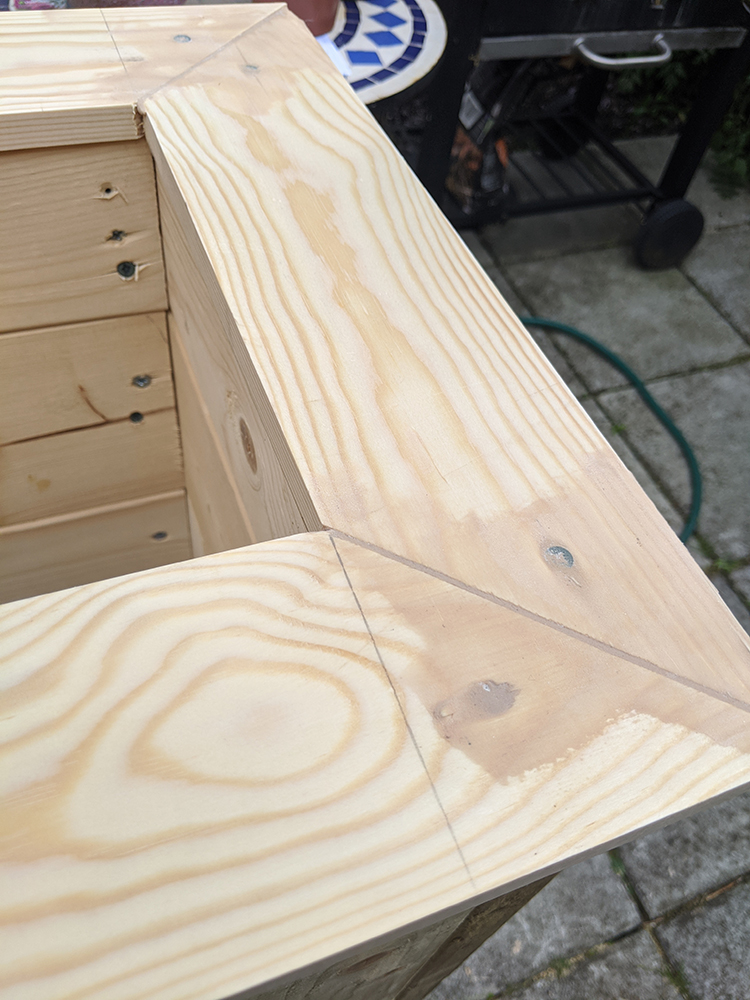
Step 5: Create the Mitred Top
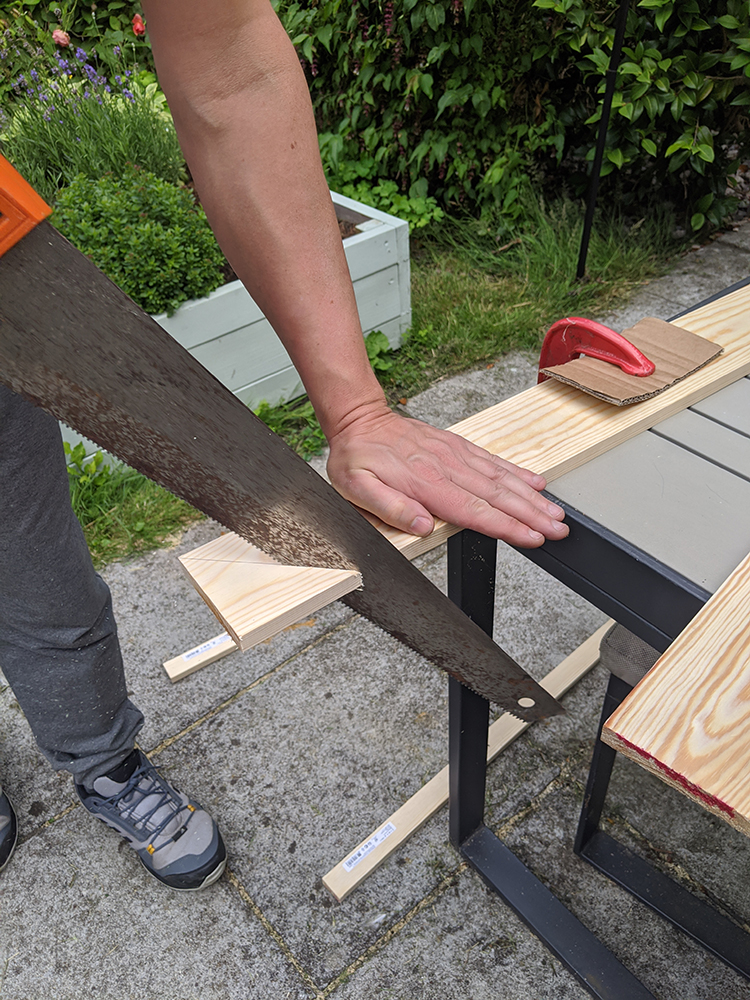

Cut each of the long pieces a 45° angle going outwards ensuring the longest side is 98cm.
Cut each of the shorter pieces at a 45° angle going inwards so that the longest side is 41.3cm to create your mitred top (yes we broke the very edge there! We used wood filler and glue to patch it up!).
Join the pieces on the top of the planter frame, lining them with the inside edges and allowing for a 1cm overhang around the entire top and screw into place at the corners.
Step 6: Attach the Slats

We put the first and last slats so that they butted up against each of the legs then the remaining six pieces were set at 59mm intervals so they were all spaced the same width apart.

Drill pilot holes and screw into place.
Step 7: Fill Holes and Paint
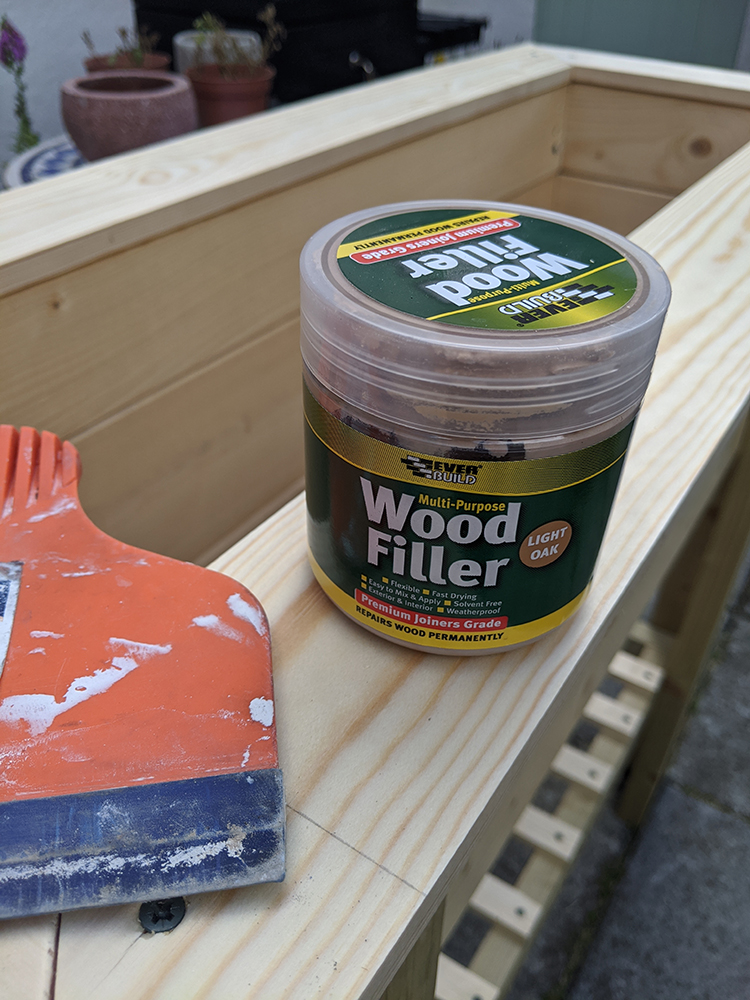
Fill all your holes and mitred corners with wood filler, leave to dry and then sand down.
Clean with a damp cloth to remove any dust and leave to dry again.
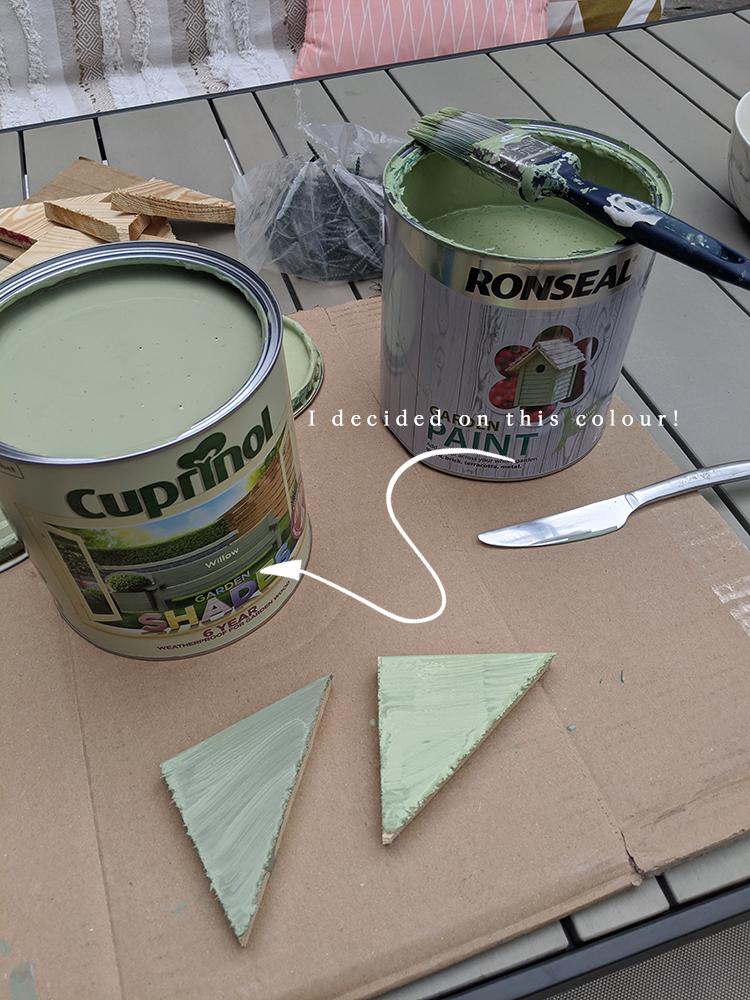
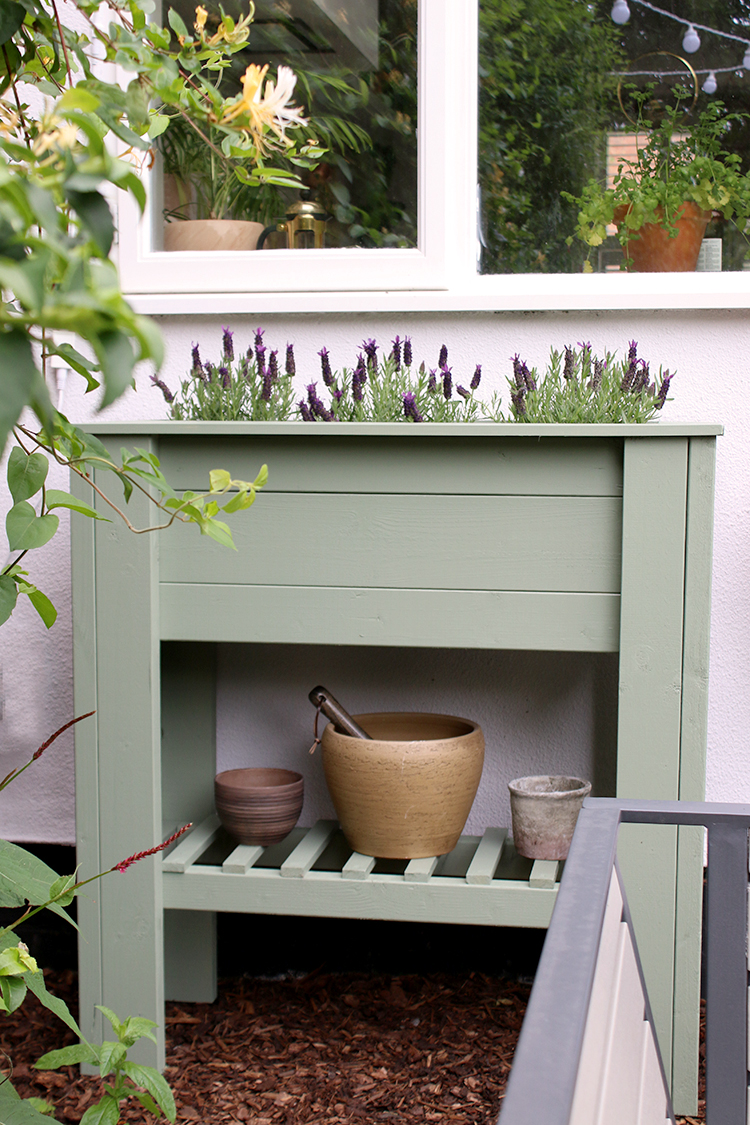
I used Cuprinol Garden Shades Willow on my planters but you can use any colour you wish!
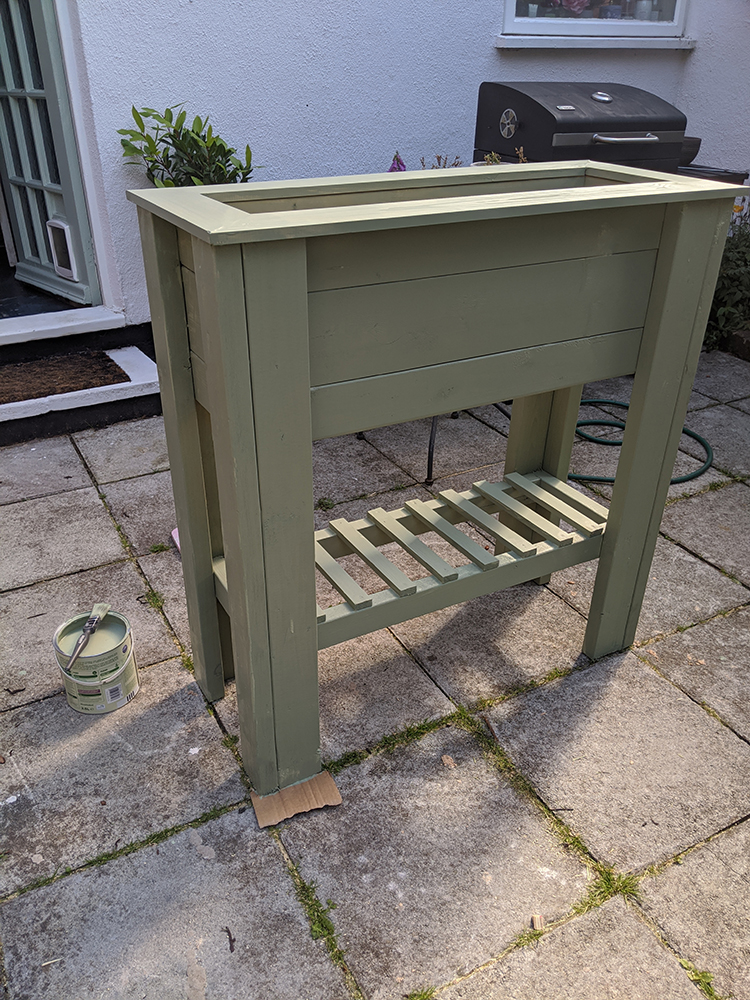
I gave mine two coats, leaving it to dry between coats.
Step 8: Construct Bottom and Line Your Planter
In order to allow for good drainage, a combination of chicken wire and weed membrane was used at the bottom of the planter.
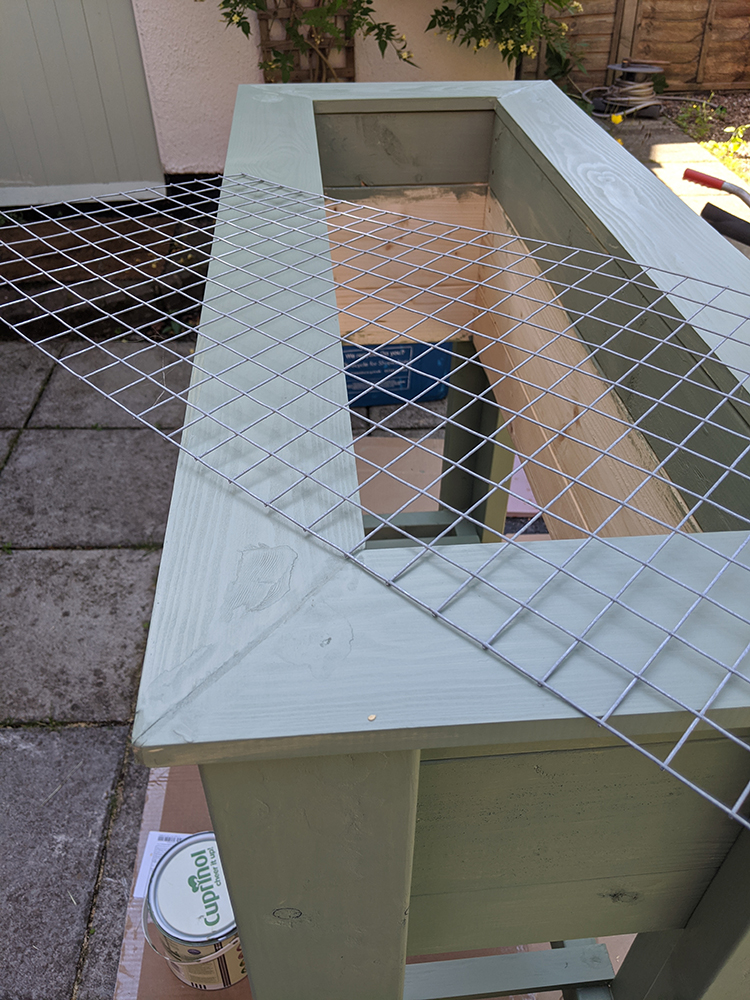
Using the top of the planter as a guide cut the chicken wire with wire cutters or plyers so that it’s a bit larger than the opening.
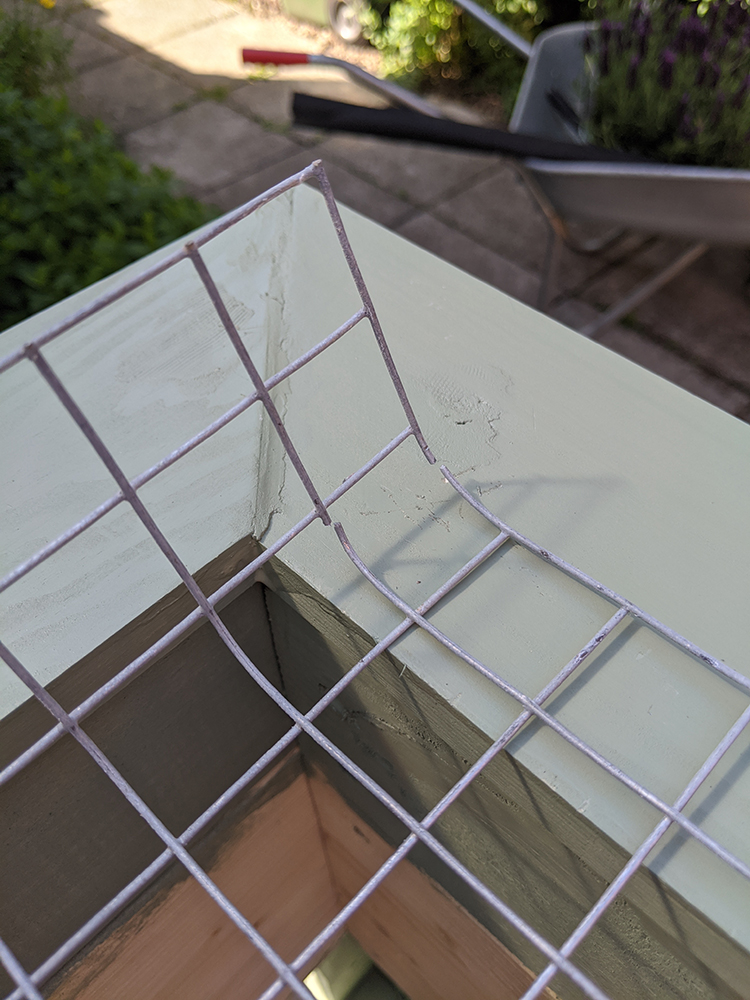

Clip the wire at the corners and bend it into a cradle shape as above so that it will sit snugly within the hole.
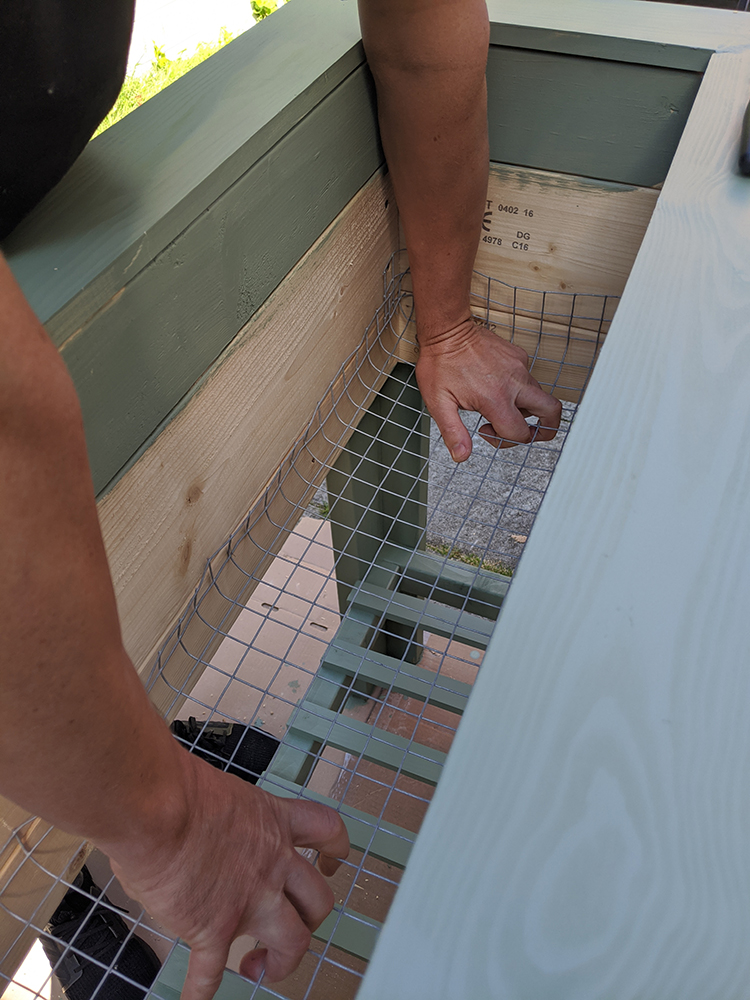

Push the chicken wire into the hole and attach around the edges with wire staples to secure in place. We used a hammer to secure into place.

Line the sides of the planter a few inches from the top with plastic sheeting (I used standard black bin bags cut in half) so that it covers the sides but not the bottom of the planter – this is just to protect the wood.
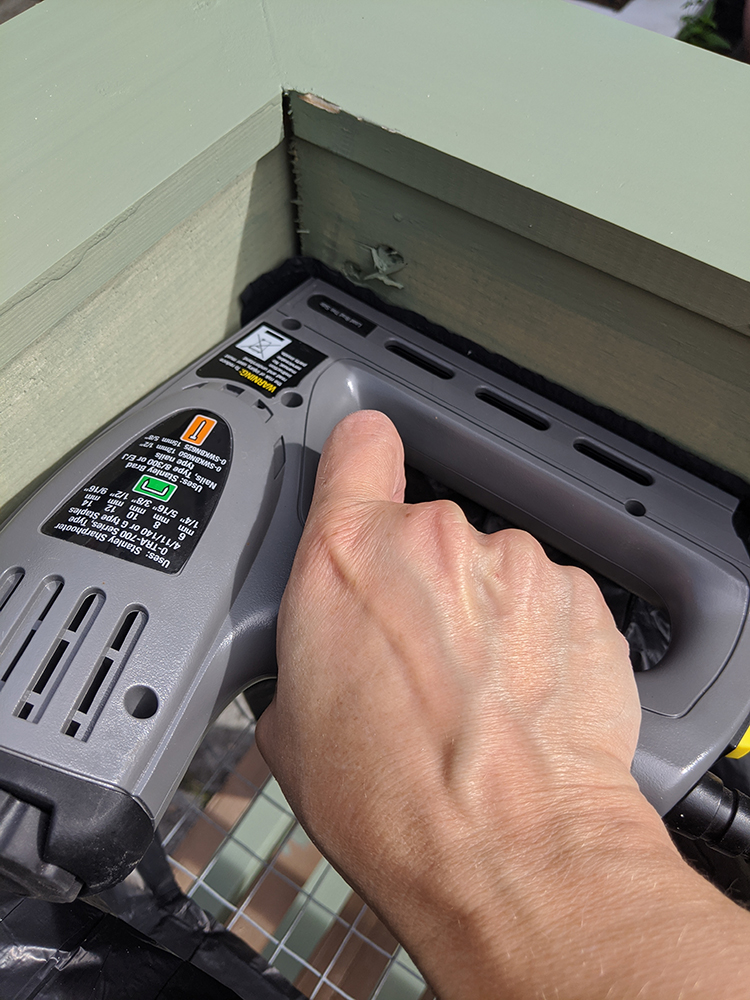
Use a staple gun around the top to secure it into place.
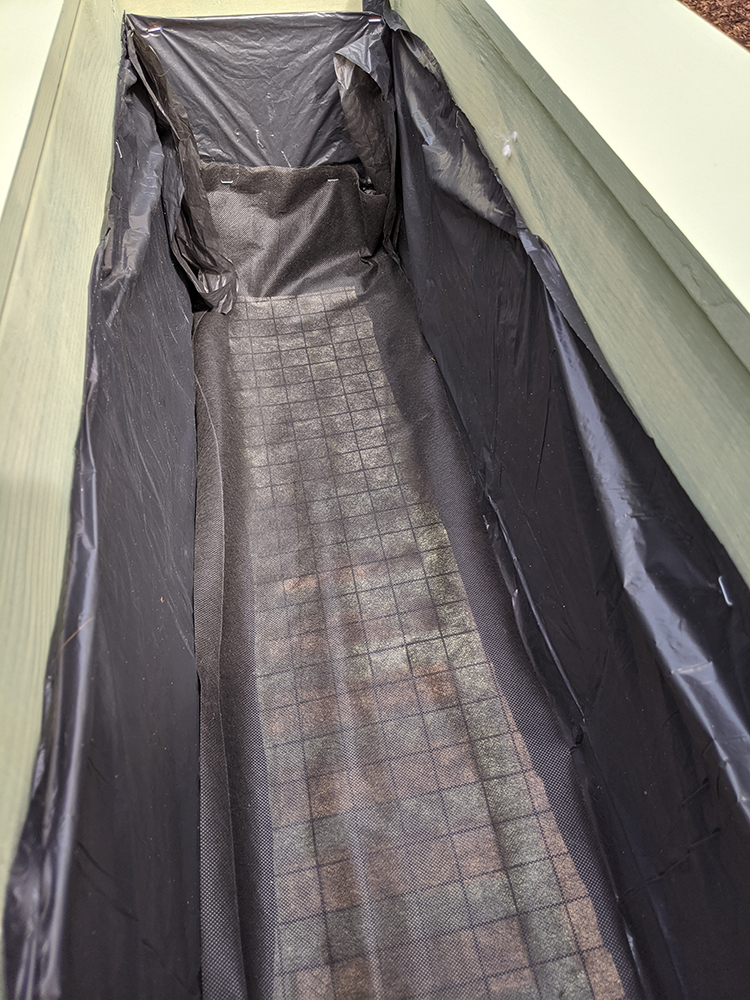
Finally, line the bottom of the planter where the chicken wire is with weed membrane and use the staple gun to secure it into place.
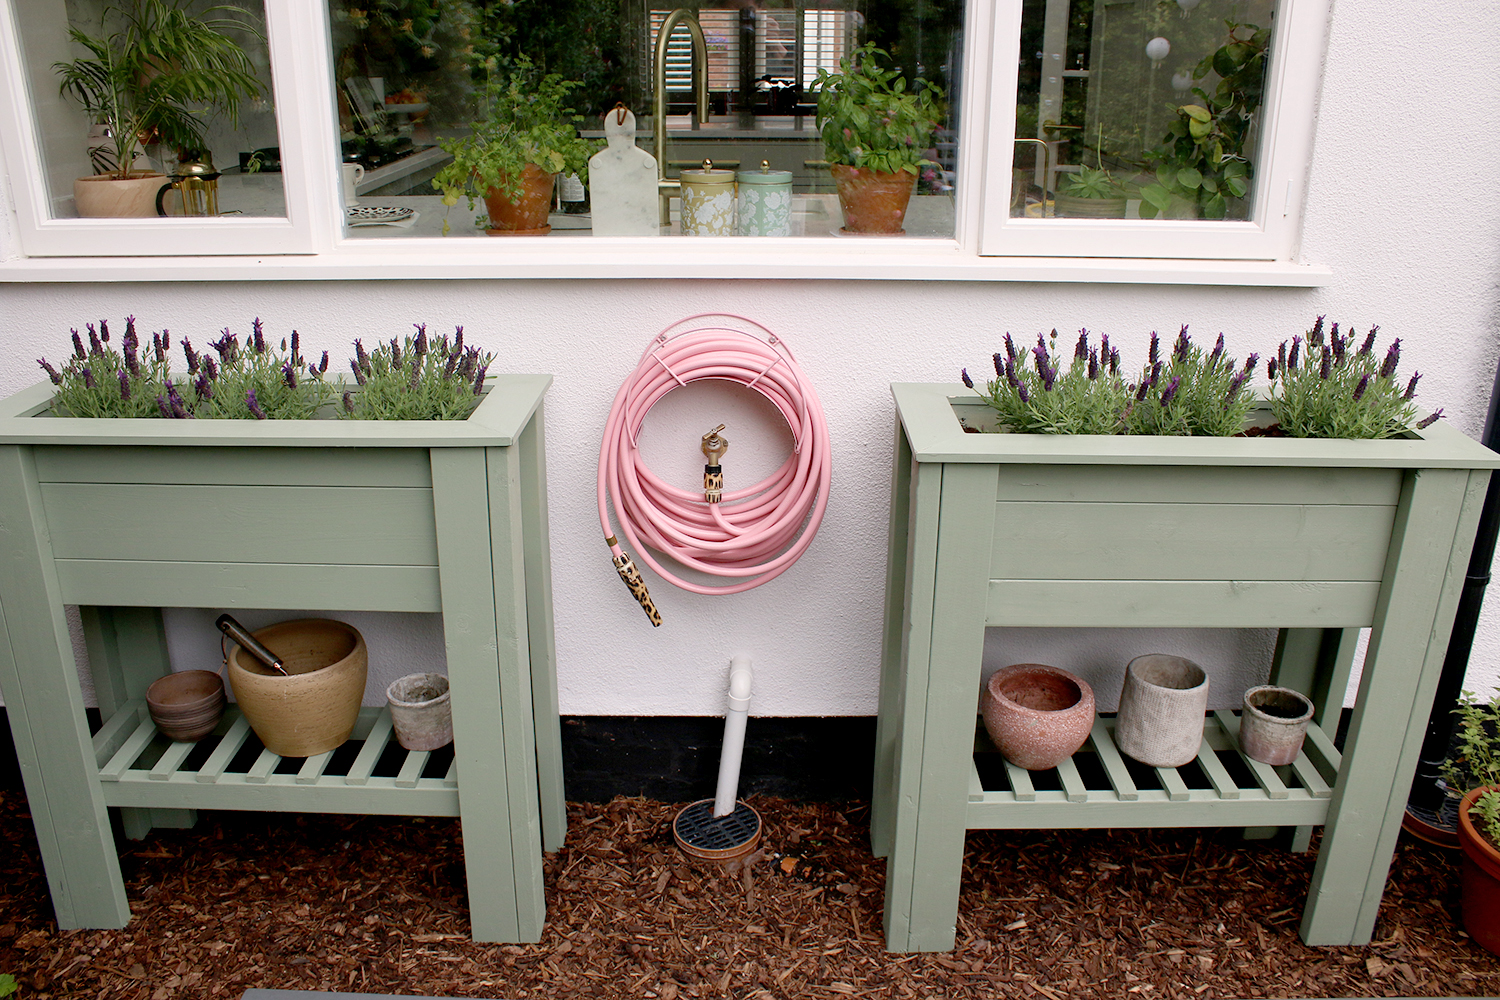
And that’s your planter done! Simply fill it with compost and your plants to finish it all off.
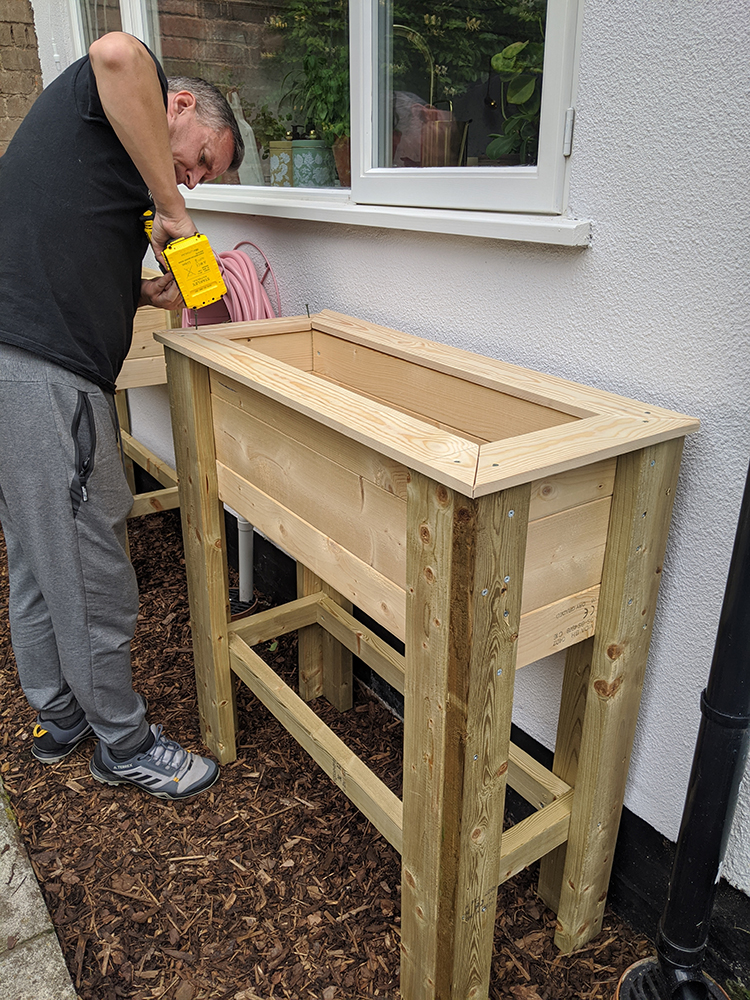
I can honestly say that I’m rather proud of how these came out. It was entirely a team project – whilst I realise Wayne is in most of these pictures and did all the sawing and screwing together which was amazing, it was, in fact, my design and I did all the planning, filling, sanding, lining, painting and planting of these so I’m taking some of the credit for this one! Ha! For a couple of people who are not at all experienced in this kind of woodwork or carpentry, I couldn’t be more pleased – they are exactly what I was hoping for.
I’m going to share the whole back of the house and round up everything that was completed over the last few months to catch you up on all the changes as there have been a few more than just the planters so stay tuned for that. In the meantime, I’d love to know what you think of the planters and if it’s something you might try doing yourself? Have you ever made your own outdoor planter? Let me know in the comments below!


I am absolutely in awe of these! The design is so cool, they look gorgeous and you made them yourselves! Wow wow and wow. Also that hose pipe is amazing. x
Aww thank you Kirstin! I am genuinely surprised how well they came out! xx
Fabulous job, team!
Yay! Thank you Claire! xxx
Yep, amazing job. I’m too lazy to do it myself so I just admire your efforts and the beautiful outcomes!
Hahaha! Thanks Denise, they were actually easier to make than I’d anticipated and I’m so pleased with the outcome ;) xx
Oh wow! They’re stunning! A little more sophisticated than my recent pallet herb garden creation! I love the colour you’ve painted them too! Great job. Kirsty x
Oh I just had a look at your little herb garden Kirsty!! So clever! I am desperate for a cute shed to dress up like yours ;) xxx
What a great solution, and such a professional design & finish! This could work in my front garden where I’d like planting to grow against the street wall, high enough to screen a little, but we have a man-hole cover in the way for normal planting. Thanks for the detailed instructions!! (btw, I can’t believe that hose). Tx
Oh thank you Tahira! Oh yes!! This would be perfect for screening a front garden! Do let me know if you decide to try it xxx (And I know, isn’t it just the cutest hose! lol)
It truly is a team effort as I glimpsed your dog and cat getting involved too. My dog is also always helping with home projects haha.
How lovely does that little corner of your garden look now? The lavender in that pale green planter is perfect. And that hose! I spotted those on Amara too, pink, gold or black!
Hahaha! They were there supervising the entire thing! LOL! Aww thank you, I’m so pleased how much better that little spot looks now especially compared to what we started with ;) The hoses come in all sorts of colours and you can mix and match different styles of the nozzles as well – it’s honestly a dream for any design-lover ;) xxx
Holy Moly! Talk about thorough but so well worth it for the fabulous results!
And the hose! Those are the little (or not so little) things that really make a room or a garden – love it!
XO
Susan
Oh, thank you, Susan! I know, that hose is just the best, isn’t it! Definitely it’s those little details that really make the difference ;) xx
The planters look amazing and really handy too. I have a similar back garden and I could do with some planters like this, thanks for the inspiration and detailed instructions.
Fantastic! Great work, team. Love the color you chose.
wow they look fab! I’ve not been able to find quite the right planters I’d like for my garden so may end up having to make our own – great to see it all step by step! thank you!