So the good news is that the building phase is officially complete! Can I get a ‘hell yeah’?! Of course, this doesn’t mean it’s done done. Oh, not by a long shot – we have so much to get on with ourselves but essentially, all the things we hired contractors to do is pretty much finished and the shell is ready now for us to complete – HURRAH! Of course, I’ll be talking through more of what is going to be happening inside the house but for this post, I wanted to talk about the outside.
The thing is we’ve ended up taking on a project that we’d not really anticipated when we started off this building journey but I need to start off from the beginning to explain.
Ya see, we knew there’d be an impact on the area just outside of the extension. Some large plants, as well as a bay tree, had to be removed in the course of the building work.
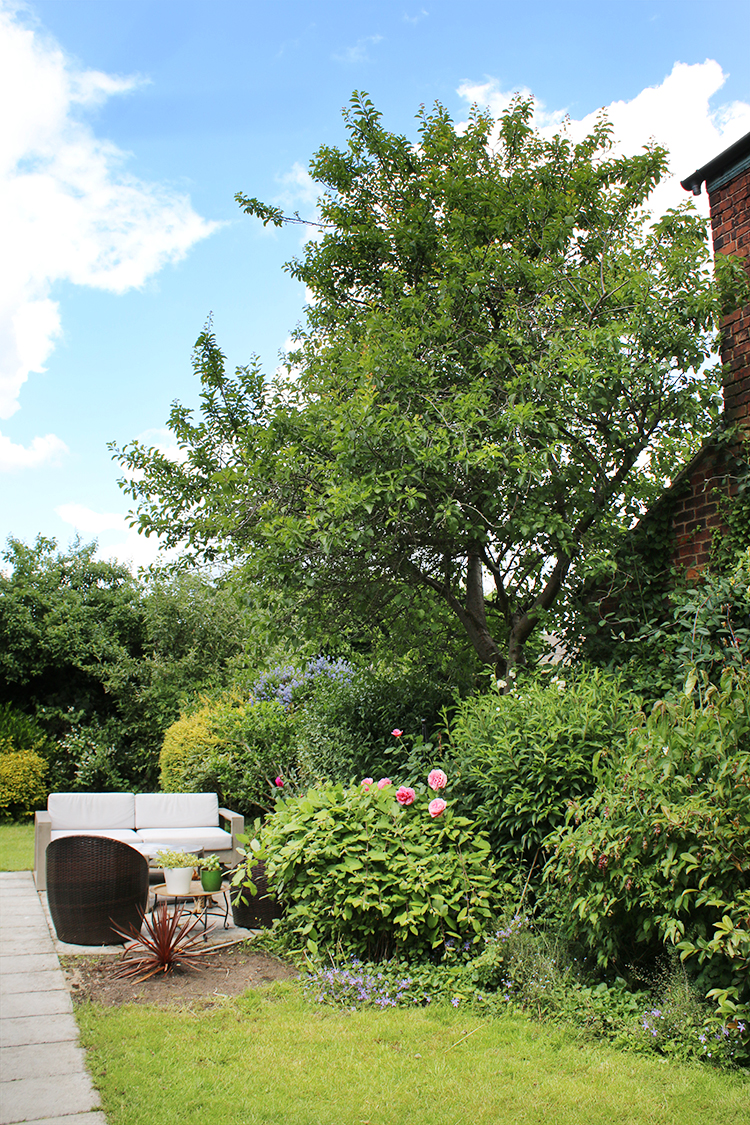
However, our very mature garden probably has no less than around 100 different trees, plants, shrubs and flowers within its fences and so losing a few was sad, yes, but certainly not detrimental to the overall look and feel of our outside space. You can see what it looked like last summer in the picture above and that’s just one corner of the garden!
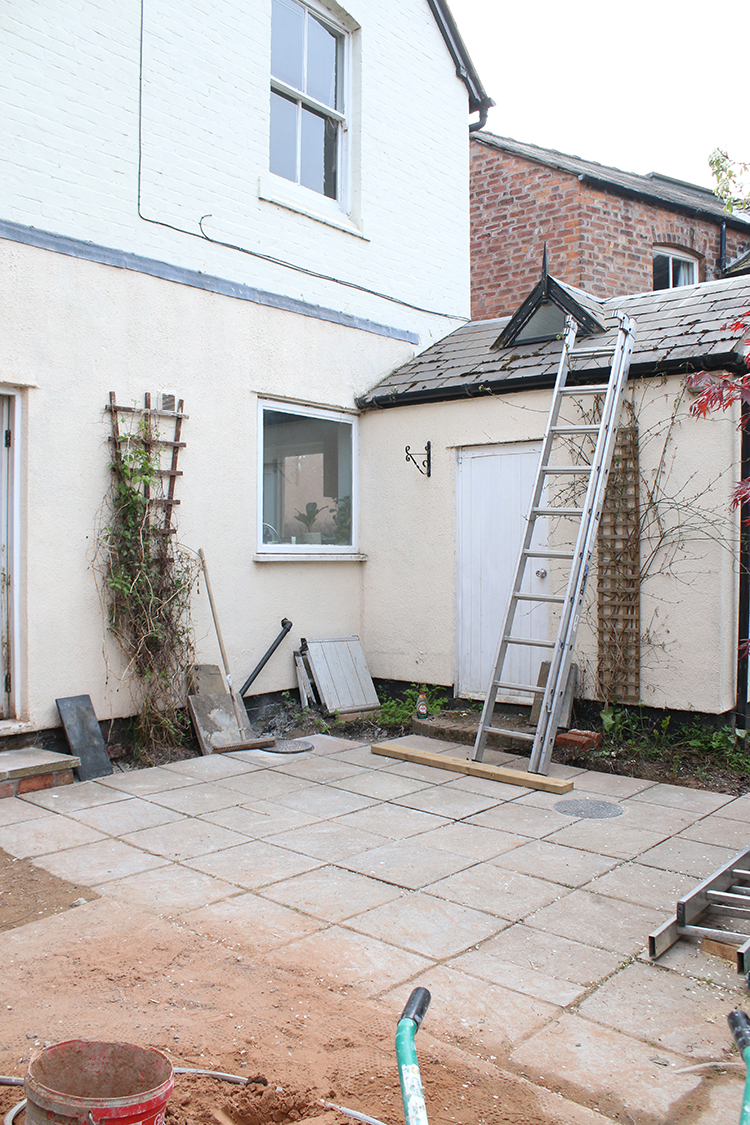
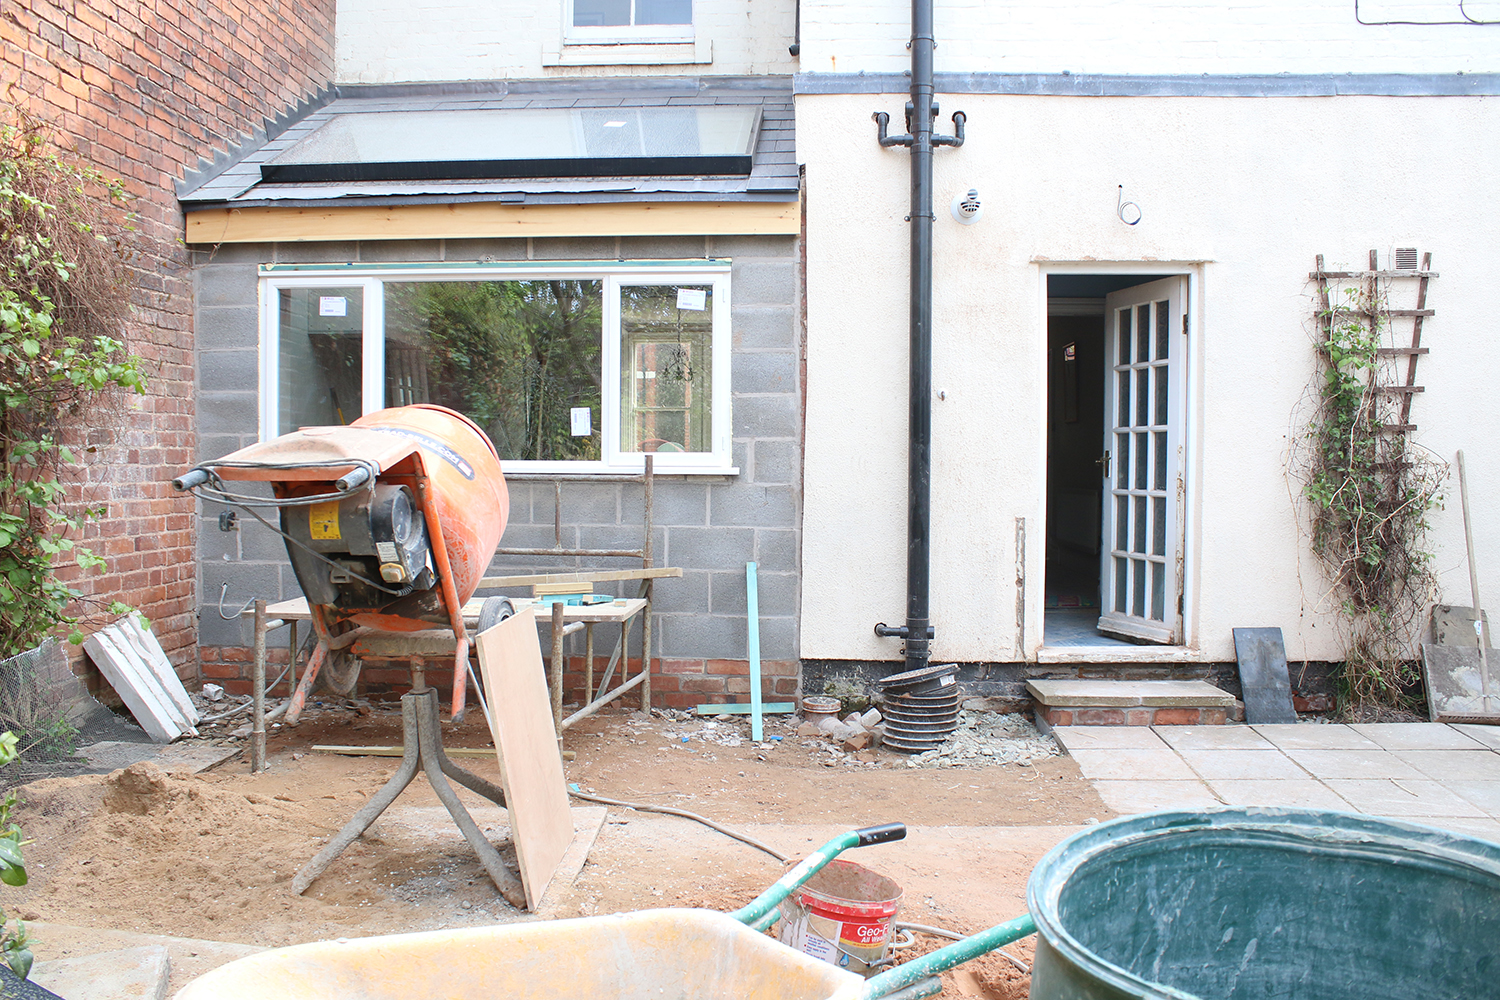
We’d always knew, in fact, that over the next few years, we wanted to extend the small patio area that’s just outside the current kitchen (seen above) across the whole back of the house to where the new kitchen will be located, creating a lovely courtyard effect between the party wall (essentially our neighbour’s outside wall) all the way to what would have been the old outhouse (now just used for storage which you can see above with the ladder leaning against it). We’d planned on ripping out the old paving slabs and tiling across the entirety, creating a really lovely entertaining area just outside the back door.
Now, this courtyard patio was most certainly a future plan. Something we knew we’d eventually do but with other priorities on the inside of the house, that was just going to have to wait until we had both the time and the money to do the project properly. As I said, this wasn’t something we were anticipating doing now.
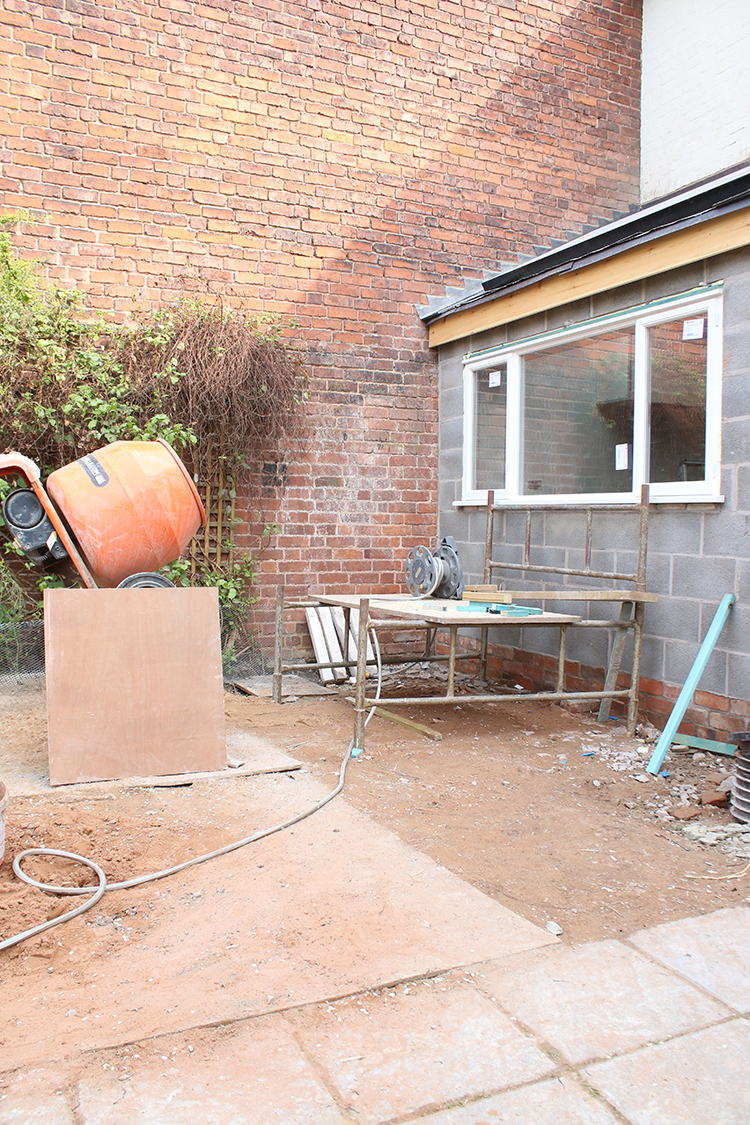
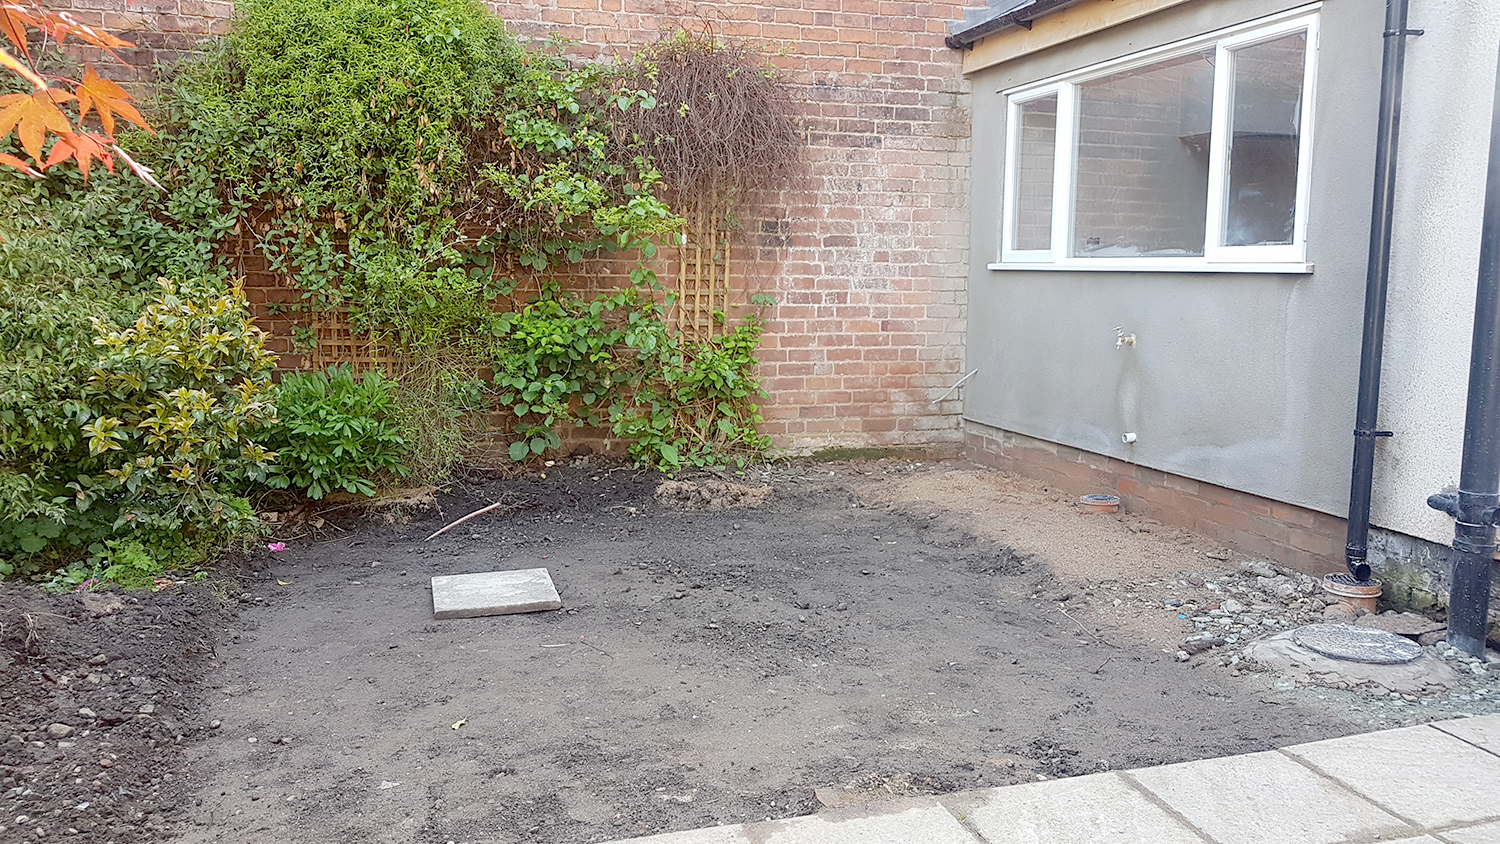
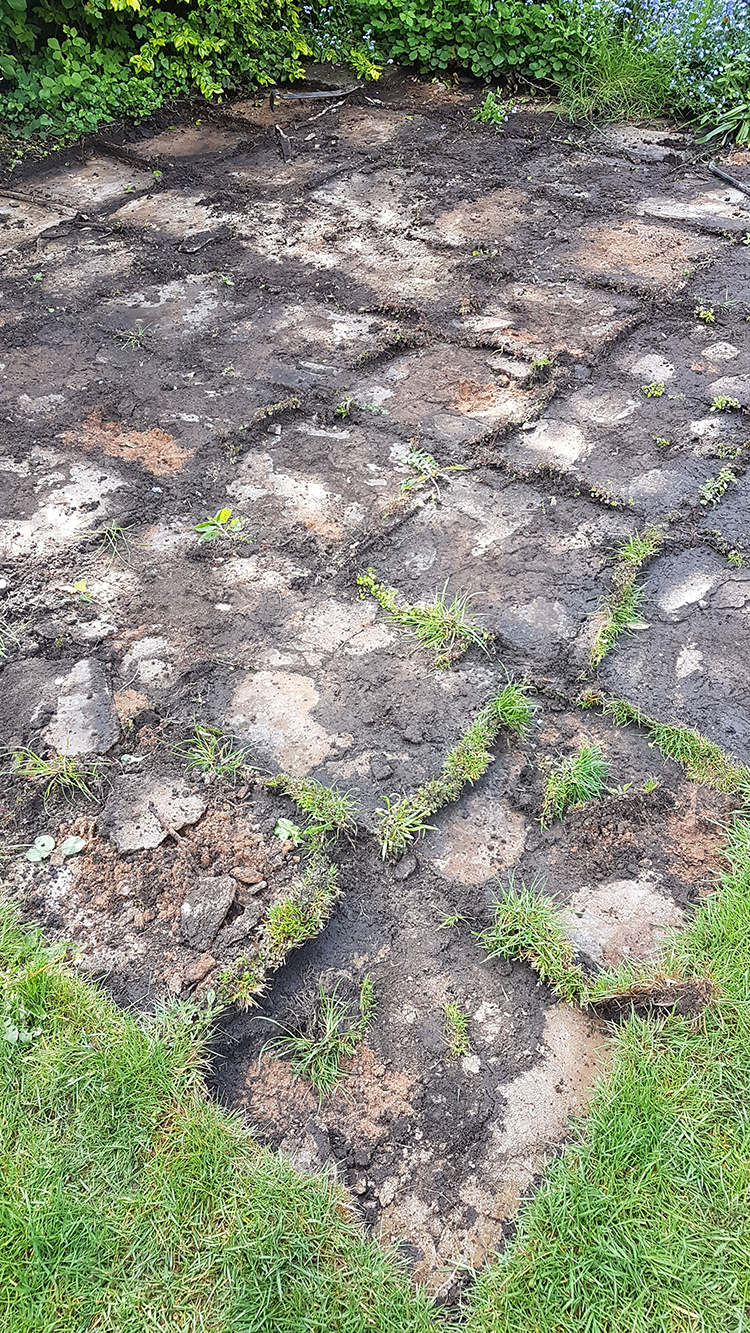
However, once the builders had finally left (actually we realised this before they did), what was left on the other side of the patio was basically a barren wasteland where not even a single strand of grass remained. Removing the top layers of soil, grass and plants in this area had essentially already been done as a result of the building work and now we were left with a big open space which would be right outside the kitchen window. Looking out onto a mud patch wasn’t exactly the vision I’d had for my new kitchen.
And so, we had to come up with a plan of action that first, didn’t take up too much of our time (we have a lot to get on with on the inside before the kitchen is installed) and something that didn’t cost the earth either (pun entirely intended but the truth is, our savings have all but been depleted with every penny going into the building work). It had to be fairly economical and easy to DIY and so a new slightly temporary plan was born.
I say temporary because I’d still love to do the tiling work and we will in time. But for now, our plans are using what we have available to us and cutting costs in other ways.
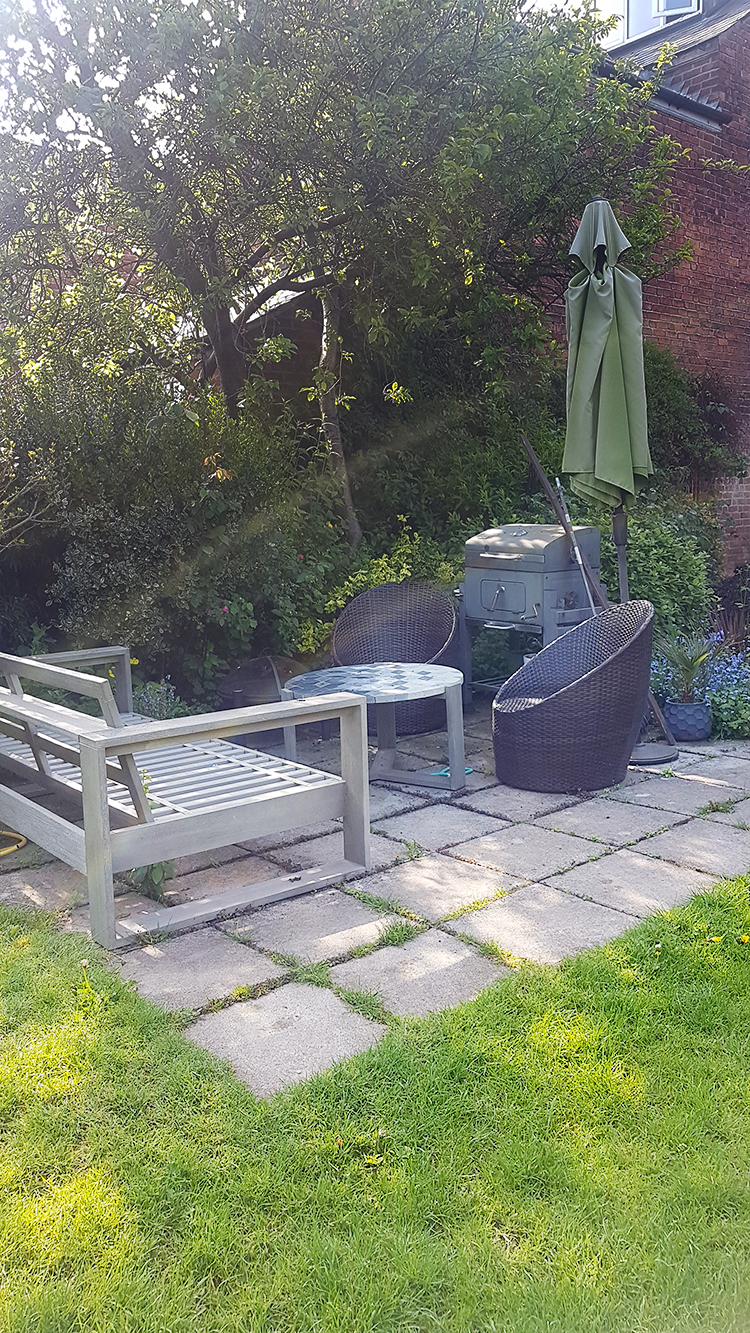
At this moment, there are two seating areas in the garden – the one closest to the house as I’ve been talking about as well as another area of paving slabs around halfway down the garden – looking slightly knackered and worse for wear after the winter season above. This area is a wonderful little suntrap and the surrounding trees mean it’s entirely private too and so it’s something we knew we wanted to keep. The seating area is comprised of the very same paving slabs that are used closest to the house and so we decided that we’d actually have enough slabs to do the entire ‘courtyard’ area if we just lifted and relocated these slabs. So, they aren’t pretty fancy tiles but they’ll do for now as we’re saving a tonne of money.
Of course, once we removed these slabs from this area, we’d then need something to replace the slabs we’d removed so we can keep that seating area where it is. We decided the most economical option was to buy a deck kit with essentially the same footprint as the old patio.
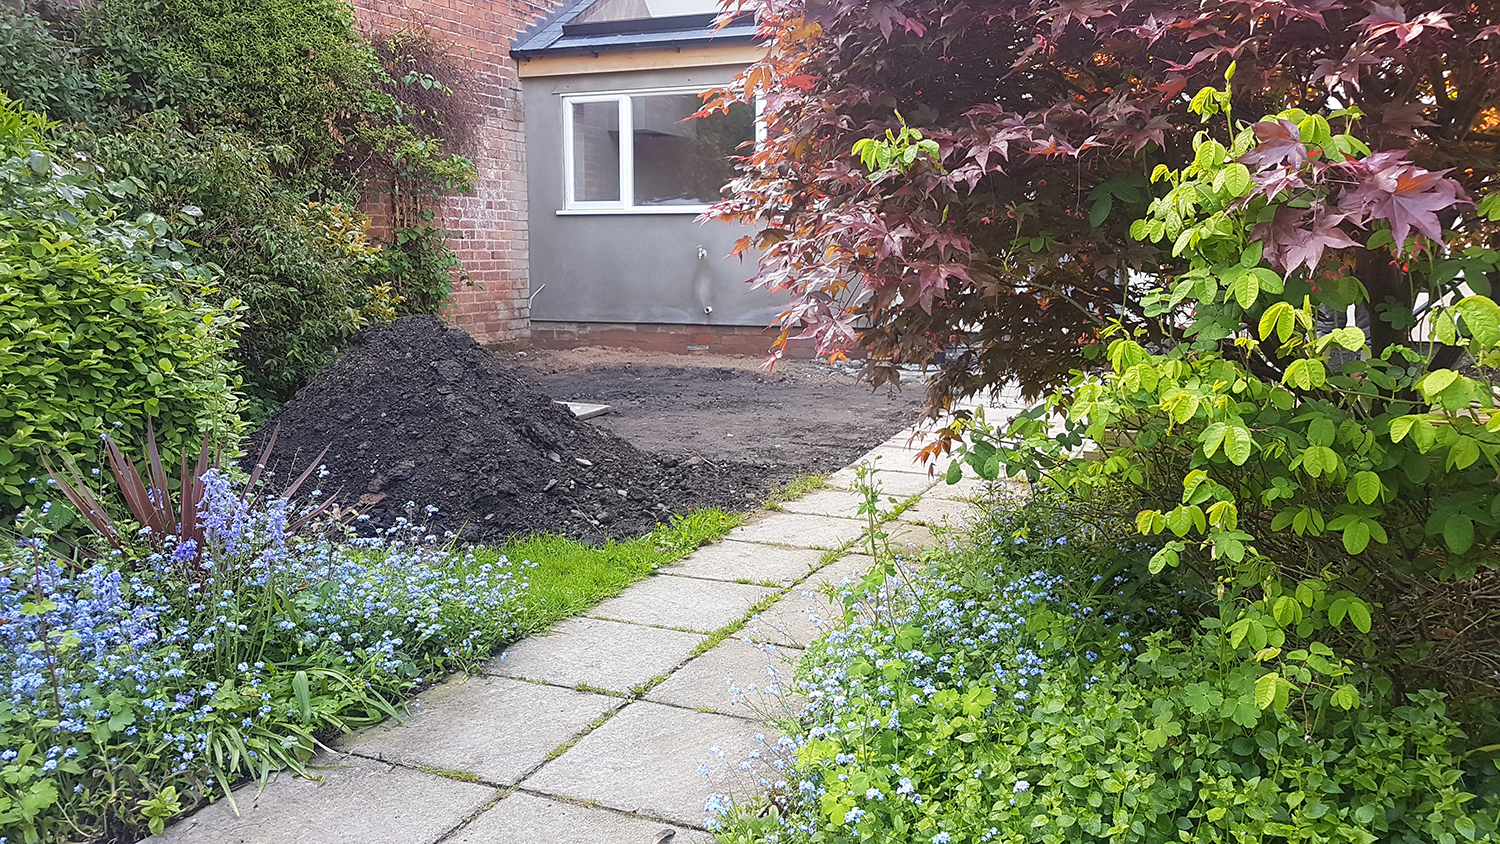
So with these plans in mind, we began work a couple of weekends ago, digging a few inches out where the new/old paving slabs would be laid, creating a huge pile of removed earth in the process which will later be used in some raised planters.
The groundwork completed, we paused while the builders finished everything on the snag list and awaited deliveries of what we needed to complete the job.
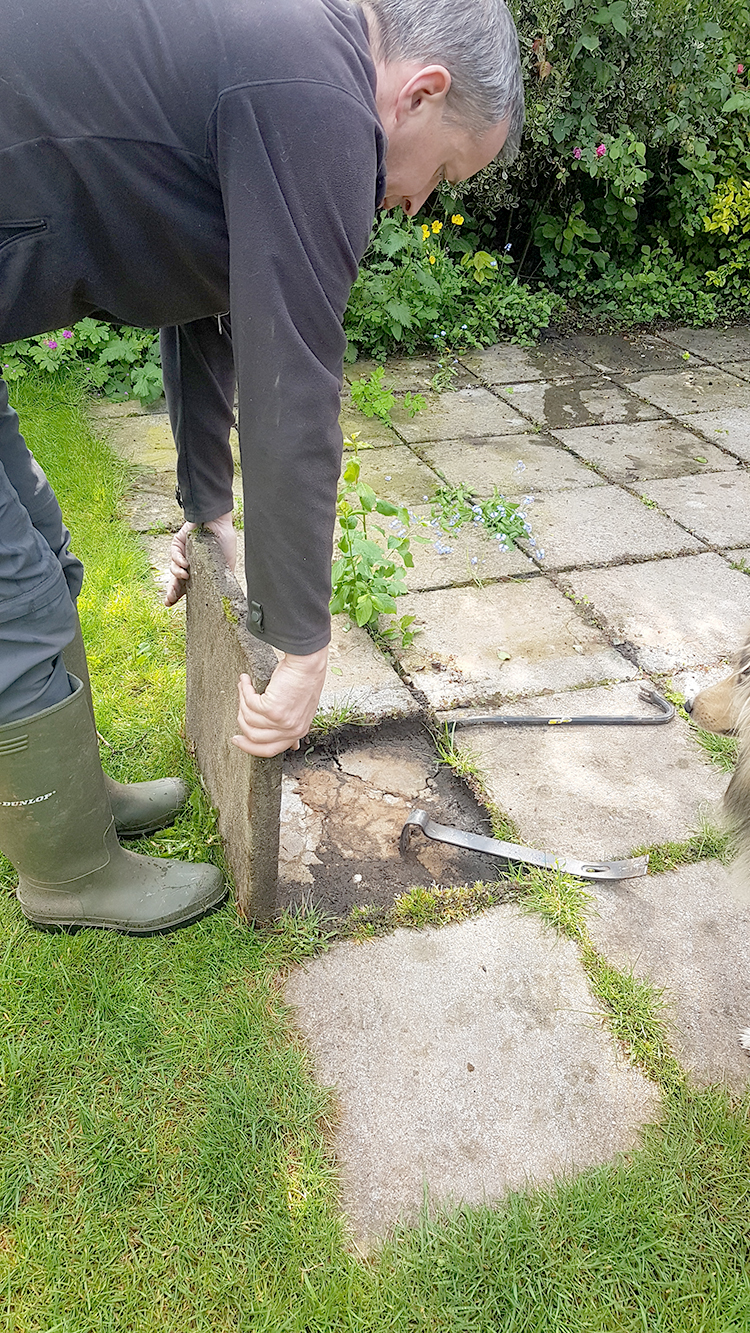
On Saturday morning, we began work, lifting and removing each of the slabs (all 58 of them – it was very tiring work!) from the patio that sits in the middle of the garden.
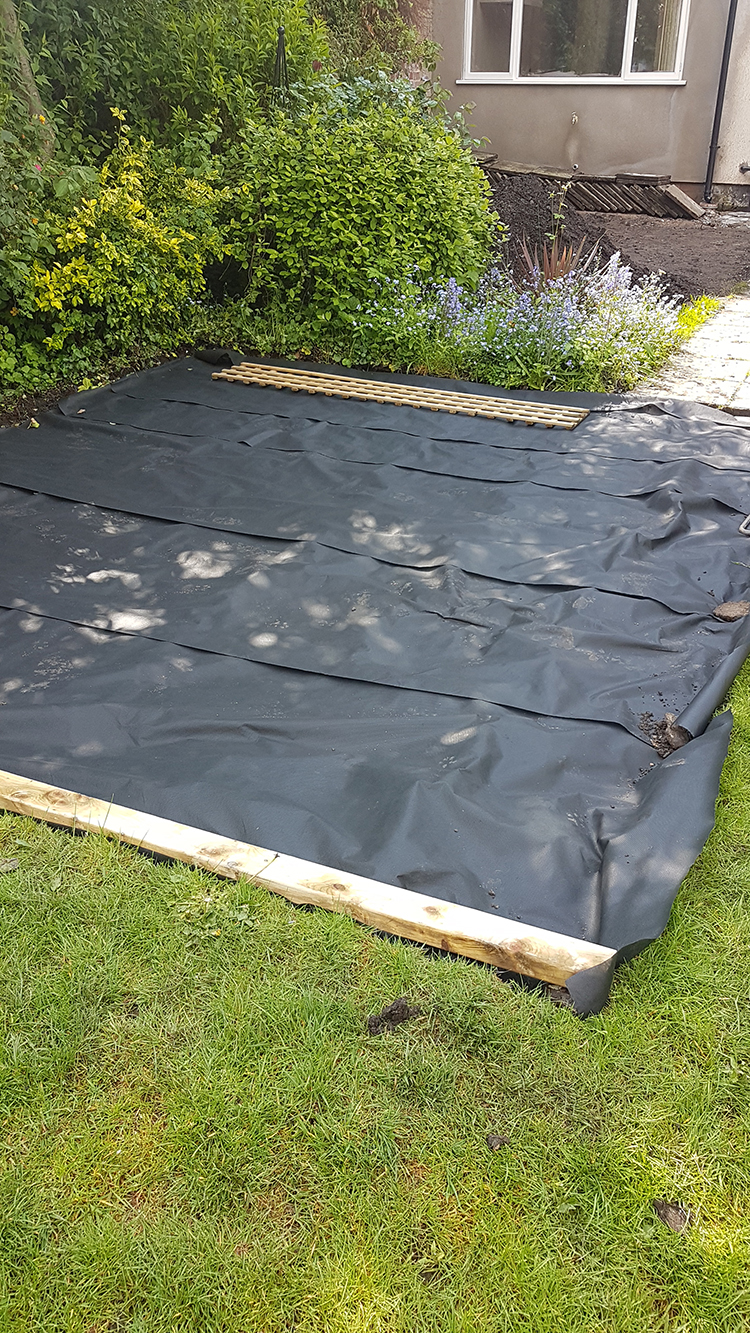
Once this was done, we covered the area with a weed protector and slightly adapted the frame of new deck to fit the exact footprint left behind by the original patio.
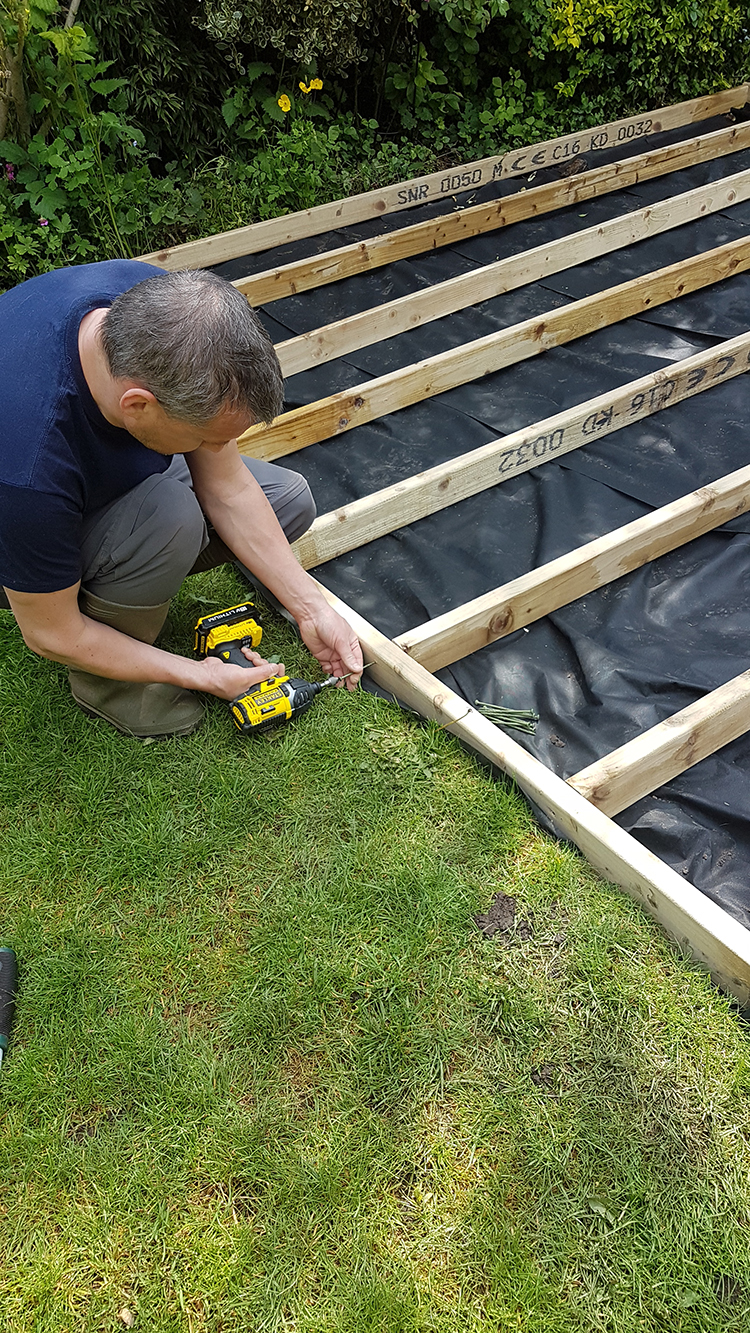
We got the deck kit from Edecks who have a whole section on their site of what they call ‘rejects’ – essentially these are decking materials that aren’t quite as high quality as their normal range and so are cheaper in price. Figuring we’ll save around £200 on the price of a similar kit from their normal range, we took the plunge on a 3.6M x 3.6M kit. (And nope, this isn’t sponsored, we paid for these ourselves just in case you were wondering).
Having built decks in the past, there is a slight difference in quality but overall, once the deck was built, it was difficult to tell the difference. The kit came with everything we needed to create a frame and attach the decking boards to it.
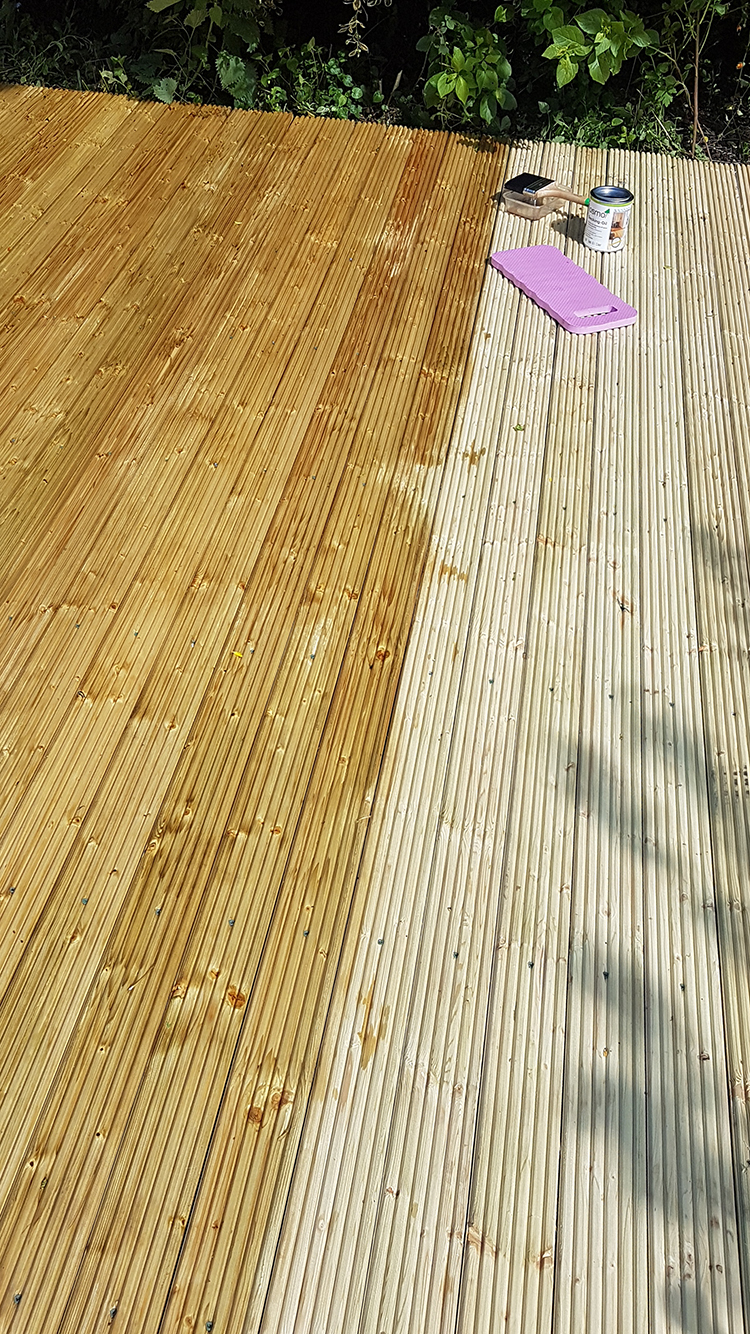
Once the deck was built (it took us a couple of hours to build), I put a coat of oil on it to protect it but I didn’t buy enough to do a second coat (the wood just sucked it right up!) so I’ll need to do a second coat once I get more oil.
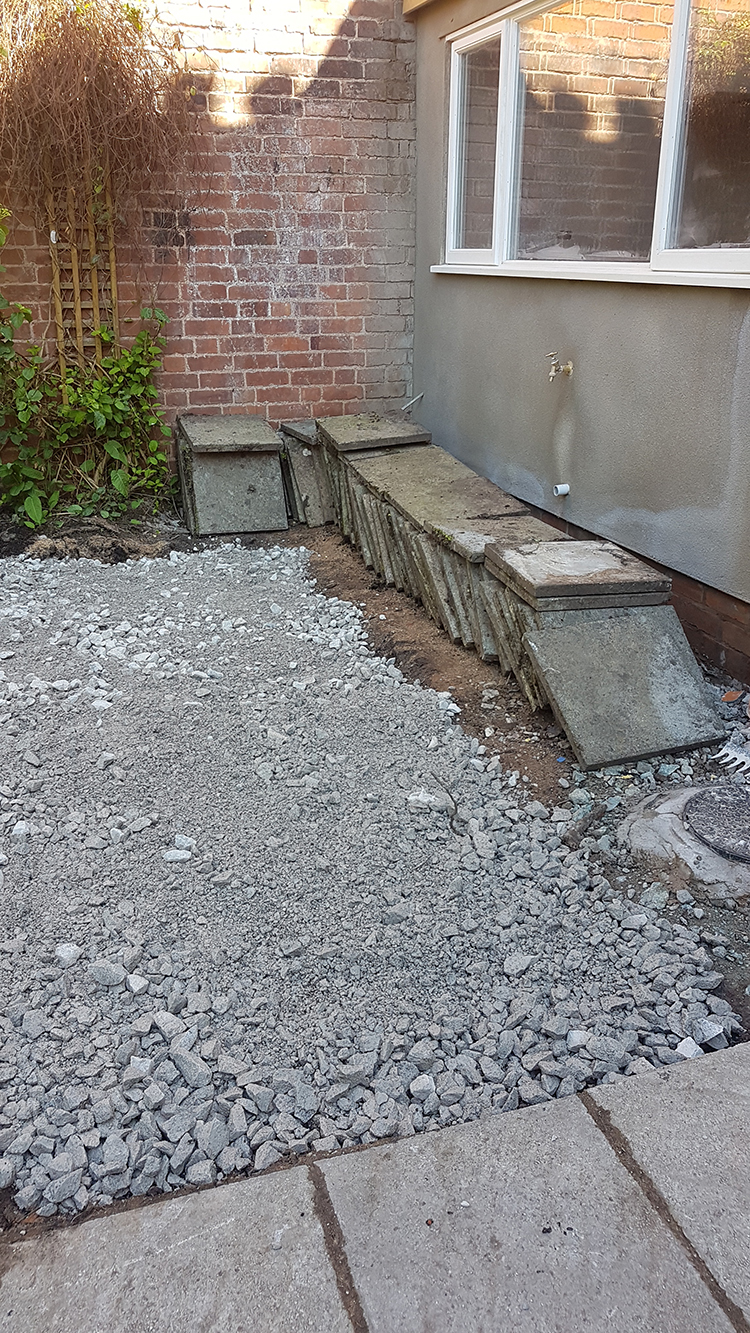
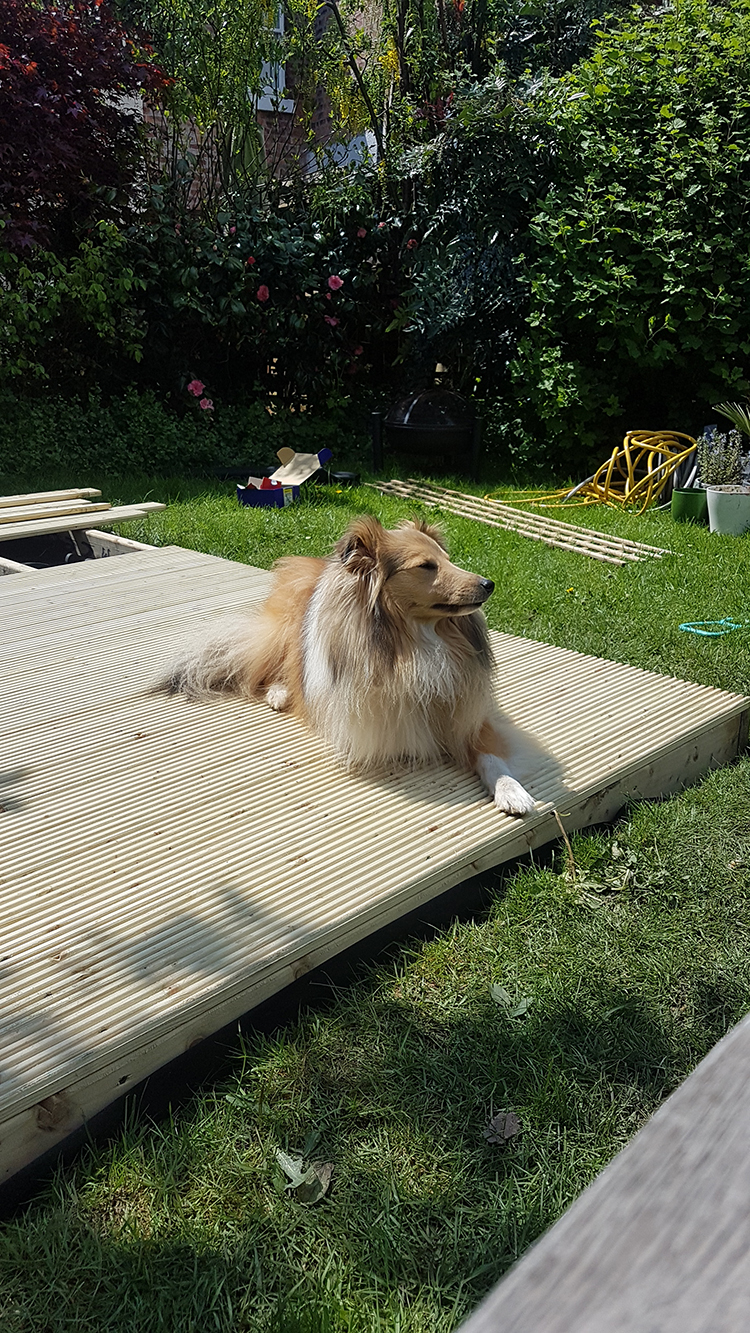
While I was oiling the deck, Wayne was busy with the courtyard area, moving nearly a tonne of aggregate and spreading it across the area where the slabs will be laid. We still need to compact the aggregate to create a solid base for the slabs but by then, it was 4pm and we’d been working flat out for 7 hours so we figured we’d call it a day! Plus, we had a new deck to enjoy.
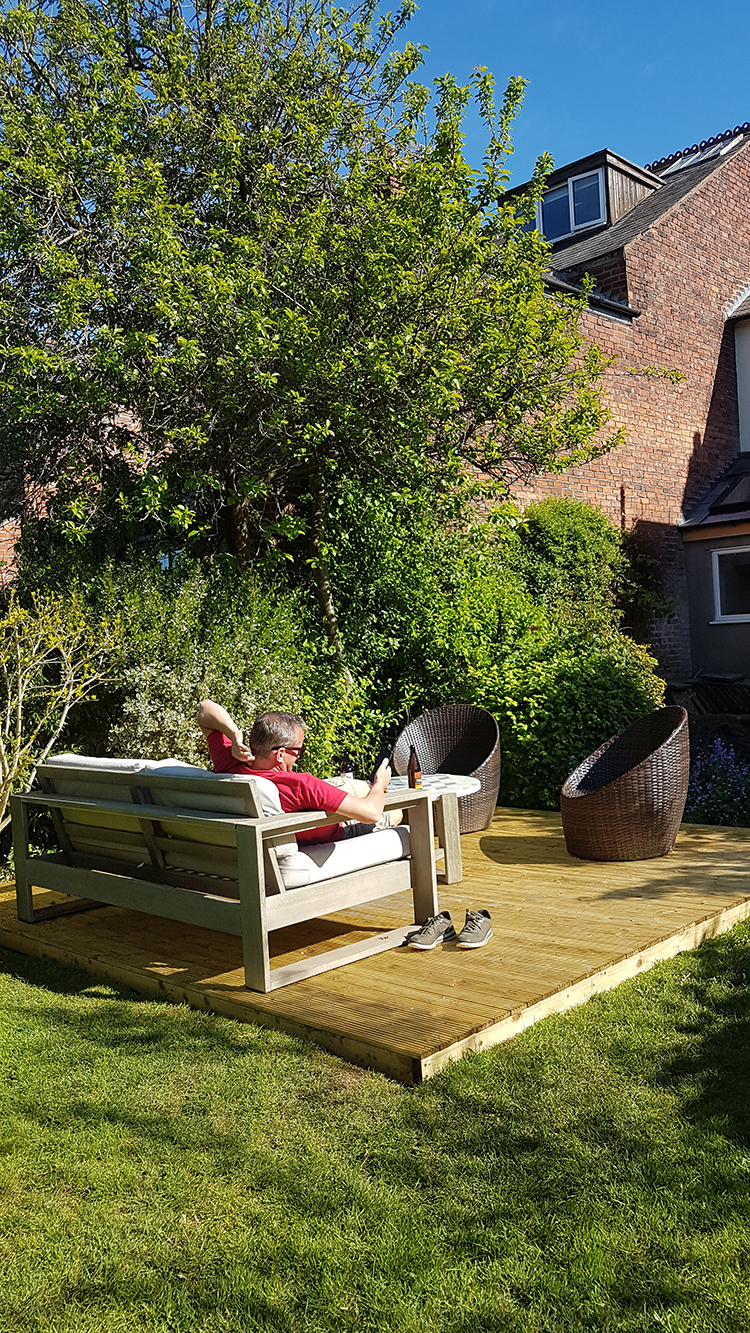
So this is really just a progress report – the deck still needs a second coat of oil and of course, I’m looking forward to properly styling it as we just put our existing furniture back in this spot! We also need to complete the courtyard patio as well as painting the entire lower back of the house – not a small job by any means but we need to blend the extension with the rest of the property! So, there’s plenty more to come out here! Have you been doing any gardening work this summer? Let me know in the comments!


It’s looking great! You really need something to look out on, even if it’s temporary what with Summer on our doorstep. Its a lovely garden already.
We haven’t had to do much so far to ours. I bought annuals last year for a lot of the tubs so it’s been much more cost effective. I’ll buy a few more this year because it’s been lovely watching things just popping up.
Your extension is looking fab by the way. That skylight will make it lovely and light. Can’t wait to see your finishing touches.
Amazing – -the power of your posts. Decking bought — delivery in 2 days :)
I really like your articles about renovation. It is great to see the progress.
No gardening for us in Slovenia yet. It is too cold, we are waiting for the sun. Please, send us some. :)
Great work! I like the deck idea and no doubt with sunny days coming our way (let’s hope) you will be enjoying it soon enough.
I’ve been gardening for the past 2 weeks and know how hard work it is. It’s worth in the end though. Thanks for your lovely posts.
We’ve been gardening for the past few months with help from family. We’re trying to tame a garden that had been let go, including all the trees, for we think about 10 years. We are slowly getting there! It’s hard work, but worth it.
Very envious of the new deck. It looks really good. I would like one but husband has yet to be convinced……..
I’m really enjoying watching the renovation, it’s looking so good and the decking seemed much easier then I had imagined!
Your renovation is looking great so far! Best of luck with your garden plans.
What a cute post! It’s like one day in the life of Quito. Such a good-spirited dog. I’d definitely pet. 12/10.