If you have a Victorian home and you’re lucky enough to still have original tiles, you might be wondering how to restore and clean the tiles so they look good again. I wanted to share how I tackled a small Victorian tiled hearth and got the old grimy tiles looking like new with only a minimal amount of elbow grease!
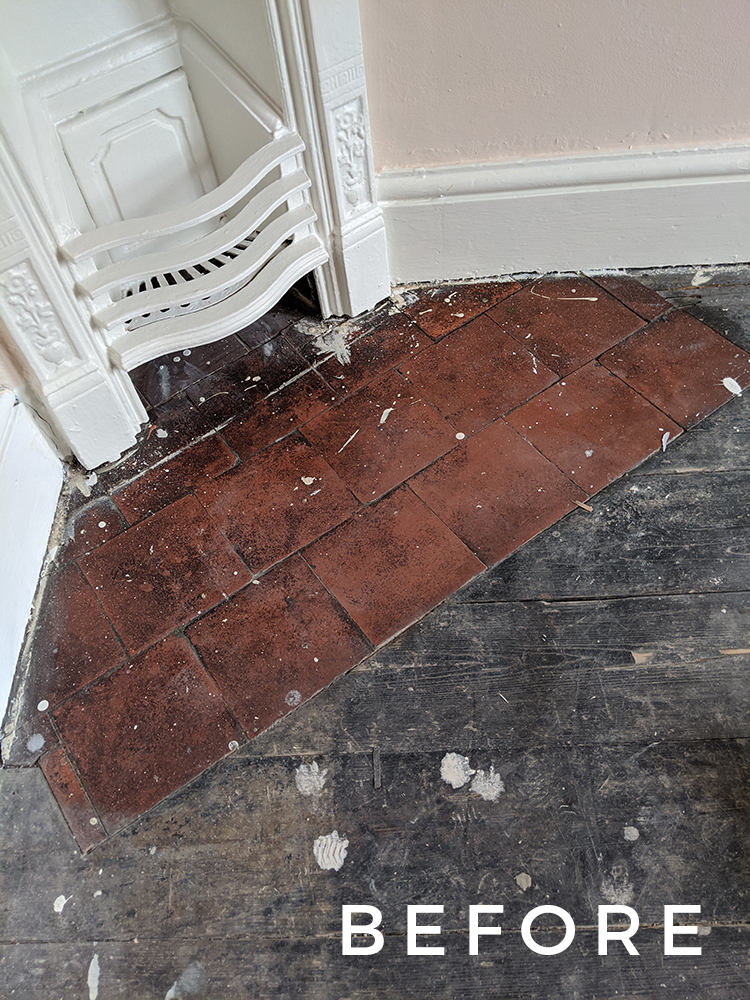
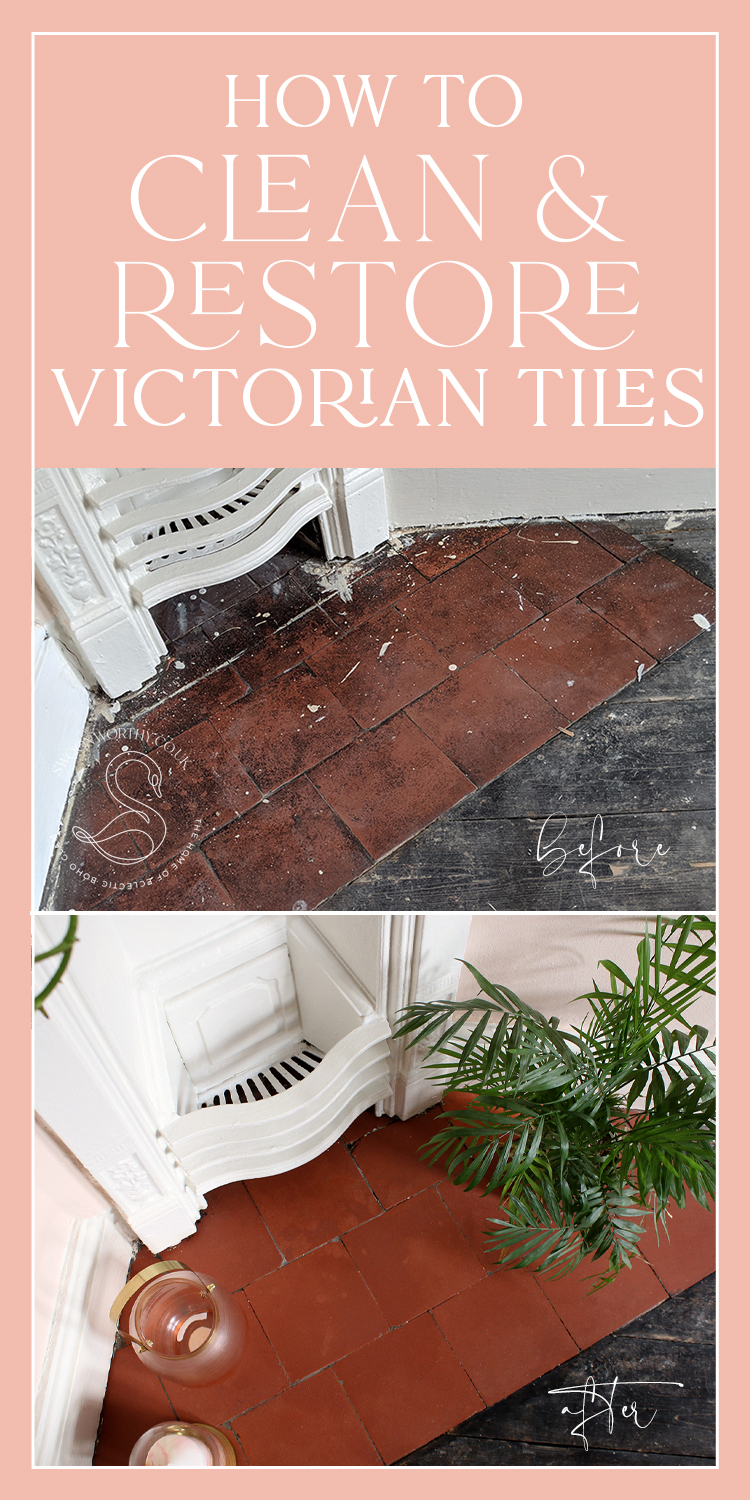
So they started off looking like this…
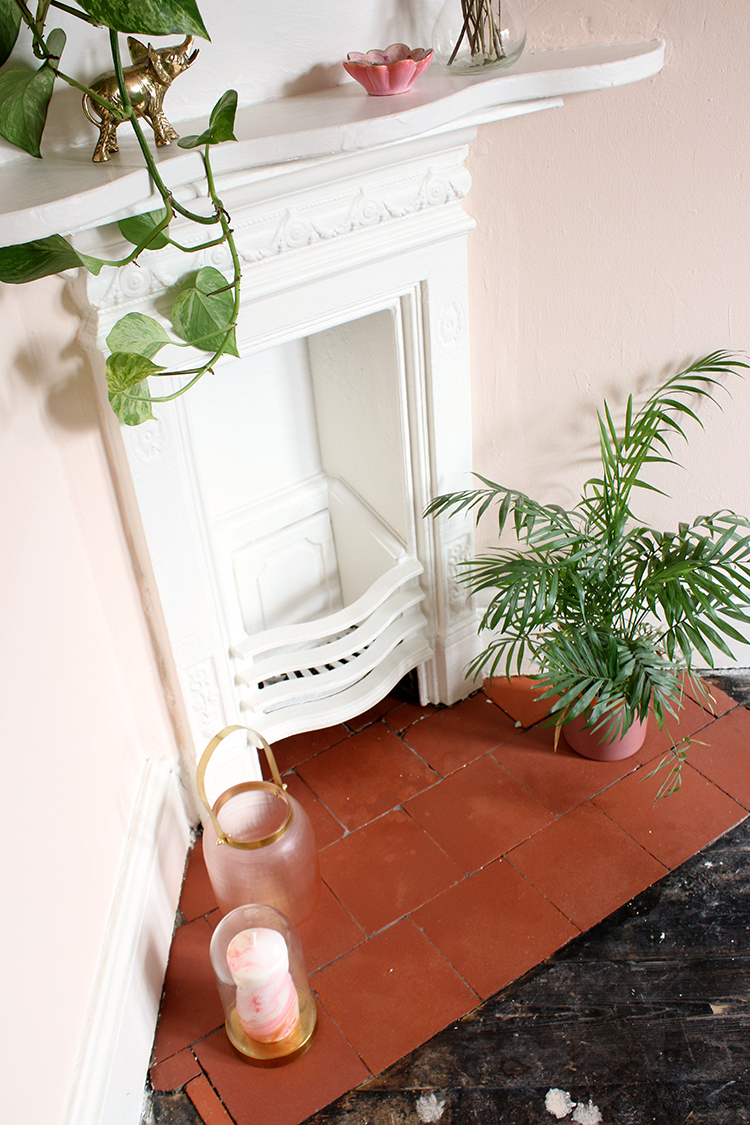
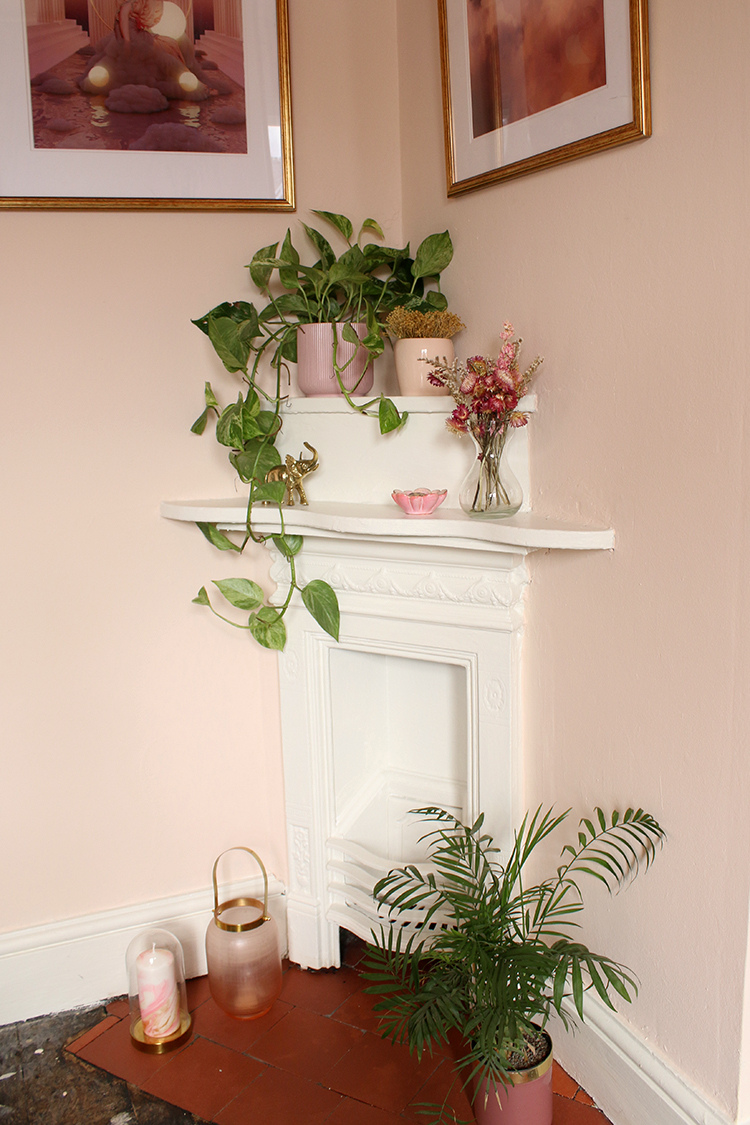
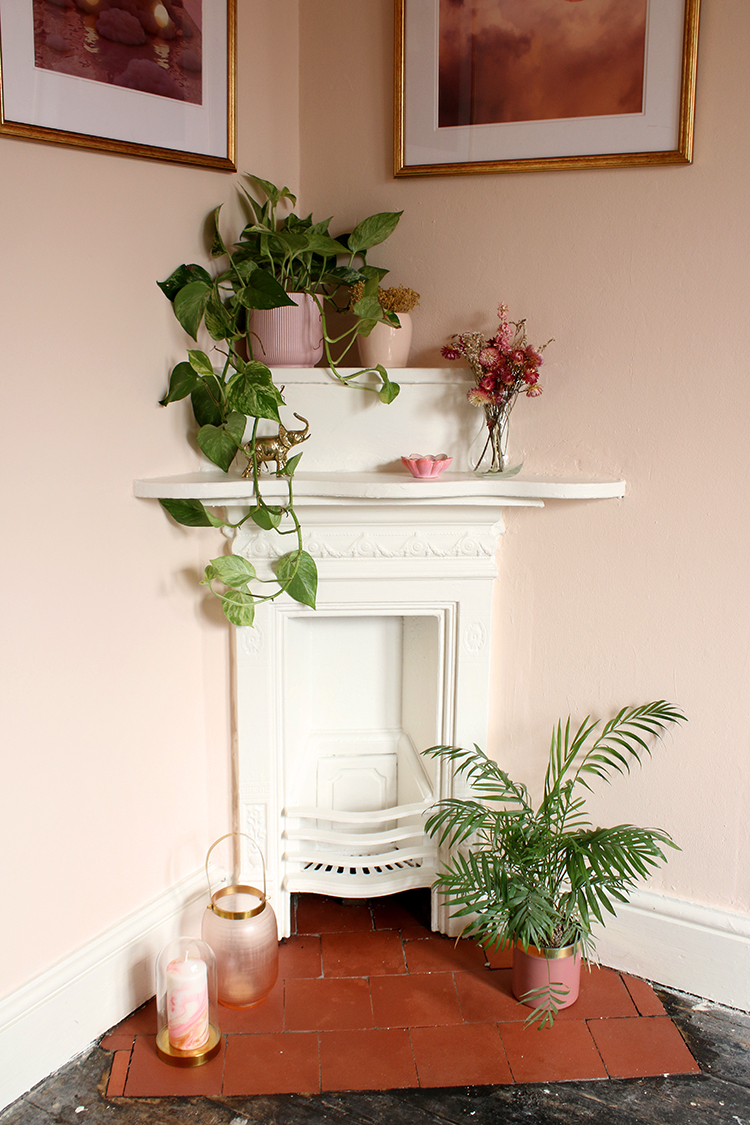
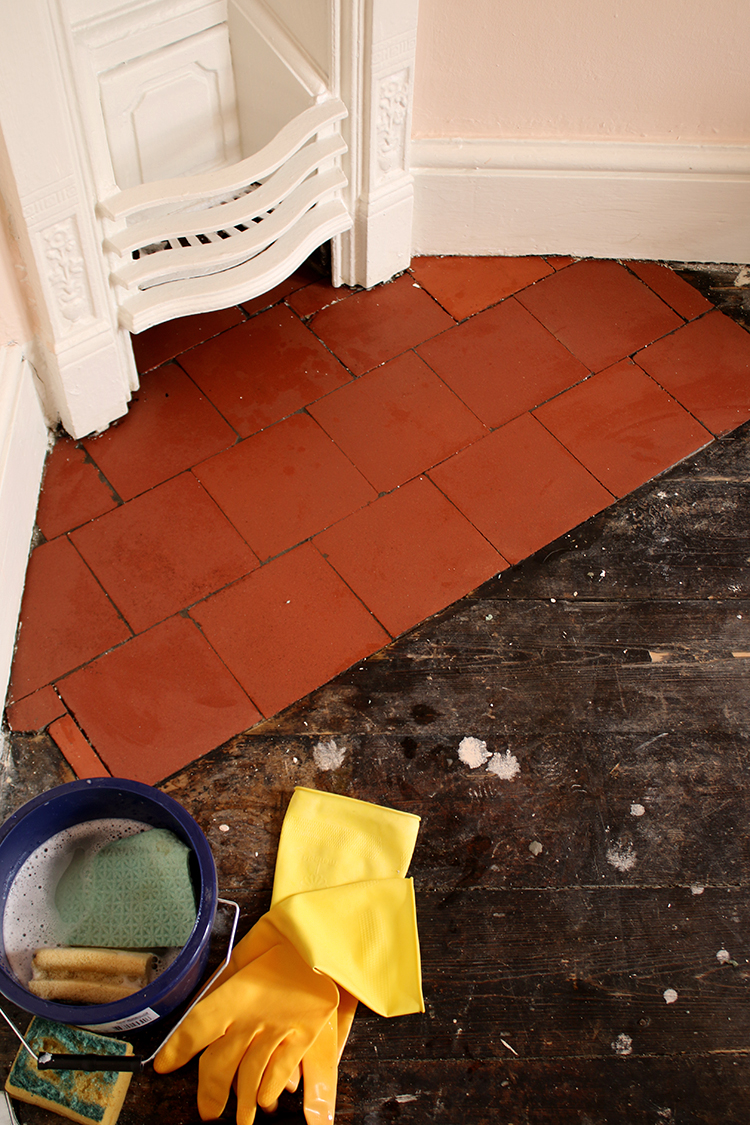
And now they look like this…
But before I told you how I did it, I want tell you first how this all came about! (If you want to skip the story, the directions are below or pin this for later!)
As you may be aware, I’m still beavering away on renovating my combination office/dressing room but I just had to share this little DIY update with you because I couldn’t believe just how easy it was. In the room, I have this tiny corner Victorian fireplace – it isn’t a working fireplace but it’s just so sweet and special that I knew I wanted it to make the best of this original feature in our old house.
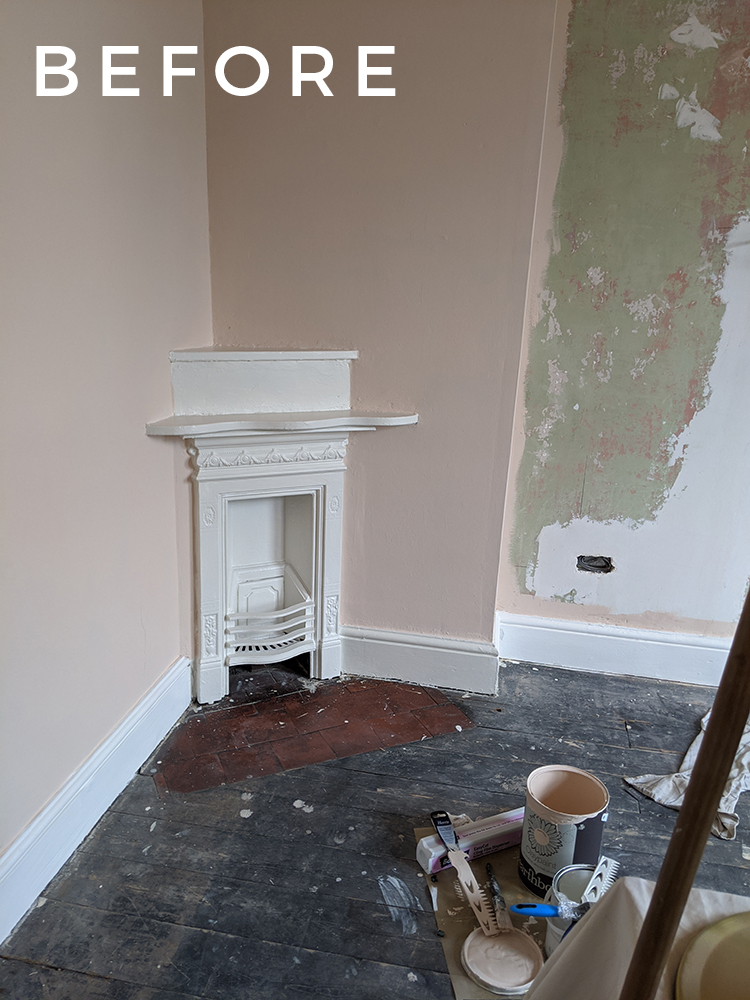
When the old vinyl flooring was ripped up, I was overjoyed to see there was actually a tiled hearth hiding beneath. I was delighted because I knew these would have been the original tiles that were laid 130 years ago when the house was built. I’ve seen these particular tiles in my home in a few different locations – they are the same tiles we have on the steps outside the front door and they were also used in the hearth in our living room.
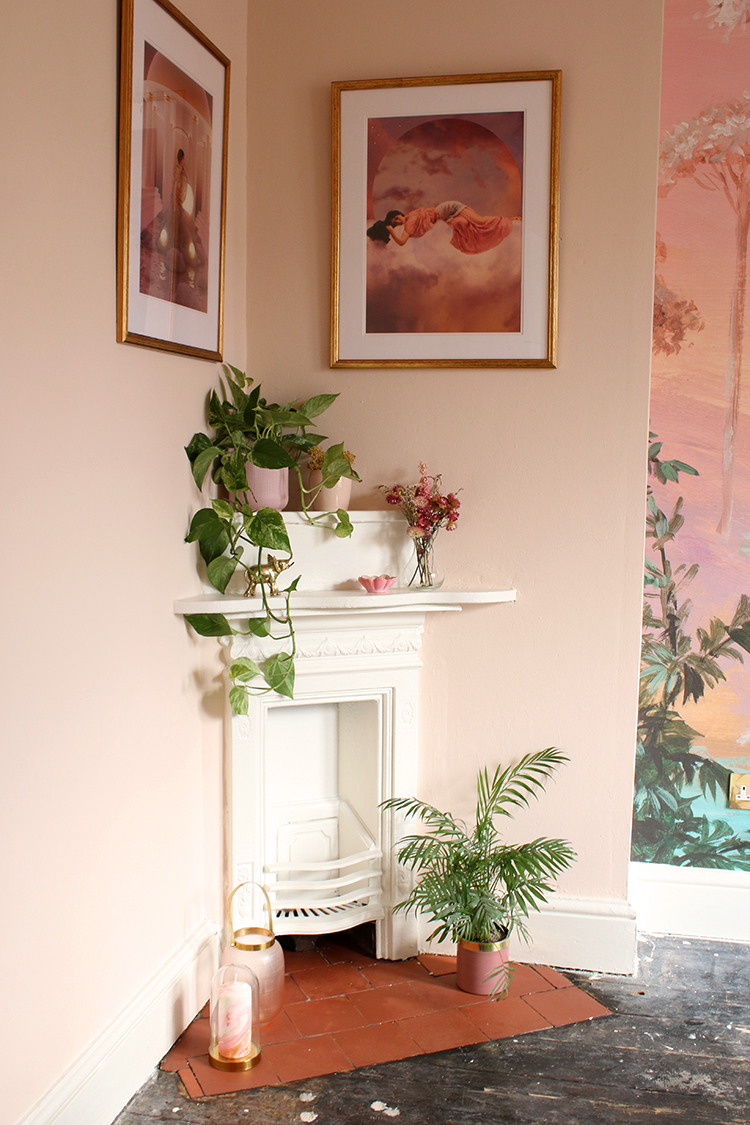
After debating what to do with them, I realised that I didn’t want to cover the tiles again when we come to carpeting this room. I love that they are a little piece of history in the house and I feel like if you’re going to have a fireplace, it should have a hearth whether it’s useable or not. (I also can’t help but think of the styling opportunities! Ha!). Now I have talked about enough Victorian fireplaces over the years (here, here and here) to understand that sometimes, restoration is best, sometimes renovation is better and a lot of times there is just no specific right answer.
For instance, in our living room downstairs, I took the decision to paint over the tiled hearth (which were exactly the same tiles you see above) as they just didn’t work with the colours we had in the living room and as I was already re-painting the fireplace tiles, I figured I’d do those at the same time.
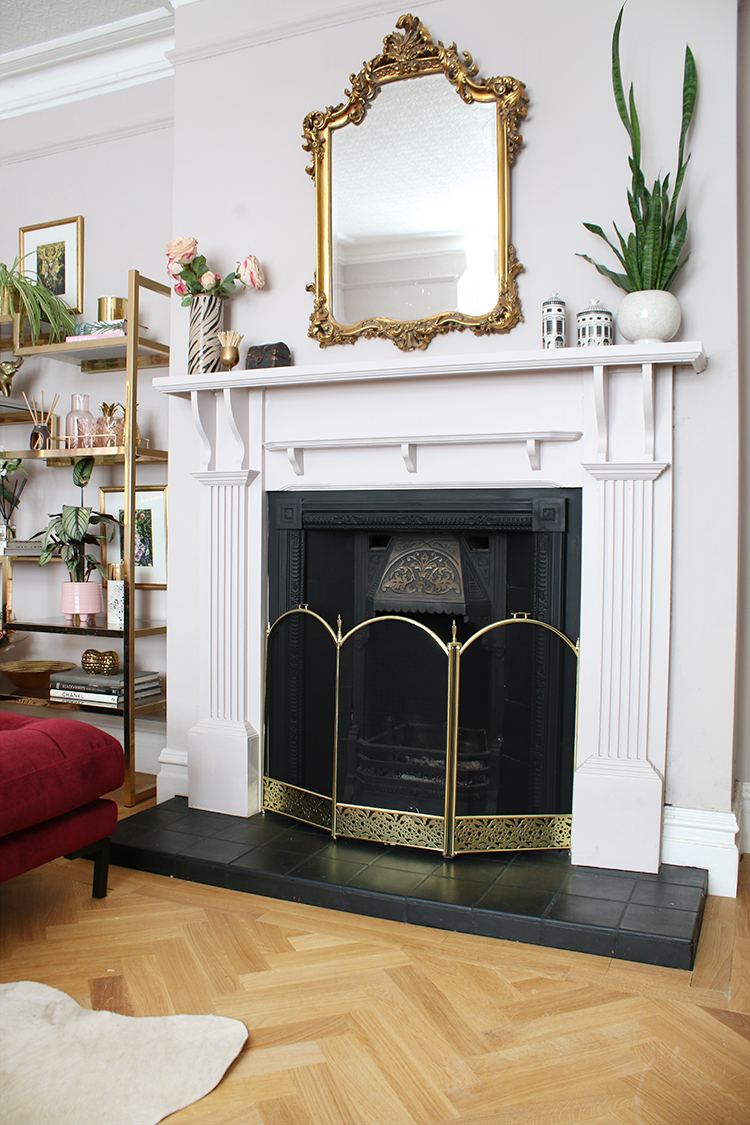
I don’t regret that decision and I feel the fireplace benefited from that update. You can see the full update and my tips for renovating an old Victorian fireplace here if you want to see how I did that and what products I used.
However, when it came to deciding what to do with these old tiles, I was a little less sure. I knew I would be using a lot of warm shades in this room including the peach on the walls and the different warm rust and pink shades that are present in the mural. So the colour was less of an issue here. Of course, not everyone agreed with me – in fact, Wayne told me to just cover over them with a different tile (indeed I had a lot of people on my Instagram DMs suggest the same when I was questioning it) but for some reason, I thought perhaps I can make them work.
Thankfully one of my lovely followers messaged me and told me about a product that she’d used herself to restore and clean up old Victorian tiles in her own home. I figured I’d give it a try knowing that if I couldn’t clean these up and they didn’t look good afterwards, I still had the option of covering them with a different tile. Basically I had nothing to lose trying to restore them to their former glory.
Well, as you can probably tell from the title of this post, the product worked an absolute treat in cleaning up the decades and decades of dirt and grime and paint splatters that were ground into them so I figured I’d share with you exactly the method I used to clean and restore my Victorian tiles.
This post may contain some affiliate links which means if you click on a link and make a purchase, I may earn a small commission from the brand for the referral. I am not paid or asked to use these links. You’ll never pay more for clicking on these links.
What You’ll Need to Restore Victorian Tiles
Here’s what I used to clean these up…
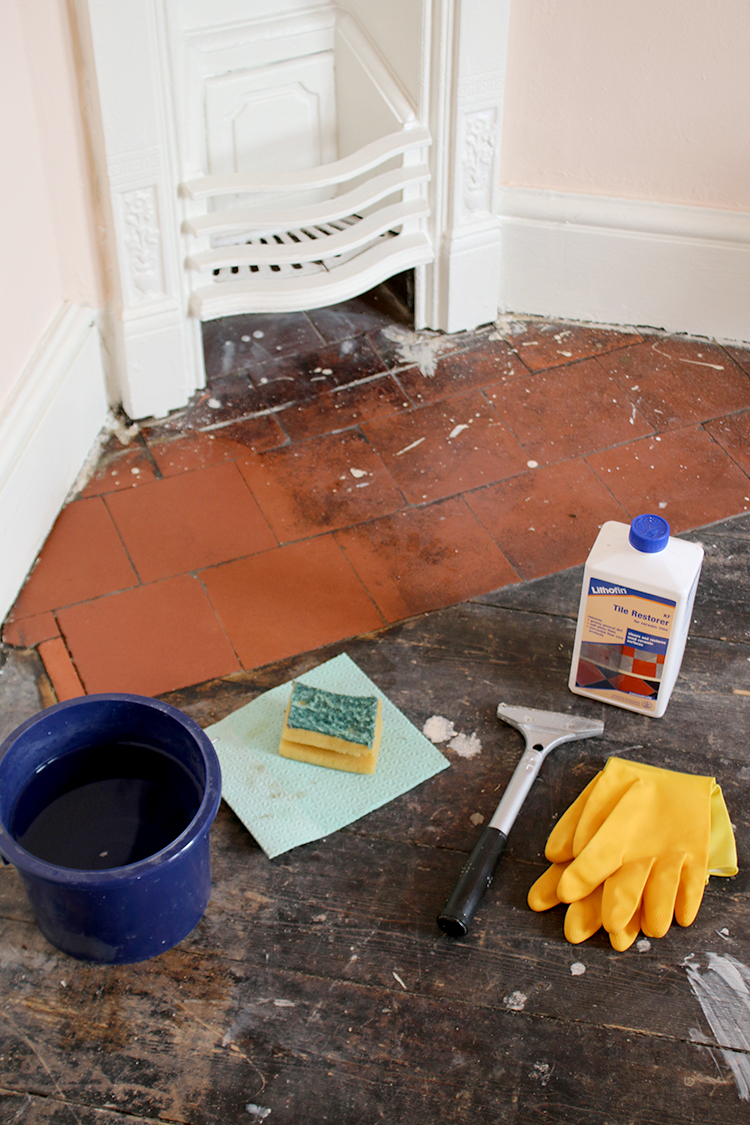
- Lithofin Tile Restorer
- A bucket of clean water
- A metal scraper with integrated razor (similar)
- One or more scrubbing sponges (these were fine for a small job but if you’ve got a larger area to cover, I’d recommend heavy-duty scrubbing brushes instead)
- A sponge cloth
- A pair of gloves to protect your hands
How to Clean and Restore Victorian Tiles
Now I’ll just start by saying while the product works really well, it does entail a little bit of elbow grease. For this small area, I would say it probably took me around 30-40 minutes which is fine when you’re dealing with only a small group of tiles in a hearth but you will probably need to set aside a lot more time for this if, for instance, you are dealing with a hallway or large room of original Victorian tiles.
The hero of this restoration is the Lithofin Tile Restorer because it does exactly what it says on the tin. A lot of the surface grime will come up immediately with this but I did find that the more stubborn areas of ground-in dirt and paint took a little longer. So this is how I did it.
It doesn’t give off really strong fumes but as I was working with chemicals, I did open the windows in the room to ensure there was plenty of ventilation in the room as I worked and of course, I wore gloves.
Step 1
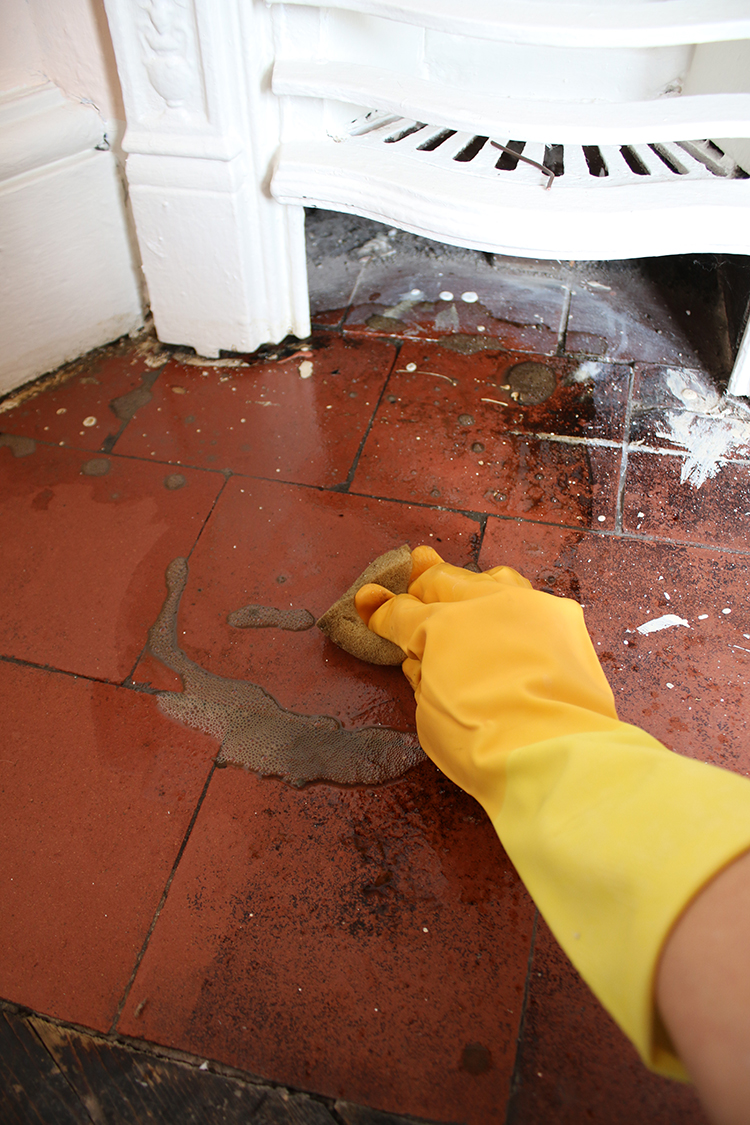
Tip the bottle directly onto your scrubbing sponge (or a small amount on the tiles if you are using the scrubbing brushes) and start working the liquid into a small patch of tiles at a time. I found it was best to concentrate on only two or three tiles at a time and work my way around.
Step 2
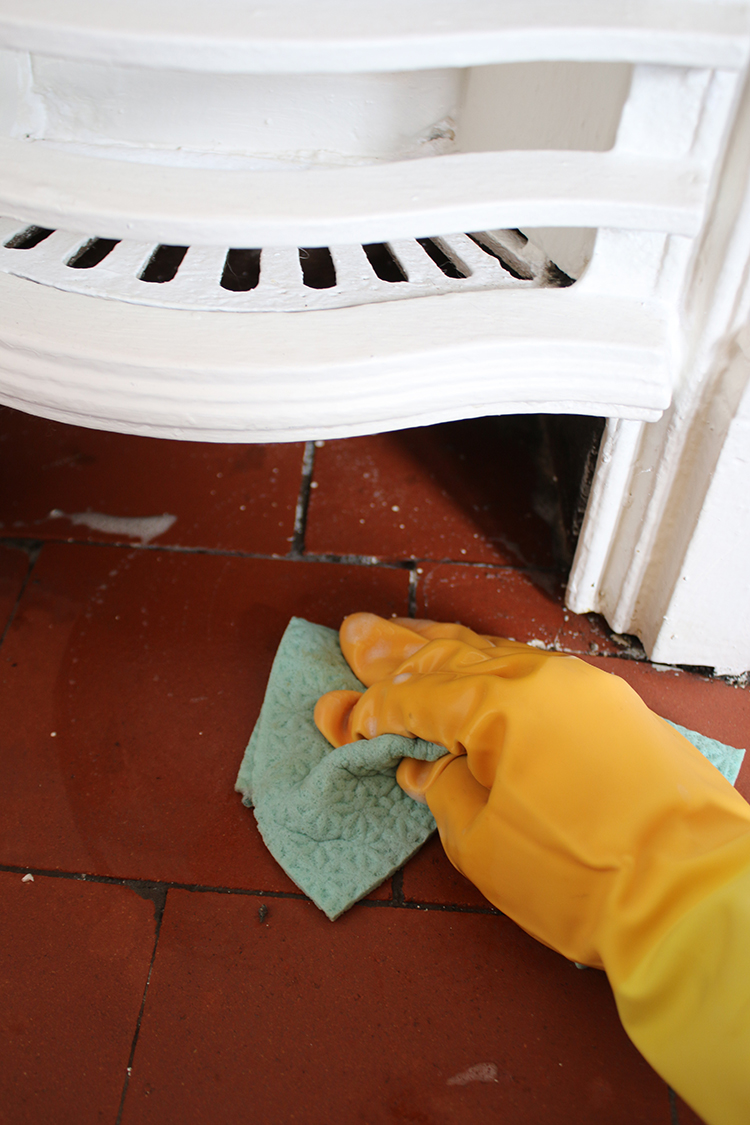
Scrub the area well with the tile restorer and leave to set for a few minutes. Use the sponge cloth dunked in the clean water, ring out to remove the excess water and wipe the area to remove the top layer of grime.
Go back in again with your scrubber and repeat the process, tipping the bottle onto the scrubbing sponge and using circular motions, to loosen even more dirt and grime. Every time you go back over it, the tile will look better and better.
Step 3
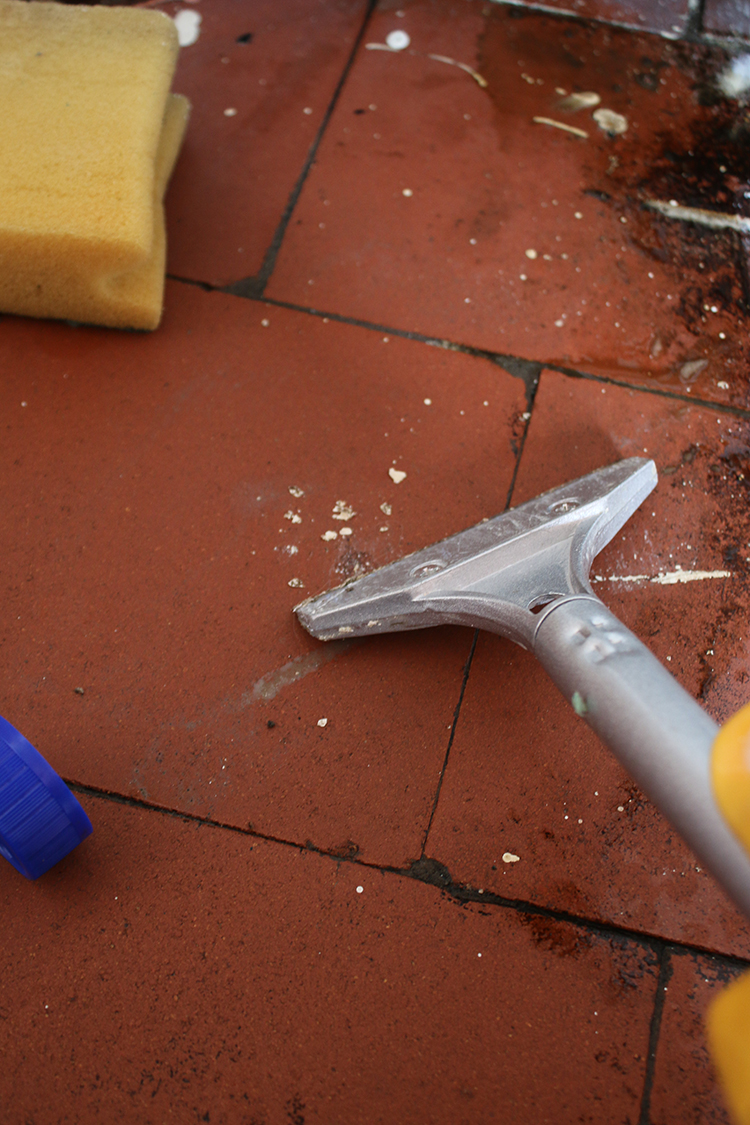
As this point, I found the paint would start to soften a bit and for any stubborn bits, I used the scraper to gently lift the paint from the tiles and then I’d use the scrubbing brush for anything that remained.
Step 4
Once everything has been lifted up, use the sponge cloth (again dipped in the clean water and rung out) to run over the tiles you’ve just cleaned and remove any remaining tile restorer residue from your tiles.
You’ll likely have to dump and replenish the clean water a few times as you go (it will get really dirty really quickly).
Then move on to the next section of tiles and the next in the same way until they are all clean.
Step 5
Finally, once all the tiles have been cleaned, use the sponge cloth with fresh clean water (or a mop for a larger area) and go over the entire surface area a couple of times to ensure all the cleaner is completely removed from your tiles.

And that’s it! Like I said, take your time, work on only a few tiles at a time and you’ll start to see how quickly and easily your tiles come up like new.
Update! Want to see the finished space? Check out this post where I reveal my glam peach office and dressing room!
I hope you enjoyed this little tutorial. Do you think it was the right decision to try and restore these tiles in my office? If you’re not convinced just yet, stay tuned as obviously we still need to install the carpeting so this little area will look even better soon. And then it’s just the furniture and styling to go! I can’t wait to share the full makeover with you soon so if you’re not subscribed, you can do so below so you won’t miss a post!


It looks wonderful! With all your accessories, warm and inviting! Love the pictures too. As always you have created a beautiful feature, with a story to tell!
It looks great, you’ve saved some “house history”, had minimal environmental impact and you’ve saved money. What’s not to love?!
That’s a result! I think keeping the hearth rather than carpeting over is right choice. These might stand out more next to a pale carpet, but you could then paint over or replace. I like it for now, especially with the plants. It’s the ‘boho’ to offset the ‘glam’ :o)
A friend of mine only yesterday asked me how to clean up her tiles! I’ve sent her a link to this blog! Perfect timing. x
Much better with the tiles: looks like a working fireplace. Do you know about Cardinal red tile polish? In Scotland I think we had more doorsteps tiled like that than I remember seeing in England, one of my Mum’s favourite chores to pass on was polishing them and I never minded because it was extremely satisfying. If you use it it will homogenise the colour in the grout and any depth of tile which can be seen if grout is missing and/or fill cracks beautifully. It used to be available on every supermarket’s shelves, and Robert Dyas (and Amazon, inevitably) still stock it amongst others. A little goes a long way if you don’t want them too red; the shine is lovely!
Oh I’ve never heard of this before! I didn’t know it was common in Scotland either – a lot of the houses on our street have them ;) Okay definitely checking it out as I wasn’t entirely sure what to do with the grout as it is a bit uneven/different colours – I was actually wondering if I should re-grout it completely but this sounds like an easier option! THANK YOU! xxx
This one is great, will probably help me out
with the tiles I’m going to clean and make as new again.
Thanks for posting.