The following post is not sponsored but I was provided with the paint and wall mural in exchange for coverage by Earthborn Paints and Woodchip and Magnolia, respectively. This post may contain some affiliate links which means if you click on a link and make a purchase, I may earn a small commission from the brand for the referral. I am not paid or asked to use these links. You’ll never pay more for clicking on these links.
Apologies for the lack of new posts last week as I’ve been busy working away on the renovation of my combined office and dressing room. Is there a simpler way to describe it? Drofficing Room? Dreffice? Hmm, we’ll have to come back to that later. Anyway, over the last two weeks, I’m happy to report that things have moved on rather significantly!
Of course, there is a long way to go yet but the messiest parts of the project are now complete so I wanted to just share what I’ve managed to accomplish in this space over the course of the last 2 weeks or so.
The first step was a major clear out because despite having a huge clear out before we moved into this house, in two and a half years, my hoarding tendencies have come back into full force. I think I counted something like 30+ notebooks. I mean, I love a notebook as much as anyone but do I really need 30 of them? (The answer is yes, yes I do and no, I didn’t get rid of any of them so shush). I did, however, get rid of a lot of rubbish and things taking up space and quite happily was able to sell my sideboard as well as a console table to a very good home and I’m still planning on selling a few other bits and pieces.
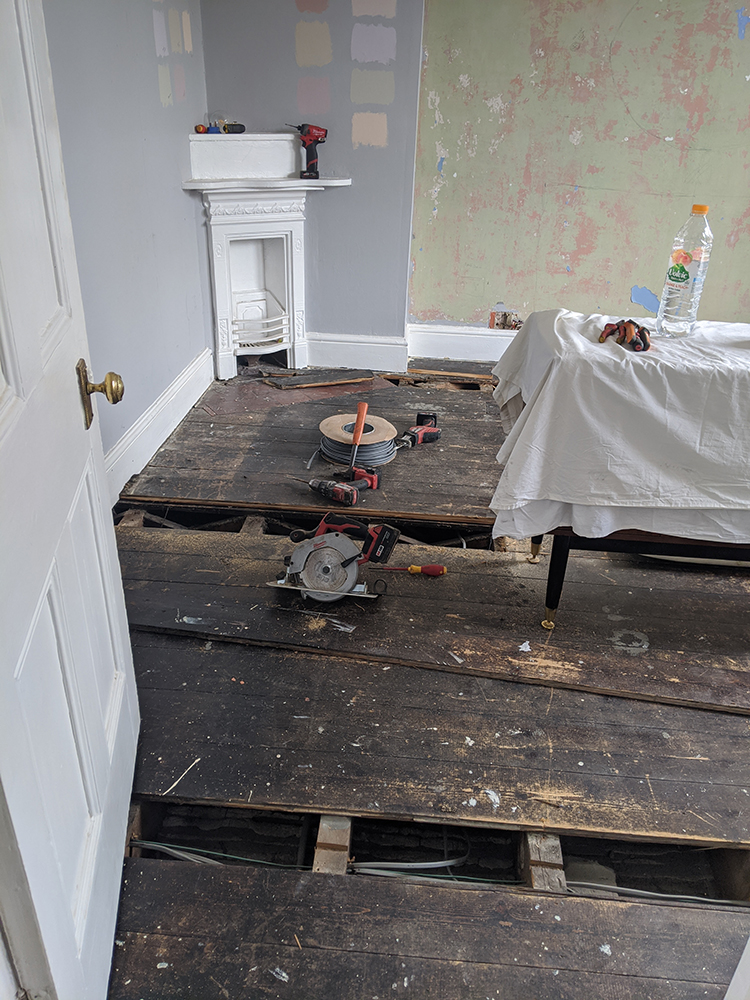
Once the room was cleared, I had my electrician come in to replace the old electrics in the room. As I’ve mentioned before, we are replacing all the electrics in the house in stages – it’s not the most efficient way of doing it perhaps but it saves us from having to tear the entire house to shreds all at once.
So the lino flooring was ripped up, floorboards were lifted, new channels were created to fit the new cables in for things like the wall lights, light switches and moving sockets and he moved the location of the overhead light from in front of the window to the middle of the room.
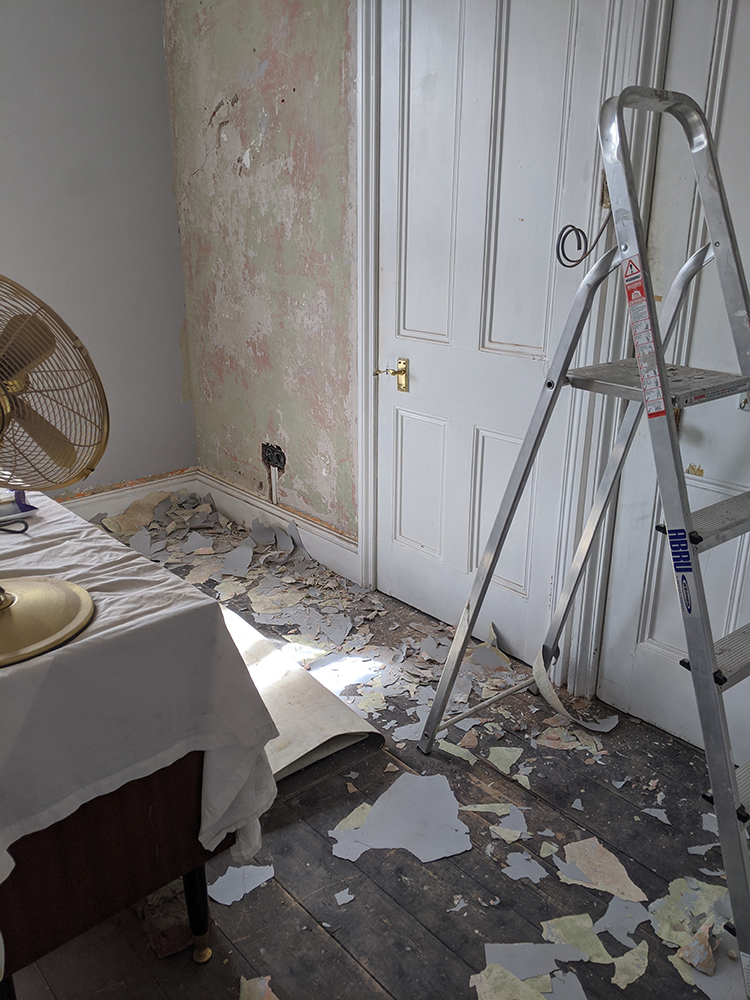
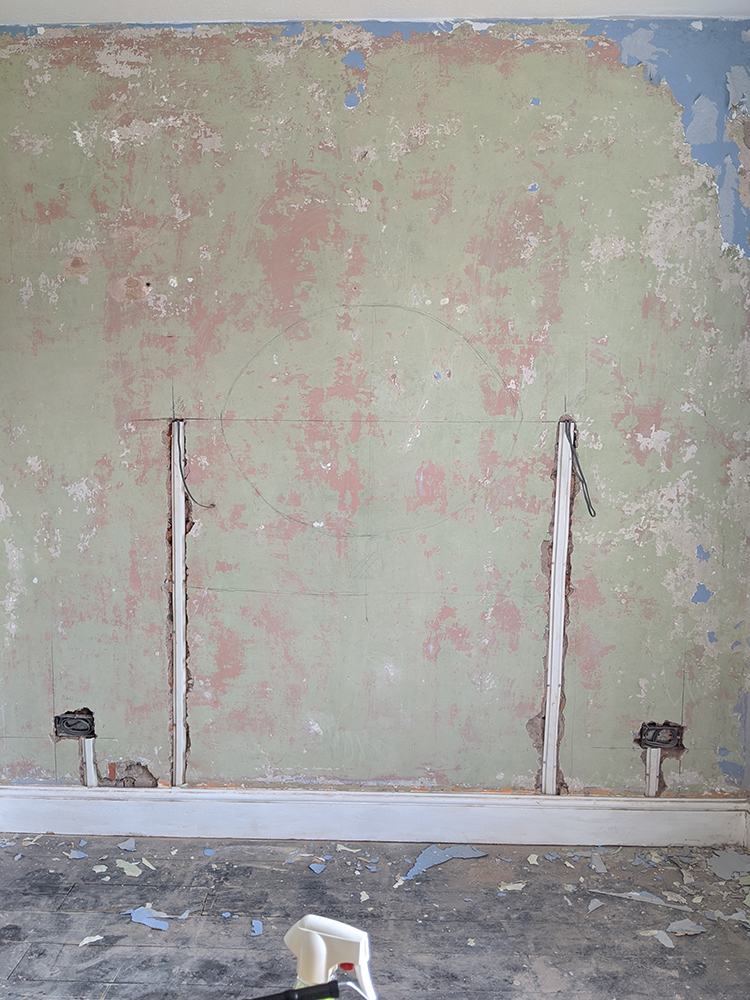
When this was completed, I started scraping all the loose paint off the bare plaster wall and noticed there was a bit of loose paint on the opposite wall as well. In for a penny, in for a pound, I decided to just remove all the loose paint from that wall which meant taking that wall back to bare plaster as well. Good times. I will just interject here and say that this is one of the reasons that I love Earthborn’s paint and why I’ve used it so many times in my home. Yes, this seems like a strange jump but I’ll explain.
I live in a Victorian home, built in the 1880’s. The walls in these old houses need to ‘breathe’ in order for you not to have problems with things like damp, it allows airflow through the bricks and through the plaster so that water doesn’t get trapped inside and it evaporates as it should. When you use cheap paint on these houses, it almost forms a sort of plastic barrier which doesn’t allow for any moisture to come through the walls. This is why you’ll sometimes see bubbles under the surface or the paint peels – it just doesn’t ‘stick’ to the walls (I scraped it all off in huge sheets, it literally just fell off the walls).
Earthborn paints have that breathability built right into the paint so that moisture has somewhere to go and it’s so great for older properties like my own. You won’t get that weird plastic-y barrier and the paint actually sticks properly on the walls, no peeling or bubbling. It’s good stuff which I’ll talk more about in just a minute. Anyway, back to the room.

So once the electrician dug all the channels Wayne went in with a wall filler to take care of all those gaping channels in the walls and to patch up any uneven spots or holes in the old plaster. He originally anticipated doing this with good old fashioned plaster but apparently, considering there is still a worldwide pandemic, there is a massive shortage of sand which means there’s a massive shortage of plaster. It’s honestly this kind of thing you just never think about, right? Strange but true.
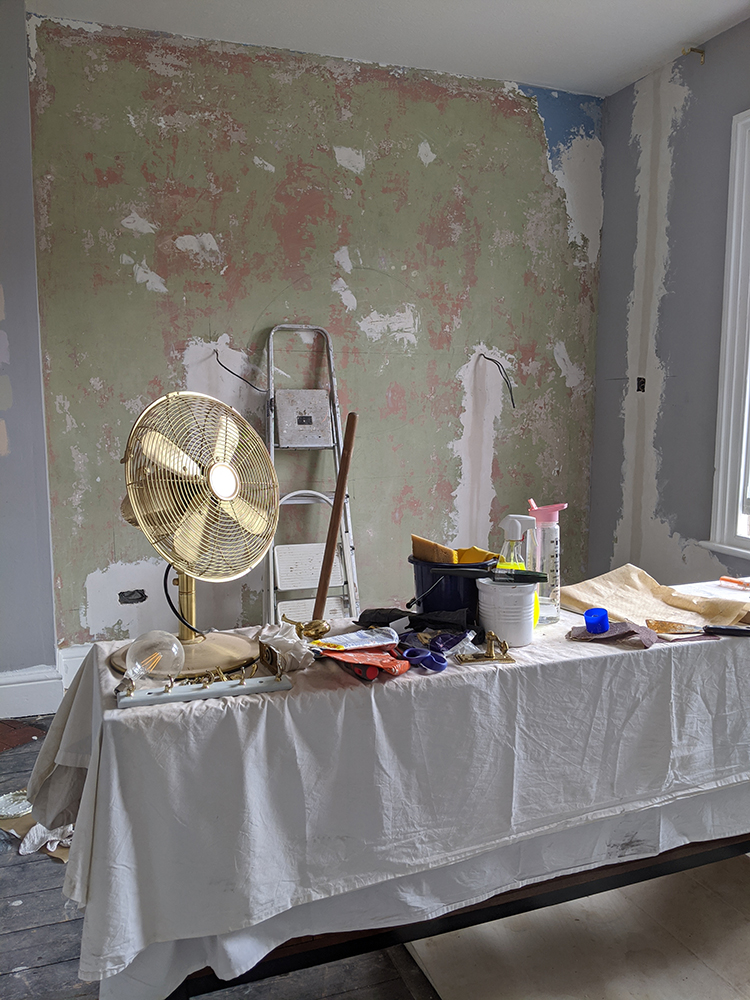
Anyway, not being able to get normal plaster for love nor money anywhere in the area, we went with another kind of filler which actually worked really well. Once he finished the big stuff, I then went in with normal wall filler on any small cracks or holes and a flexible caulk to take care of any little cracks or separation around the skirting boards and windows.
Once this was all dry, the room was cleaned of dust and debris and I gave all the woodwork – skirting board, doors and windows – a light sanding. I then used sugar soap everywhere to get rid of any remaining dust or dirt. Finally, the room was completely prepped for paint. (See, I told you we’d get back to talking about the paint!)
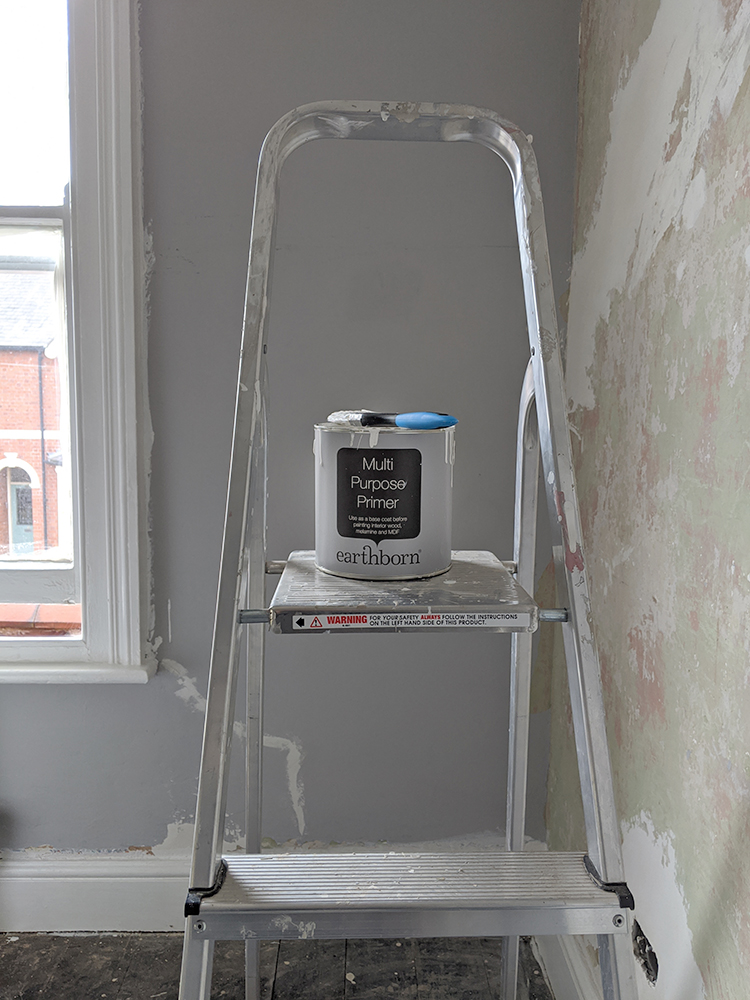
After giving the woodwork a coat of Earthborn’s Multi-Surface Primer (I have literally used this so many times on everything wood in my house), I decided to try one of Earthborn’s new range of colours called Up Up Away – a soft warm white in their Eggshell No 17 for the woodwork.
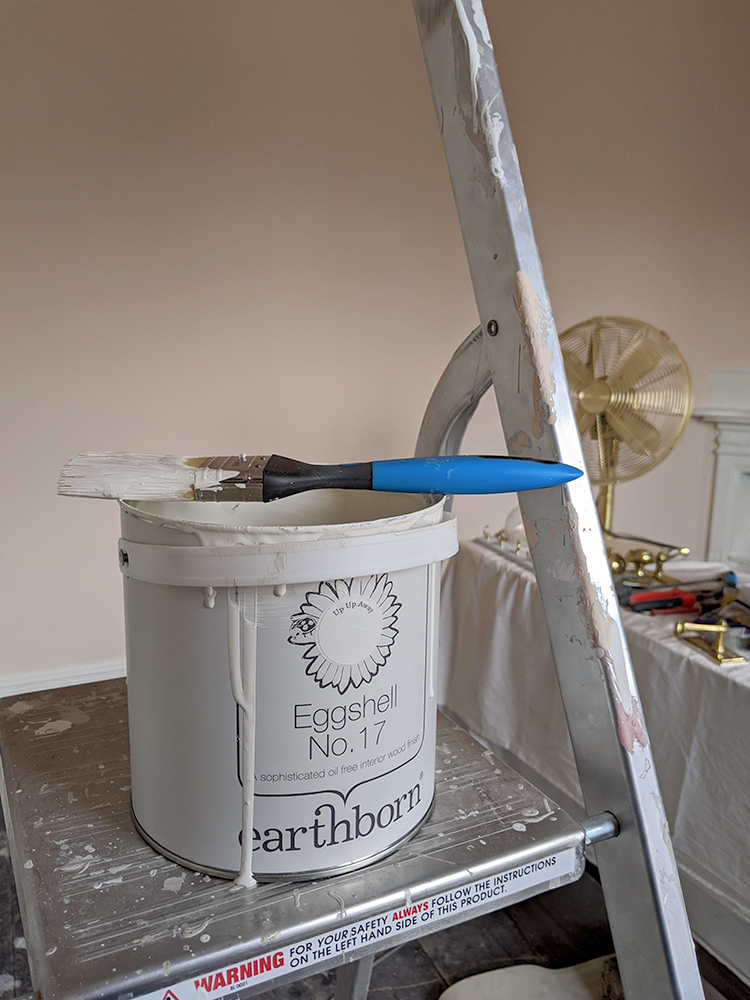
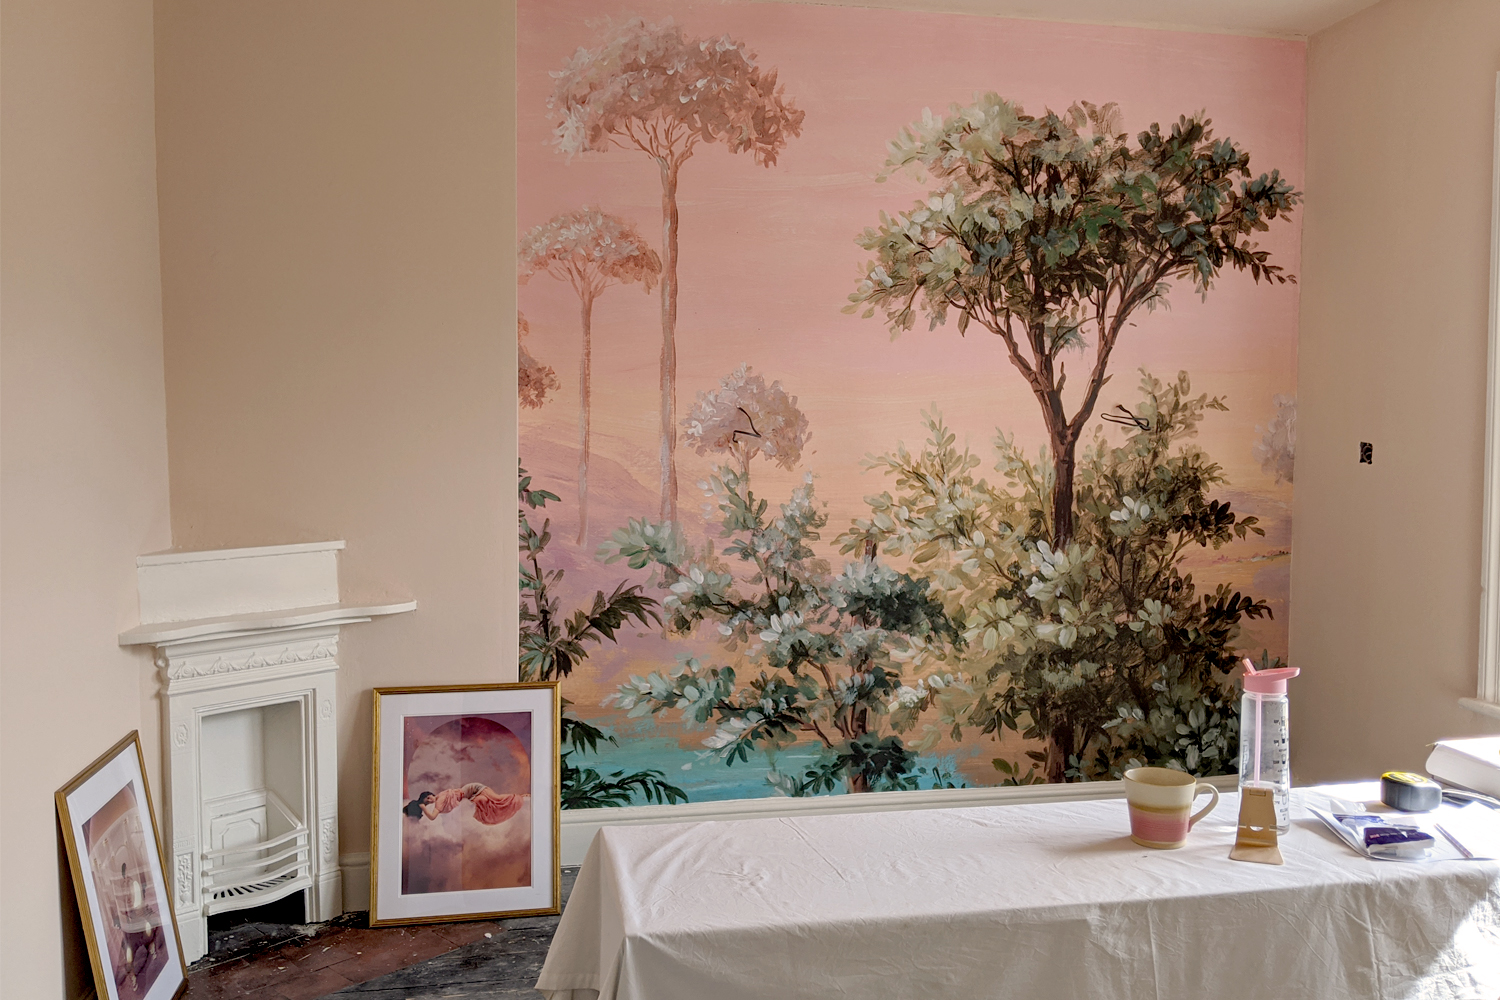
As you can see from the image below, I only got as far as painting the fireplace and a small bit of skirting board before I decided to paint the walls first. I actually panicked slightly, I admit.
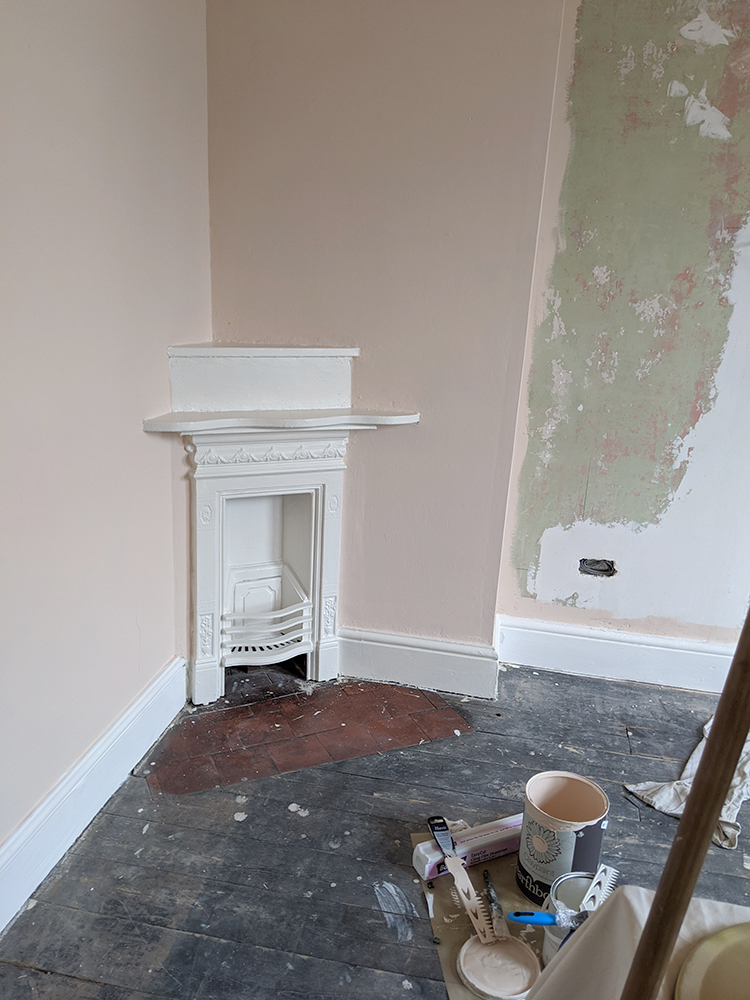
Against the bluey-grey of the original paint colour, the woodwork I’d painted looked a bit yellow but I knew that adjoining colours sometimes have a way of reflecting poorly on other colours they are placed up against. The blue was bringing out the yellow tones and I knew I wasn’t really getting a true colour reading. So I decided that I’d paint the walls first and then see how the wood colour looked against the peach walls.

Once I started painting the walls, the room just started coming to life. After having had to look at depressing grey for such a long time, it was a huge relief to see the room with a beautiful gentle wash of Earthborn’s Peach Baby Claypaint.
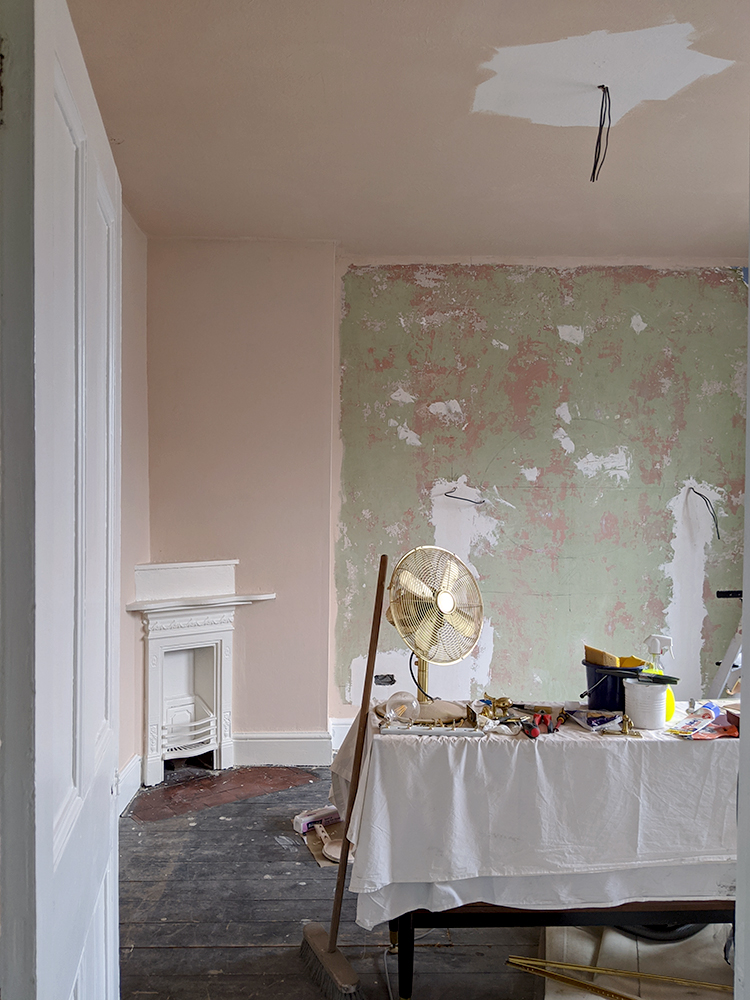
Two coats of this beautiful warm peach shade on three of the walls and the ceiling and suddenly, the Up Up Away paint on the woodwork looked perfect. See, I really didn’t need to panic! It’s all about context.
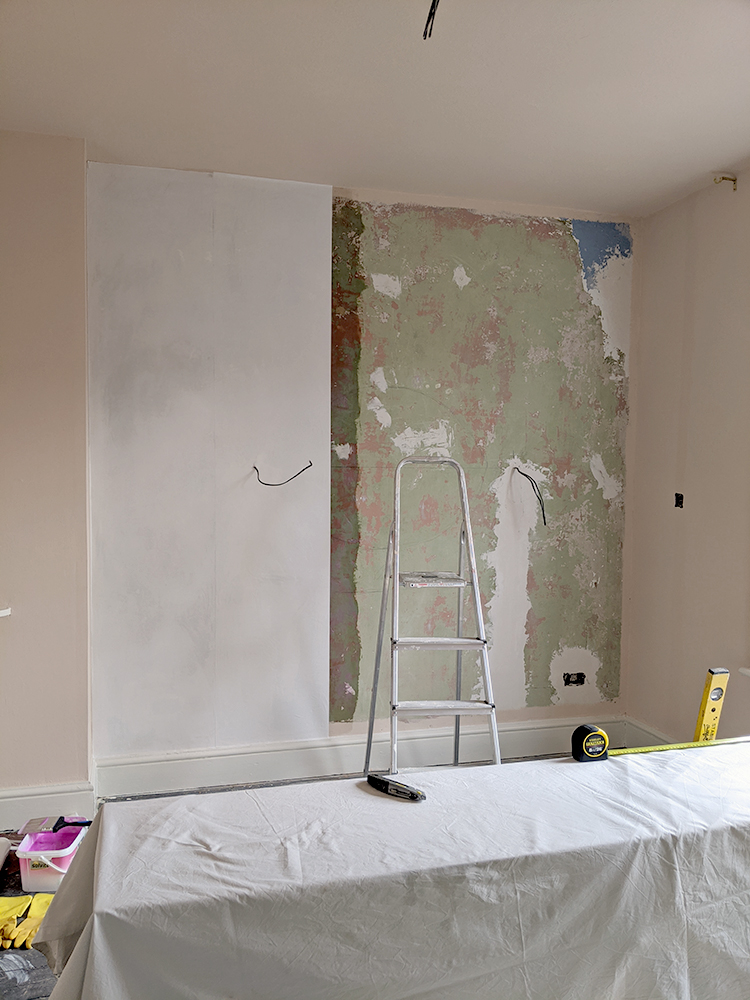
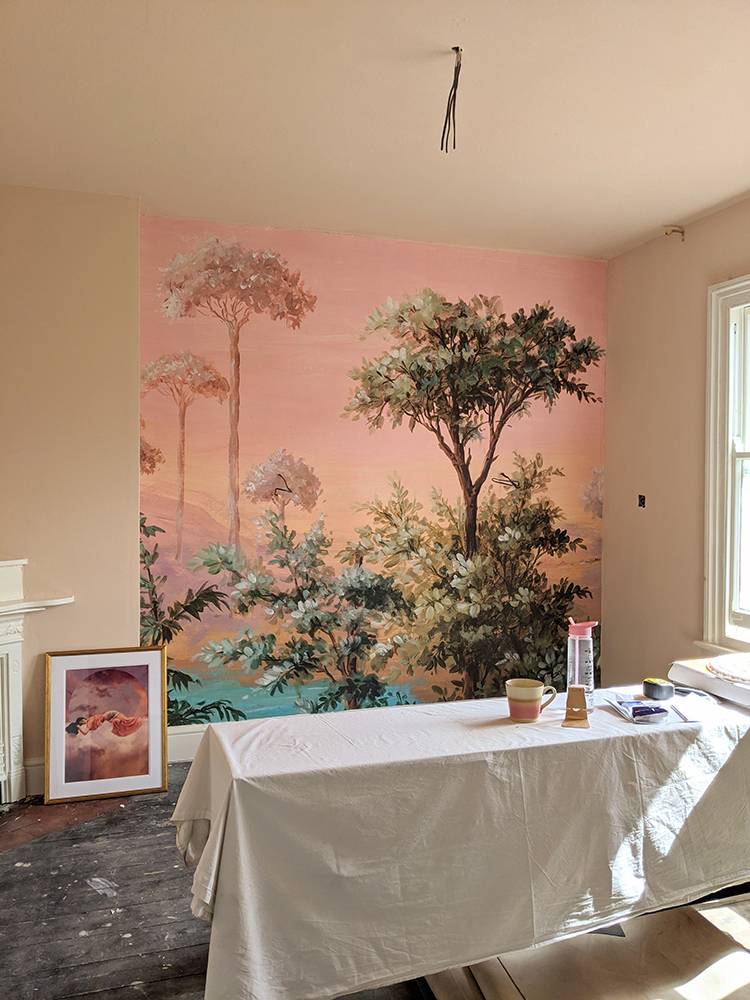
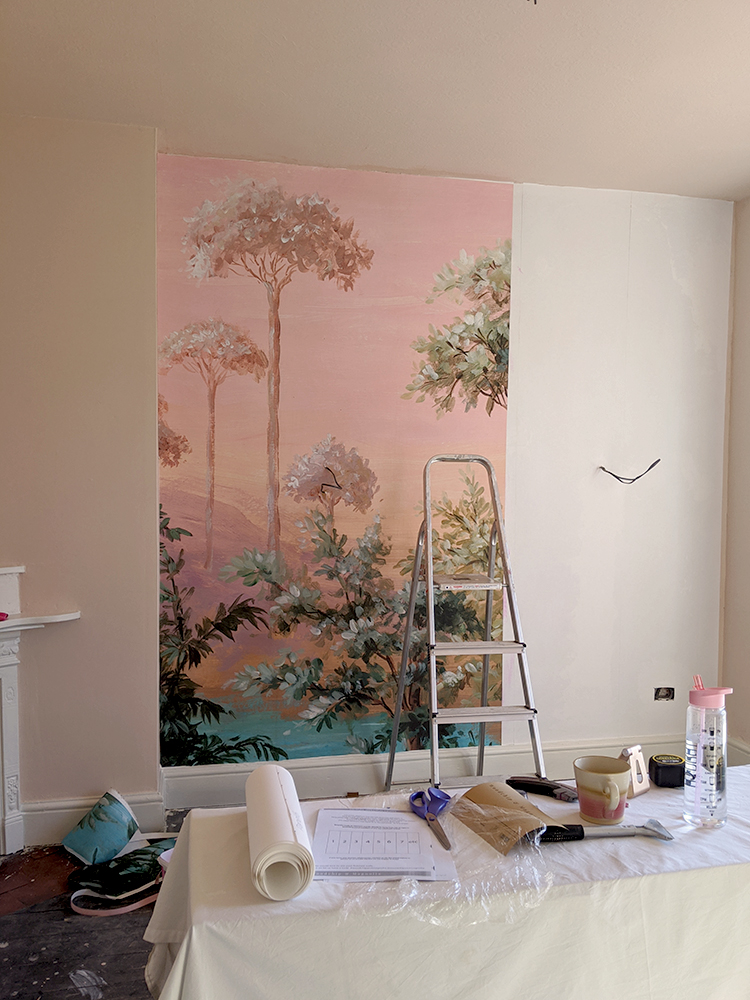
After painting the walls and ceiling and all the woodwork, I decided I was ready to say goodbye to the horrible plaster wall I’d been staring at for the last 2 1/2 years as this was going to be the wall which would be graced with the wall mural from Woodchip and Magnolia. When I put the mural up in my bedroom (you can see that one here), I lined the wall with this exact lining paper first and then the mural on top of that and it gave me such a wonderful foundation upon which to hang the mural that I decided to do it again.
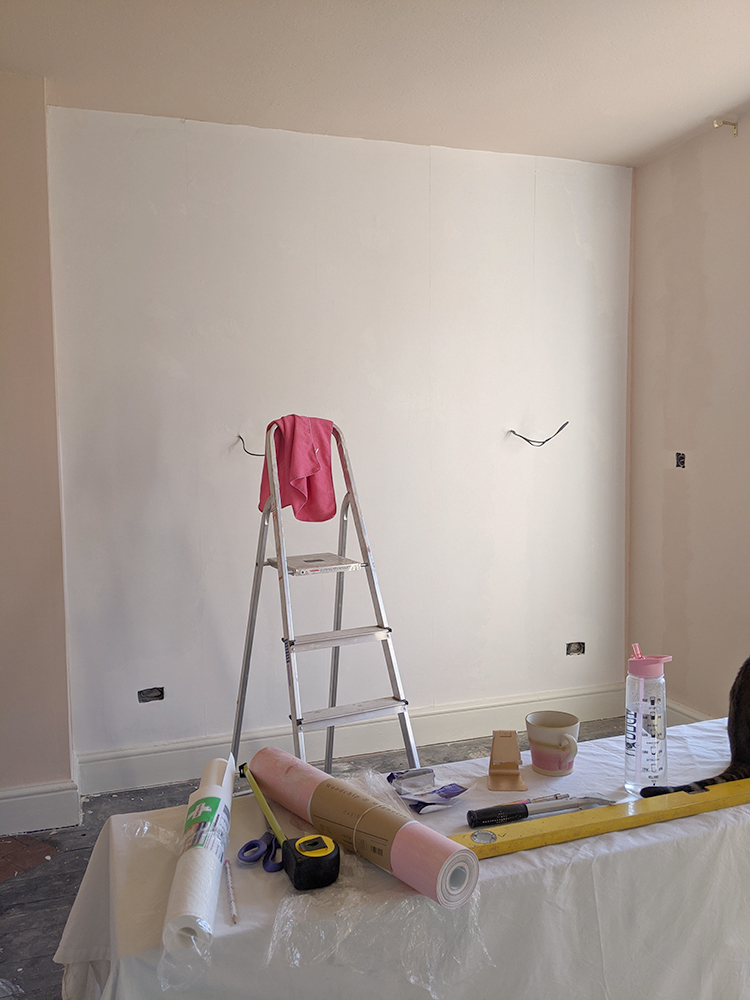
So on Sunday, I hung the lining paper and then on Monday, I finally got to hang my beautiful Woodchip & Magnolia Oasis mural and my goodness, it’s just DREAMY. I have been lusting after this mural as soon as it was released, perhaps a year or a year and a half ago. It’s been a long time that I’ve dreamed of using this mural somewhere in my home and I am just so excited I finally have a place for it. (Also if peachy pink colours aren’t your thing, check out the Oasis mural in Natural as an alternative!)
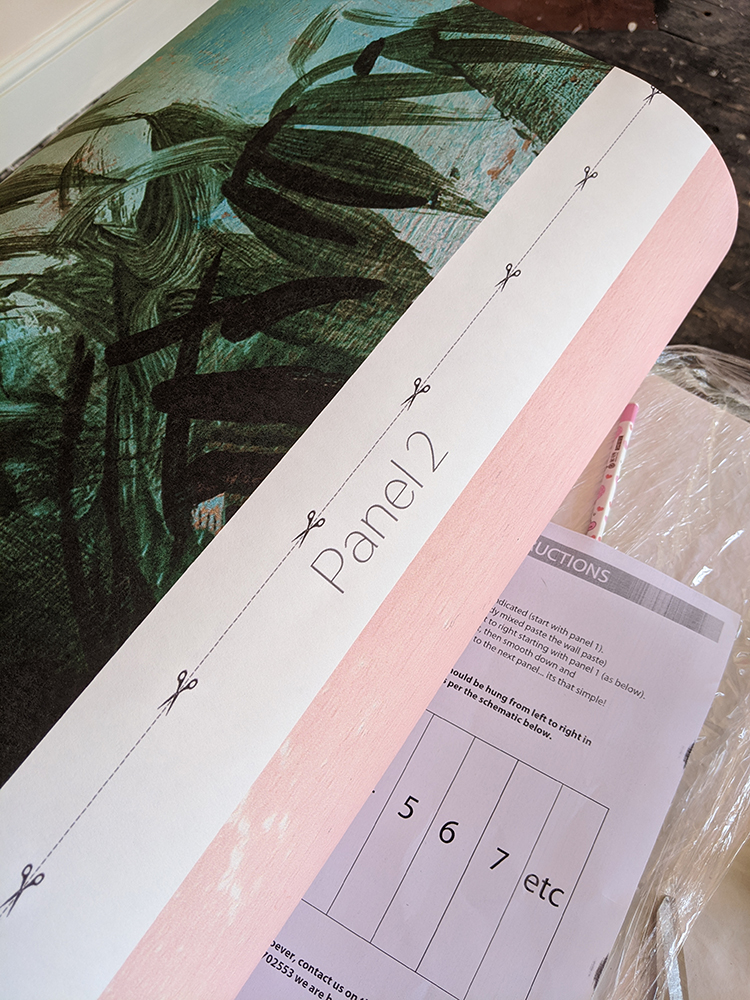
The quality of the paper is incredible – it’s so thick and easy to work with. The mural comes on one roll but each panel is numbered clearly and shows you where to cut it (my wall was 7 panels in total).
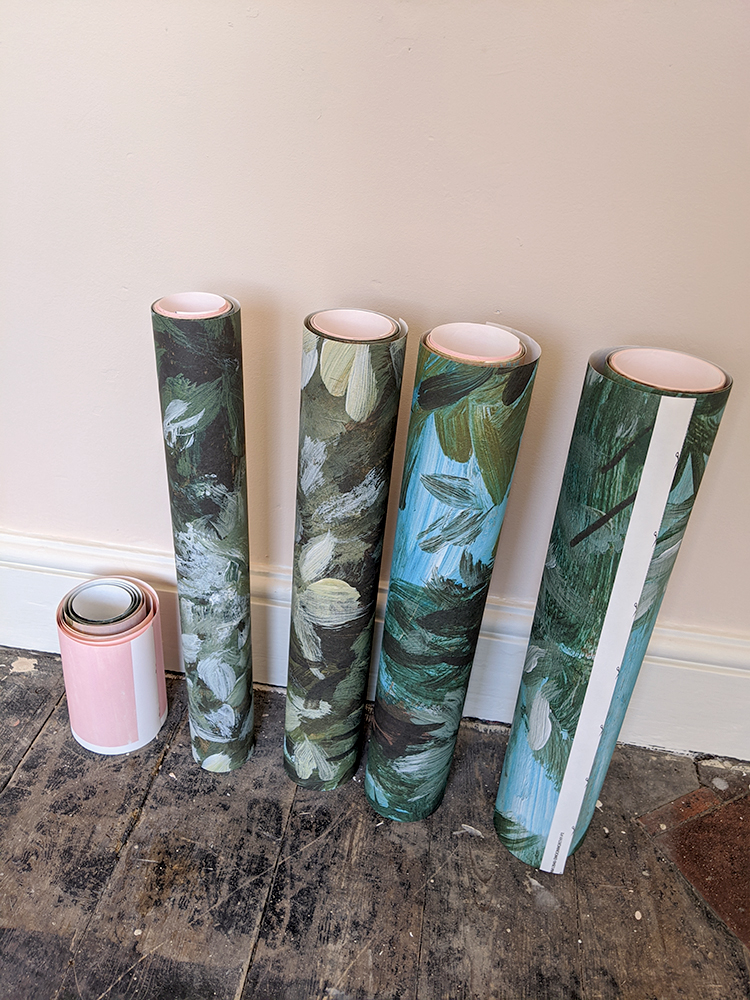
I pre-cut every panel to make it easier for me to grab each one in order from right to left and hang it up. Because it’s “paste the wall” (as opposed to “paste the paper”), it is as simple as generously applying the paste (this is the one I always use) to the wall where the panel will go (I take it out a little further than the width of the panel) and then hanging the panel with a slight overlap at the top and smoothing it down as you go until finally cutting the excess from the top and bottom.
Starting from the left and working your way to the right, the process goes really quickly and pattern matching between panels was a breeze. I think I did the whole wall in less than 2 hours and most of that time was just applying the paste! (By the way, if you’d like me to do a blog post with tips on how to hang a wall mural, let me know in the comments!)
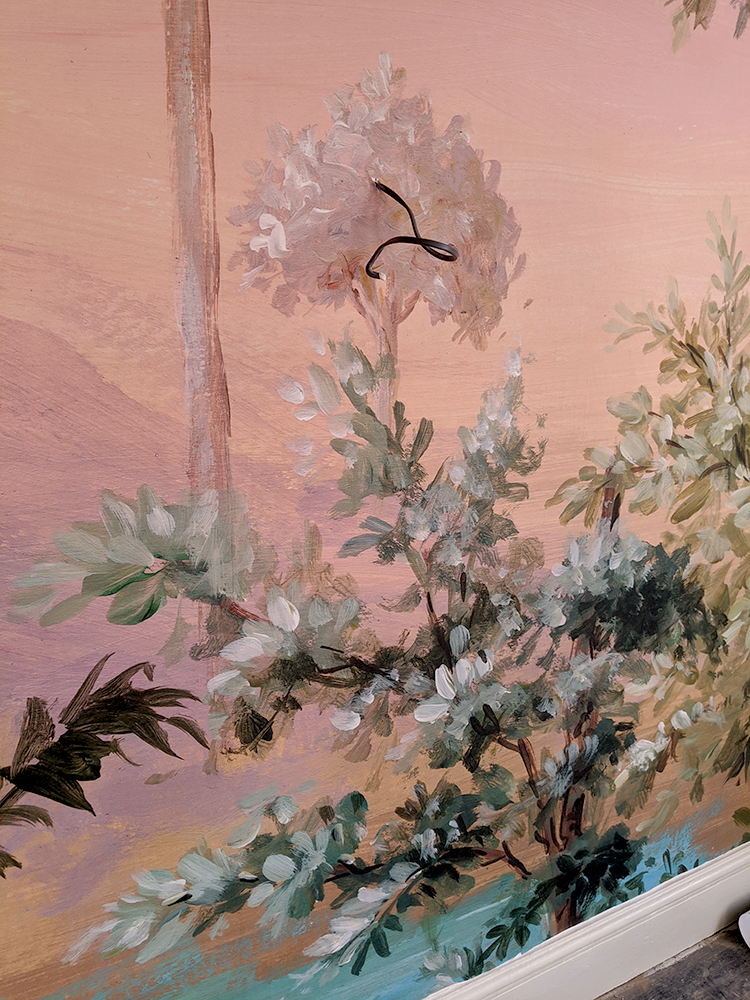
The detail on the mural is really just incredible. I don’t think the pictures – as gorgeous as it looks here – even does it justice.
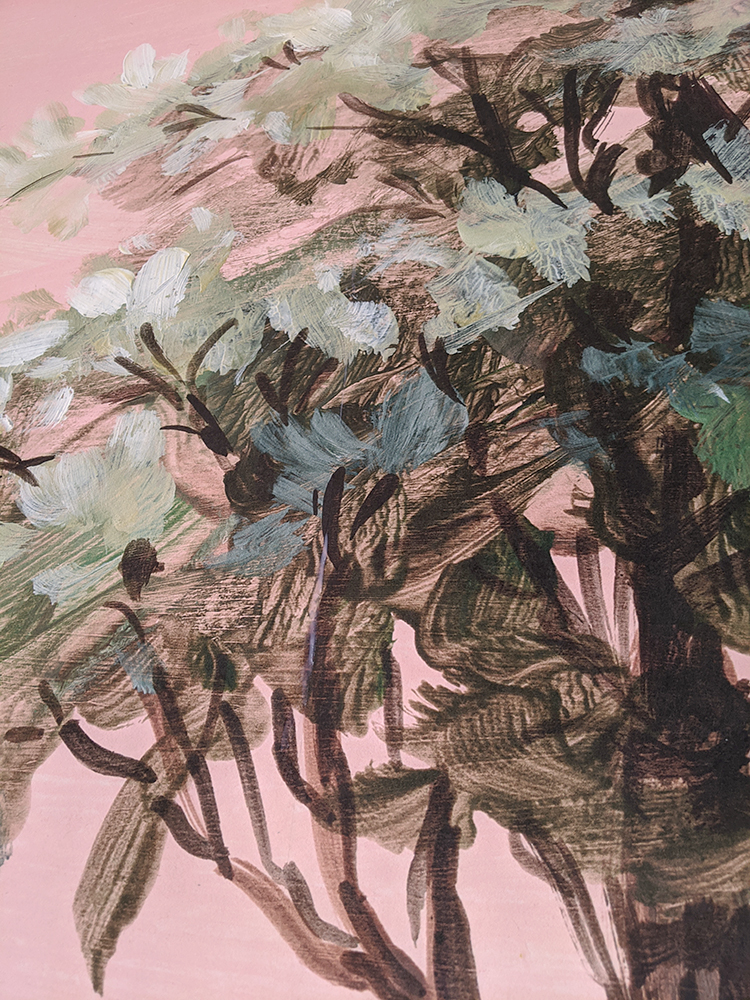
You can so clearly see each brushstroke that it looks as if it’s been hand-painted on the wall. It really is just staggeringly beautiful and is a testament to just how talented Nina, who owns Woodchip and Magnolia, really is.
So, now that the painting is completed and the mural is up, it feels like there’s been good progress made, especially now that most of the really messy unpleasant work is complete! So what’s left? I have my electrician coming back next week to install the lighting, switches and sockets, I need to sort out the carpet installation and then it’s just getting the furniture delivered and styling the space and then it’s done! I’m so excited that I’m finally going to have an inspiring place to work again.
I’d love to know what you think of the space so far! Are you working on your own home office or work area at the moment? Let me know in the comments!


…it will be like sitting in a fantasy garden, very inspiring for you when dressing & working! I like that you took the colour over the ceiling too, it looks great and not at all heavy. Look forward to seeing the progress, best of luck with the rest of your ‘Dressing Office’. Tx
Wow! I love reading about the updates on your home, especially the challenges you overcome in a historic home! I’m excited to see how this room comes together. :) The mural is just gorgeous!
Love the mural and the wall colour!
I hope you’ll do a post about how to apply a mural, you inspired me I want one. Xx
Amazing transformation. Can’t wait to see the final unveiling. You’re so ambitious! BTW, I like “dreffice.” ;)
Looks AMAZING already Kimberly! Can’t wait to see the rest!
Hello! Which wall filler did you use to fill in the channels instead of plaster? I am about to have my house re wired and want to fill in myself (or is this a terrible idea?!). Thanks!
That mural is so perfect! I’ve been loving designs with murals in bedroom decor lately too. It adds the perfect amount of drama, even when you keep most of your other design elements neutral. Best of luck with the continued renovation!
Yes please to the mural tutorial. Please can you share the filler details. I need them too for our re-wire channels!