I wanted to kind of check in with you all with how things are going in terms of the last few weeks as the back of my house has been ripped apart in preparation for the new extension going in and the open plan kitchen diner taking shape! (Can I get a hell yeah?!) As I’m writing this, we are just over a third of the way through for the building work but of course, this is just for the creation of the shell itself and so doesn’t include for things like installing the flooring or the new kitchen. Either way, it’s moving very quickly and things are happening on a daily basis so expect at least another post or two before the shell is complete!
If you are just catching up, I’ve explained a bit more in terms of our plans with this post here and an update before we began work here. Since then, work has started in earnest and I’m currently living in the midst of a lot of construction so it’s been interesting, to say the least!
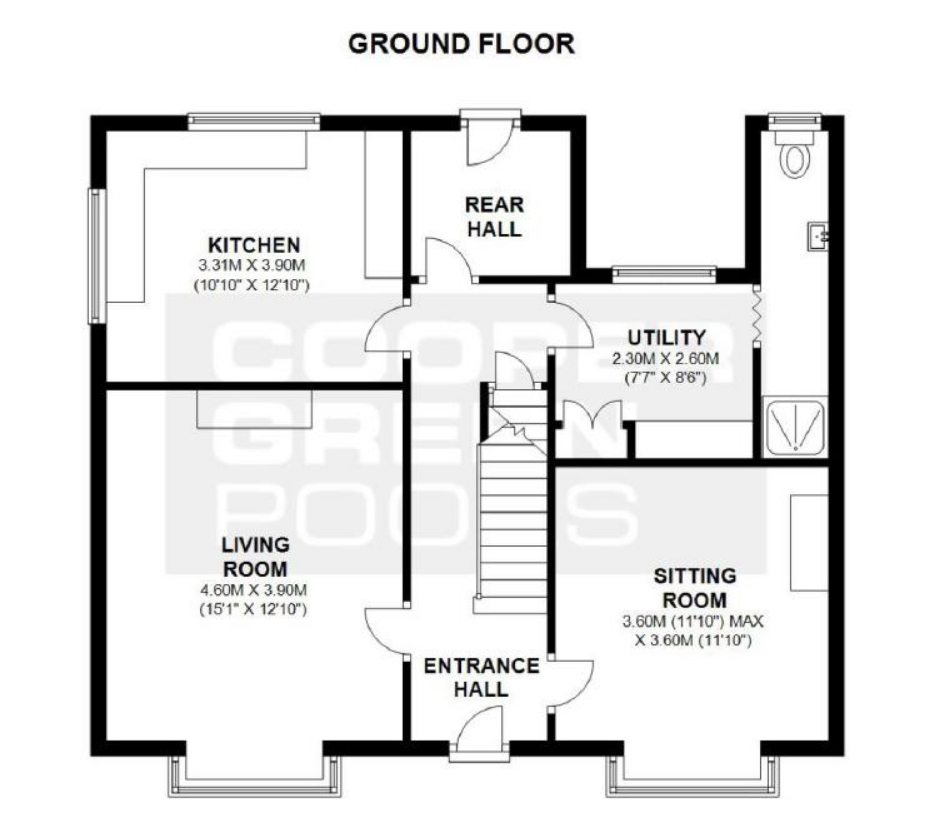
From the estate agent listing – the measurements are mostly wrong by the way but this is what the layout was when we moved in. Bear in mind, what they have as the ‘sitting room’ is the ‘dining room’.
Anyway, the basic gist for those who haven’t been following along is that we were removing the wall between the current utility room and the dining room, demolishing the old bathroom, creating a small extension at the back of the house which will house the future kitchen. At the moment, the old kitchen is on the opposite side of the house which is a blessing as it means we can continue to use the old kitchen until the new one is in place. It also means, we are only really ‘losing’ a couple of rooms and all of it is happening in one very specific section of the house (the lower west side of the house) which makes things a bit easier to work around!
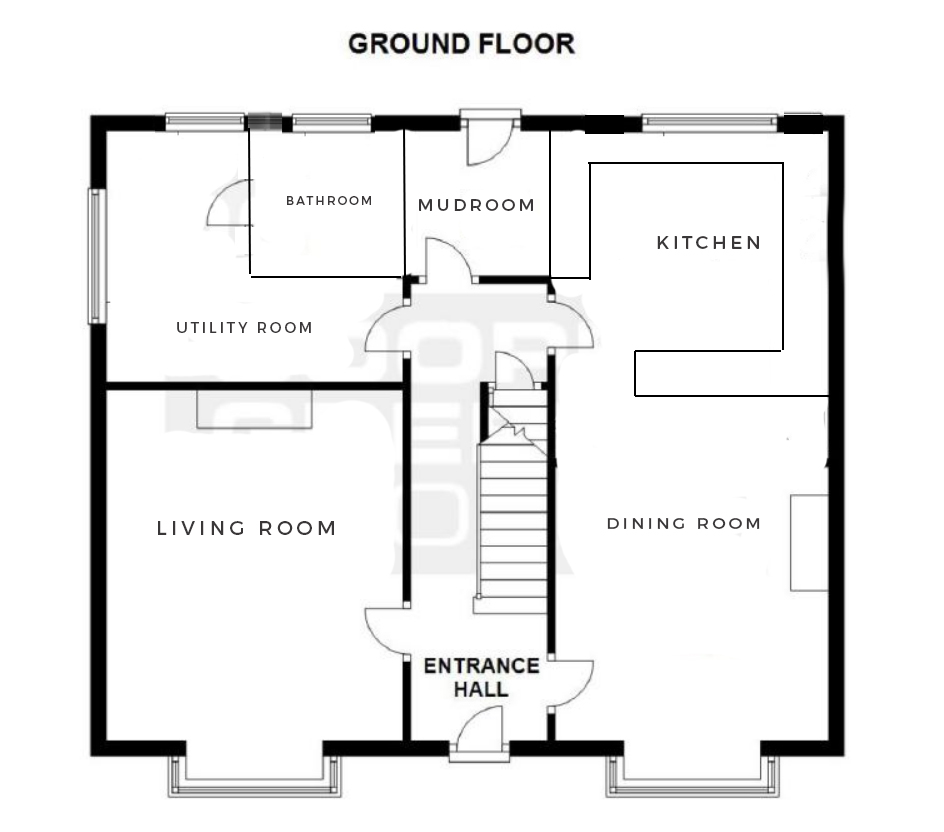
I did a really shitty quick sketch as to what it will look like above but obviously, this is a ridiculously simplified version. I could have shared the architect’s drawings but because we’ve made changes to how we will be moving on from this project to the other side of the house, I didn’t want to share that here as I felt it might just confuse things. We’d originally planned on creating a small shower room and office where the old kitchen is but that’s all changed now as I’ve decided to keep my office where it is upstairs and we’ll be using the space to put in a bigger bathroom than originally planned and create a large much-needed utility room from that space instead.
However, all those plans for the new bathroom and utility room are essentially Phase II of this build and probably won’t be started until next year sometime once we’ve replenished our savings a bit!
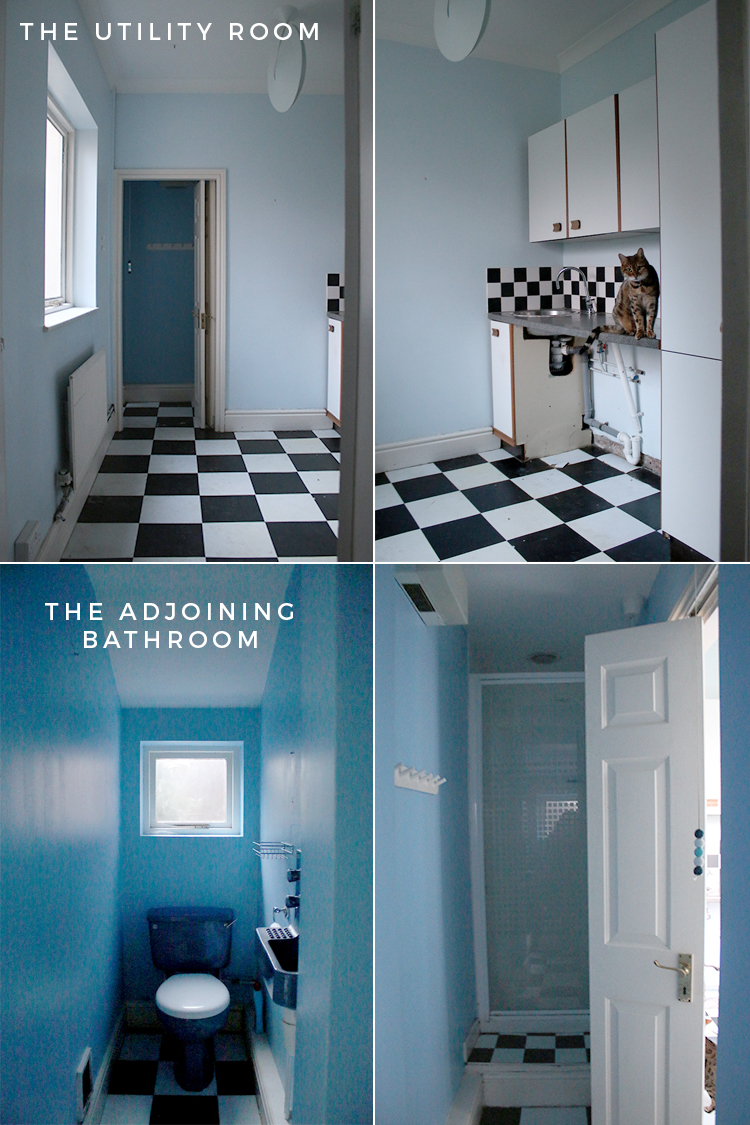
This was the existing utility room and the horrible, murder-y bathroom that adjoined it. Yep, they are both pretty awful but needless to say at this point, they are both history.
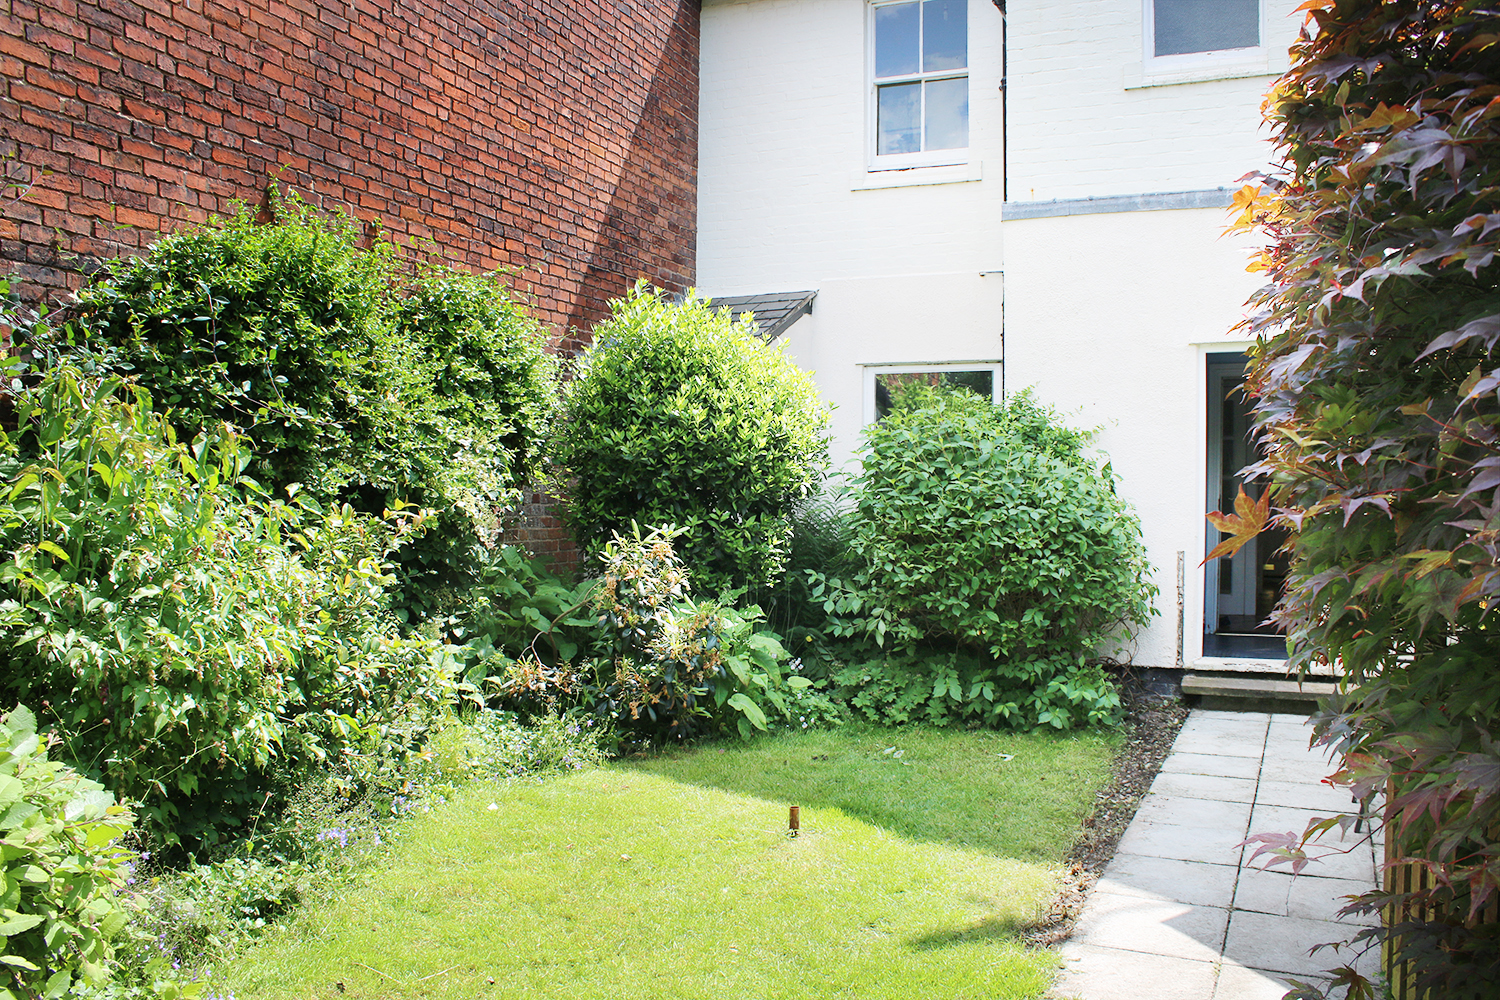
And above, you can see a picture I’d taken last summer – you can just about see the roof of the bathroom and the rather strange ‘gap’ between the mudroom (where the door is) and the old bathroom (you can see this in the first layout above too). Funny that it looks rather small in the picture but there is around 3.4 metres x 1.6 metres of unused space there that we were eager to put to use. (The brick wall, for those wondering, is the house next door which was a later addition. Our house – the first one built on the entire street – was originally built as a detached house, then later it was converted into a sort of semi-detached seeing that we share a wall with next door. The home next to us is about 1/3rd the width but double the length of ours. So that’s why you see that wall there. Old houses, eh?)
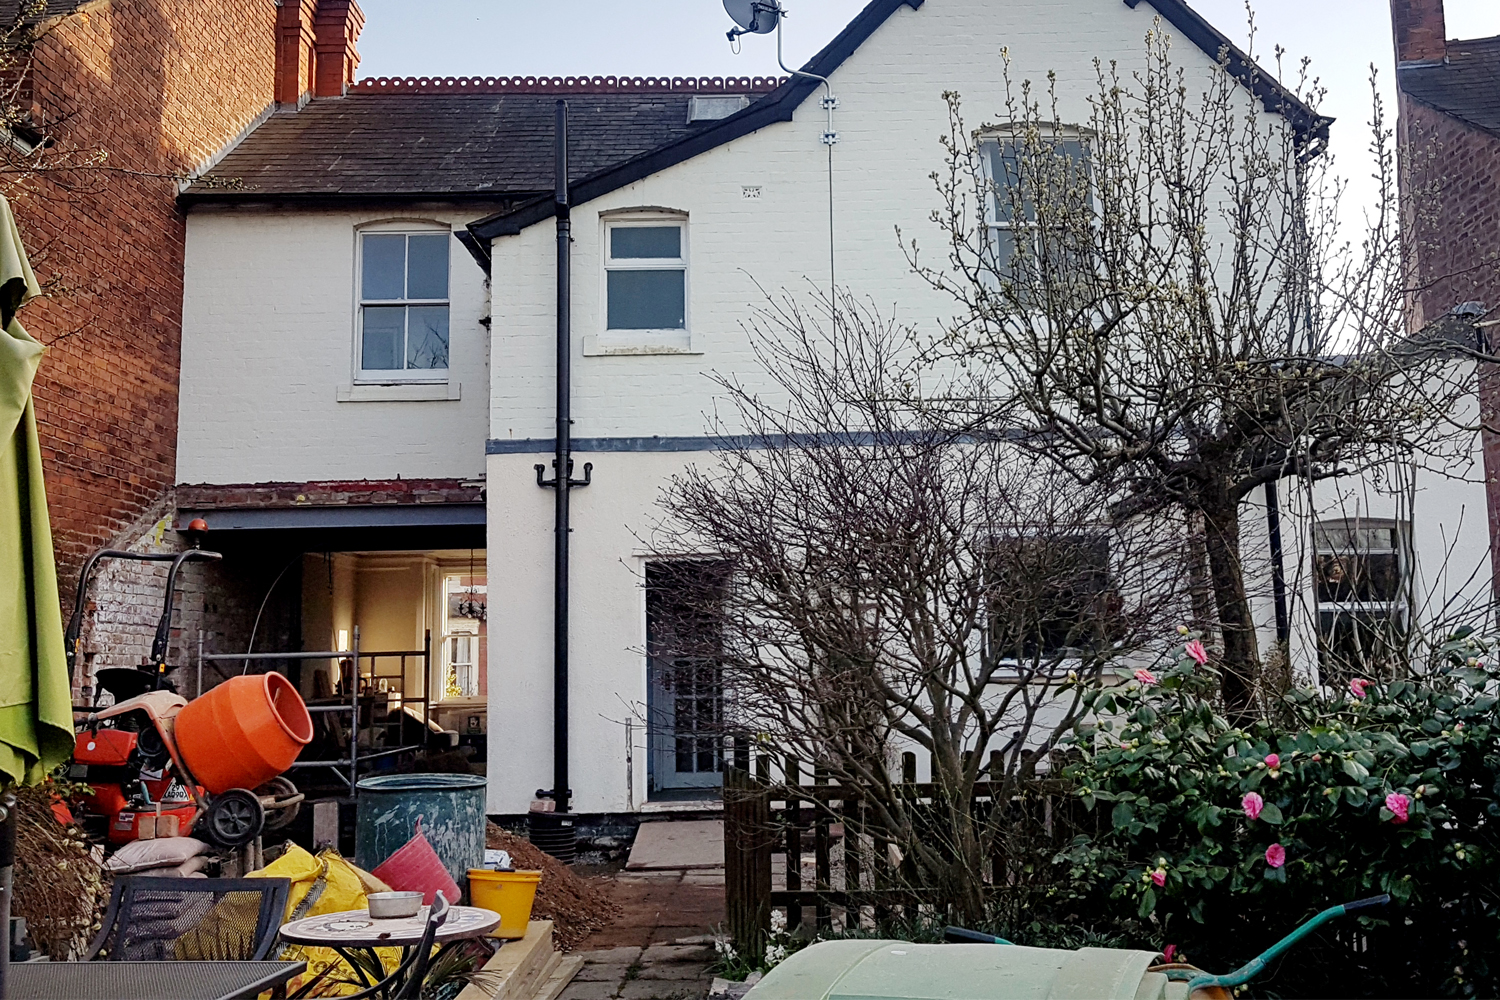
And… this is what it looks like now! Ha! Not quite the beautiful before and after you’re used to I’m sure ;) But let’s just step back a little and I’ll show you what’s been happening over the last couple of weeks.
The first thing to go was the utility room window and the bricks below that. This just allowed them access to remove all the units in the utility room so they could start taking down the dining room wall. You see the old chandelier? That’s the dining room!
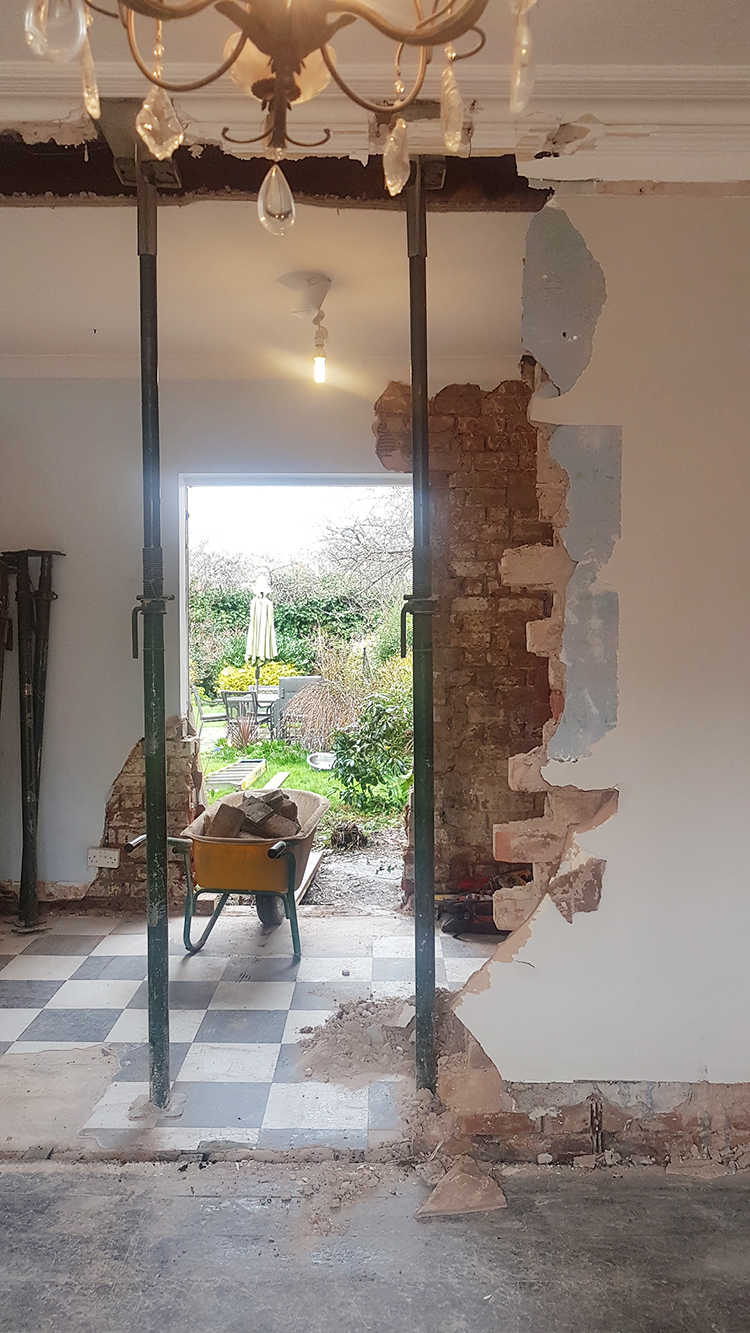
This is Day 1-2 of the build – It didn’t take very long for the dining room wall to be removed completely with acro props holding up the whole thing.
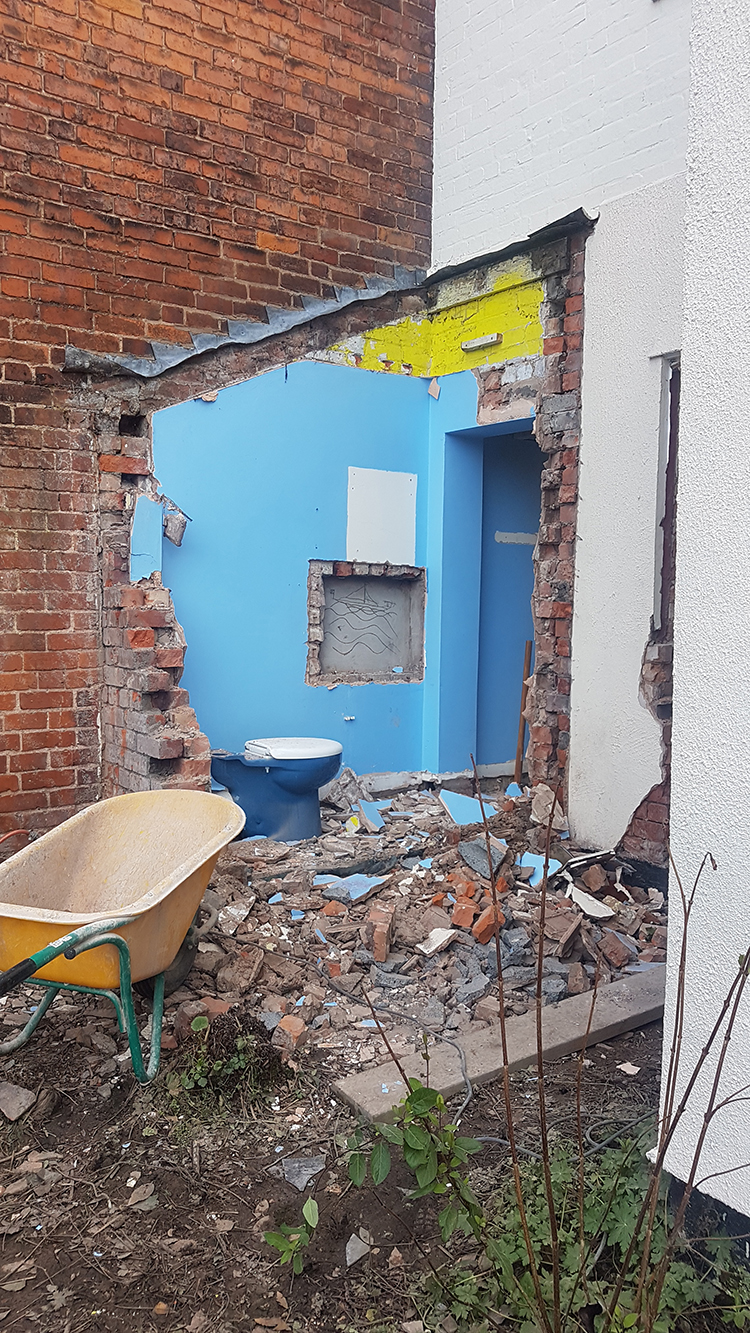
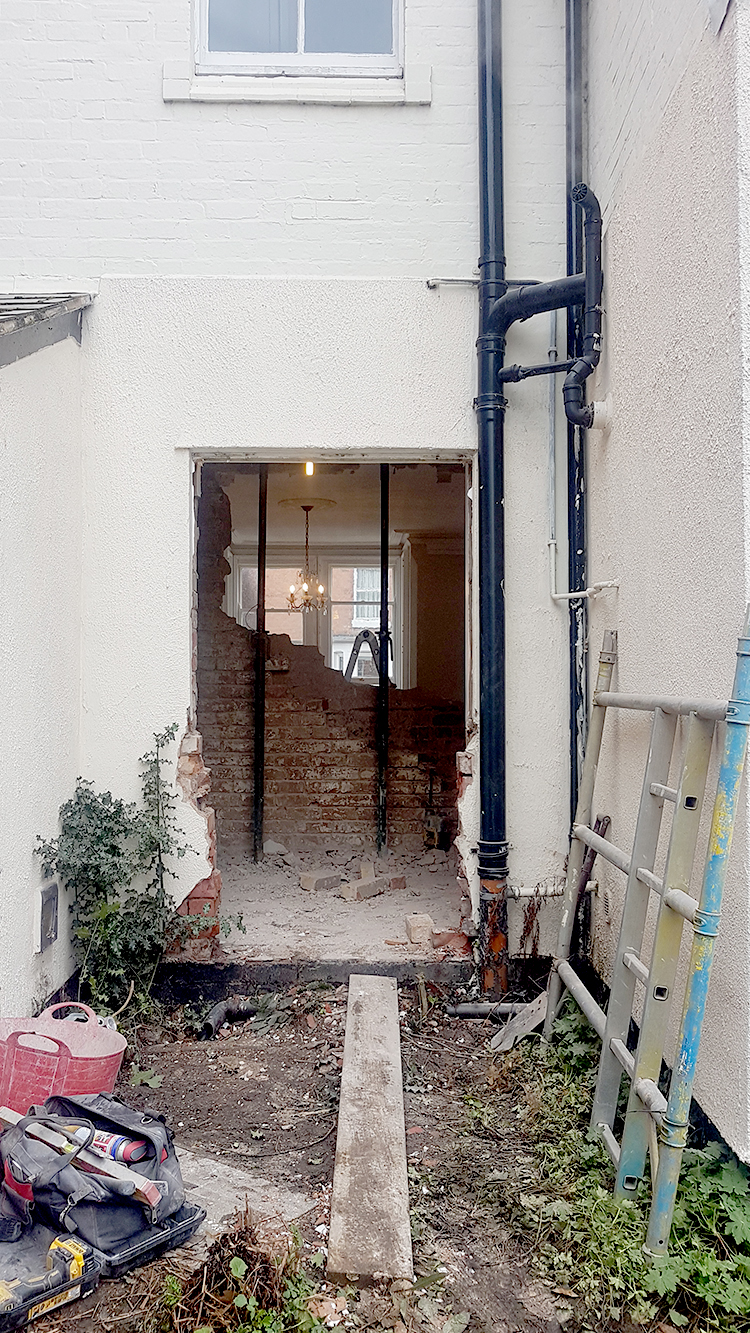
Not long after, the little bathroom was demolished. I was not sad to see it go!!
And then rest of that back wall was removed… Yes there’s now a massive hole in my house!
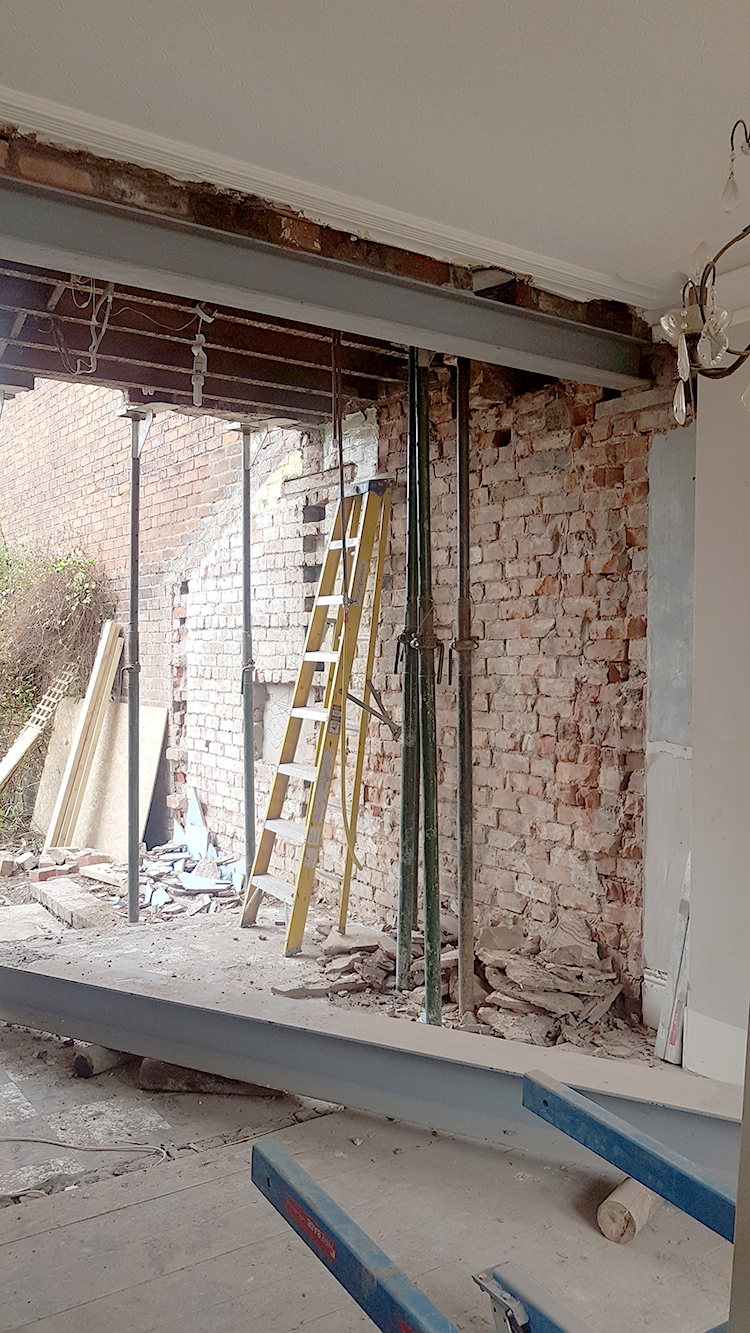
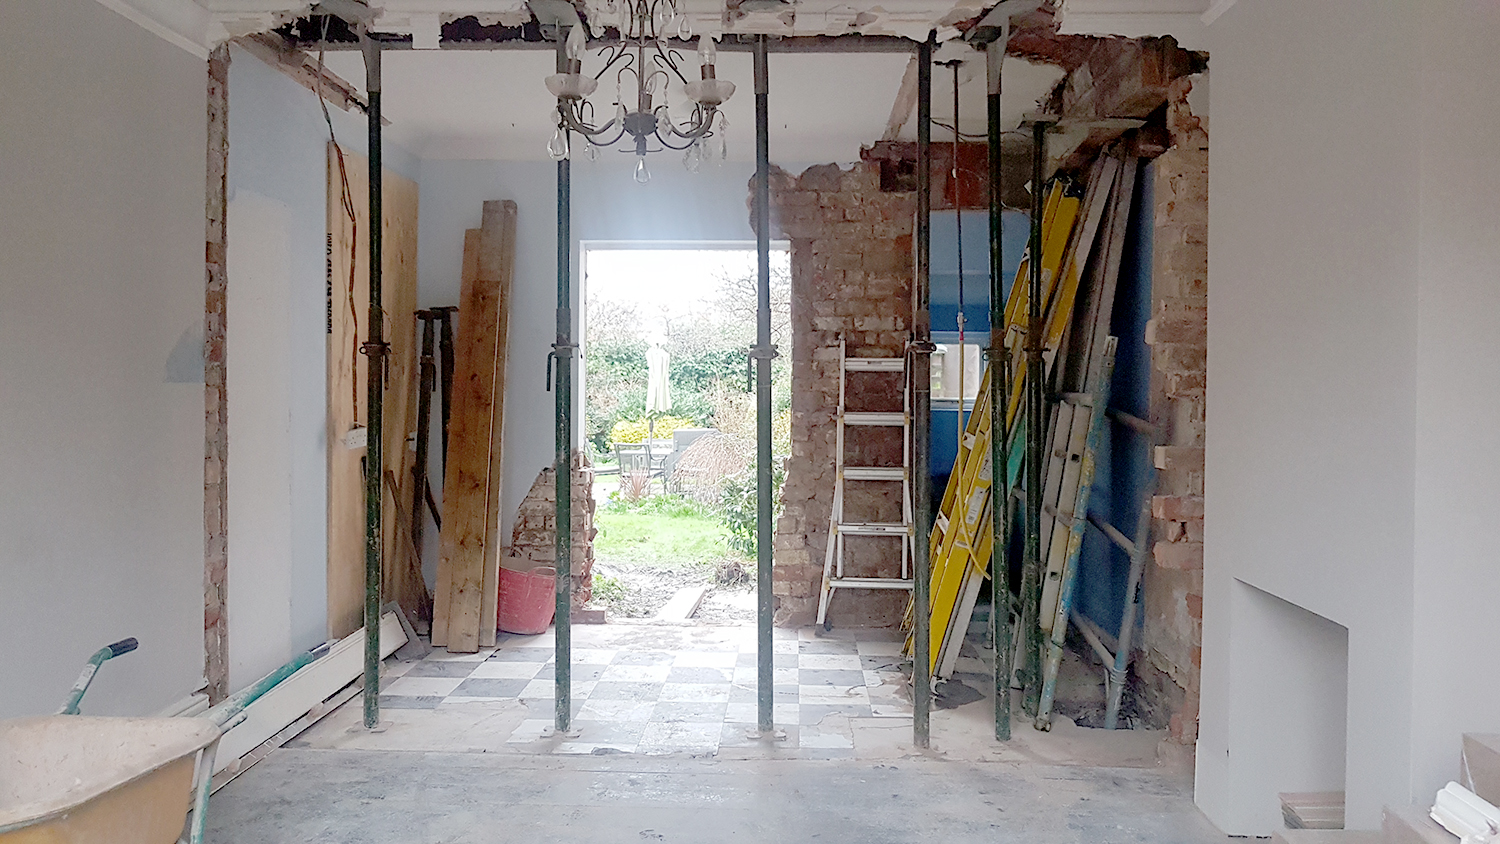
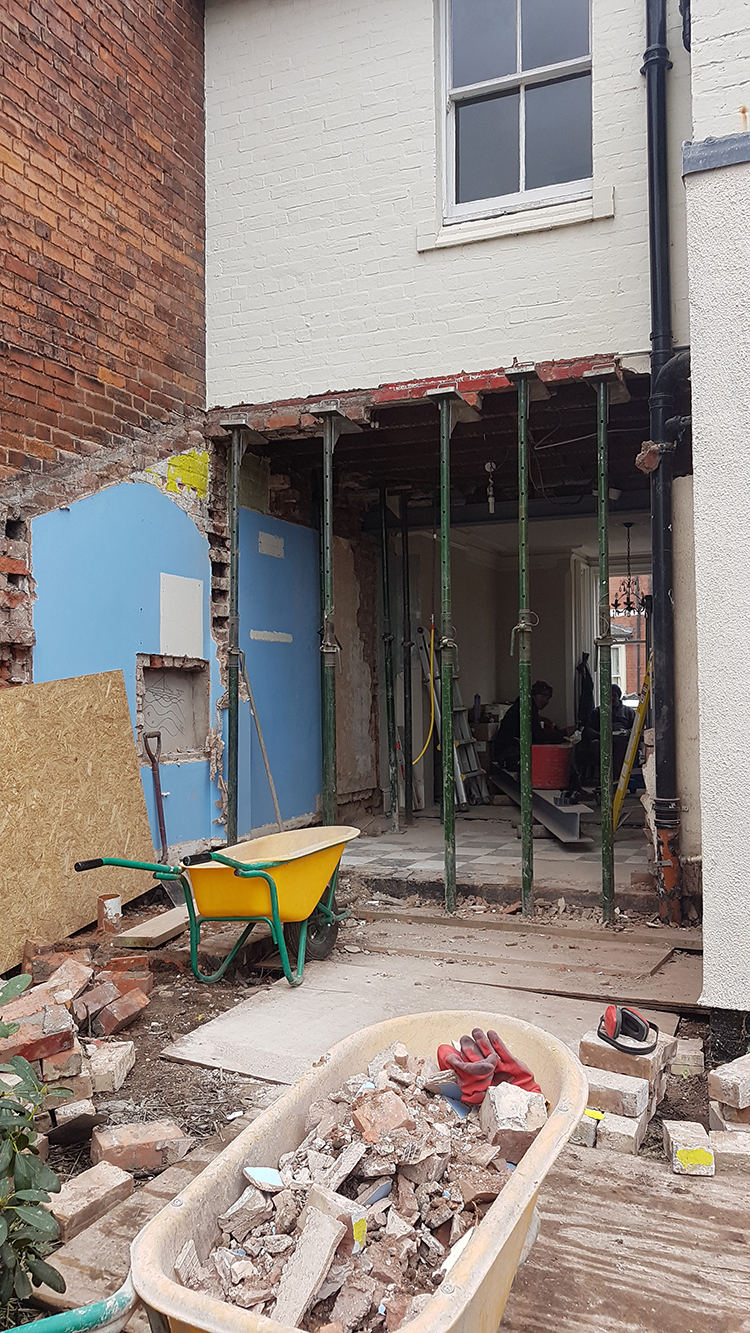
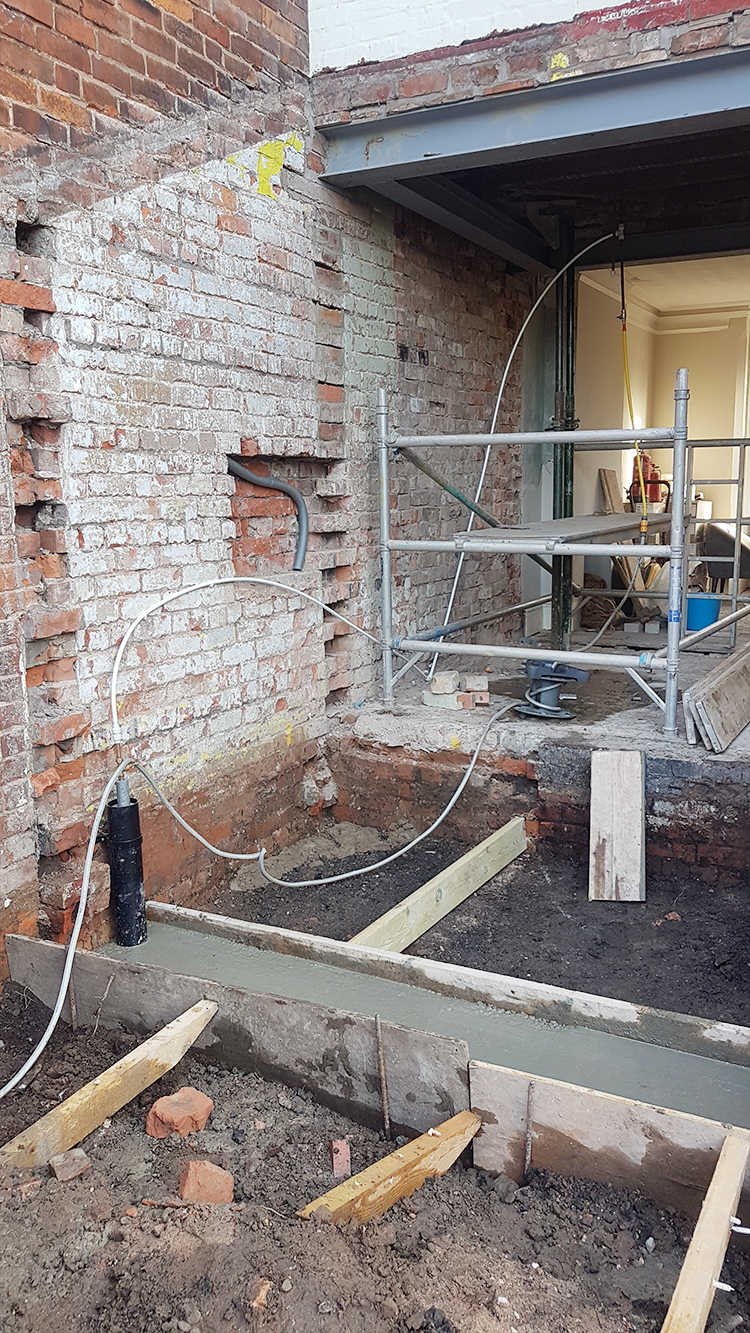
An RSJ was installed where the dining room wall was removed – the first of five steels that were required on this project!
Then another went up on the outside wall…and another went up on the far left wall between those two (which I failed to get a picture of).
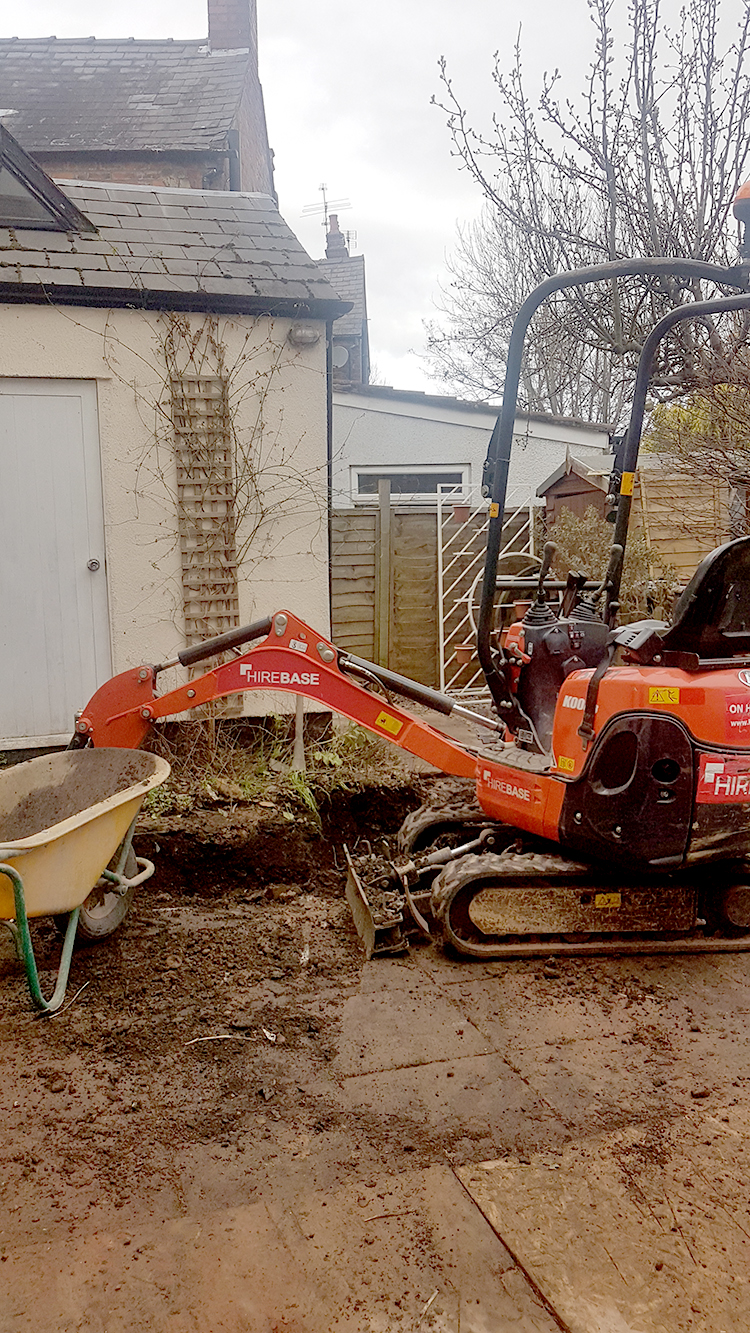
Then the digger arrived…

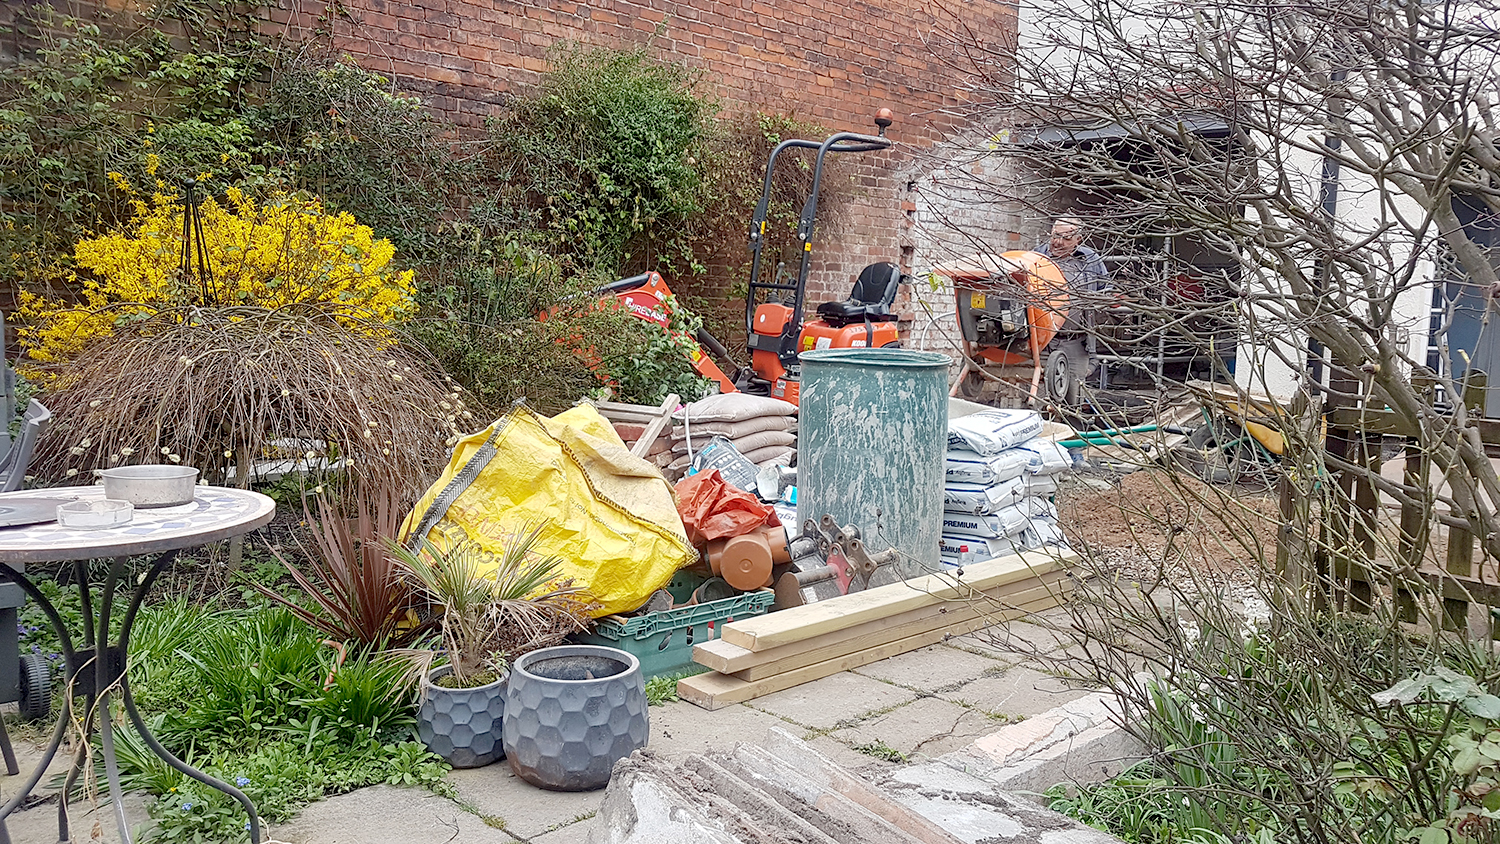
And they started digging huge trenches all around the back of the house to fit all the new plumbing. Essentially, all the waste and water feeds are being relocated and new plumbing needed to be installed for what will be the future bathroom on the other side of the house. They also need to dig out to put the new footings for the extension.
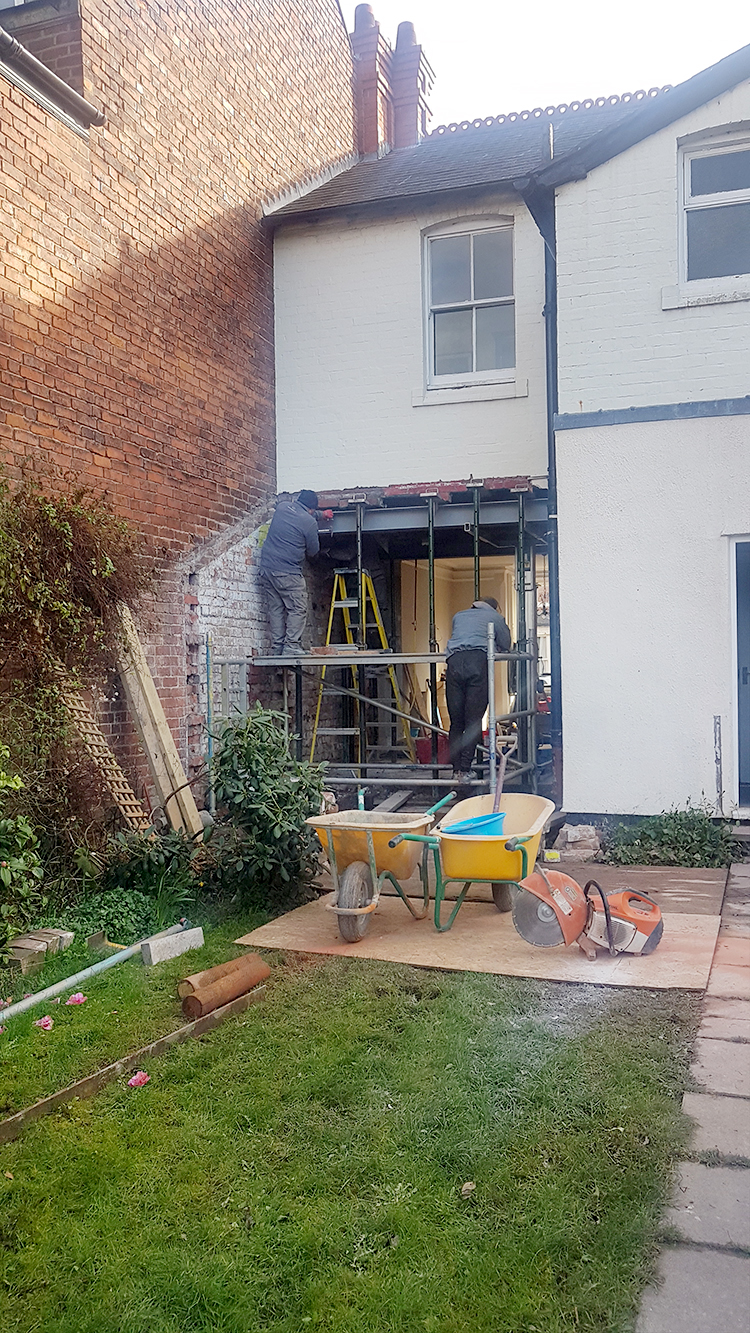
So once this was all done and the plumbing was moved, they started on the new footings for the extension. And that’s where I’m going to leave it for now! On Friday, everything was filled in and a small wall was created and then on Monday, the wall between the utility room and the mudroom was taken down and rebuilt in a new location and on Tuesday, we had a new boiler fitted and our old boiler and immersion tank removed. This week is going to be a bit crazy but we should finally start to see the actual structure taking shape which I’ll share with you soon!
One thing I hadn’t been prepared for was just how quick it’s all going. For those local to me, our builder is John Simmons from Hatton Developments Ltd and he’s been genuinely fantastic to work with so far. He’s absolutely on top of the ball here and every single day he’s been on site for at least a short time overseeing all the progress on the build. His team has been courteous and friendly throughout and I’ve been kept up to date every single day with what’s happening and what’s to expect so I feel super confident in his abilities.
We’ve hit a few snags along the way – pretty much a given considering our home was built in 1889 and nothing is every really straight-forward, the walls and floors are always hiding a myriad of surprises which aren’t revealed until you start opening them up. But John has been great, coming up with good cost-effective solutions and keeping both my architect, Karen Harper of AVA Architects and the structural engineer and building inspection in the loop. I honestly can’t fault the guy, he’s been brilliant.
Of course, things have been dusty and my parquet flooring in the hallway has taken a serious beating with so much dust and dirt and foot traffic. As a result, I’m looking for a decent steam cleaner so if anyone has one they’ve used and loved, let me know! Also, I’m trying to work full time while this is all going on around me each and every weekday from 8 am until 5 pm and so some days can get a bit hectic as I’m trying to project manage around everything else.
But through it all, I’m just keeping my eye on the prize. It’s never fun living through a renovation but it’s certainly not impossible, especially when you can see progress happening every single day. It really does make it that much easier when you know it’s all temporary. I figure 5 or so weeks of chaos is a small price to pay for what we’re going to end up with so it’s all worth it in the end.
I am also sharing almost daily updates over on my Instagram Stories so if you haven’t been following me there, then I’d love for you to join in the fun – just click on Reno Diary and Reno 2 to catch up with the latest in ‘real time’.


I cant believe how far it come, they seem to be doing a fab job. Xxx
They are working so quickly that even as I was writing this, I realised it’s basically now out of date as they’ve gotten so much more done since last week! Ha! It’s great seeing the progress though! xxx
I’m excited (for you) and envious in equal measure! 😉
Aww thank you Sally! I’m very excited too! xxx
Love the pics and the creation of the new space. I’m so excited for you!!! Nothing like a home tailored for your family’s needs :)
Aww thank you! I told Wayne that I feel like we are doing the best thing for this house – the layout will make so much more sense both for us and for whomever might live here in the future :) xx
Absolutely loving watching your Stories at the moment – takes me back to our own kitchen reno which was on a much smaller scale, just a new window and removing a chimney breast before creating a new kitchen, but it was similar for us that we had an existing kitchen on the other side so the chaos was pretty minimal in terms of being able to cook and eat, up until the very last couple of days really when the appliances were moved and installed. So, handy reno tip for anyone wanting to do a kitchen – put it somewhere else so you can keep the old one til the last minute! :-)
I can’t wait for it all to be done for you – it will be a much better use of space. I really can’t believe the previous layout – I mean, who decided that tiny weeny shed at the back for the downstairs loo was a good idea? I guess maybe once upon a time it was a log or coal store or something and then it was incorporated into the house? Either way, the new plans are sensible and wonderful and you can soon forget all about your downstairs loo of doom! x
Hahaha! That’s a good bit of advice! It definitely helps! The funny thing is we probably won’t get to do the bathroom for at least a little bit after the work is done but we can just continue to use the current kitchen as a rather OTT utility space! Two kitchens is probably a bit much though going forward ;)
It was such a dumb layout though, right?! We saw the potential before we even viewed the house so these plans have been in the works for a long time :D
Wee shed downstairs loo made me laugh – yes, that’s it! It was like a shed and it wasn’t original to the house (!?!) so someone built that ON PURPOSE. Who knows why people do what they do! Thankfully, I’m already starting to forget the Loo Shed of Doom was even there at all ;) xx
Yeah – it’s started. Really pleased for you and also for all of us for our vicarious viewing pleasure!
They are making cracking progress.
The shed may have been an outside loo that was added at a later date and then incorporated into the house at a later date to that.
We’re still working through agreeing scope for estimate for our renovations, so hopefully we can get started in a couple of months too!
They are indeed making good progress! It’s crazy how fast they are moving ;) So, on the opposite side of the house is where the original outdoor loo would have been – it’s a big solid structure and we use it for storage :D You can see it in this picture (it’s even got a little roof light):
https://www.swoonworthy.co.uk/wp-content/uploads/2018/06/IMG_8211-1.jpg
The ‘shed loo’ (haha) was a much later addition so it’s just bizarre why they built it like that, very very odd! So glad it’s gone now ;) Best of luck with your renovations – the waiting part is the hardest! xx