The following is a paid advertising feature for Desenio.
I created my first gallery wall back in 2013. Eager to just fill up the entire area but with little clue to what I was doing, the end result was sadly, a bit disappointing. I tried to stick to a colour scheme but it felt disjointed, messy and not at all the stylish look I had envisioned. It took me so long to put together, however, that I left it up there for a while until I grew so despondent of my creation that I eventually took the whole thing down. I decided at that point, it was needless to even try again and opting for a few larger pieces instead.
In the years since then (despite my entirely incorrect prediction that they would eventually be considered hopelessly out of style), gallery walls are still very much a thing. Even with a lot more experience now, I still find them challenging to pull together easily despite the fact that they are an excellent way of creating a strong focal point on a large expanse of a blank wall. I’d been playing with the idea of including one in my guest bedroom when Desenio got in touch with the invitation to work with them again.
I’ve always thought Desenio had an incredible selection of on-trend prints at incredibly reasonable prices. I worked with them long ago when I updated my old bedroom and have continued to purchase their products over the years, finding the quality and sheer choice of prints outstanding so it was a no-brainer for me to collaborate with them for this post. Not only that but Desenio have allowed me to share an incredibly generous discount code, just in time for the Black Friday sales!
Exclusive access to Desenio’s Black Weekend offer!
Use my VIP-code “SWOON40” and you get both early access AND a better offer – an incredible 40% off posters!
The code is valid between 26th and 28th of November (not including frames nor handpicked/personalized posters).
Now, I’m forever looking for short cuts in my styling and taking some of the work out of pulling a room or vignette together and Desenio’s website makes it SO easy to create a gallery wall. I wanted to share my steps of creating one with you and assure you that they take so much guesswork out of pulling a gallery wall together, I was able to create this gallery wall and place my order in less than an hour.
Step 1: Gather Inspiration from Desenio’s Picture Gallery
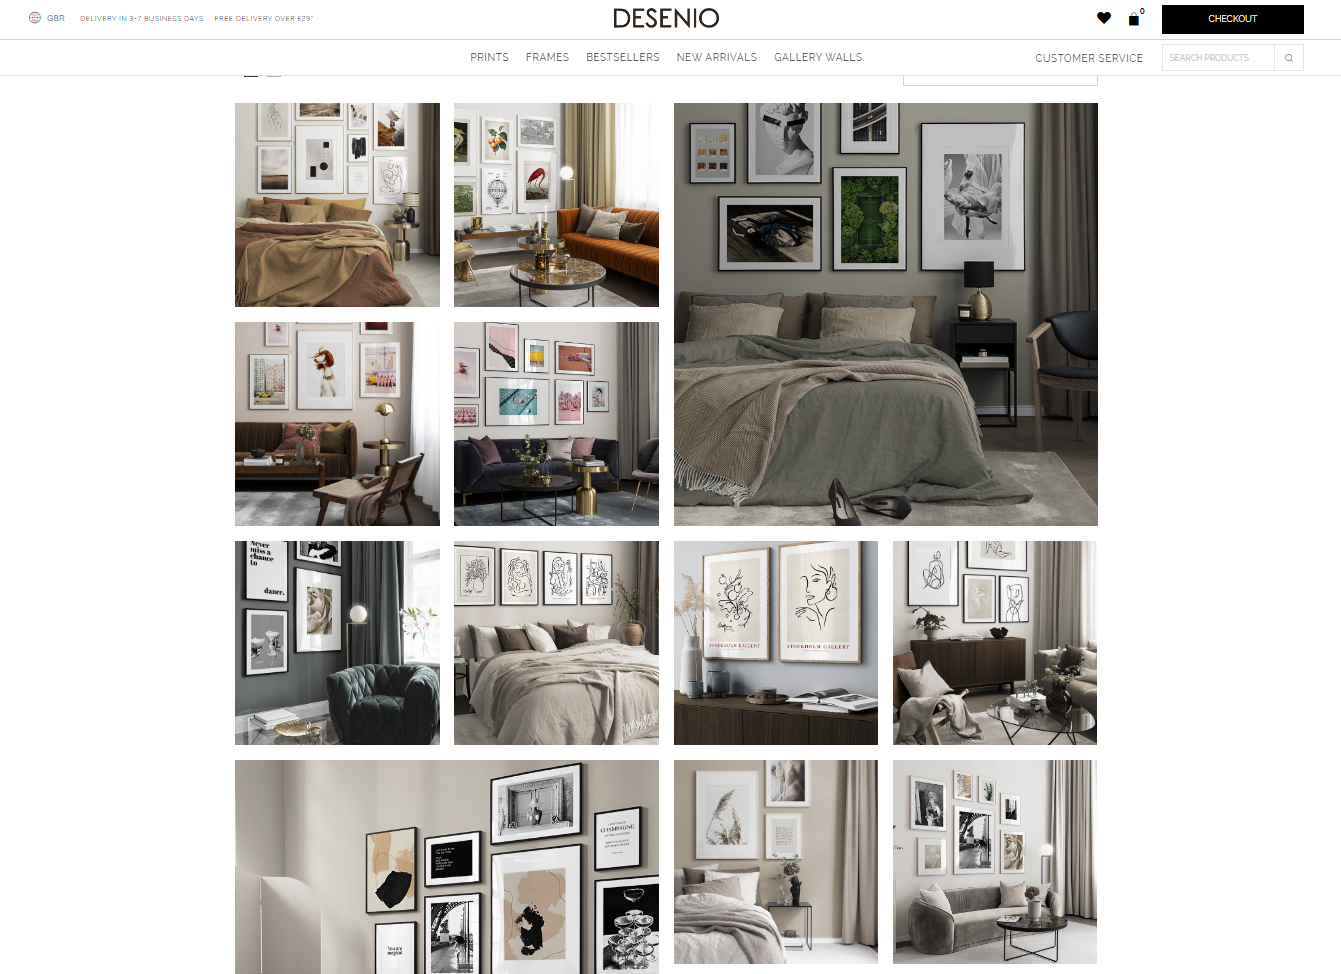
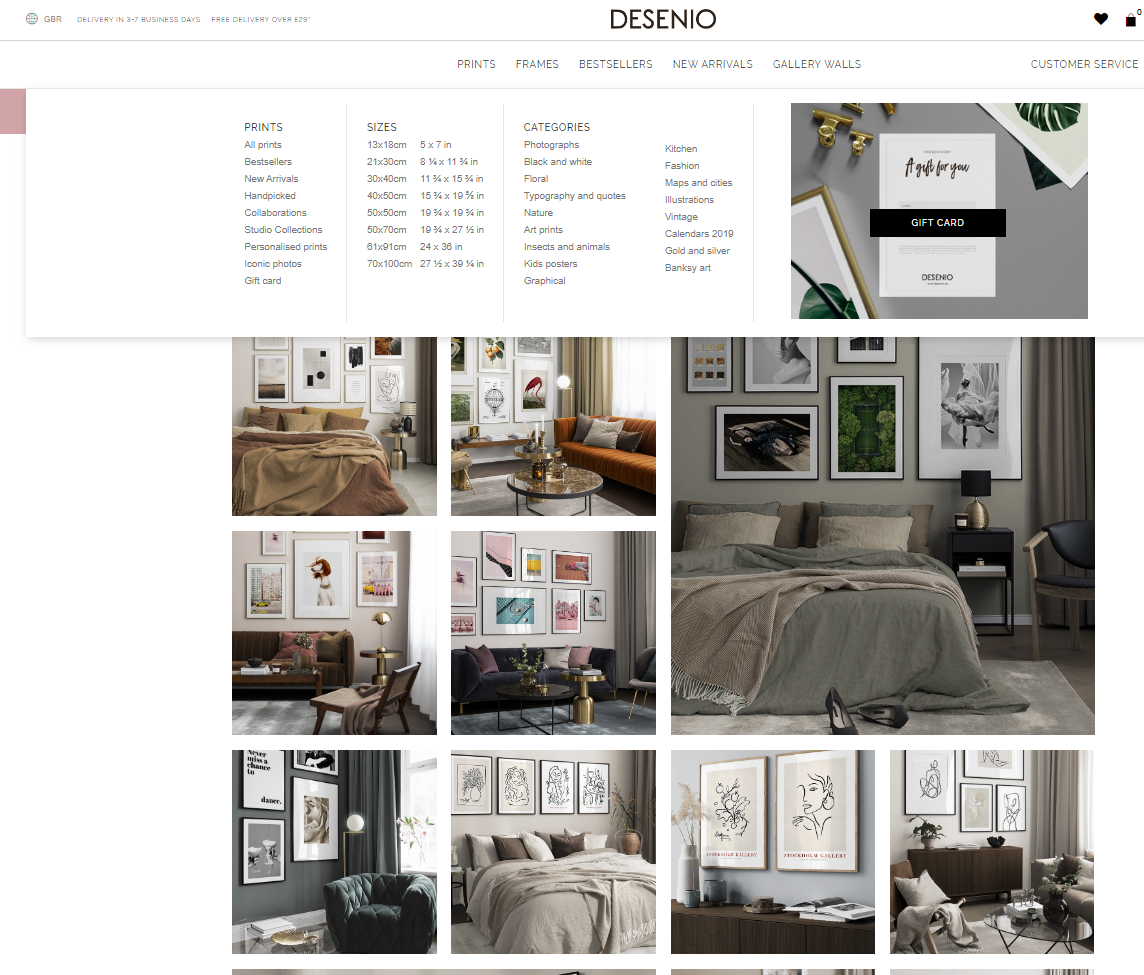
The first thing you want to do when creating your gallery is to decide what look you are going for. Do you want something fun and bold? Something that calms you? Invigorates? Surprises? Resist the urge to plunge right into the shopping pages and take a look at the ‘Gallery Wall Inspiration’ first.
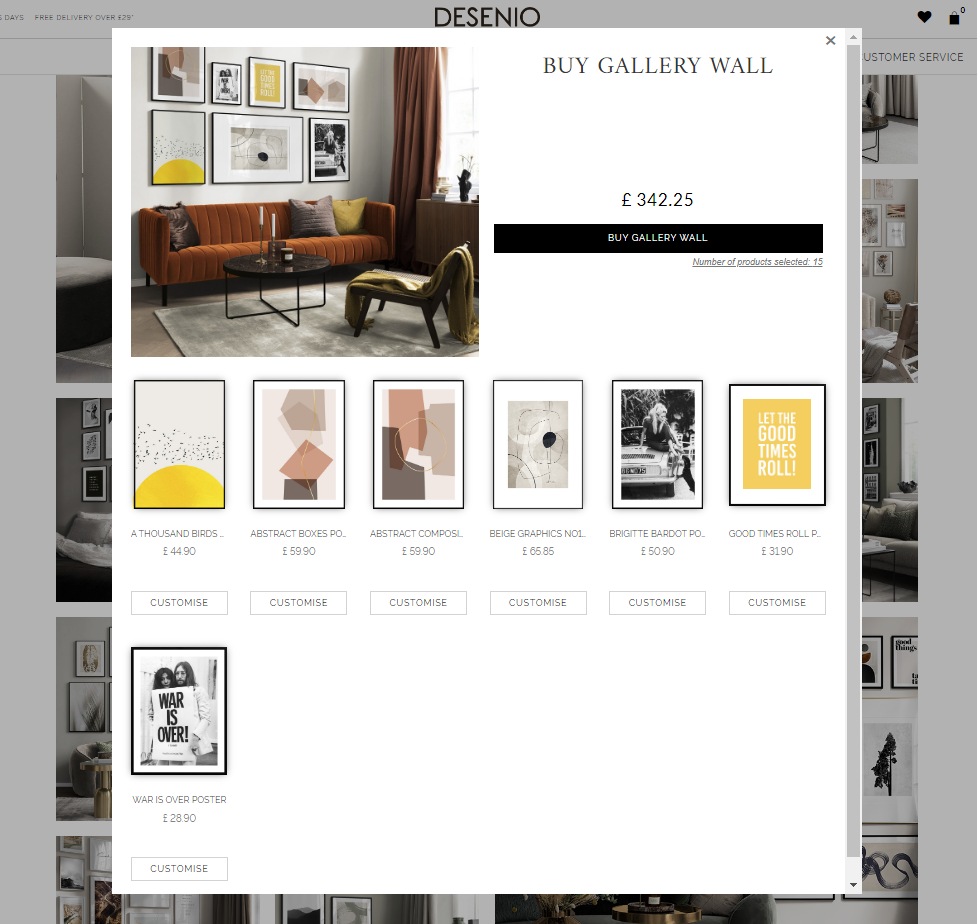
Desenio’s stylists are masters at creating coordinated looks and you might just find one that’s perfect for you. They even have an option to purchase an entire gallery wall just as you see it in their inspiration images.
However, if you’re looking to create something a little unique for you, then perusing these images will give you a good idea of what kind of prints they have and what kind of look you’d ultimately like.
Step 2: Measure the Wall Space You Have
The next step is to measure out the wall you would like to create your gallery wall. This will give you a good idea of how many prints and frames you’ll require when you move on to the next step.
Step 3: Choose a Gallery Layout to Fit Your Size
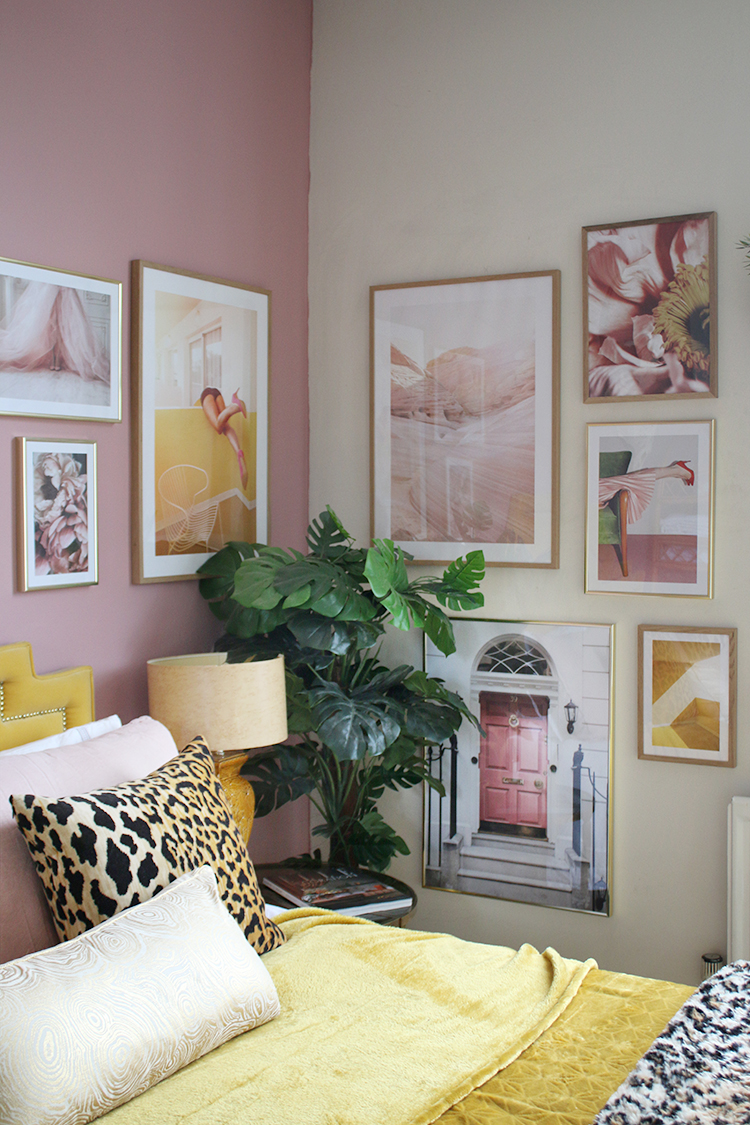
Now on my own gallery for the guest bedroom, I decided I was going to split the layout between two walls and I exercised a little bit of poetic license, as I had a bed on one wall and more space on the other. So while mine isn’t an exact match for the gallery layout I personally chose, this was absolutely where I started in my planning!
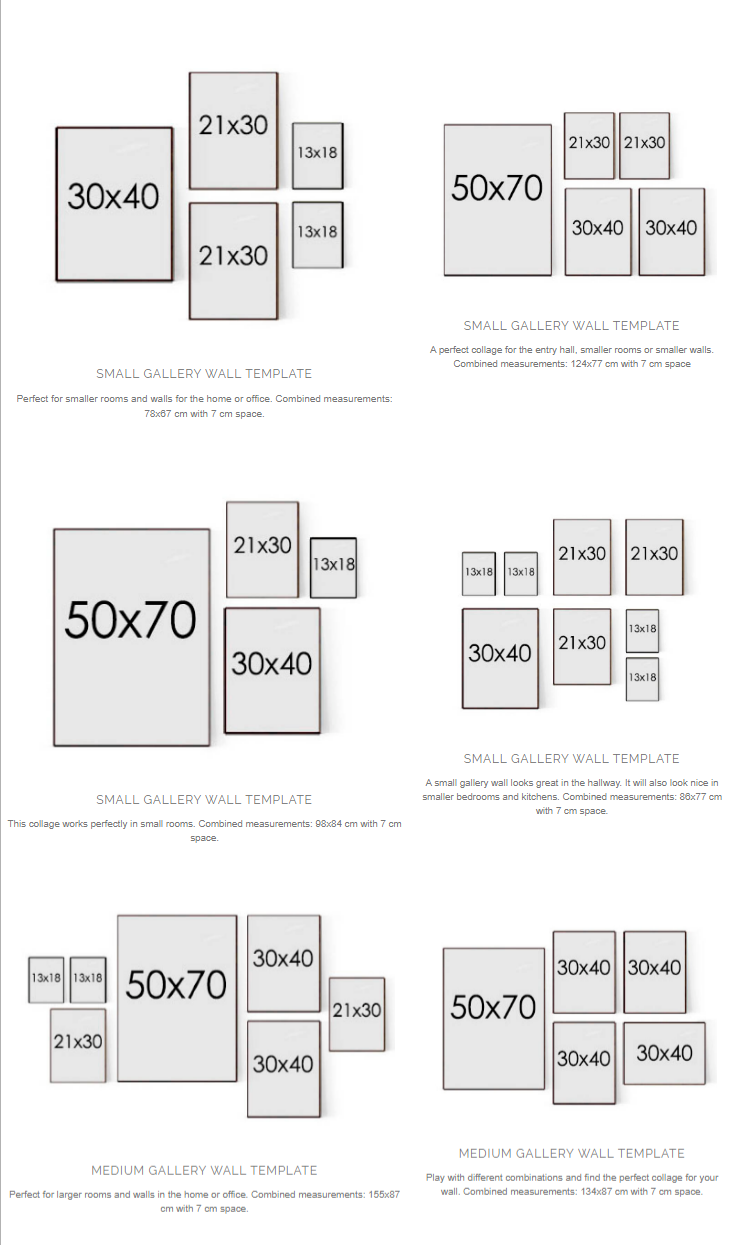
If you scroll down past the gallery wall inspiration on that page, you’ll see a whole host of different layout options depending on how much space you have to play with. From large walls to medium spaces to smaller ones, Desenio have created layout options for pretty much any space.
Choose a gallery layout from the options provided and make a note of how many prints of each size and format you’ll be needing to create your gallery.
Step 4: Filter Results for Coordinated Colour Schemes
Now it’s finally time to shop! I’d start off with your largest, biggest impact print in the gallery layout you’ve chosen as this will be the anchor for your entire scheme. So with your colour scheme in mind, go to the menu and choose to filter your results by the largest size you have in your gallery.
For me, this was the 50x70cm print. Once I had chosen the size, I clicked on ‘filter’ which then allowed me to choose the style, colour and format (either landscape or portrait).
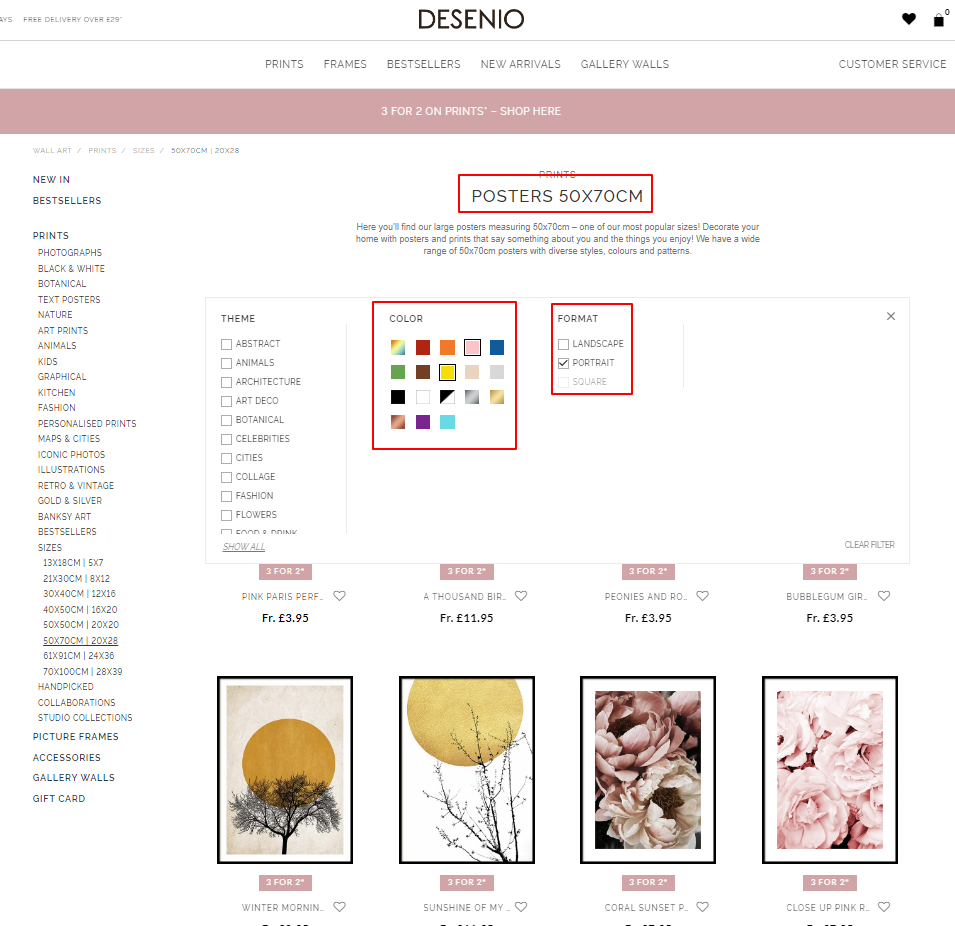
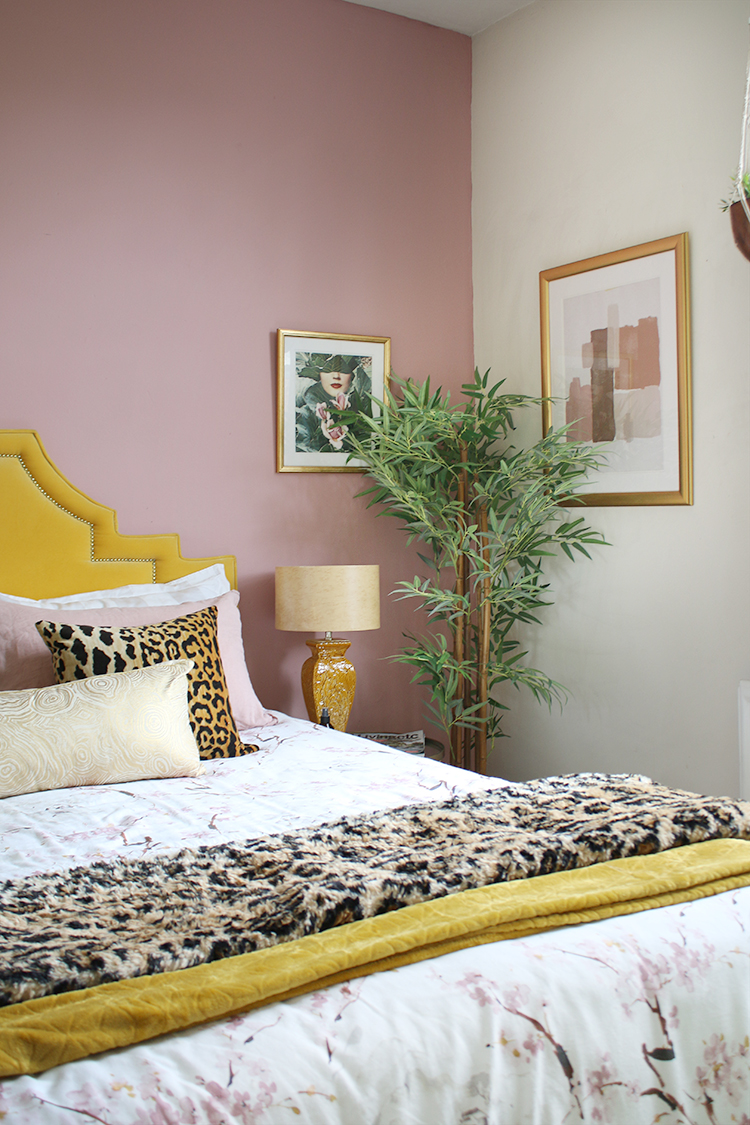
This really allows you to only choose from the pieces that work within that layout and narrows down your choices to those within your colour scheme. As my colour palette in the guest bedroom is yellow and pink, I was only having to then choose from those specific pieces that worked within that palette.
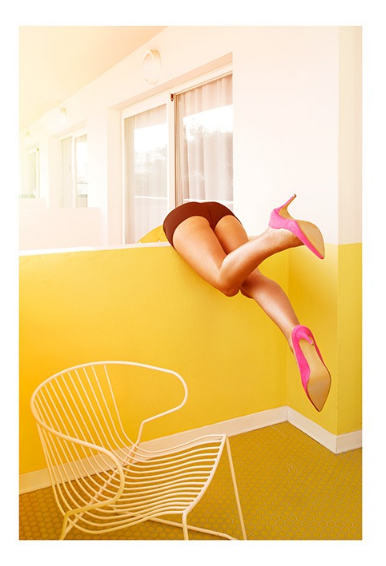
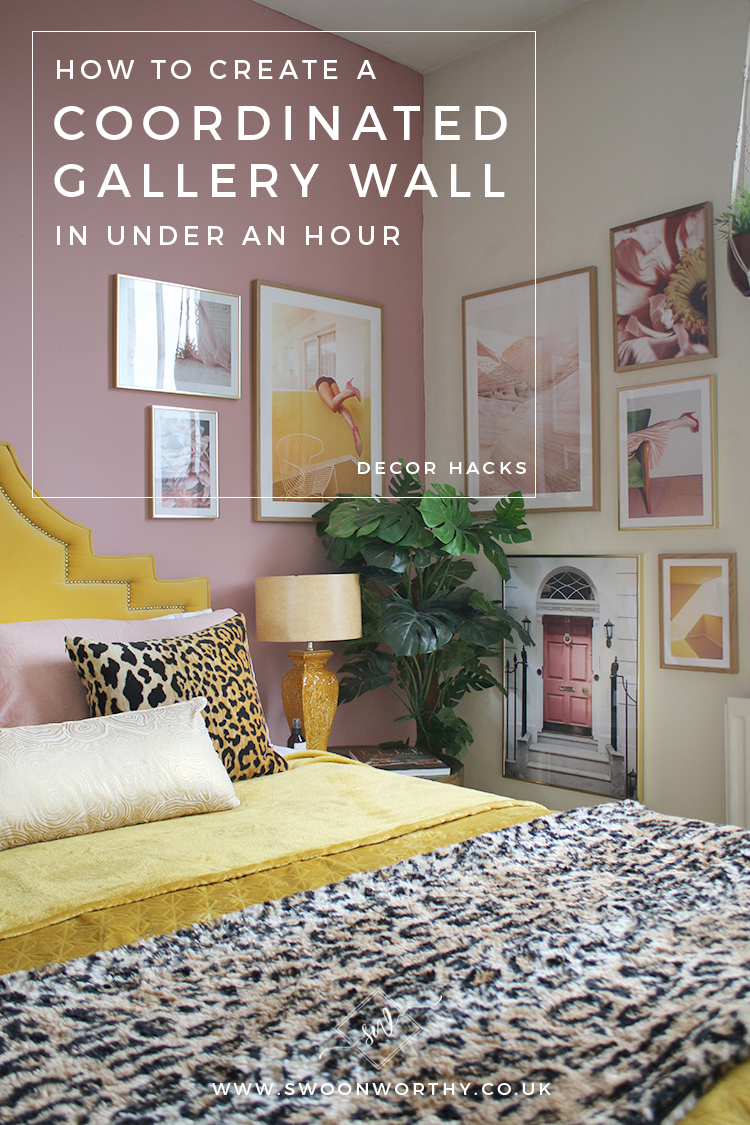
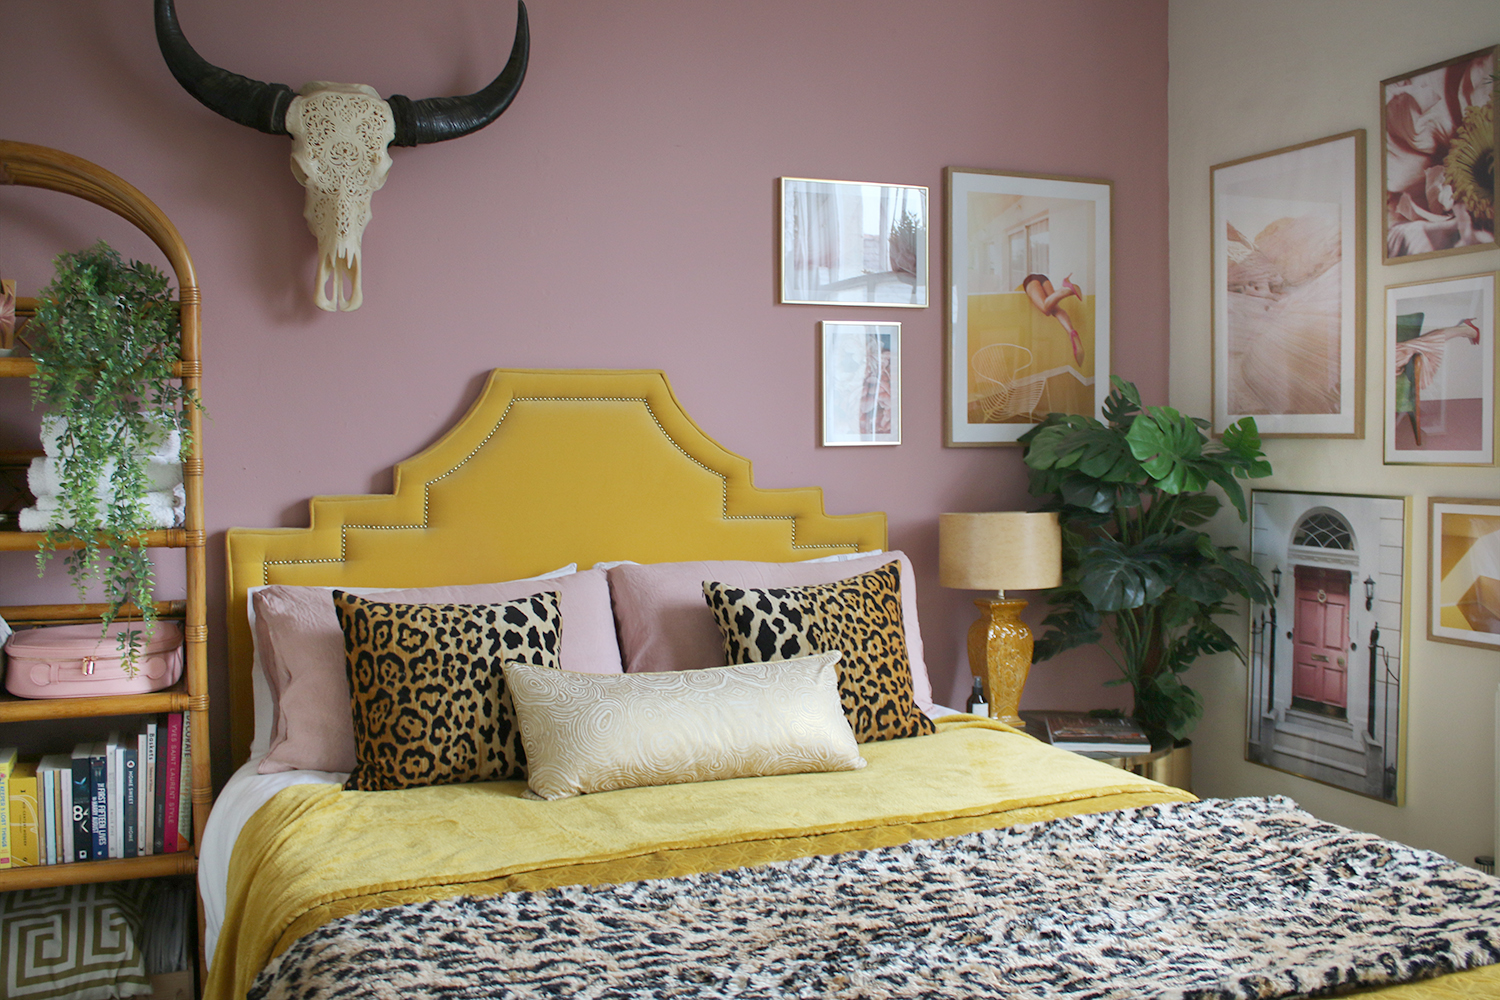
I fell in love with the print of the bold yellow wall with a woman leaning over a balcony and so Legs Over became the focal point of my gallery. There are so many different styles to choose from so once you’ve narrowed your choices in this way, then listen to your heart! Which pulls you in and delights you? Art is so subjective so be sure to choose your largest prints based on how you feel about them rather than anything else.
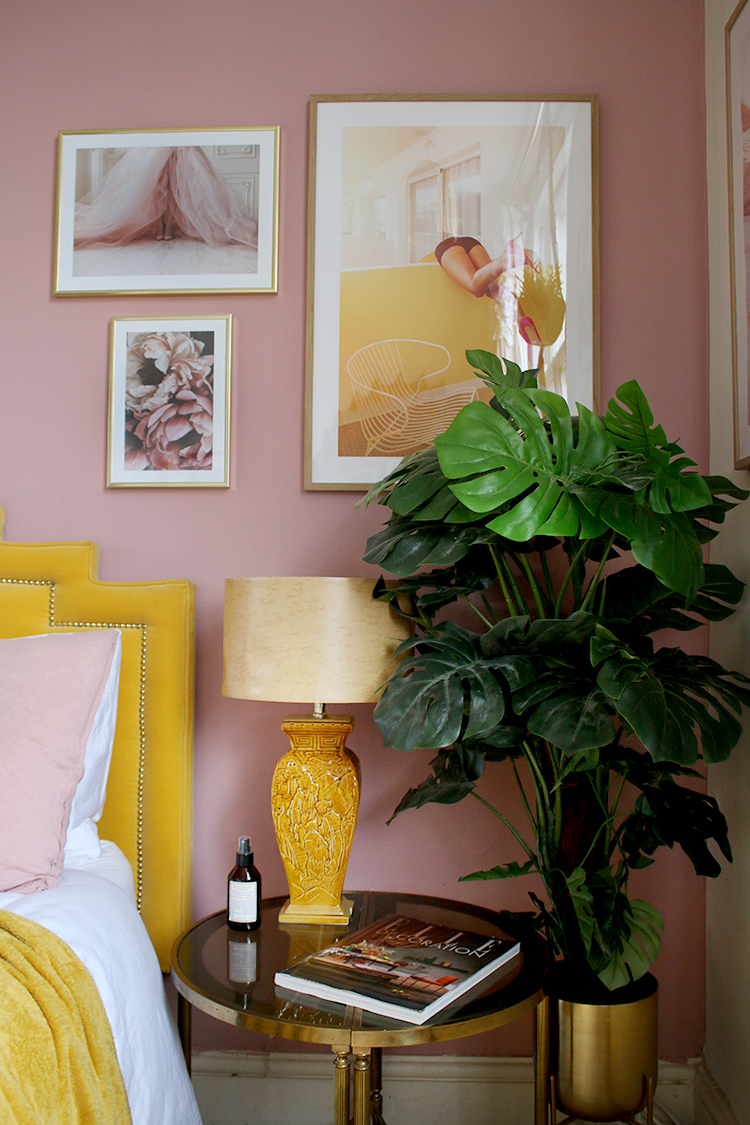
Once you’ve chosen your largest pieces, lookout for ways to coordinate this with each of your other smaller pieces. Filter in exactly the same way for each piece in your layout and look for some themes or commonalities to pull the scheme together. In mine, I chose three pieces all with ‘legs’ and two pieces with florals as well as pieces that had an architectural abstract theme, each piece coordinating with at least one other in the gallery. Above, along with Legs Over is Pink Dress and Coral Sunset.
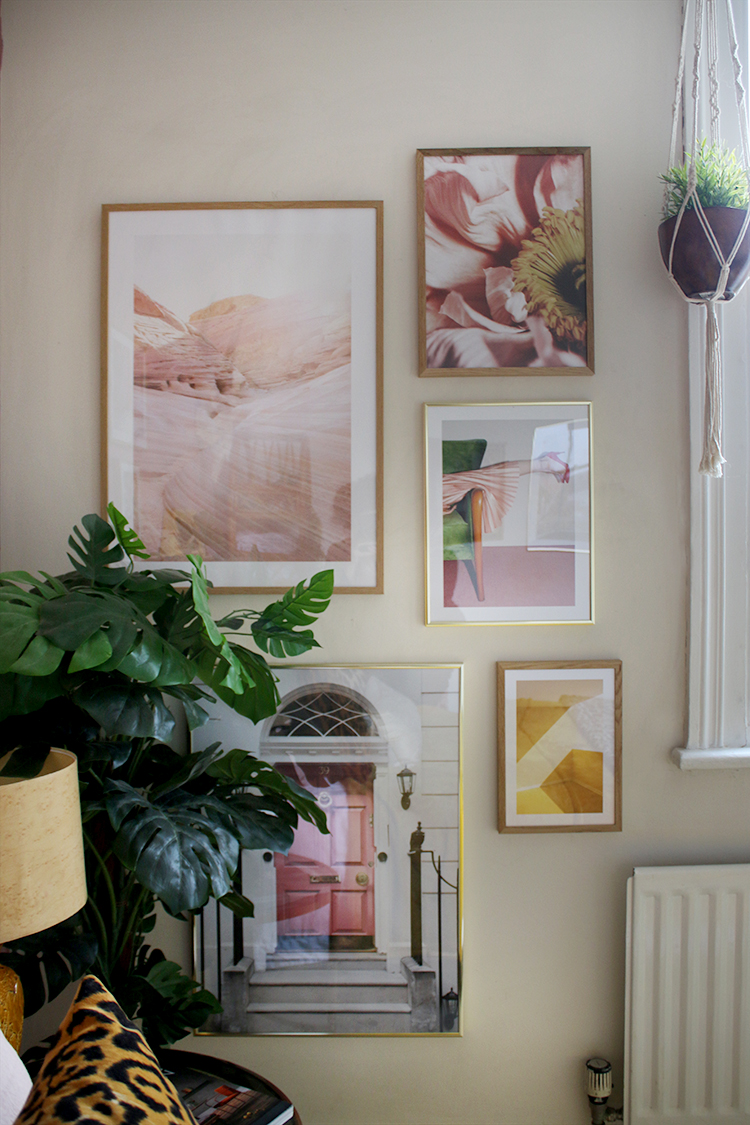
On the other wall, I chose Open Your Mind, Close Up Poppy, The Nap, Yellow Balcony and London Pink Door. I love the fact that they are all different in terms of style but all have some relation to one another which was made so much easier to do with all the filter options you’re provided!
Bonus: Create a Mood Board
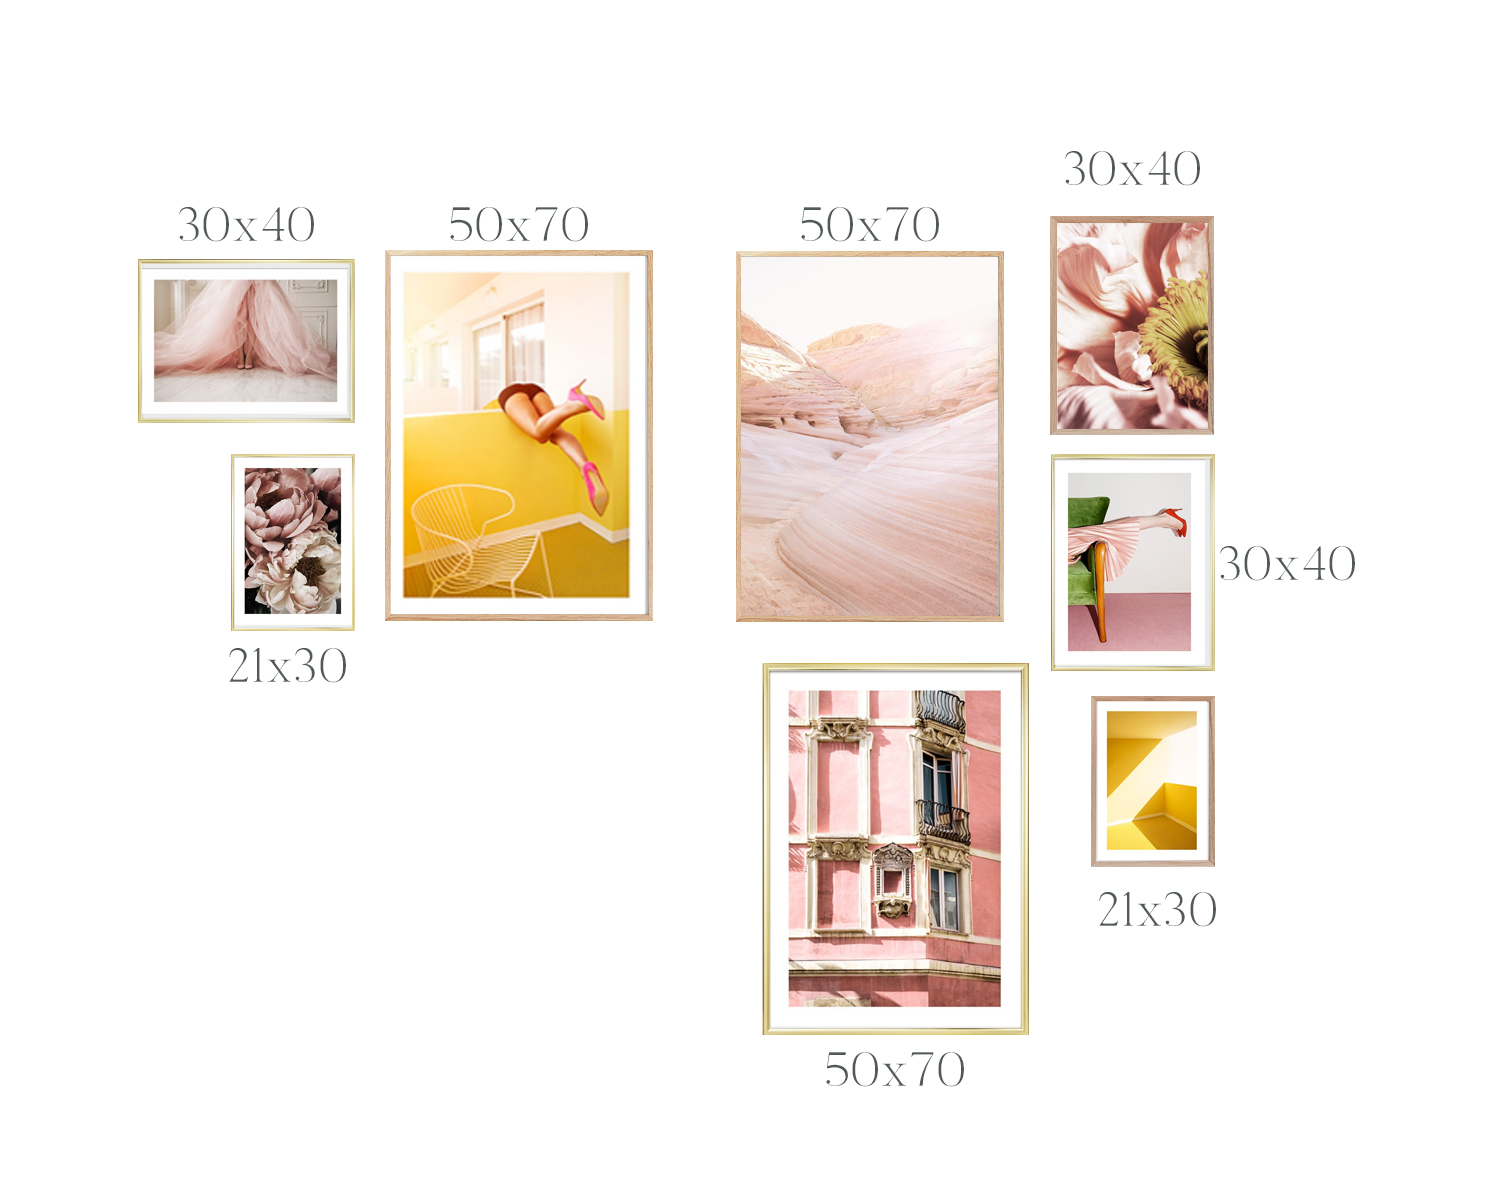
Now, this last step isn’t crucial but it did help me to visualise what the final look would be in my own gallery and to make sure the prints I chose really worked nicely together. I took a screenshot of the gallery wall layout I had chosen and then took screenshots of each of the prints I liked. In Photoshop, the screenshot of the layout was my first layer and then I layered each print on top, resizing it to fit the layout on the page.
It was then really easy to decide if something wasn’t quite the right fit and go back to my filtered results to find something else that might work better. If you don’t have Photoshop, you could also try doing this in Word, Powerpoint or Canva. It doesn’t have to be perfect but it will help to ensure everything coordinates perfectly.
For the eagle eyed among you, yes, I decided to swap out the pink building print you see in my moodboard for a different one as I decided at the last minute that I preferred that one in my living room makeover! I ended up purchasing (with my own money) a few extra prints and so the London door print ended up on the gallery wall instead!
I couldn’t be more pleased with how my gallery wall turned out and I’m actually considering now taking it up to the ceiling using the exact steps I’ve shared here with you today.
If you’re ready to create your own gallery wall, do take advantage of that amazing discount code above and let me know if you’re ready to try creating your own gallery wall in the comments below.
Disclaimer: This post is a paid promotion by Desenio and I received my prints free in exchange for my review. I only work with brands that I love and think that you’ll love too! Thanks for supporting the brands that support Swoon Worthy.


It looks fab Kimberly! I love your choice of prints, and I also love how you’ve created the gallery in the corner, rather than just on one wall!! xx
Congratulations on your wins! (the link didn’t work) I am not at all surprised – your writing style is fresh and always friendly and you even allow me to crazy love Quito from a distance!
Your taste is always spot on and I love the colors you use – mine are somewhat similar. Your kitchen is die for!
Kisses to Quito!
Susan
The gallery wall looks absolutely stunning m’lady! Love!