So we’ll start with a confession, shall we? Do I make my bed up every single day? Hell no. However, do I love when I spend those extra 2 minutes doing it? Absolutely. There’s just something about getting into a nicely made up bed that feels slightly luxurious. It’s like when you are staying in a hotel and come back to your room later in the day and it’s all lovely and fresh and made up again. It’s just so nice climbing into that at night rather than having to re-fluff pillows and craw into a messy, dishevelled bed.
The other reason I never regret it is because the bed takes up so much visual and physical space in a bedroom. It’s pretty much the first thing you’ll see and so if you manage to make your bed look nice, you’re already like 1/3 of the way to a nice, tidy space.
Pin this for later!
But there are little tricks to making your bed look especially inviting and I figured I’d share some of my tips today for getting that ‘a stylist’s been in here’ kind of vibe for your own bedroom. It really doesn’t take too much once you know the key elements you’ll need but I thought I’d share how I tend to make mine to give you some advice when creating your own perfectly styled bed.
This post may contain some affiliate links which means if you purchase an item via my link, I may earn a small commission as a thank you from the brand for the referral. You will never pay more for clicking on these links.
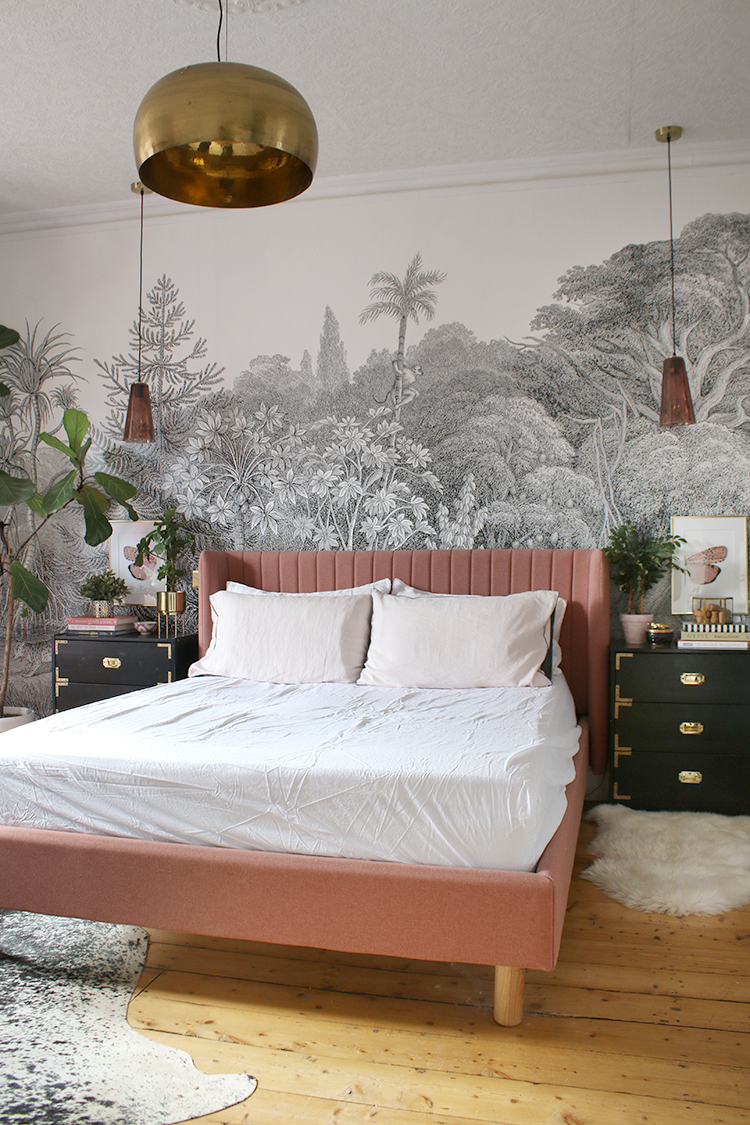
Step 1: Your Foundations Count
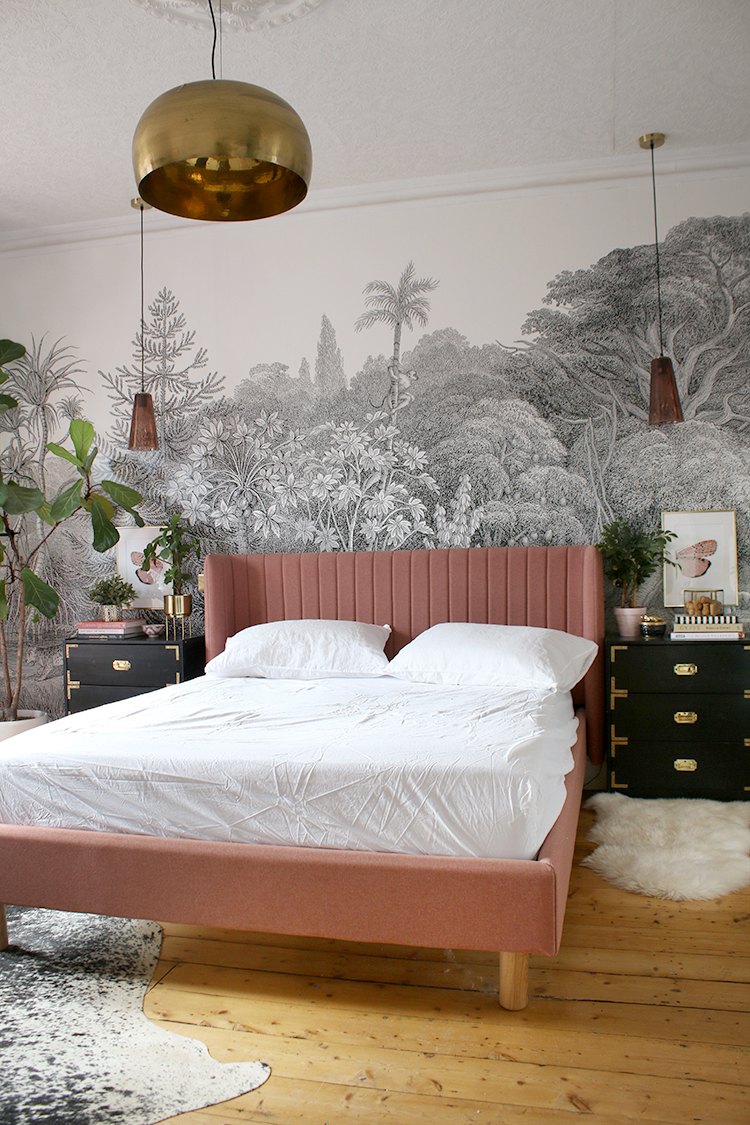
Nope, I didn’t iron the fitted sheet and yes its slightly messy and I could have tucked it in a bit better along the sides but my mattress weighs like a million pounds so lifting it to get a perfect tuck is just a bit difficult. Also, life is just too short and anyway, this is more about styling. I mean, I’m not your mum, kay? #sorrynotsorry ;)
Now, as you probably know, I’m American and I have gotten so used to sleeping with a fitted sheet and a top sheet that I struggle to get comfy without that top sheet on me. In fact, I’ve actually gotten Wayne so used to it now too that he doesn’t like not having it either. But that’s a personal preference. I’m fully aware that in the UK, a lot of people are perfectly happy with just a fitted sheet and a duvet. For me, however, I really appreciate that extra layer. I’ve styled my bed today without one for simplicity but if you’re like me and like a top sheet, then go for it.
Now whether you go for a fitted and a flat sheet or no flat sheet at all, your sheet set and your duvet cover set should be the best quality you can afford. It’s something you’ll never ever regret parting your cash with as it’s something your skin comes into contact with every single day and night so if you can, avoid scratchy cheap fabrics. I’m a big fan of natural fabrics and a recent complete convert to linen but I’ve always appreciated good quality, high-thread-count and/or organic cotton as well. Both just get softer with repeat washings and feel so nice against your bare skin.
Of course, a comfy mattress and good quality bed are also incredibly important for support and sound sleep. So again, you’ll want to make sure you purchase the best that you can afford – it’s just not worth scrimping on. If you’re curious, you can read more about my (ridiculously comfy and luxurious) mattress here and my beautiful pink bed is from Made which you can read about here.
Step 2: Choose Your Duvet Cover According to Your Surroundings
The style of your duvet cover (or duvet cover set) will obviously vary depending on your personal style. For me, I do have some patterned sets but for the most part, I like something a bit more plain that I can dress up or change the look of simply by swapping out my cushions or throws. I used to only use pure white sets in years past but lately, I’ve been enjoying soft pinks and neutral shades too.
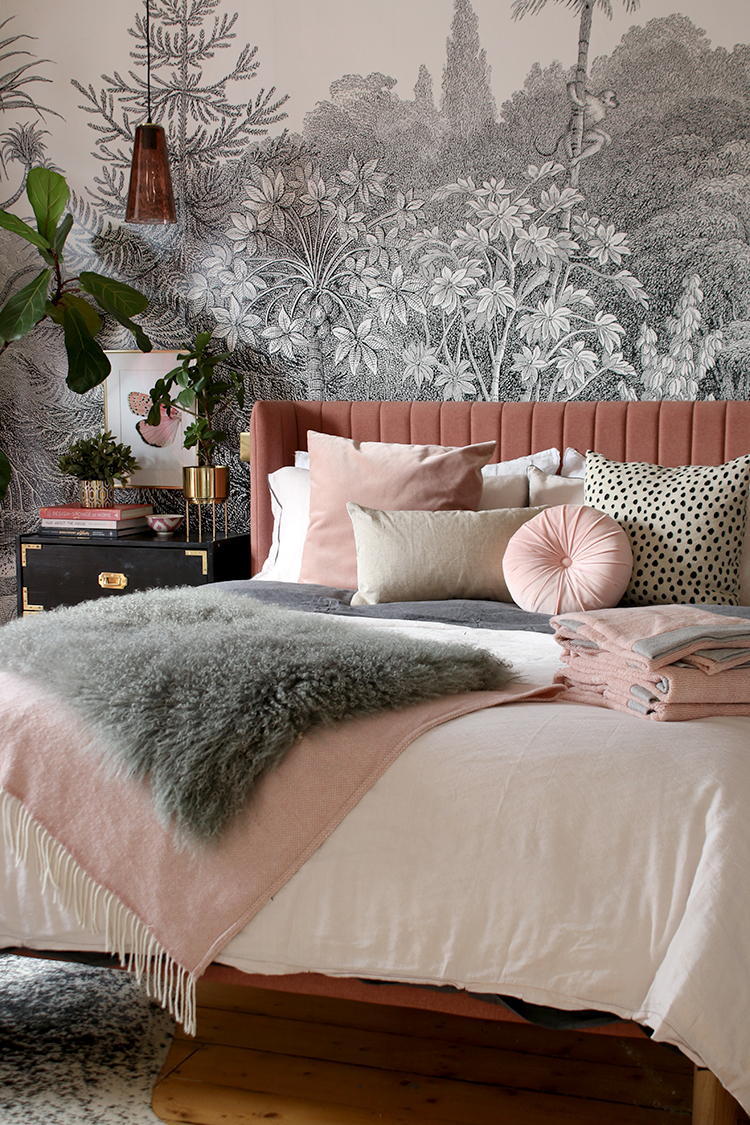
Regardless of what you prefer, look for colours and patterns that blend in with the rest of your space and that work within your own personal style. For my bed, I chose my bedding from Made’s new conscious range – this is the Elija Bamboo Linen duvet set in the plaster pink and grey colourway which are eco-friendly as well as being incredibly soft. The soft pink and deep grey pick up the colours of my wall mural and bed and add a bit of that relaxed glamour that I adore.
Step 3: The Pillow Prop
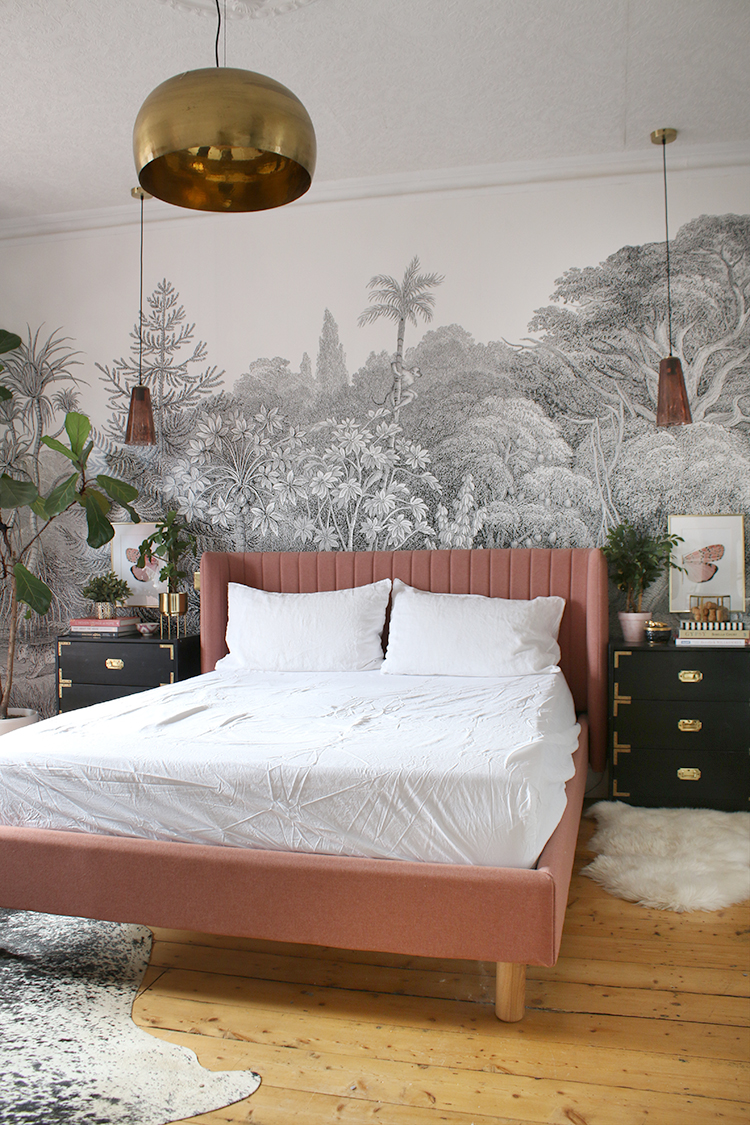
Give your pillows a good shake to fluff them up (squashed pillows just look a little sad!) and prop them up resting against your headboard. I tend to use 4 pillows – 2 which match the sheets and 2 which match the duvet for a nice mix.
Sometimes, if the set comes with housewife pillowcases (the ones with the fabric border all around it), then I’ll place these to the back with my ‘sleeping’ pillows at the front, otherwise, I tend to like to layer the pillows that match the sheets at the back and the ones that match the duvet at the front. Play around to see what looks best – there’s really no wrong way!
If you prefer a more contemporary look, then instead of propping up the pillows, you can fluff them and place one on top of the other flat on the bed. I just prefer this look as I feel they add height to the display and make for a nice ‘background’ for your cushions!
Step 4: The Duvet
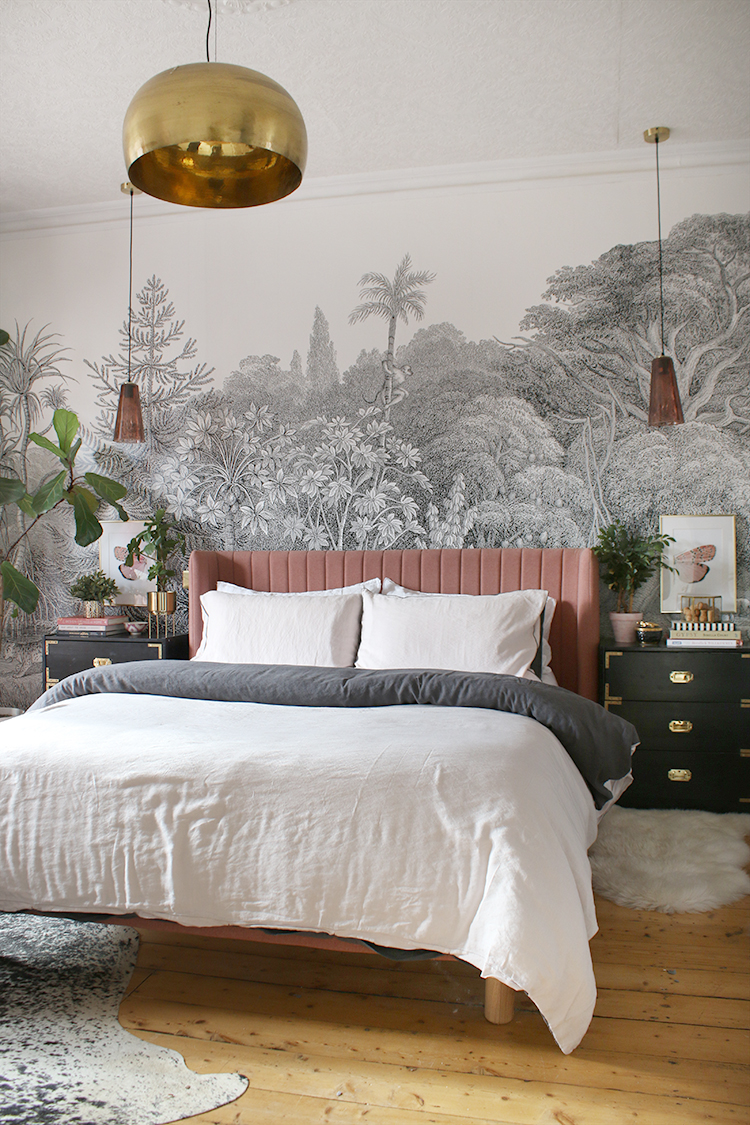
A lovely fluffy duvet is just heaven so that’s your next step. Because the duvet set I’m using is reversible (plaster pink on one side and dark grey on the other), I really wanted to show that off on the bed. To do this, I simply folded down the top of the duvet just to sit in front of the propped up pillows, allowing the dark colour to show.
But even if you’re duvet isn’t reversible, you can still use this trick to create a comfy invitation to climb in (kind of like that ‘turn down service’ in fancy hotels!). If you have used a flat sheet with your duvet, then this can be folded down as well so that both layers are showing for a nice added touch of layering.
Step 5: Throw Cushions
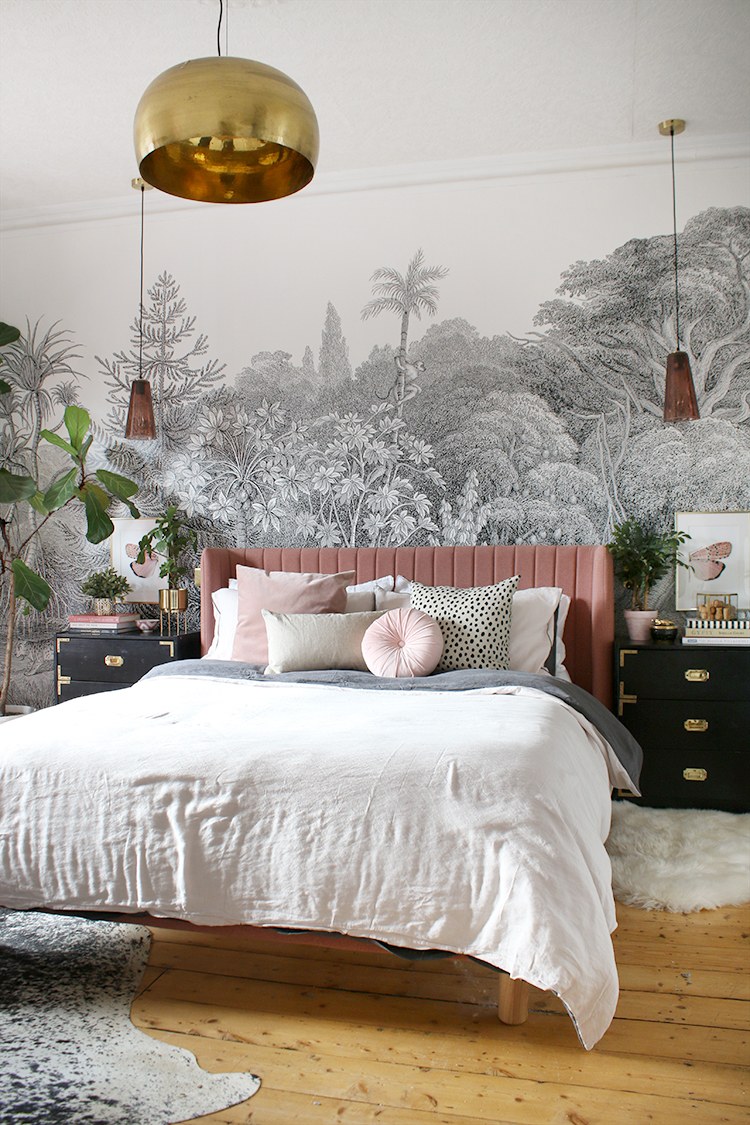
Ahh my favourite step! What I normally do is look through my collection (yes, I have a lot of cushions) that work with the colours and textures of the duvet cover and the bedroom. I try to have a nice mix here too – square, bolster and round cushions mixed together create a lovely tension but how many you would like to have is entirely up to you!
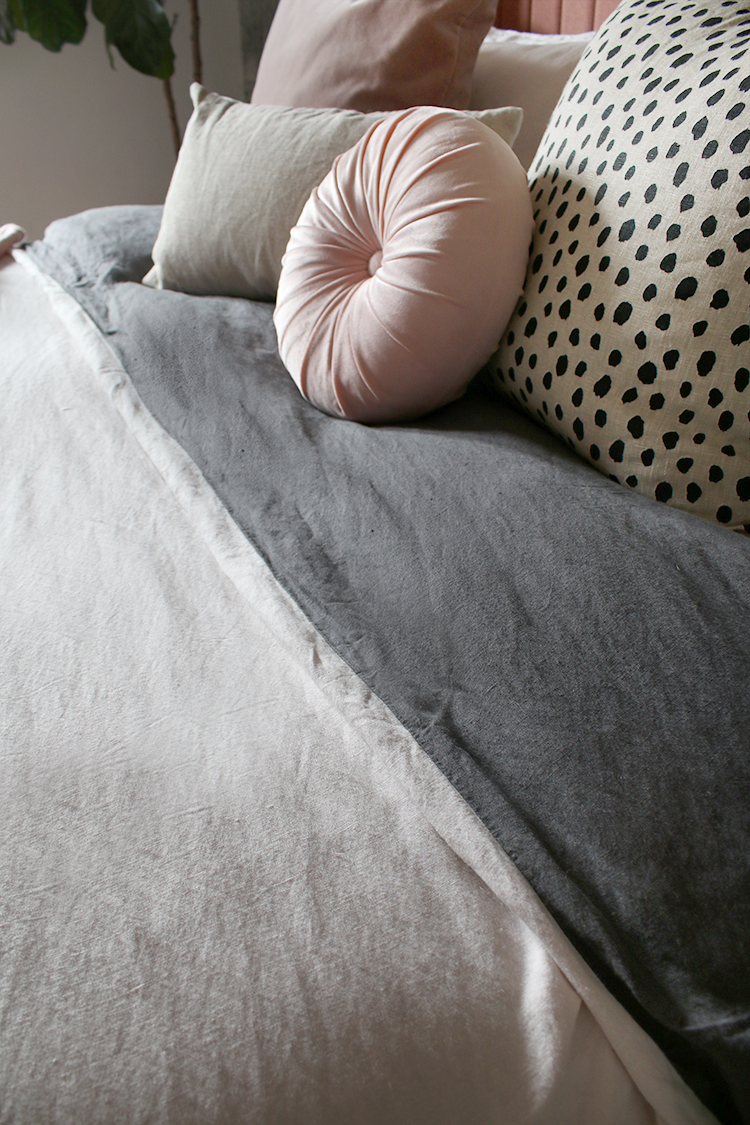
In my example, I’ve used four – 2 square pillows, 1 rectangular and 1 round. I also like to mix up fabrics, throwing a pattern into the mix if you are using plain bedding just to give the whole scheme a bit of a pop. As the duvet is a really pale pink, I decided to use two pink velvet cushions in different saturations, one linen fabric with a spotty pattern and one small rectangular cushion which is pale grey one one side and natural linen on the other (I used the linen side to balance the other linen cushion).
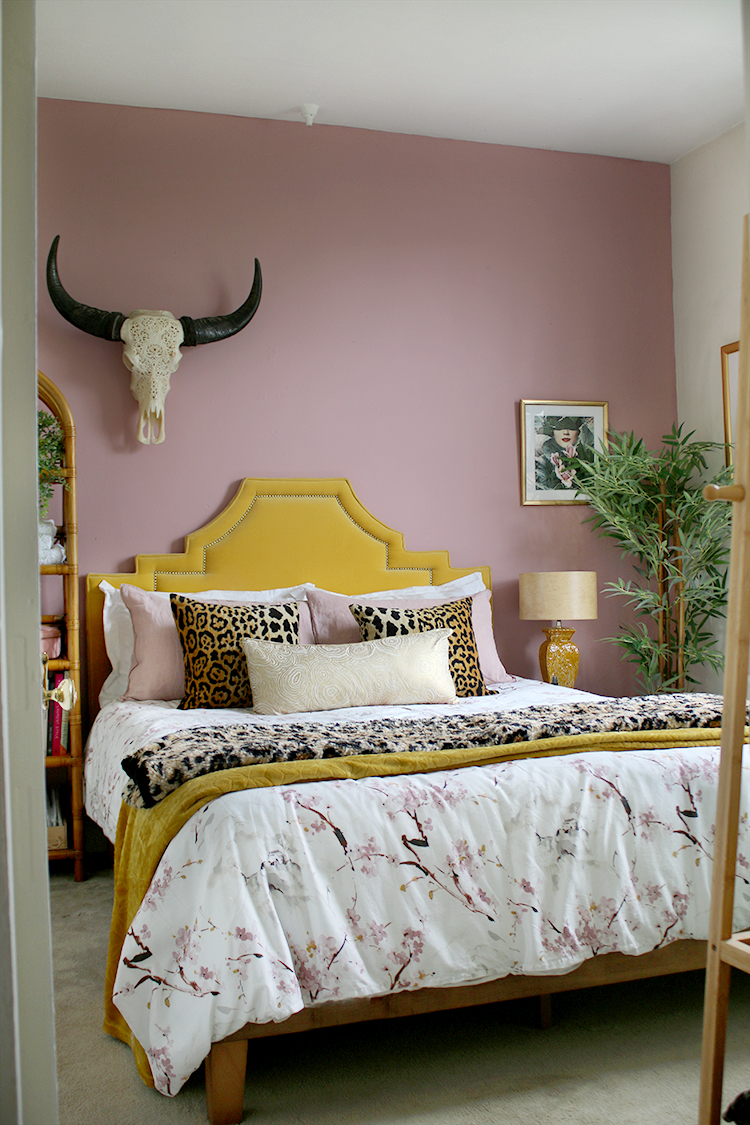
In my guest bedroom above, I used 3 – two matching leopard print cushions and one bolster cushion in a gold print. (You can also see here that I’ve placed the housewife pillows to the back.) Odd numbers are normally the easiest to work with as they tend to look more pleasing to the eye and the symmetry is a good shortcut to making it look more pulled together.
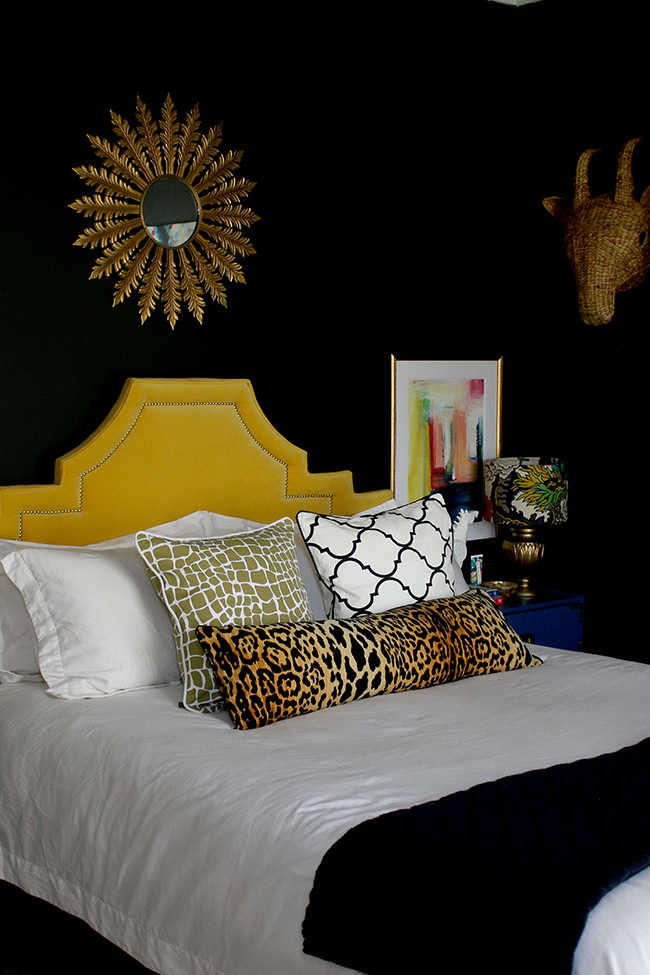
In my final example, I’m sharing a picture from a few years ago of our bed in my old home but you can see here that I used one long bolster cushion (in fact, it’s a tutorial on how to make one if you are feeling crafty) against 2 square mismatched cushions. Looking at it now a few years later? I probably would have removed those two square cushions and just left the bolster on it’s own against the pillows. A single large bolster cushion in a fun pattern is a nice option if you don’t want to be faffing with removing a bunch of cushions every night but you still want the bed to look a bit styled.
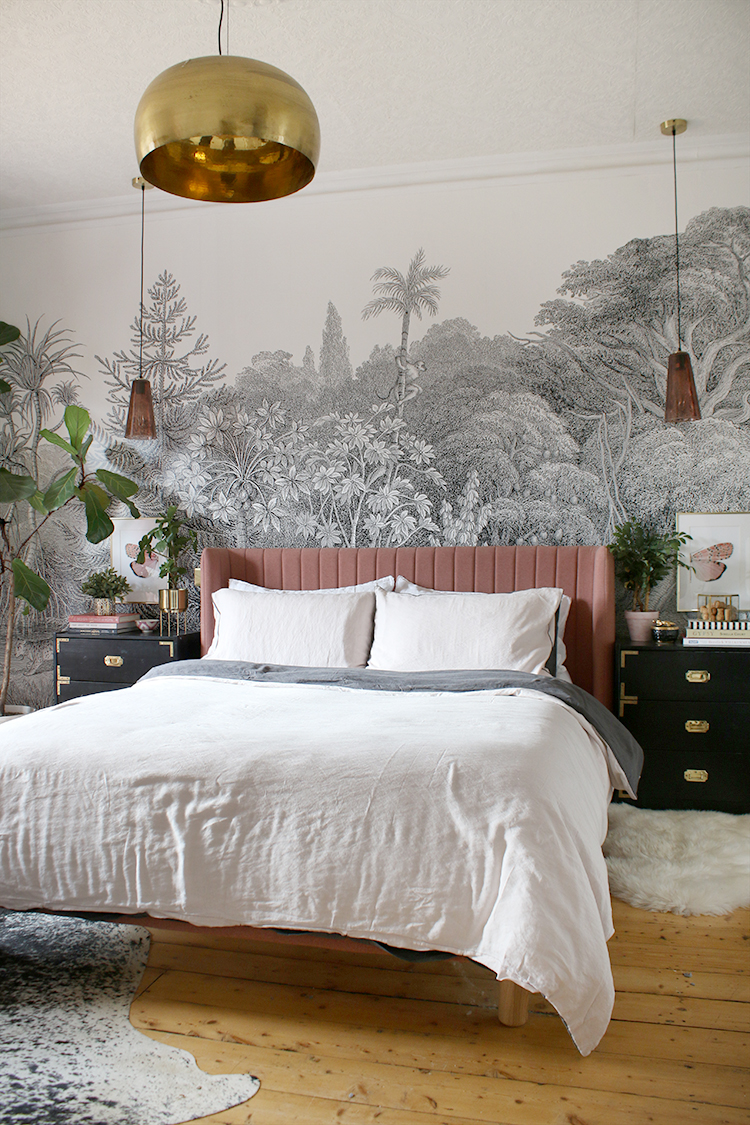
Step 6: Add Layers
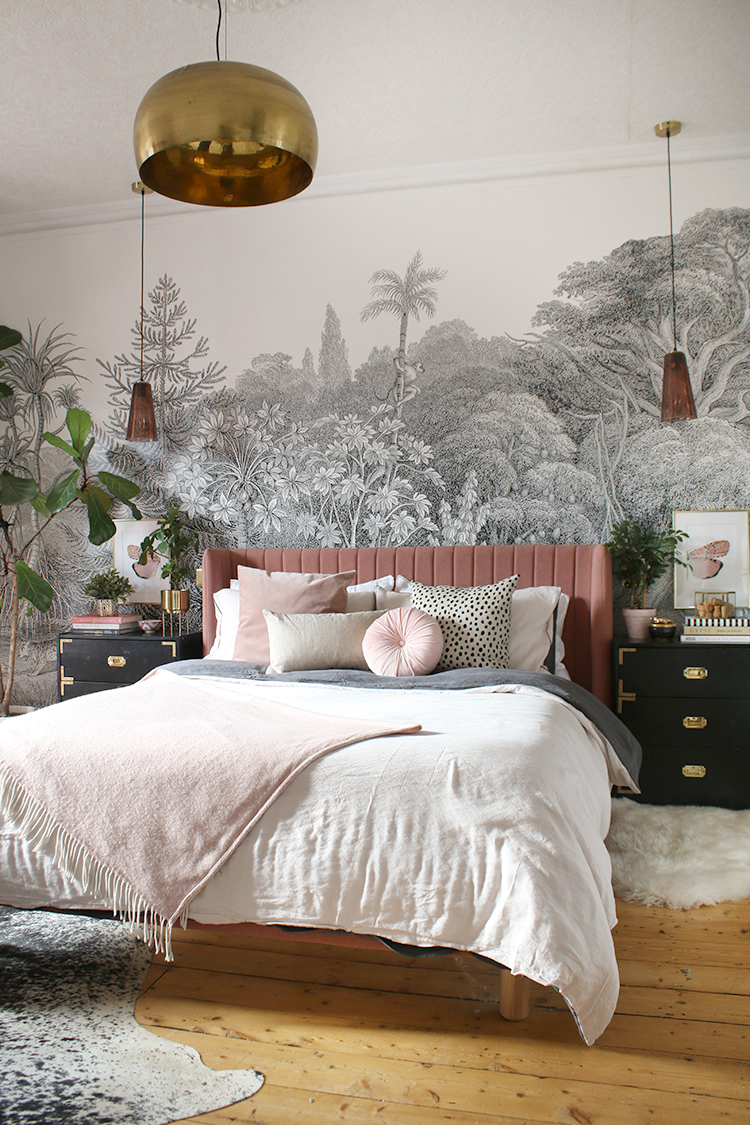
Finally, I feel like no bed is really complete without a throw at the end of the bed. As this one is a little too short to span the length of the bed, I simply folded it and laid it on a diagonal across one corner. However, I felt like there wasn’t enough contrast between the throw and the bedding and I felt like the bed needed just a bit more texture.
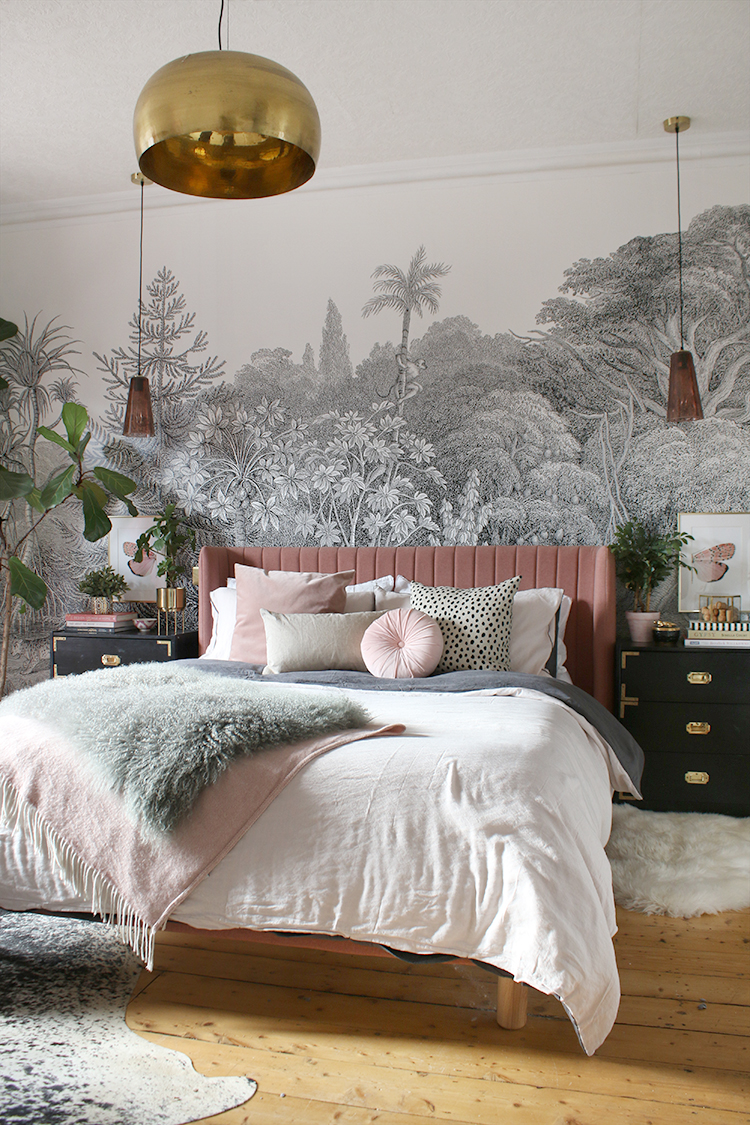
Ahh that’s better! As you can see, I finished it all off by layering a mongolian fur throw on top of that. Whatever you do, look out for a throw that has a bit of texture to add an extra layer of cosy to the space. Knitted, velvet, mohair – it doesn’t matter as long as it works within colour scheme you’ve chosen and it’s adding some texture to the bed. If you have a larger throw and want a more pulled-together look, then simply fold it in thirds and span it across the bottom of the bed or lay it over the duvet cover and fold down in half so that both the throw and duvet are showing.
We all like a gif, right? So I decided to make one so you can see how the whole thing comes together!

And that’s it! Your bed is complete and cosy. You might want to now resist the urge to climb in and mess up all your hard work – not that I’d blame you!
Shop the Post
If you love the look of my bed, here’s how I got the look:
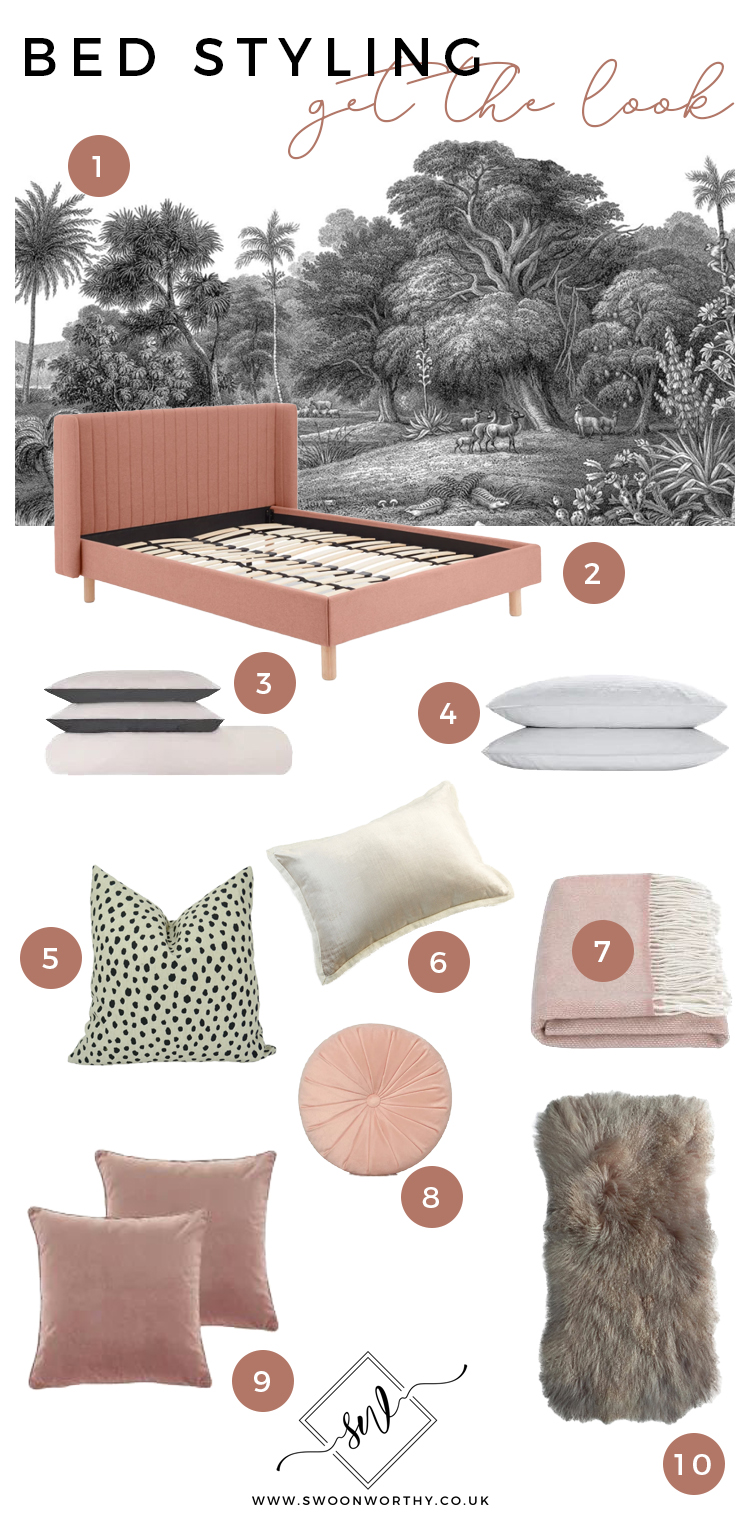
1 / 2 / 3 / 4 / 5 / 6 / 7 / 8 / 9 / 10
I hope you enjoyed my tips today but I’d love to hear from you now! Do you make your bed every day and if so, do you style it? Tell me… what’s on your bed?? The comment box awaits!
Disclaimer: The duvet and sheet set were provided as a gift from Made as part of an Instagram collaboration but this post falls outside of that agreement.


I’m with you. No, I don’t make my bed every day – and yes, I love it when I do. Since childhood, I’ve always used a top sheet. That’s just the way it was done. Then, several years ago I had hip replacement surgery and for a while, turning over in bed could be difficult. I found that without a top sheet, that task was much easier, as I didn’t get tangled in it by my not-so-graceful efforts. I now have given up the top sheet in the cold weather months but I still use a top sheet in the summertime as a light covering when I sleep instead of the heavier/warmer duvet. It really felt odd at first, but now I love it. I still have the problem of what to do with all the decorative pillows when I crawl into bed at night. A storage bench or large basket somewhere in the room is always in the way. Oh well – 1st world problems, right?
no more excuse not to have a lovely bed, you’ve made it easy for us :) I use a top sheet, tip from my mum – easier to wash flat sheet weekly vs the duvet cover (monthly will do). Just one cushion for now (only spot for them at night is the floor, which I don’t fancy – when I figure out night storage I’ll go mad as I love the look). thanks for linking the affordable Mongolian throw, been looking for exactly that to throw over a chair!
I especially like how the pillows and the duvet crawl themselves up the bed. I just need to magic my bed to do that :-)
I have always loved how you style your beds. My husband hates cushions with a passion and frankly refuses to let me make our bed look nice, so I used to always try with the guest room one. However, we no longer have a guestroom now we turned it into our toddler’s bedroom, so our guests will have to sleep on an airbed in the tiny nursery! In fact, our first guests being subjected to this arrangement are coming on Friday – you have inspired me to make a bit of an effort to make it look nice for them, though the phrase you can’t polish a t**d comes to mind a little! :-) xx
I do make my bed everyday I also have to have a top sheet I hate when I go away and don’t have it.
I really want bedding from society of wanderers maybe when the kids stop puking in my bed