So for the last two weekends, we’ve been working on all the wall panels (or moulding) on the dining room walls. We probably would have finished it last weekend but half way through the work, our staple gun decided to die so we had to move on to a few other things! Anyway, the progress photos probably don’t look all that impressive but I figured I’d share where we are with everything!
Here’s what we’ve accomplished since my last update:
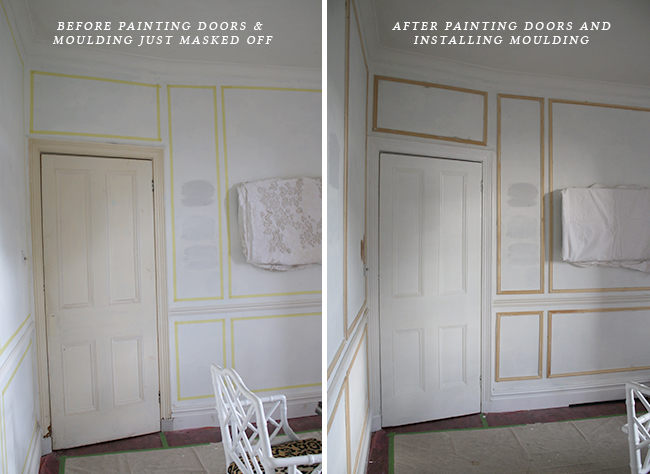
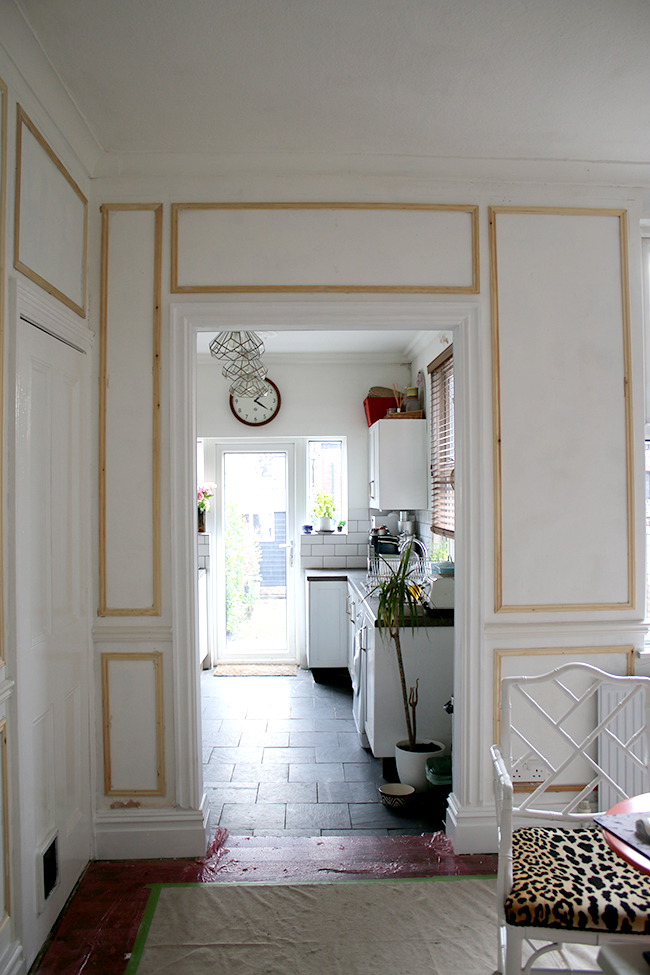
I painted all the skirting boards, both doors and all the architraves in glossy white. I decided to try a Dulux water-based paint for this because the oil based glosses in white go yellow so let’s hope they can withstand a bit of wear and tear from the pets. The room immediately looked brighter just changing that one small thing. I really wanted Wayne to install the door handles this weekend but we ran out of time as his mum was coming over on Sunday afternoon so we had to down tools a little earlier than usual. Oh well, that’ll have to happen next weekend now!
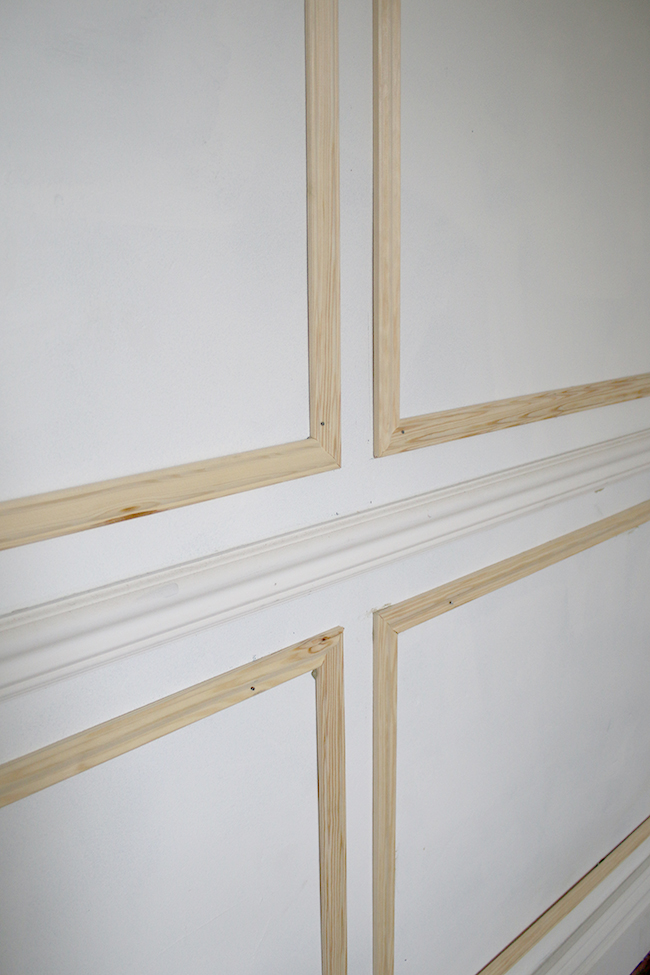
We started to install all the moulding last weekend and completed it this weekend. We chose this pine wall panel moulding from Wickes for the job but had to make 3 separate trips as well as place an online order because we needed 38 pieces and well, trying to get that many in one go was challenging to say the least – it’s a long story so I won’t bore you with that! Then there was the death of our staple gun so yeah, it was only this weekend that we actually finished it!
It wasn’t actually too bad of a process but it was very much a two-person job for the entire thing and so I couldn’t get too many pictures of the process. Essentially, we constructed the panel first before installing them with grip adhesive and small panel pins on the wall. You can see some of the work in this slideshow if you’re curious!
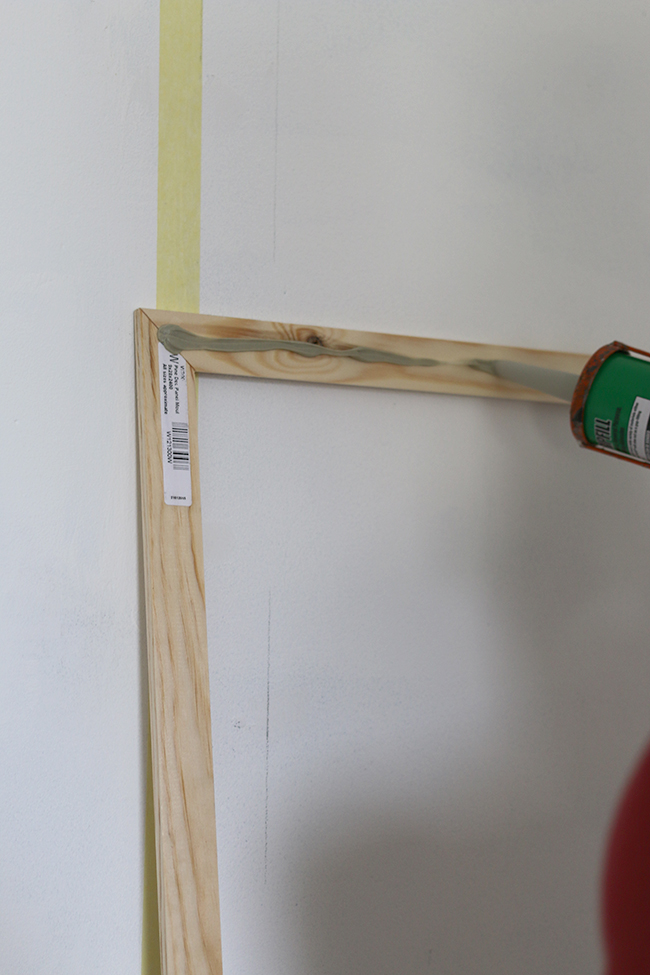
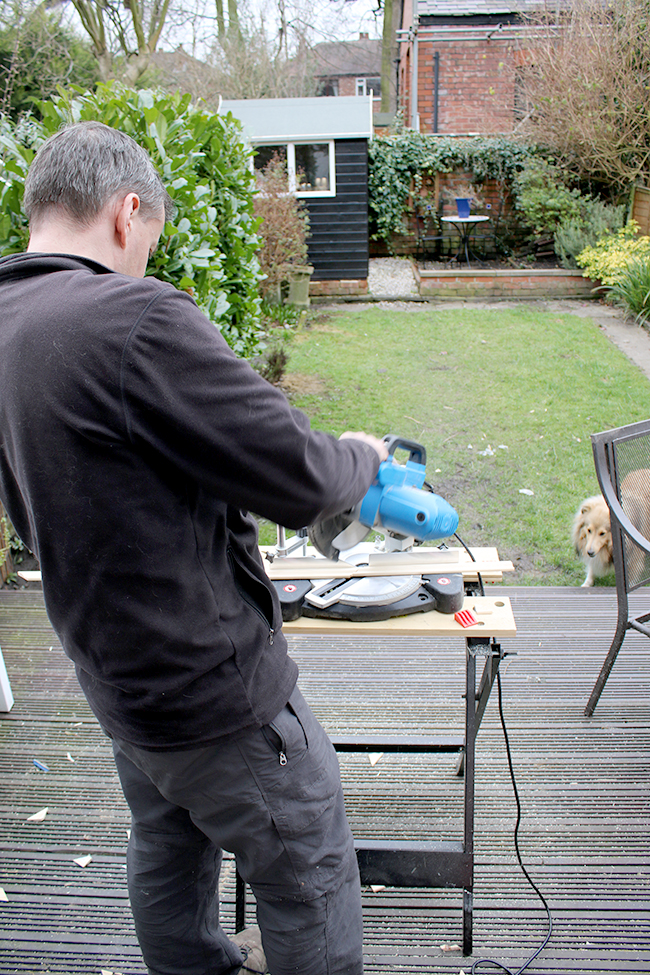
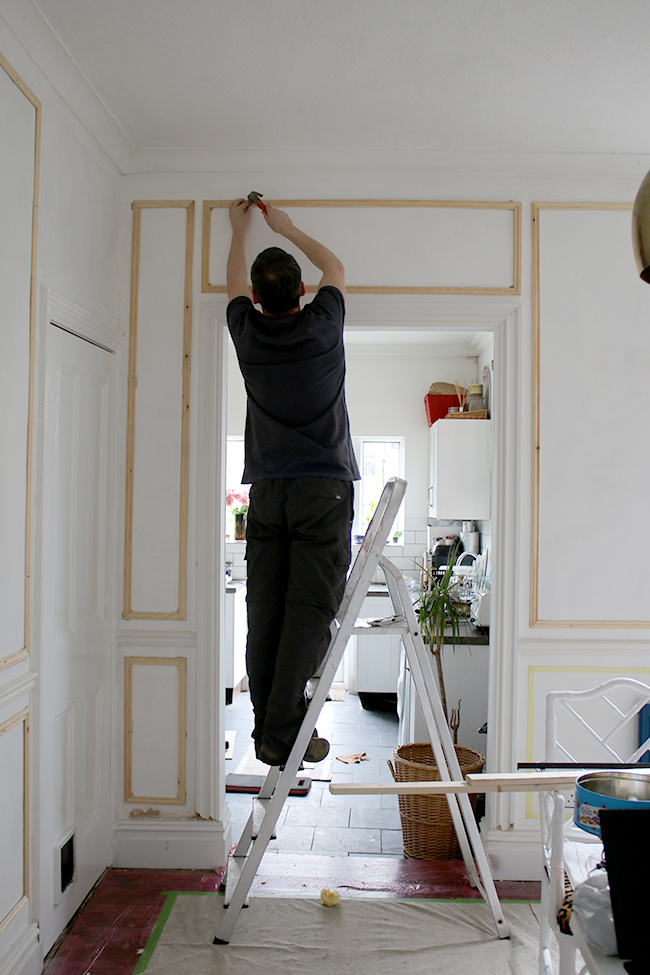

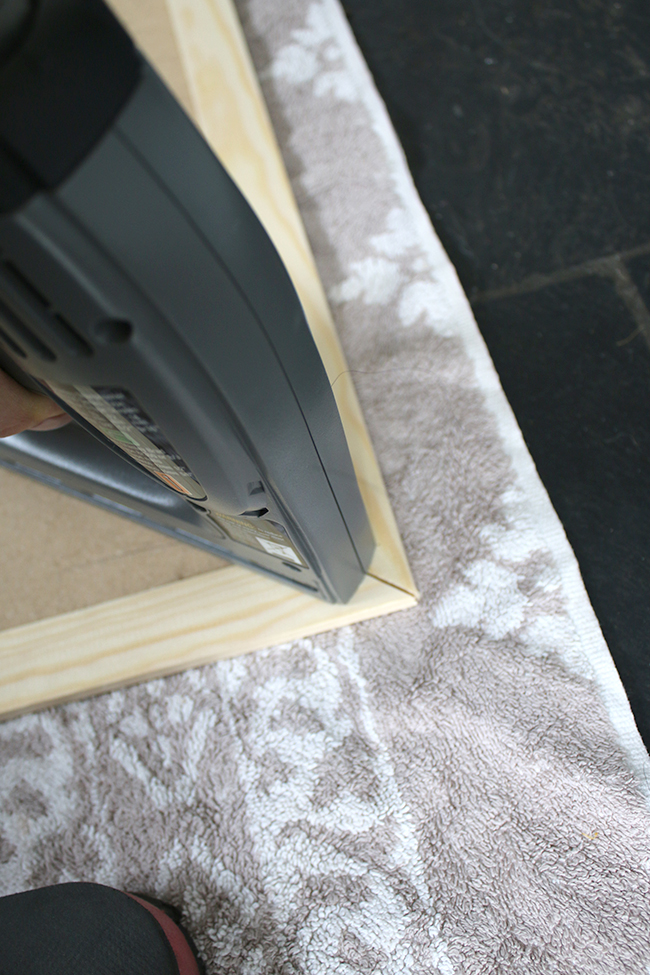
It was actually a lot easier than we’d anticipated, just a bit of a long and drawn out process! Wayne cut the pieces to size using our mitre saw, I then stapled them together and applied glue to the back. Then while Wayne held it up to the wall, I had to adjust the panel using wood templates so it was perfectly level and at the correct height. Obviously this is not shown in the slideshow above because I couldn’t hold the camera at the same time and I’d not set up the tripod because I’m a terrible blogger. Once we were confident it was in the right place, we both pressed it onto the wall and Wayne finally used small panel pins to hold it into place while the glue dried.
So if you were going to attempt this yourself, it’s not a bad job but definitely get someone to assist – I couldn’t imagine trying to do it with one person.
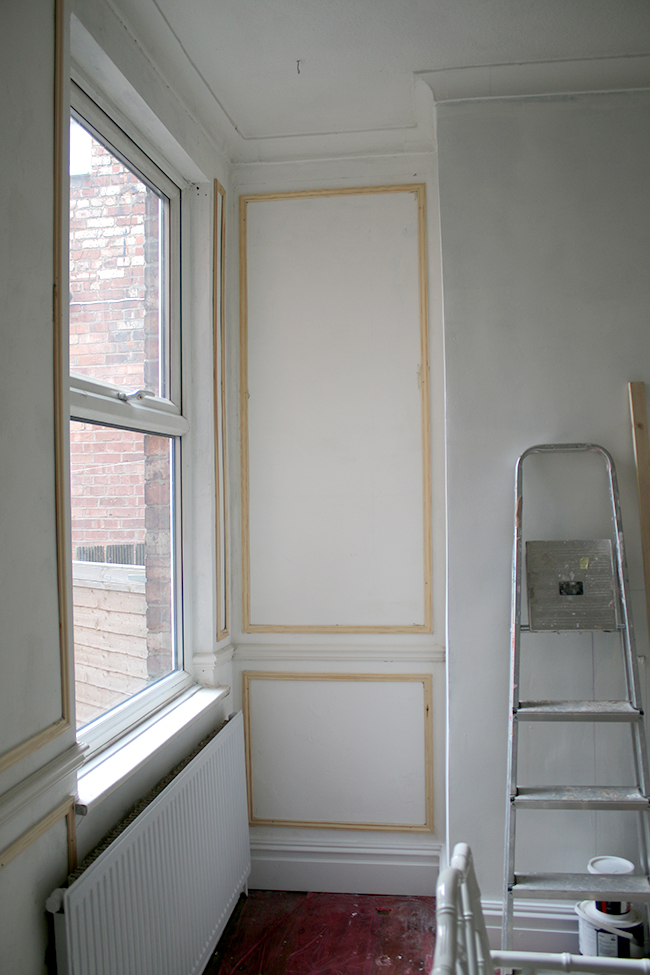
On Sunday, Wayne filled all the gaps with decorator’s caulk while I gave the radiator two coats of paint. I know my pictures make it look like Wayne is doing everything but I swear I’m just as involved and it’s definitely been a team effort – ha! ;) There’s still a bit of filling to do as we ran out of caulk (always the way!) so we’ll have to finish that up soon.

Oh one other thing we did was relocate the light switch. It’s always been in an awkward position being a bit too far and too high from the corner of the wall and I realised that in order for me to hang artwork on that wall, the light switch would have to move. So Wayne did take care of that one, digging a new channel and moving the wiring down and filling it all so that it’s now out of the way!

As it’s Easter weekend coming up, Wayne has Friday and Monday off (hurrah!) so we are hoping to make some really good progress for our four-day weekend. Here’s what we need to get done by next week:
- Install door handles
- Last coat of paint on radiator
- Paint ceiling
- Paint walls
- Paint fireplace surround
- Install wallpaper
I’ve ordered all the frames for the prints that are going in here as well so that should be coming fairly soon I hope!
Why do we need to get all this done by next Monday? As crazy as this sounds, I actually have a film crew coming the following Friday (!!!) so the room will need to look as ‘finished’ as possible during the filming – great to light a bit of a fire under our bums, eh?!! Ack! That means we need to remove the floor protection, move all the furniture back into the space, hang pictures and minimally decorate simply to get all the things that are currently being stored in other rooms out of them so that they can be filmed. So that’s why we really need to get as much as possible done by next Monday.
The whole filming thing is all a bit hush-hush at the moment but it’ll be a fun collaboration so I’ll be able to share that with you very soon! Needless to say, it’s gonna be a little insane here!
And then over the following couple of weeks, we’ll finish everything off so while it’ll look mostly done, we will still have these items left to cross off the list:
- Install tiles in fireplace
- Last coat of stain on floors and 2 coats of poly (which means removing all the furniture/accessories again – can you say ‘ballache’?)
- Style & finishing touches
So I’m hoping – as crazy as it seems at this point – to be showing you a fully finished room by the end of April. Fingers crossed things all go to plan. From here on out, there’s nothing particularly difficult to do so a smooth ride would be rather nice… Wish me luck we can get everything done on time!


EEEK, FILM CREW!!!
There’s nothing better than a film crew coming for getting you to shift your arse in gear! And by “you” I mean “me”, and by “film crew” I mean “any kind of company, especially family.:D My brother and my sister-in-law are visiting me on Monday, which means I’ll get SO MUCH STUFF DONE ON SATURDAY!!!!
I love the last pic, even with the protected floor and the unpainted wooden whatsits it already looks so stately! Looking forward to the reveal.
It’s going to look so beautiful! I know it takes a huge amount of work, but I can already really see a difference and imagine what the end result will look like. Good luck getting as much as possible done before the film crew arrives – keeping my fingers crossed. xo
It’s looking good! One question…Did you remove the tape from the walls or just apply the paneling over the top?
We removed the tape first! There were pencil marks on the wall that we used as a guide already so we were able to use a lot of the measurements that were already there. I say ‘a lot’ because we had to make a few adjustments as we went! :) xx
You’ve done awesome – it looks like you’ve achieved a lot. The panels look great. Looking forward to seeing when it’s all done.
PSA: Dulux reformulated their gloss paint so it no longer goes yellow, look for a triangle on the lid to besure youre getting the right stuff. Did my dining room wood work 6 months ago, still bright white. Does take forever dry (I mean cure) but is ultra durable and shiny, also goes on a treat so not bad trade off.
Thanks for the tip Chelsea! I realised that I’d used a gloss paint that was water based for our bathroom remodel and that’s still nice and white nearly 2 years on so I feel pretty confident this will be a good option :) xx
I can see that it is going to look wonderful! I am very excited to see how the new prints will look, really good idea to have moved the light switch. But even more than yours and Wayne’s practical and artistic endeavours, I am so impressed by your planning and project management skills Kimberly – skills that women are still sometimes accused of lacking in relation to DIY! You are a great role model. Elizabeth x
The proportions of the room are so suited to the panelling. I just know its going to look amazing. isn’t it just fab to have a fella who does a bit of DIY ! Good for you on getting stuck in too. I am more of a project manager : ) xxx
A film crew ! How exciting xx
Great progress so far, can’t wait for the reveal! Good luck with the filming! Sharon
You’re doing such a fab job here. It’s going to look stunning. I can tell. It’s all in the details and those are coming on a treat. Try not to work too hard this weekend. Make some time for a hot cross bun or an easter egg!!xx
What a great team you make. And how exciting to have a film crew coming. Can’t wait to hear more. xx
Progress! Gotta love it. Can’t wait to see everything when it’s finished. Love all of your choices.
Amazeballs. It’s great that you’re sharing all this info – very inspiring and it’s really starting to look very grand. What made you decide to go for the panelled look? Are you painting the panels any differently? Excited to see how it’s going to turn out.
Wow, you are one super crafty gal Kimberly! Love it :)
Great progress! Can’t wait to see the finished result, and a film crew, how exciting! x
Looking good, its going to look fantastic when its all done can’t wait to see. Xxx
eek!! I am so excited for you!!! It’s already gorgeous :) This is going to be so AH-MAAAA-ZING!!!! XO
When your dining room is done, I know I will want every single thing in it. This molding is just the best canvas for all the other layers. And like I said before I’m itching to do it too.
Goodness me, there’s nothing like a pressing deadline to help your DIY get done!
Wow it’s really coming along nicely Kimberly… I cannot wait to see the end result I know for sure it is going to look fab! The film crew will be blown away ;) xxx
Yikes! The PRESSURE! And the EXCITEMENT! A film crew?!!!! Can’t wait to hear more about it! Great job on the panelling, it has completely changed the dynamic of the room! S’gonna look beautiful!
jealous dot com X
I can’t believe how much of a difference the paneling makes already, the room looks HUGE!! Can’t wait to see the finished product :)
This is the post I’ve been waiting for! We are going to do a few panels on the wall behind our bed when we do the bedroom, and I was hoping you’d do a ‘how to’ for me! I had a good idea of how to go about it, but it is super helpful having it confirmed that it’s an effective approach. What brand of glue did you use, and also do you have a preferred caulk? We usually shop in B&Q but also frequent Wickes and Screwfix so I am sure we can get hold of the right stuff!
It looks absolutely brilliant, especially now you’ve painted – seriously amazing (and I love the paint colour! We have some F&B for the panelled wall in the bedroom so really looking forward to cracking that open now!). Will stay tuned for the big reveal soon! x
Oh I’m so pleased it was helpful Anna! We used EvoStick Gripfill to adhere them:
http://amzn.to/1RKqOf4
(you can get it in B&Q)
And then just the standard white decorator’s caulk you can get anywhere to fill them (we got ours at B&Q).
Your bedroom sounds fab though – I really want to do our hallway at some point with panels as well in the future but after that, I fear no wall will be safe! Ha! Want to put them everywhere!! ;) xxx
Thank you! Very helpful indeed!
I can’t wait to start on it, but we need to strip the wallpaper, plasterboard over the tops of the walls which used to be glass panels, and then skim the entire room first! Eep. But then the fun can start – even treating us to a new bed, wooo!! :-) xx
Ohhhhhhhh SMART! I would have never thought in a thousand years to construct each rectangular panel *before* putting it on the wall! That is actually pure genius. You guys have beautiful minds (and yes, I’m totally stalking / comment-bombing you this morning xx).