I think every time I post a little craft, I say I’m not crafty. I think that’s because I look at my good friends who are truly creative and incredible at various crafts (currently looking at you Alex, Maria and Nicolette and SO MANY OTHERS), I just can’t even compare myself. I don’t have a clue how to knit or embroider, I’m a very average on a sewing machine, I can’t do calligraphy or hand lettering or anything else crafty people are so good at. So when I do share these little DIYs with you, they are just really simple things that I come up with to solve some sort of problem.
And one problem I realised that I have is that I hoard gift boxes and yes, it’s a problem. It also means that if I can do these things, genuinely ANYONE can do them.
So the problem stems from the fact that I absolutely can not bear to throw out a nice box or even throw it in recycling. I always figure at some point in time, I’ll use it for something and so they all get stashed away into one of the drawers in my desk or in my sideboards or in a cabinet and then, stupidly, I kind of forget about them. Of course, I might use a few over Christmas or the odd birthday but then I end up receiving more myself for those exact occasions and I also get sent PR gifts in beautiful packaging through the year. While I’m certainly not complaining about the thoughtfulness and generosity of others (on the contrary, I’m incredibly grateful!), what it means is that my stash just grows and grows.
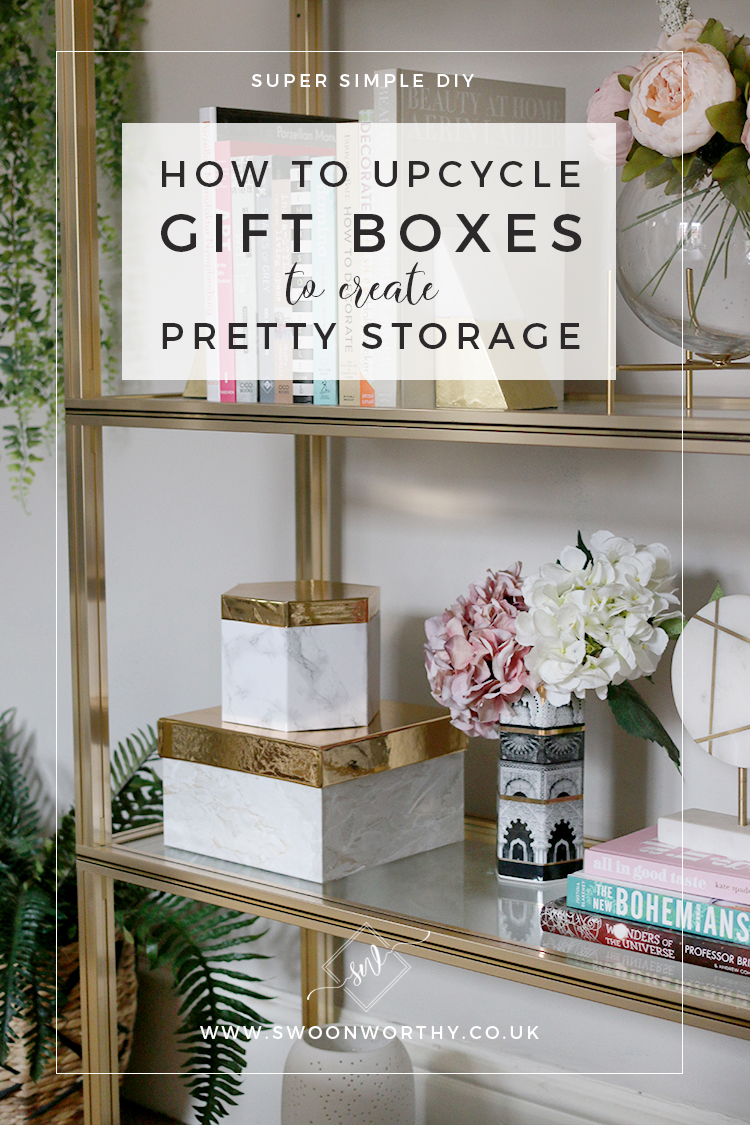
So what do I do with all of them? Well, as I discussed in my last post, during my little search for cute storage pieces and in the midst of decluttering, I figured I could upcycle a few of these boxes and use them around the house.
You’ll have to forgive the fact that I didn’t take any ‘before’ pictures of the boxes. I hadn’t actually planned on posting this to the blog but then once I started, I pulled out the camera just in case you were looking for an idea or two on what to do with those nice leftover boxes you probably also have stashed somewhere (don’t lie to me, I know I’m not the only one who does this). I have a particular soft spot for boxes with unusual shapes but a good sturdy square box with a nice top is great too.
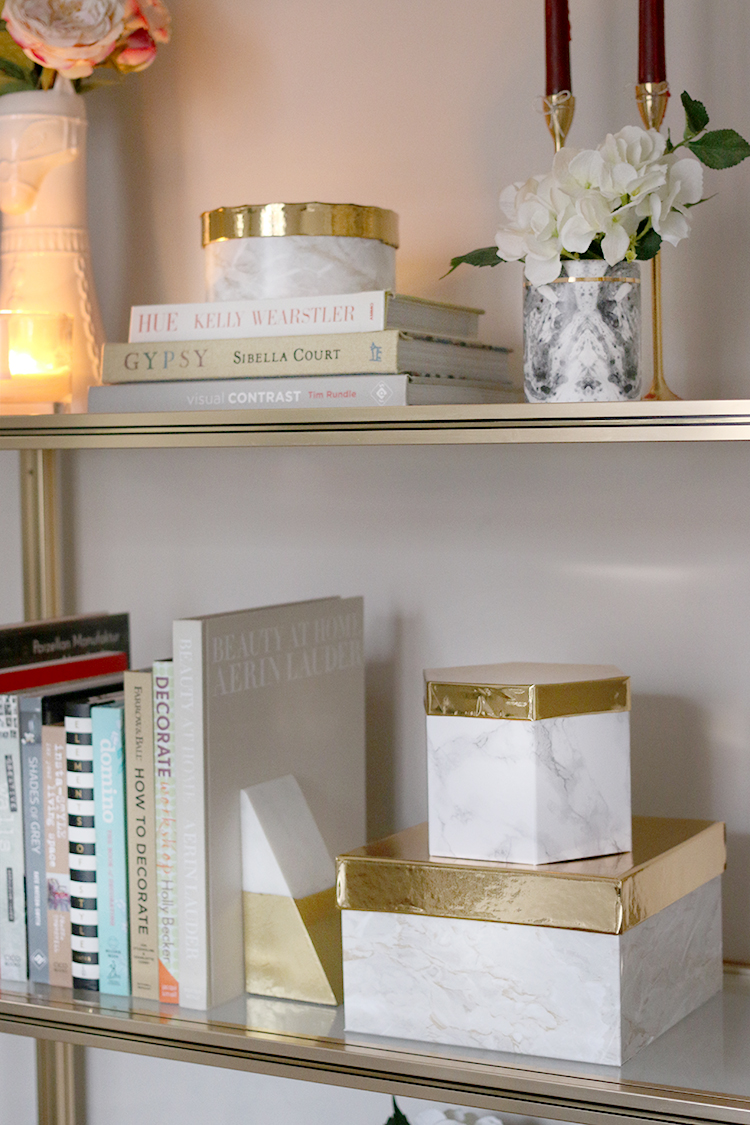
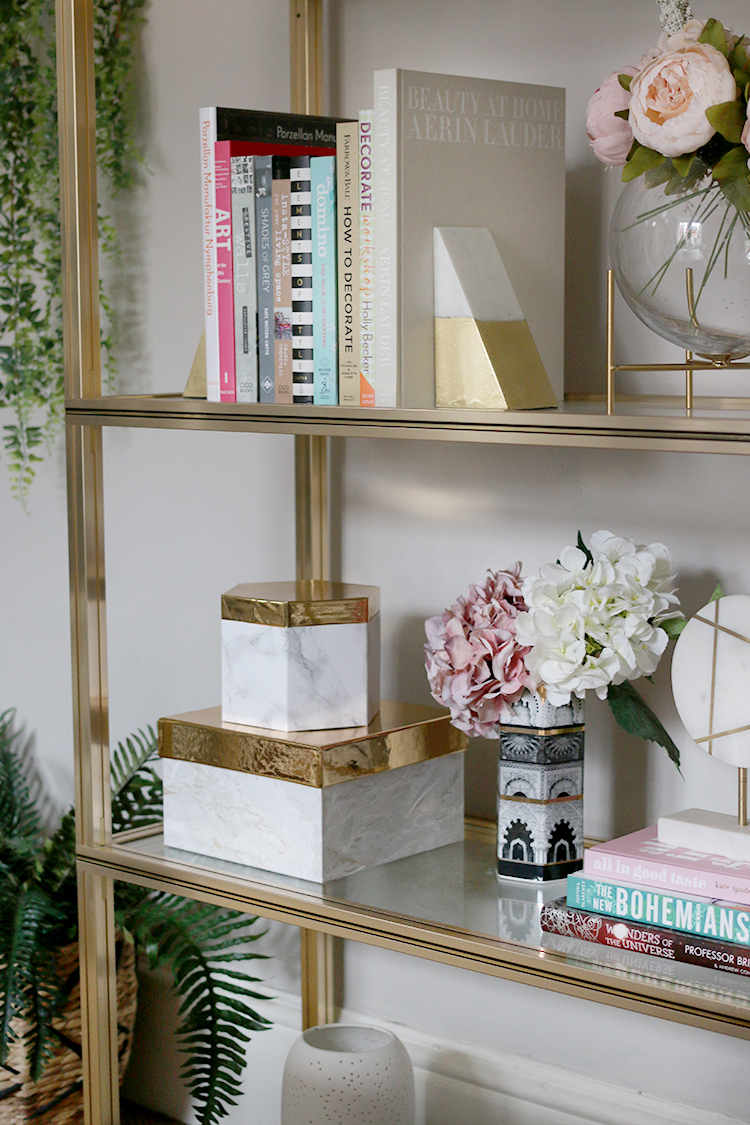
In the interests of full disclosure, I covered the hexagon box quite some time ago and it’s appeared in a few areas in my home. At the time, I think I might have shared it to my Instagram Stories but over the time I’ve had it (perhaps a year?), I’ve used it quite a bit. So I thought I’d just take the same approach to a couple other boxes I was hoarding keeping. The original hexagon box was from a Tom Dixon Candle, the larger square box was from Paperchase and the little round box was originally from Bombay Duck (although I can’t even remember what was in it – I’ve had it that long).
Affiliate links may be used in this post.
Here’s what you’ll need:
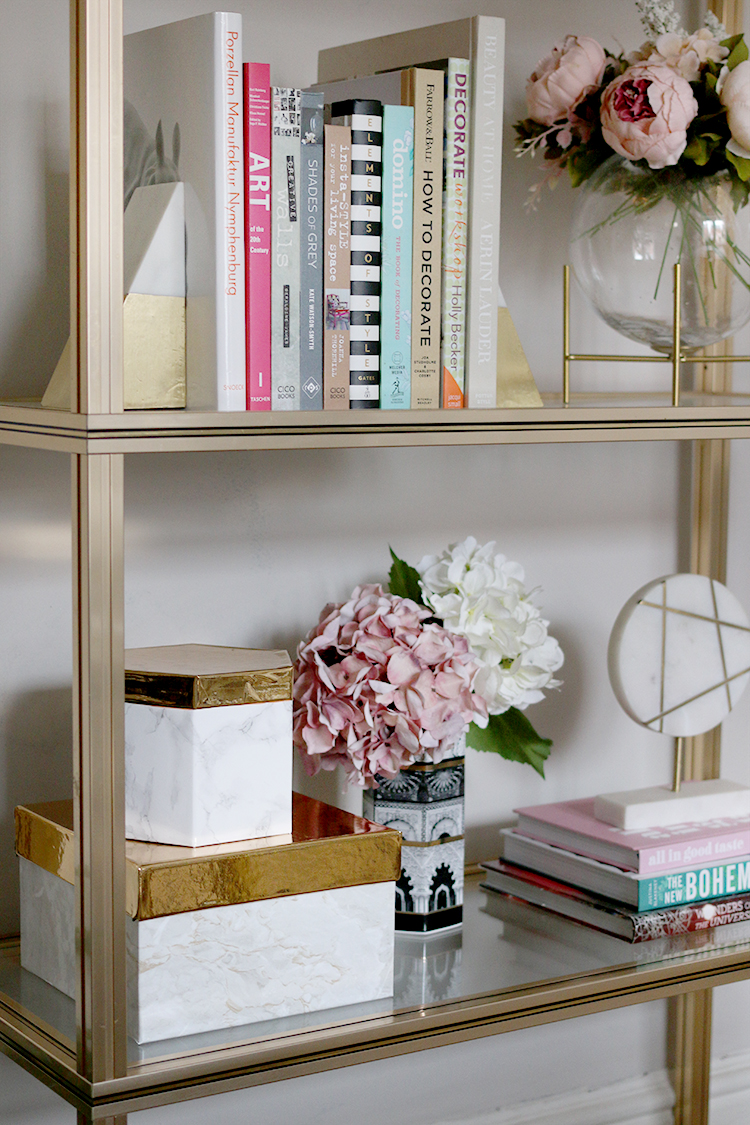
Now I pretty much always have a stash of sticky back plastic. I had covered some shelving in my dressing room with this warm marble pattern and I figured I’d use it again. I also used an existing roll of gold contact paper I also had from past projects. So I didn’t spend a penny. And yes, I’m a serial user of sticky back plastic – it’s right behind paint in my mind for a quick and easy makeover.
- Nice sturdy gift boxes of course!
- Grey Marble Sticky Back Plastic (used on hex box)
- Warm Marble Sticky Back Plastic (used on square and round boxes)
- Gold Sticky Back Plastic
- A pencil
- A pair of sharp scissors
- A scraper (I tend to like these because they are quite strong but a credit card will do in a pinch)
- A cutting mat or board (optional)
Here’s how to do a rectangular or square box:
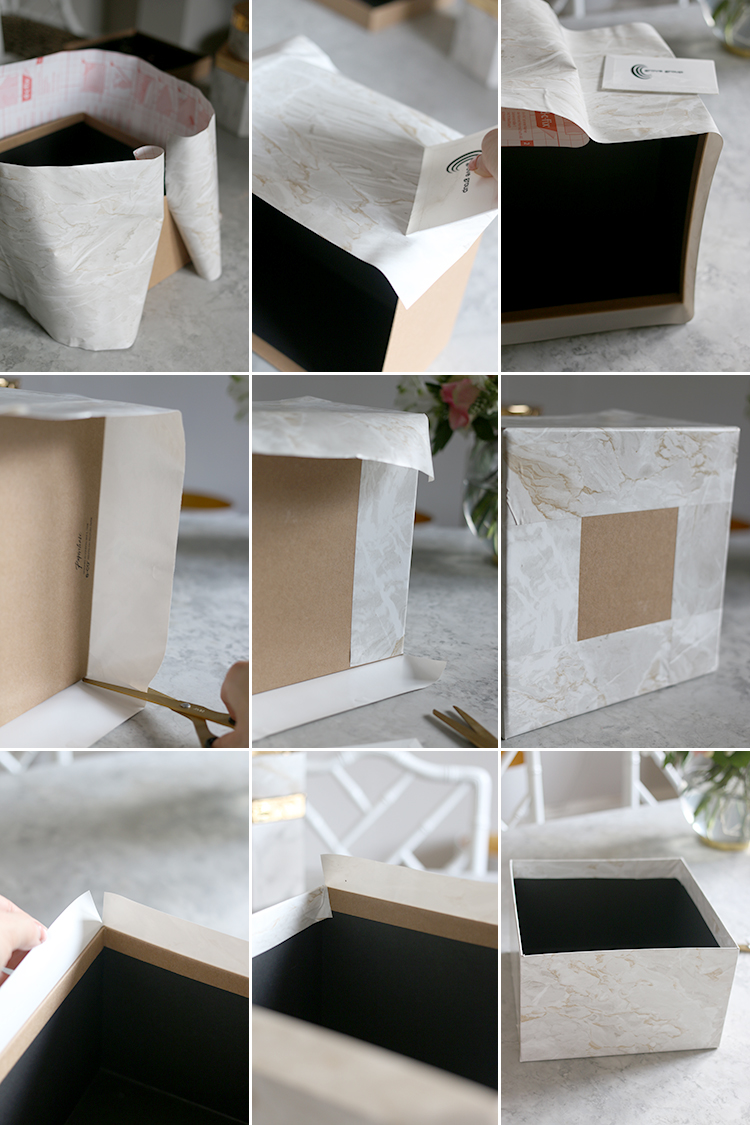
- Starting with the bottom box, cut your sticky back plastic so that it completely wraps around the box (with around a 1″ overlap) and allow an additional excess of 2″ of paper at both the top and the bottom of the box.
- Remove the backing paper from one of the short ends of your plastic and allow around a 2″ overlap on one of the sides and align one edge of your box so it’s centred – you’ll want to have excess paper at both the top and bottom of your boxes. Use your scraper to stick the plastic to the box, removing any air bubbles as you go. Working slowly is your best bet, removing the backing paper gradually from underneath and making sure the paper is nice and straight.
- Pay particular attention to the corners of the box – you want the paper to fit against the box nice and snug so run your scraper along the edge a few times to get any air pockets completely out before you move on to the next side.
- Once your paper is fully wrapped around the box, you’ll want to make 4 cuts parallel to each corner of the box. Wrap each side against the bottom of the box, overlapping them.
- At the top of the box, do the same. Make 4 cuts to each corner and press each side down firmly.
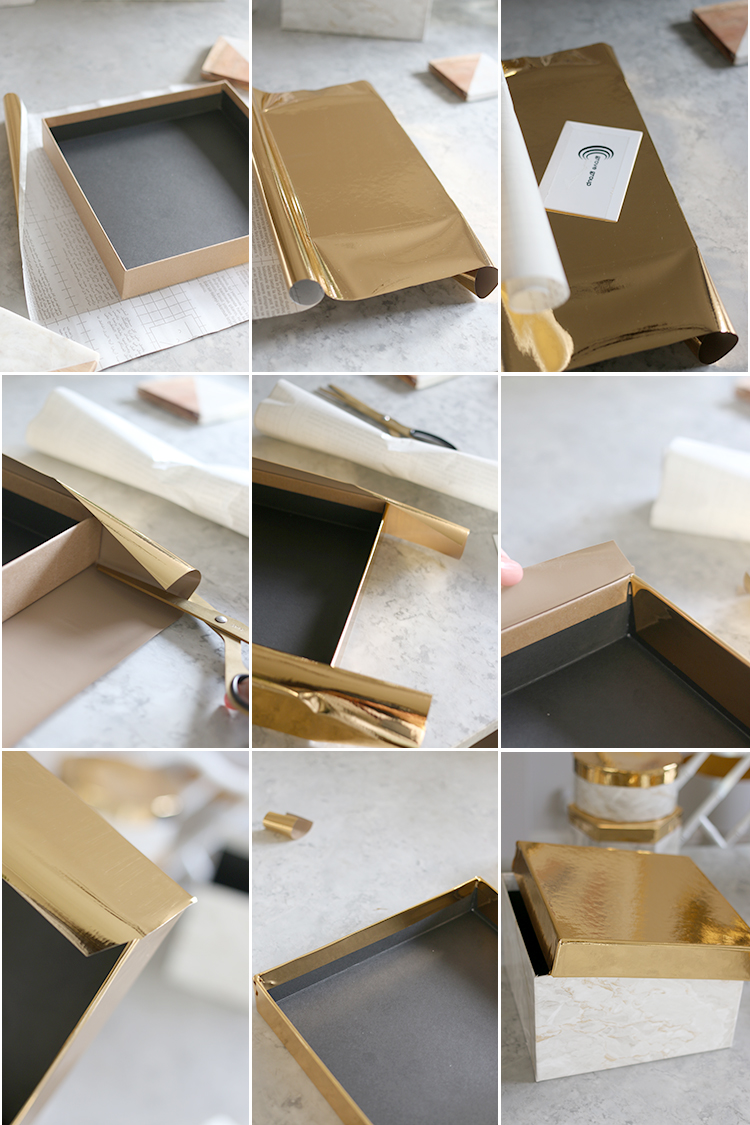
- For the top of the box, cut your sticky back plastic 2″ larger on each side than the top of the box.
- Start by removing a portion of the paper so that there’s enough to wrap around the entire edge but you’ll want to start sticking it down at the top flat surface (ie don’t start with the side, otherwise you’ll end up with more air bubbles). Use your scraper and again, take it slowly so that you are scraping it down, removing the backing paper as you go and removing any air pockets.
- Once the top is fully stuck down, once again make cuts at each corner and fold two opposite sides down, wrapping them around the inside of the top of the box.
- On the opposite sides, carefully cut off the excess paper at the corner then cut the edges at an angle and wrap them around to complete your box.
Here’s how I did the round box:
*Before we begin, I will say I wasn’t crazy about how this one came out. I ended up doing the top twice because the first go was such a mess but the beauty of sticky back plastic is that it can easily be removed. So if you screw up, it’s pretty easy to start again.
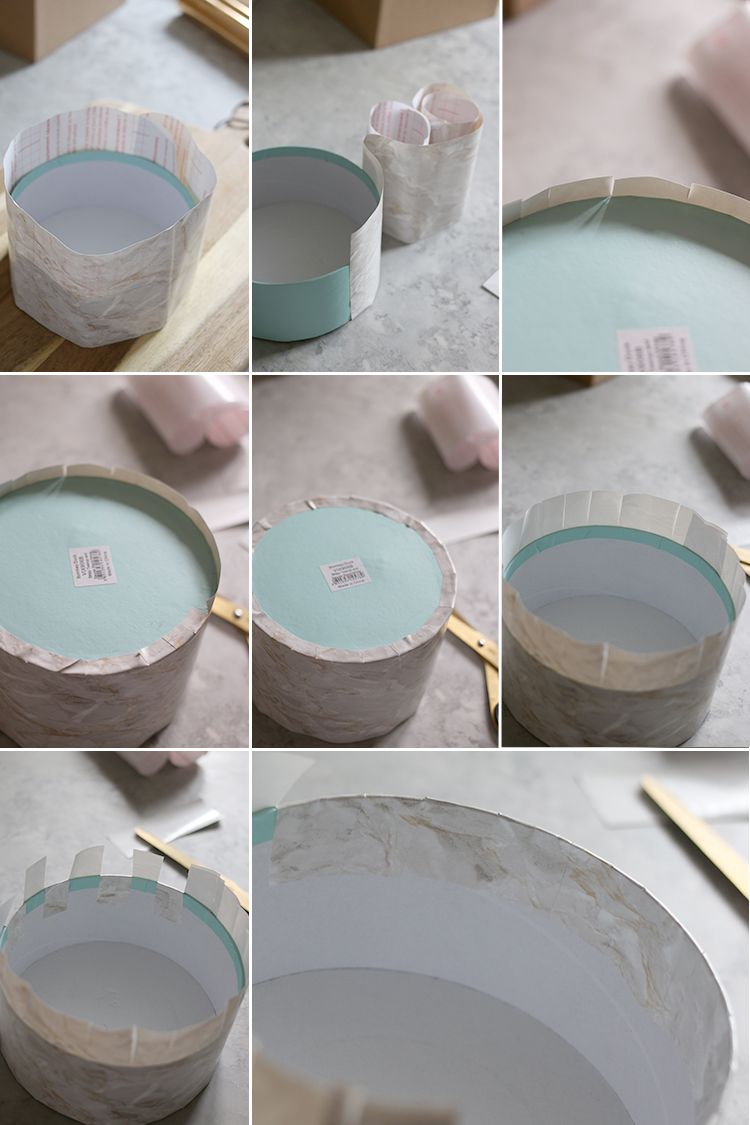
- Start by cutting a rectangle in your sticky back plastic so that it fully wraps around your box including around a 1″ overlap. You also want to make it around 2″ higher at both the top and bottom (I messed this bit up and you can see I wasn’t working with enough at the bottom of the box so do as I say, not as I do!)
- Using your scraper, wrap the paper completely around the edge of the box and smooth as you go, removing any air pockets as soon as you see them.
- Because the box is round, it’s tough to get the sticky back plastic totally smooth where you overlap it both on the bottom and the top of the box. To get over this, you’re going to make small cuts on both edges in your excess paper around every inch or so. (The images explain this better!)
- I found I got a better, smoother edge when I stuck down every other ‘tab’ first and then followed with the remaining ones. Don’t ask me why this works better – it just does! ;) Press each tab down hard, making sure it’s completely stuck before moving on to the next.
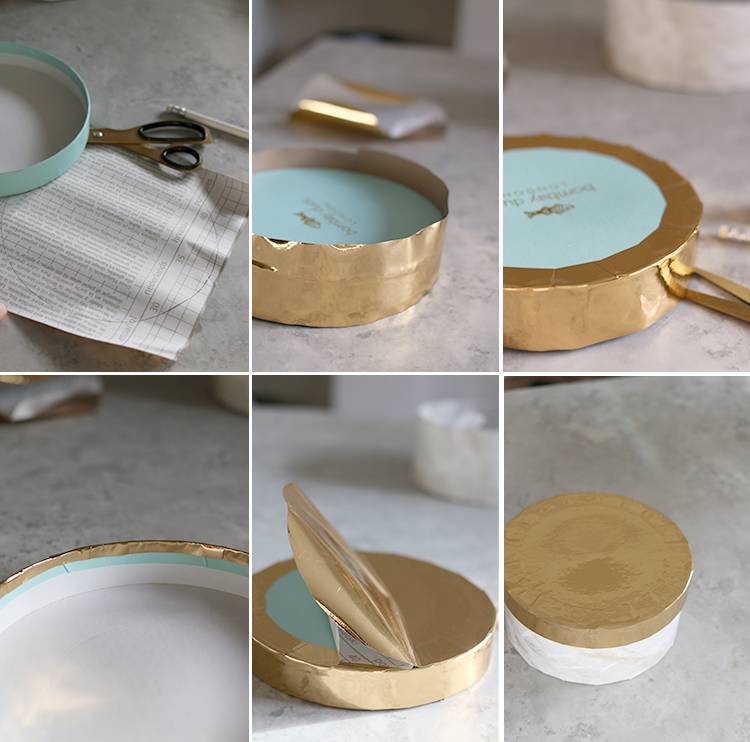
- For the top of the box, you’re going to follow the steps above pretty similarly. However, you want to start by tracing the top of the box onto the back of the gold sticky back plastic and carefully cutting out. Set this aside for now.
- Next, you’re going to cut a rectangle so that it fully wraps around the edge of the top of the box with around a 1″ overlap. Yet again, I didn’t quite allow enough height and struggled when it came to wrapping so you will want to make sure you’ve got around a full inch or so of excess paper both at the top and the bottom. Carefully wrap the paper around and stick it down as you go.
- Same as before, you’re going to want to make little incisions in the excess paper and then stick them down – again, it works best to press down every other tab and then overlap the other ones just as you did the bottom of the box. Do this at the top and the bottom of the box.
- Now remove the backing paper from the round piece you cut out earlier and carefully place it on the top to cover your tabs. As you can see from the last picture, you can see the tabs through that top piece which is a bit of a shame but there ya go! Told you I wasn’t crafty! LOL!
So that’s how easy it is to upcycle your gift boxes into cute storage you’d be happy to have on display. I’d love to know what you think of this little project and if it’s a DIY you’d try? Are you also a hoarder of pretty gift boxes and packaging? Let me know in the comments! I need to know I’m not the only one with a stash of these around my house! ;)


These look fab Kimberly, I love them and what a great use for them :) I’m afraid I can’t make you feel better about collecting boxes as I gave this habit up about a year ago, but these make me want to start collecting again! Great idea xxx
Yes, I’m right there with you in saving boxes! 😊 I love that you shared this. Now I don’t feel guilty about saving them as this is a great way to redeem them! The book shelf is beautiful and styled with perfection.
Pat
I miss my sturdy boxes from my little box subscription days.
You put yourself down I think you are far more adept at craft than you give yourself credit for.
I saw your calligraphy on stories it was not bad for your first class x
Me too along with tins! I am inundated!!
OMG I cannot part with a good box, (been obsessed since toddlerdom – one of my favourite toys was a wooden box!)… and they’ll often lie empty ‘waiting’ for the perfect use/item… It’s very hard to declutter something I’m keeping for, well, decluttering :o)
These look amazing Kimbereley! I love crafting and I made a few things for Christmas presents. I’d definitely give this project a go as I’m a keeper of boxes too!
I love a good box! Powder, who make lovely scarves, socks, gloves, etc, have some lovely boxes. I’ve got one that came with 3 pairs of socks, and another that I think had wristwarmers in. They’re both the type that has a drawer, rather than a lid, and the designs on them are beautiful, so no need to tart them up.
I got a box of chocolates at Christmas that was also a drawer type. I tipped out the chocolates into a bowl, and put it to use straight away, as storage for a set of pens I was given.
As I have a lot of art and craft materials, boxes are great (and necessary) to keep things organised.
Tins are another thing I collect for their storage opportunities! I’ve been known to buy some biscuits, just because I love the tin!
Sticky back plastic is great for covering ugly or plain boxes. Your mix of gold and marble elevates them.
Thanks for the shout-out! :) I think these boxes look great – the gold and marble looks so stylish – such a great way of making a feature of the boxes.
I agree with Nicolette – you are far more adept at craft than you give yourself credit for. One day you’ll realise this!! xx
Your boxes look lovely I love the marble with the gold lids, very glam.