It’s no secret that I love the look of dried flowers and grasses – especially as we come into autumn and winter, I just think they work so beautifully with this season. While I adore my plant babies as well as the beauty of fresh flowers, dried flowers will provide a little bit of colour and plenty of gorgeous texture that will last for a really long time. I’ve purchased a number of dried flower arrangements over the last couple of years and have broken up some of my existing ones (to use in smaller arrangements) so I was looking for what else I can do to display them around my home.
This post may contain some affiliate links which means if you click on a link and make a purchase, I may earn a small commission from the brand for the referral. I am not paid or asked to use these links. You’ll never pay more for clicking on these links.
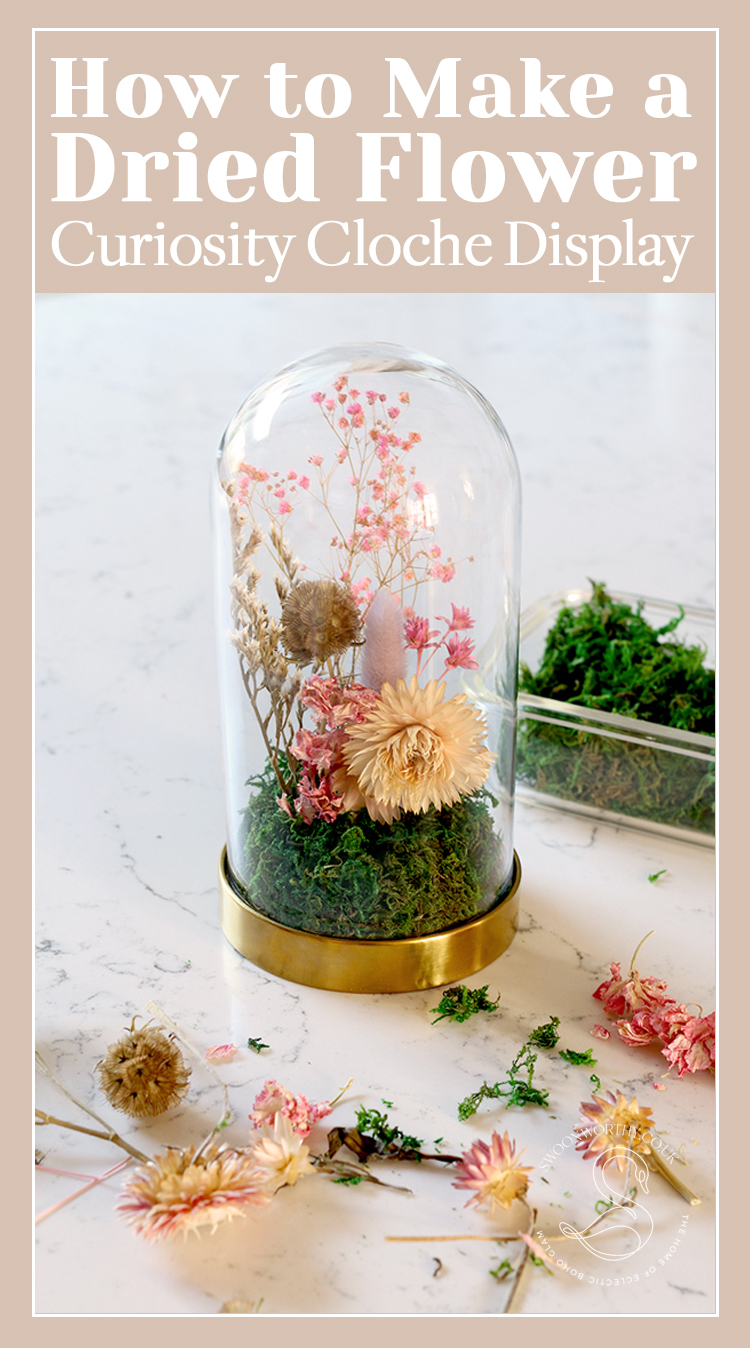
Over on Anthropologie, I saw they had dried flower arrangements in little cloches and as soon as I saw them, I knew that would be my next project to make my own. Cloches have become quite popular in recent years and while in Victorian times, you’d often have seen them with unusual insects or other ‘curiosities’ kept under the glass dome, today, a lot of people use them for candles or as tiny displays for whatever their heart desires.
This project doesn’t really require all that much in terms of supplies. I’ve linked to where you can find the same or similar products but I actually already had almost everything I needed. It also didn’t take very long to create (easily less than an hour) so they could make great handmade gifts too.
Here’s what you’ll need

- A cloche (I got mine from IKEA but if you prefer a wood base, this one is also rather lovely
- Floral foam
- Decorative moss
- Gorilla Glue (or any glue you might have handy)
- Some cardboard (only a small piece is needed so check your recycling bin)
- A selection of dried flowers and grasses
I’ve had that cloche for ages now and all the other bits were just things I had around the house including the dried flowers – if you have some existing grasses or flowers, consider pinching a few from those. If not, consider buying an arrangement to get a good variety.
You won’t need much so you can still display the arrangement and have the little floral cloche as well. I ended up stealing small bits from a few different arrangements I already had knocking about. In fact, the only thing I needed to purchase for this was the dried moss and I have so much leftover, I might need to find another crafty project to use it!
One last thing… don’t get too hung up on copying this exactly – pull the flowers and grasses you love (maybe you can even dry some yourself from your garden) and create something that’s uniquely your own.
How to DIY Your Dried Flower Cloche
Step 1

Trace the bottom of your cloche on your cardboard and then mark a few mm inside this line. You want your cardboard to be smaller than the area where the glass will sit on top so it closes comfortably.
Step 2
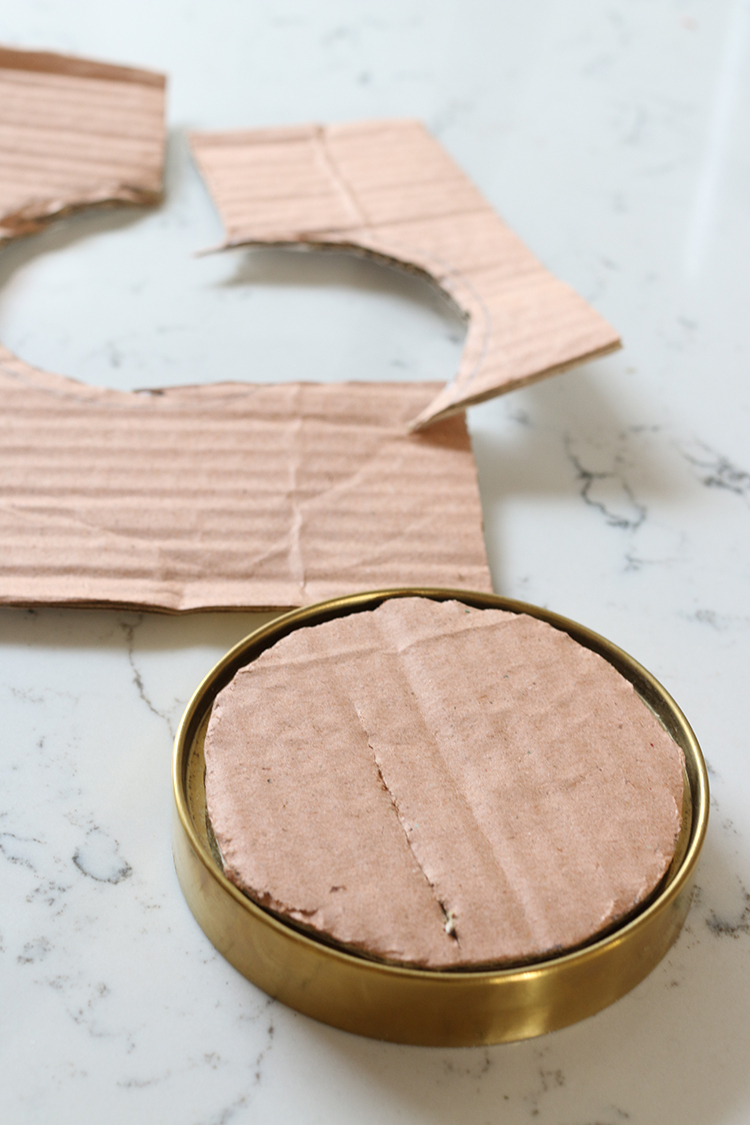
Trim any areas to ensure the cardboard fits comfortably inside the glass dome. It doesn’t have to be perfect as it’ll be completely covered later on but it just means the entire thing can be removed from the dome in the future so it’s not permanently attached to the cloche base and the glass can be easily cleaned.
Step 3
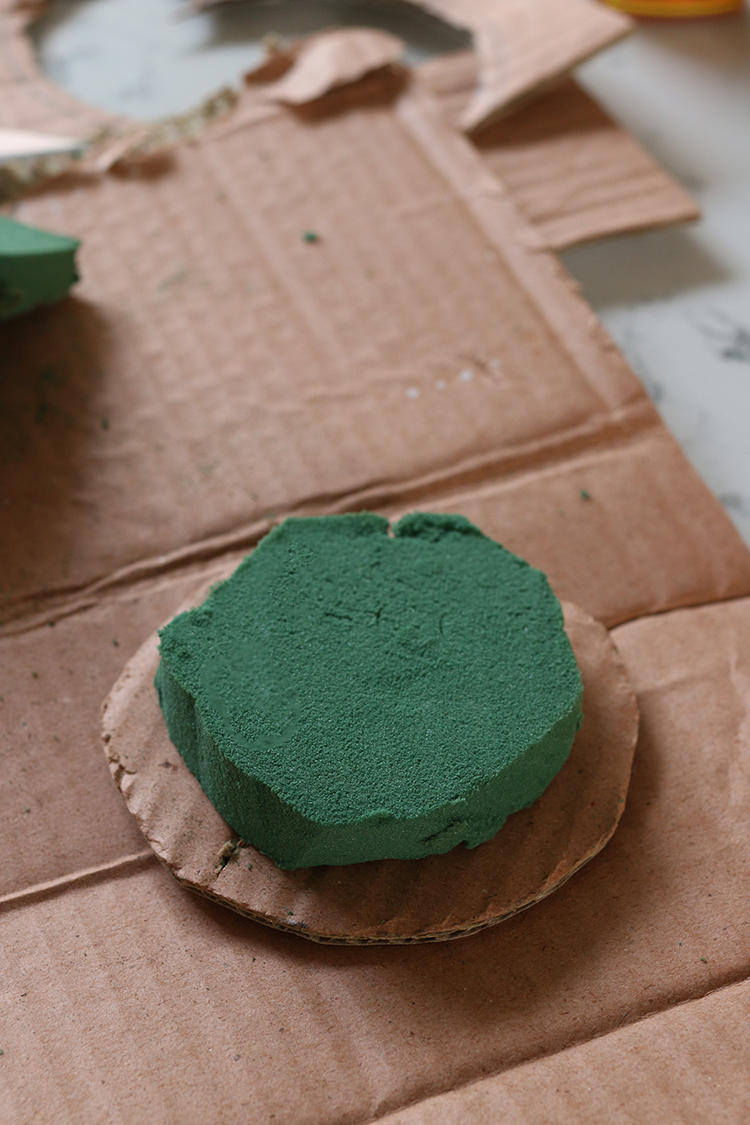
Using a kitchen knife, cut the floral foam so that it’s smaller than your cardboard base by about 1-2cm. Again, this will all be covered with moss so it doesn’t need to look perfect.
Step 4
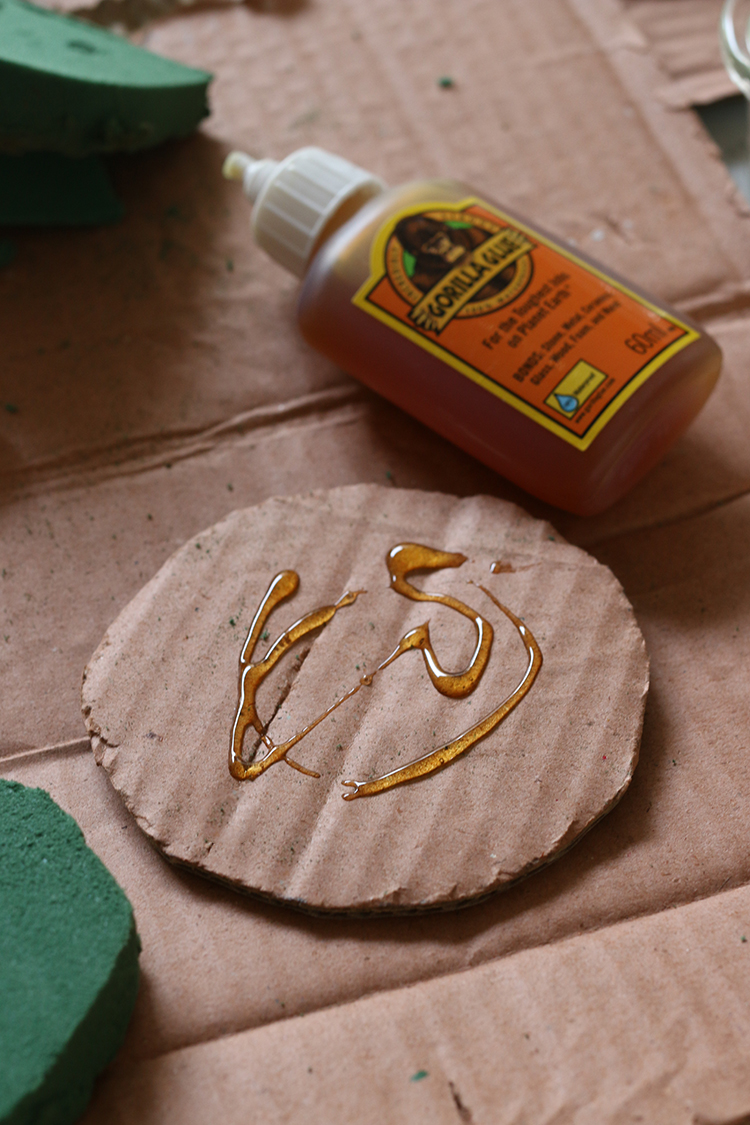
Place glue on your cardboard where the floral foam will be sat to attach it to the cardboard base.
Step 5
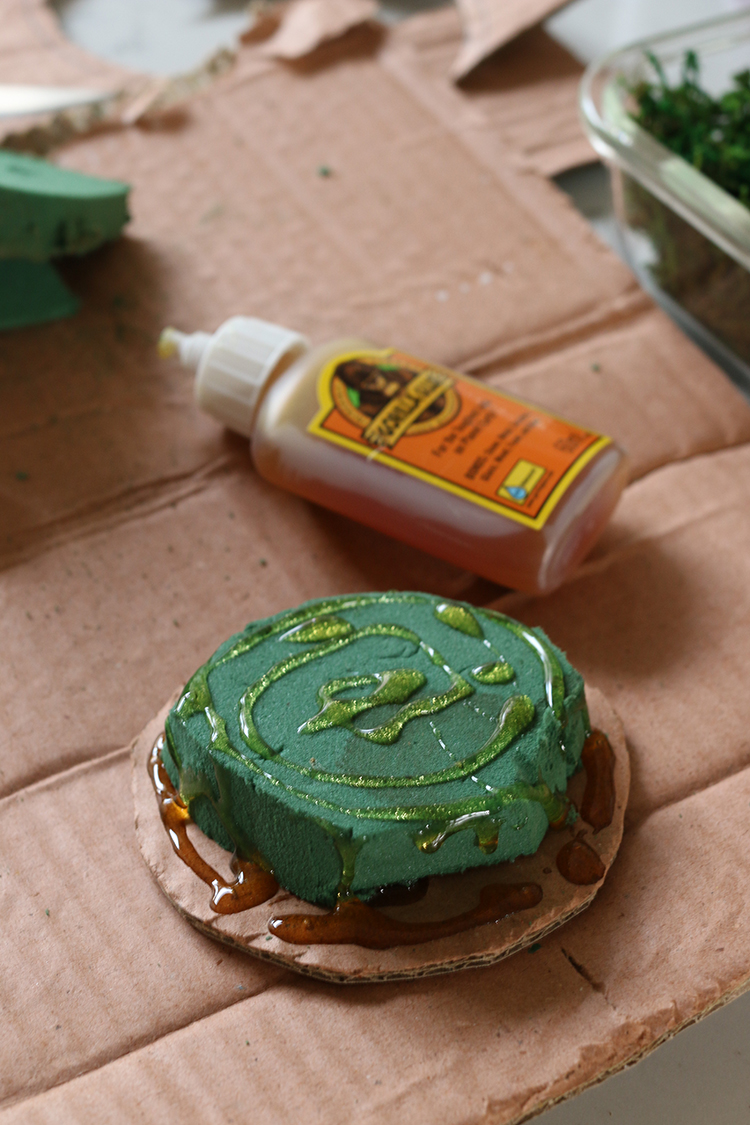
Add more glue to the rest of the visible cardboard as well as around the sides and top of the floral foam.
Step 6
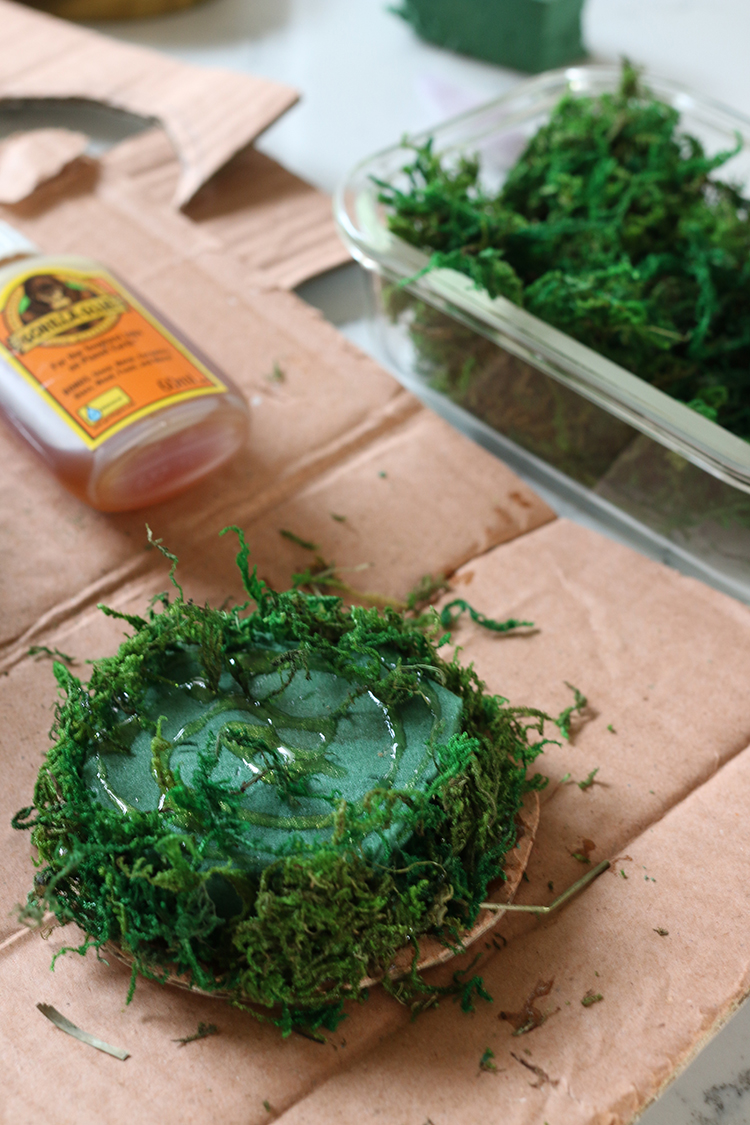
Start covering the sides with small bits of moss, a little at a time until the foam and cardboard are covered. You may want to use gloves for this so you don’t get glue on your hands but you’ll want to press the moss into the glue to make sure it stays secure.
Step 7
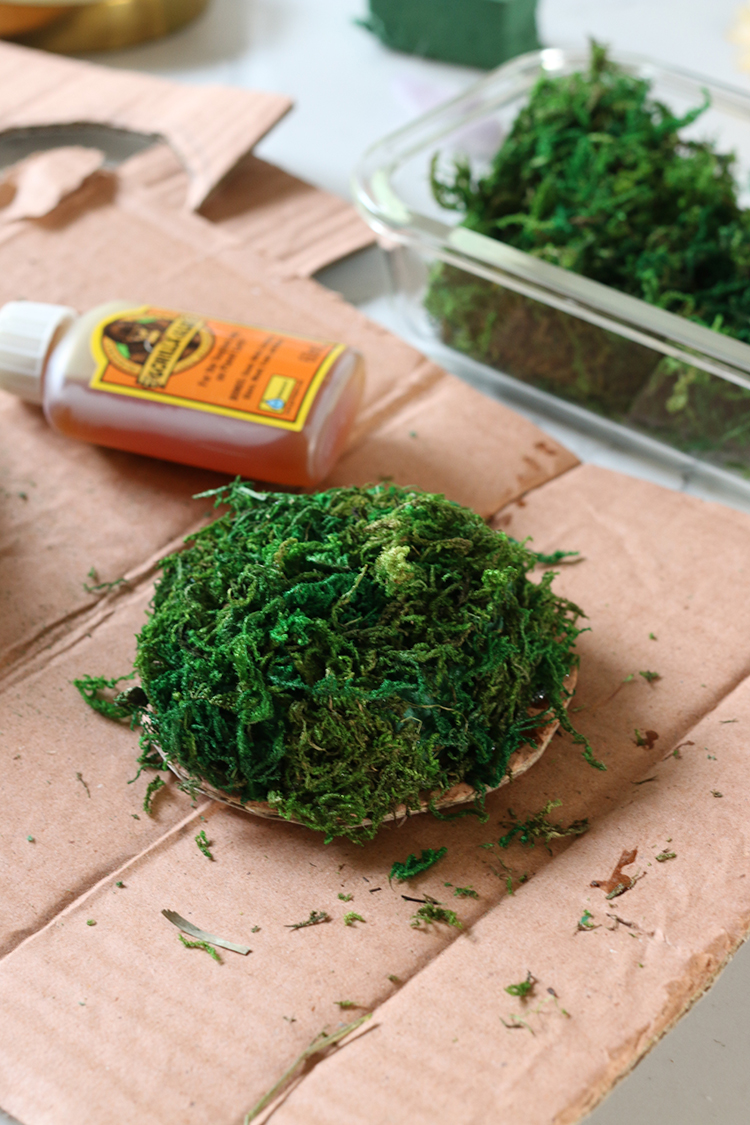
Continue covering the top with moss as well.
Step 8
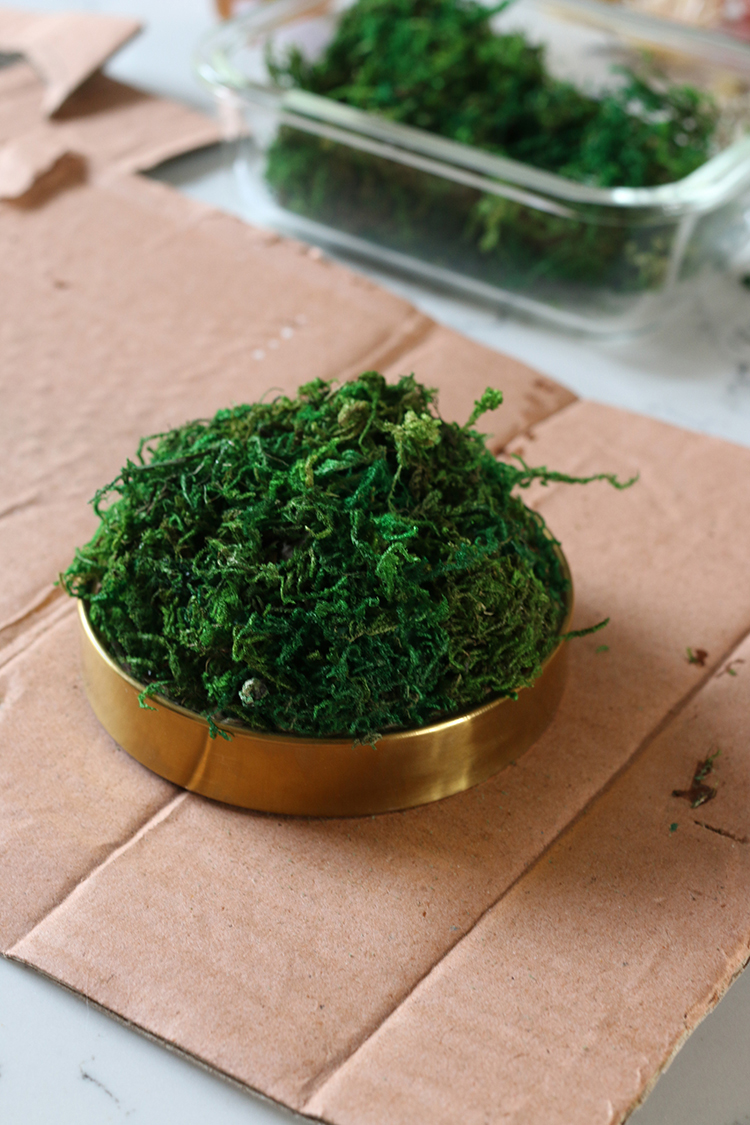
Place your moss base on the cloche base. At this point, you may want to put the glass dome over the top to make sure it will still close properly. You may have to trim the moss a bit with scissors if you find you’ve added too much at this point if you’re struggling to place the glass dome on top.
Step 9
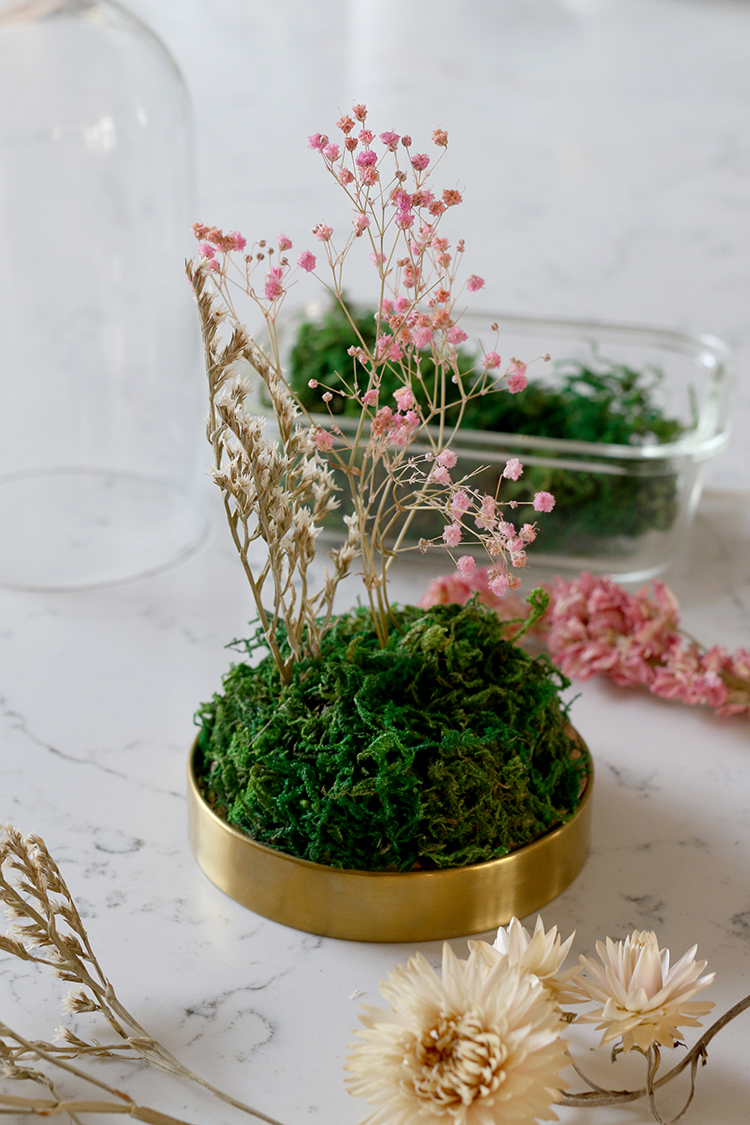
Now that your base is done, start adding your tallest dried flower pieces, trimming the ends as needed and pushing them securely into the floral foam and short enough so that they fit well inside the globe. I layered taller pieces in the back to add some height to the display…
Step 10
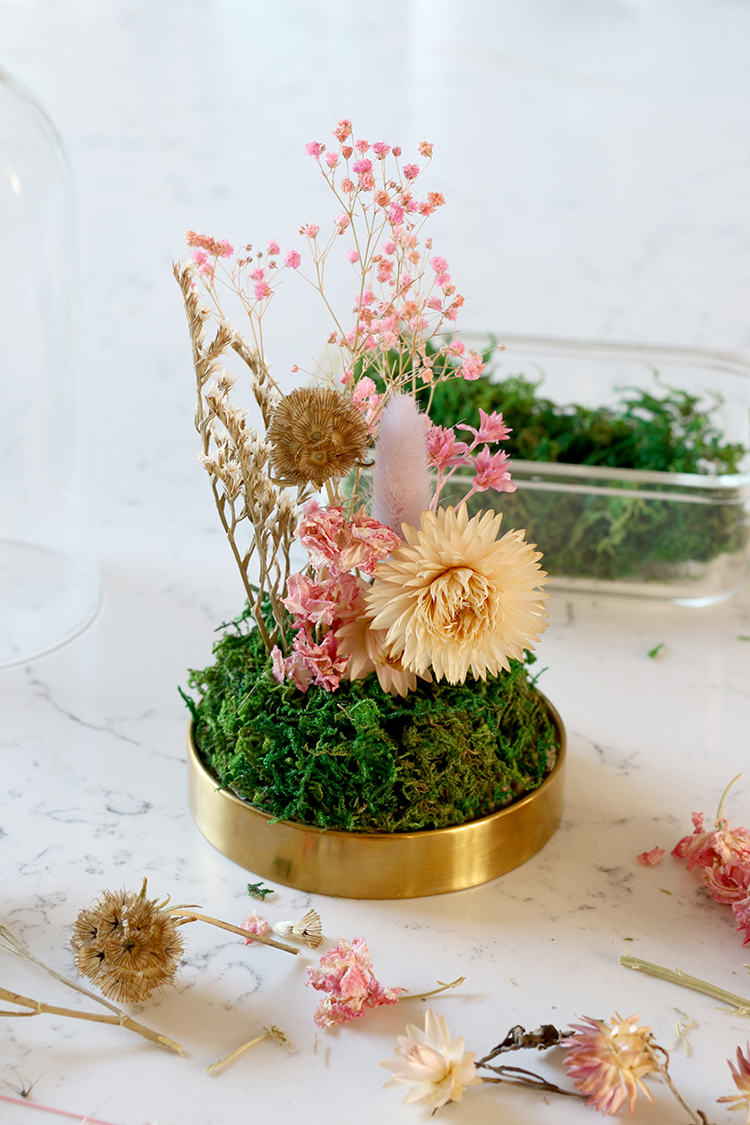
And then filled in shorter and larger flowers towards the front. Because you’re using foam, it’s easy to move things around and play around with the arrangement until you’re happy with it.
Step 11
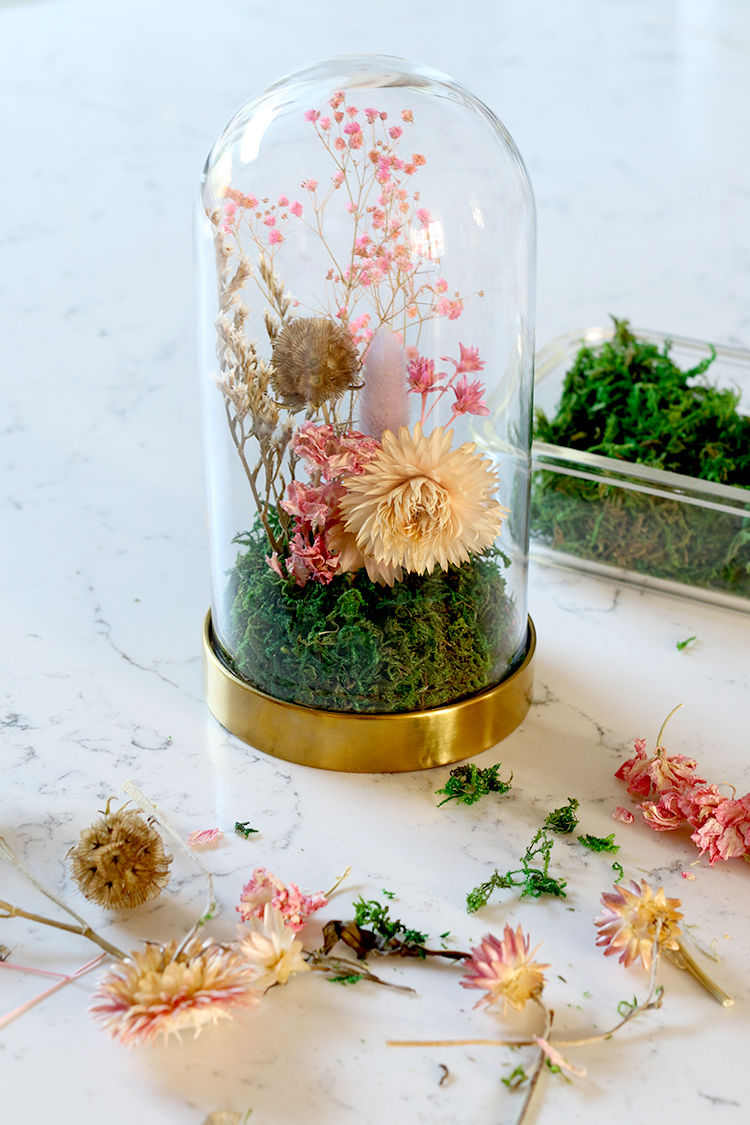
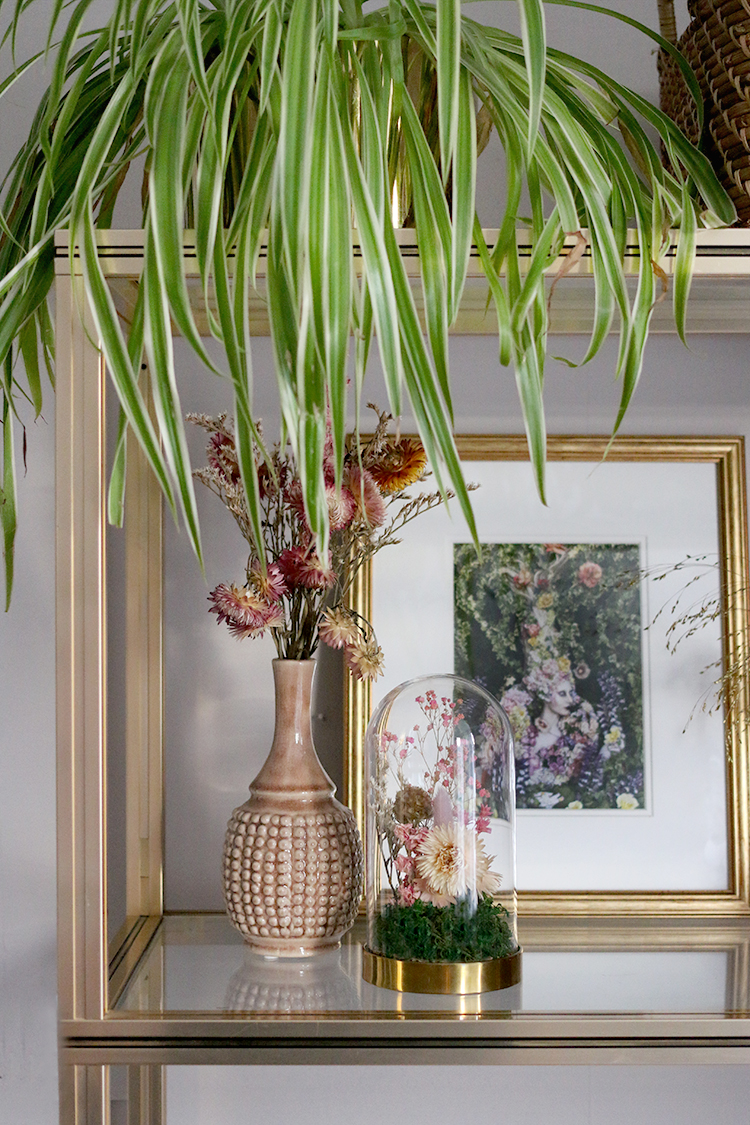
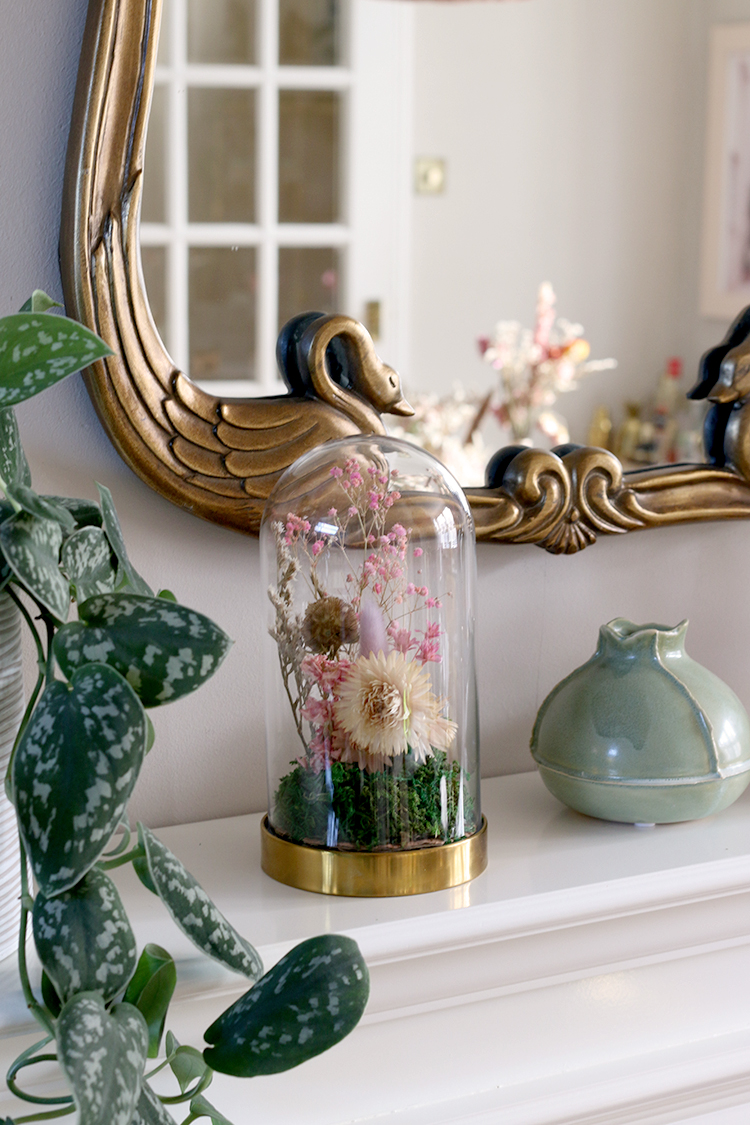
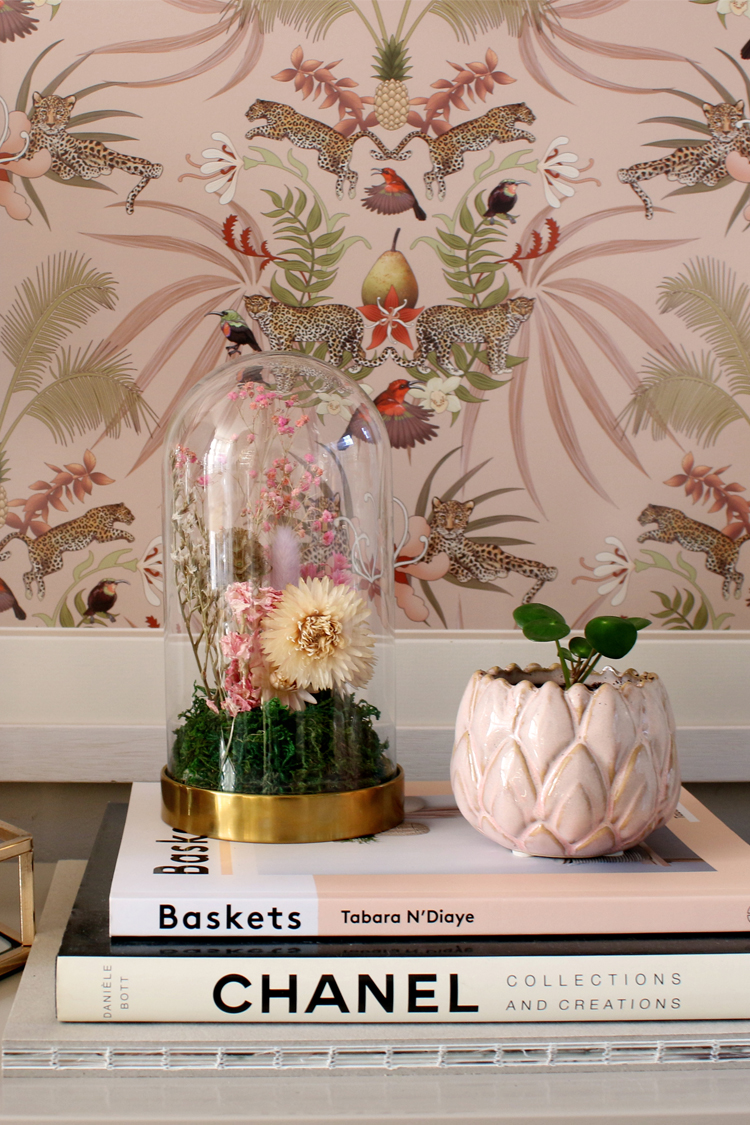
Add your glass top and you’re done! Now all that’s left to do is decide where you’ll display your little dried flower cloche.
I hope you like this little DIY as much as I enjoyed putting it together. A friend of mine remarked it looked very ethereal (such a good word) and you’d half-expect a little fairy to be living there! So it may be a nice activity to do with kids too. Let me know if you’re thinking of trying this one or how you would decorate your curiosity cloche in the comments!


This is so lovely Kimberly!
Thank you so much lovely! xx
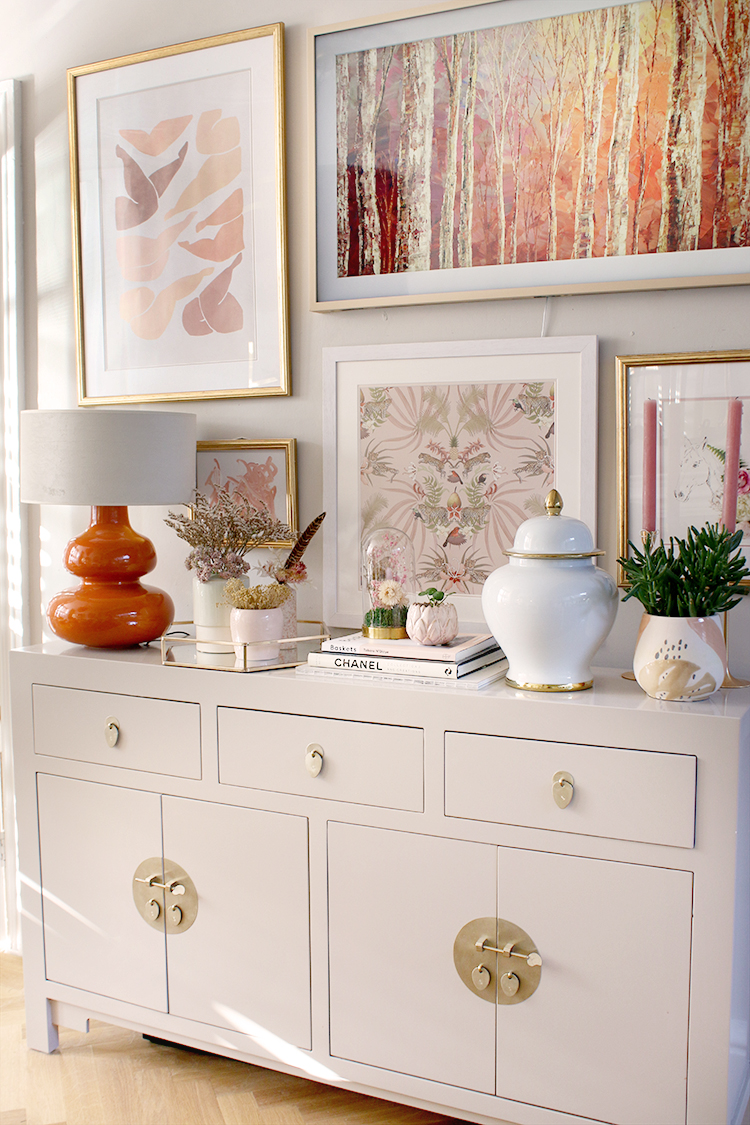
Hiya Kimberley what a lovely idea and so simple! Nice one! Do you mind my asking what color the unit is painted that your little cloche is sitting on please? I have just bought some pale pink tiles for a kitchen splash back and trying to choose a color for the paint background is proving tricky! They keep on wanting to become a mushroom color! Eek! Thank you.
Aww sorry, it actually came in that colour! The unit is from Nine Schools. However, it does match really well with my walls which are painted in Earthborn’s Donkey Ride if that helps! I love it with pink :) xx
Hi Kimberley,
It looks so sweet. You might be interested to know that there is a floral oasis that is especially for dried flowers. It’s a taupe colour and it doesn’t crumble the way the green (wet) oasis does. You can buy it from online floristry suppliers.
Oh that’s great to know! I didn’t soak this one obviously because it wasn’t necessary (and I already had it to hand!) but that’s a great tip for the future – thank you! xx
This is so beautiful, and much better quality than the inspiration piece! I love it… and that friend of yours sounds very wise and insightful… :)