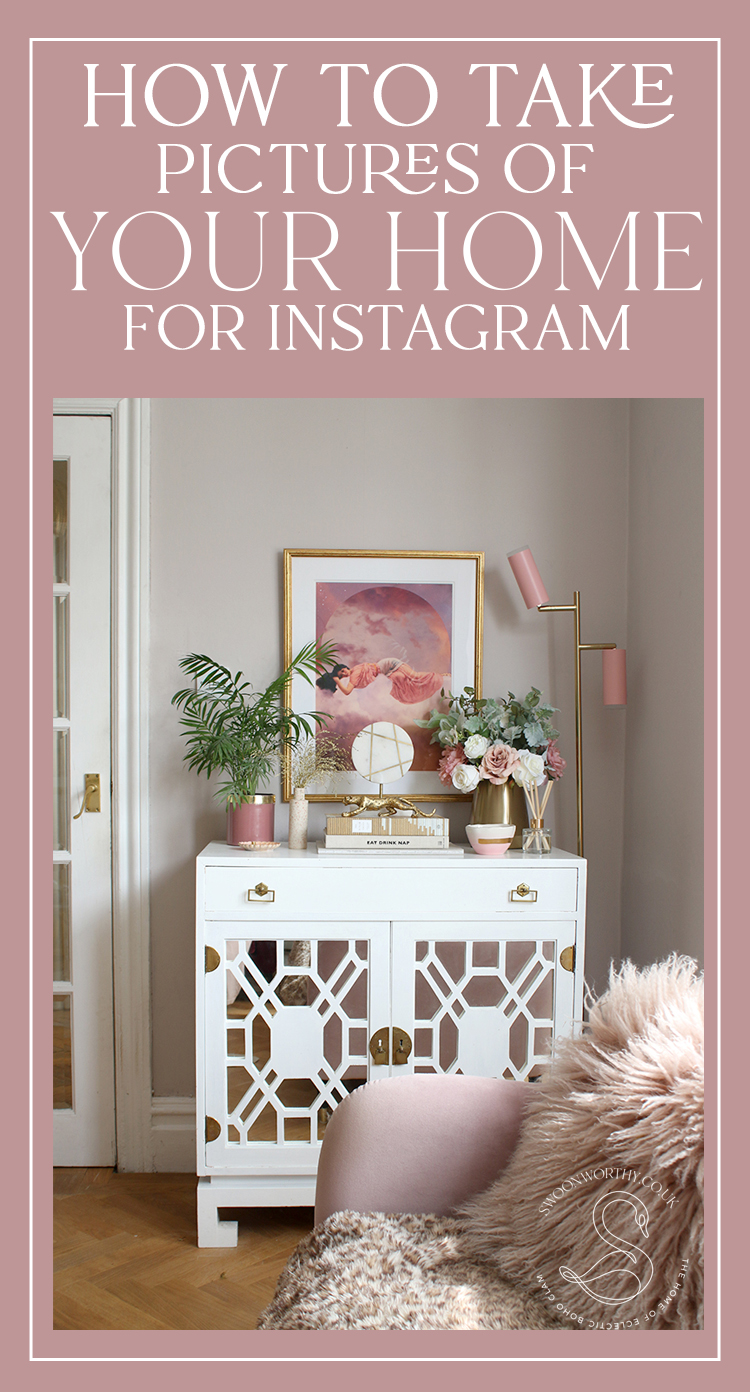
Do you remember long long ago when Instagram first started and it was all about taking pictures ‘in the moment’? After all, that’s where the ‘Insta’ part of the app’s name came from. I look back at my earliest shots now and wonder what on earth I was thinking but I could do the same if I looked back on the earliest posts of my blog too. We all have to start somewhere, right? I don’t think any one of us could have imagined the impact Instagram would eventually have in terms of social media and while I continue to have a very love/hate relationship with it (you can read all about why that is here), I do still love scrolling through for inspiration.
There are so many people there now sharing their love of home interiors and seeing as so many of us are spending so much more time in our homes, I thought I’d give you some of my tips for how to take pictures of your home to share in those little squares. I see so many people with lovely homes but their images just don’t do their spaces justice – and it’s not because the rooms they are showing aren’t lovely but the pictures they’ve taken just need a bit of work!
So as someone who’s own photography has come on leaps and bounds since those early days (and trust me when I say I’m still learning all the time), I wanted to share some of my tips if you want to improve your photography game. Now, I normally take photos for my blog and then take additional shots at the same time to share on my Instagram feed. That means the shots you see on my feed are taken with a DSLR Camera (I have a Canon 70D if you’re curious). However, the tips I’m sharing are not just for those with nice fancy cameras. These days, mobiles have come such a long way in allowing you to edit and adjust photos easily within plenty of different kinds of apps to really take your photography to the next level. So this is genuinely for anyone – whether you have a nice camera you’re just trying to get to grips with or if you’re simply using a mobile phone.
If you’re looking for tips on taking photographs with a DSLR camera, I shared some photography tips here on my blog. The post is a few years old but the tips are still totally relevant if you want to start taking your photos to the next level and learn how to shoot on manual settings.
Set the Scene
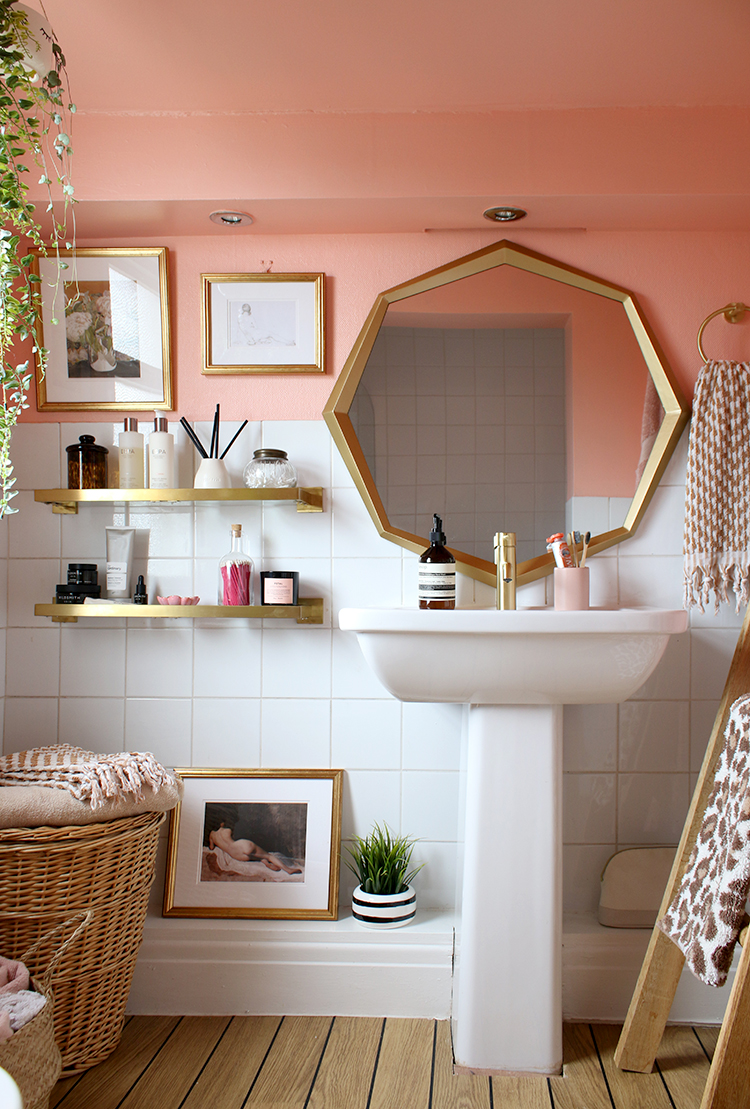
No one’s home is going to be fully perfect all the time. If they tell you that their home is always Instagram-perfect, they are lying! LOL! So the first step you’ll probably need to take is a quick tidy up and clean of the space you want to photograph. This means removing that pile of post you still haven’t sorted from the table or re-fluffing the squashed sofa cushions or dusting the shelves you’re shooting. Now, I’m not saying it has to be totally perfect and devoid of life (I’ll get to this in just a bit) because you can go too far with this. But ask yourself if it actually adds to the scene – if it doesn’t, you can safely remove it from shot.
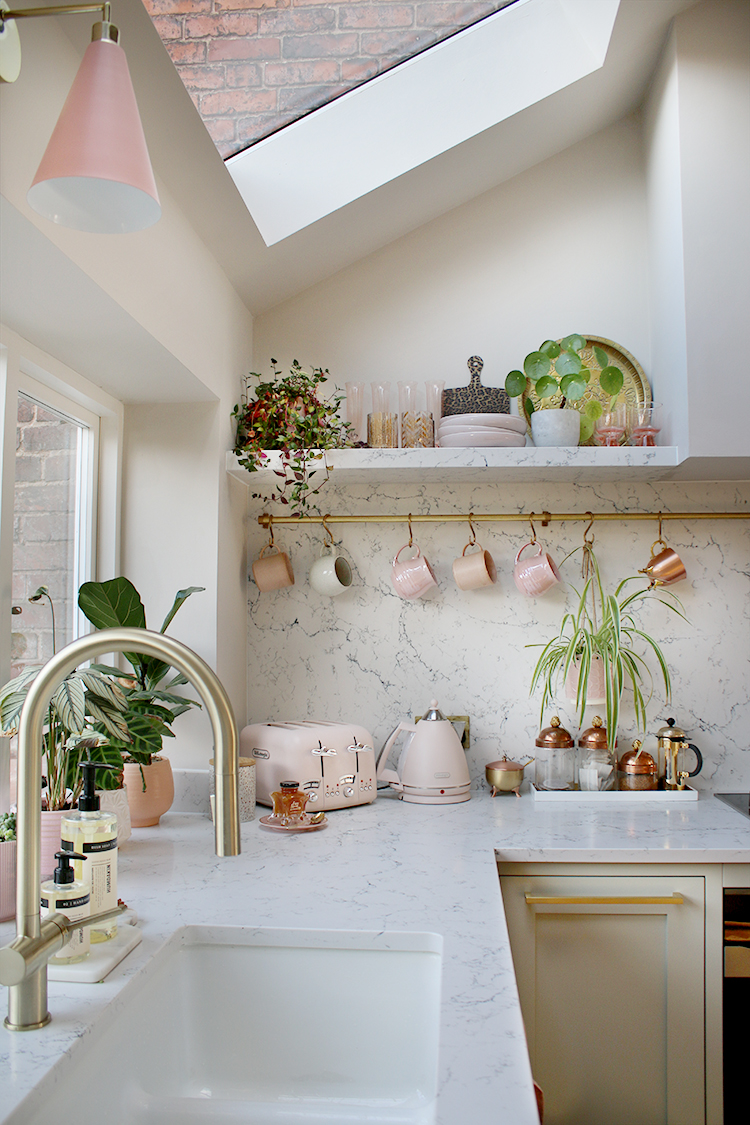
You’ll also want to ensure there is an element of contrast and texture within the shot to make sure there’s something interesting to look at. Add a thick textured throw to the end of the bed or a small rattan basket with a plant in it on the floor. Give the space some texture and then layer these pieces so some items are closer to the camera and some are further away.
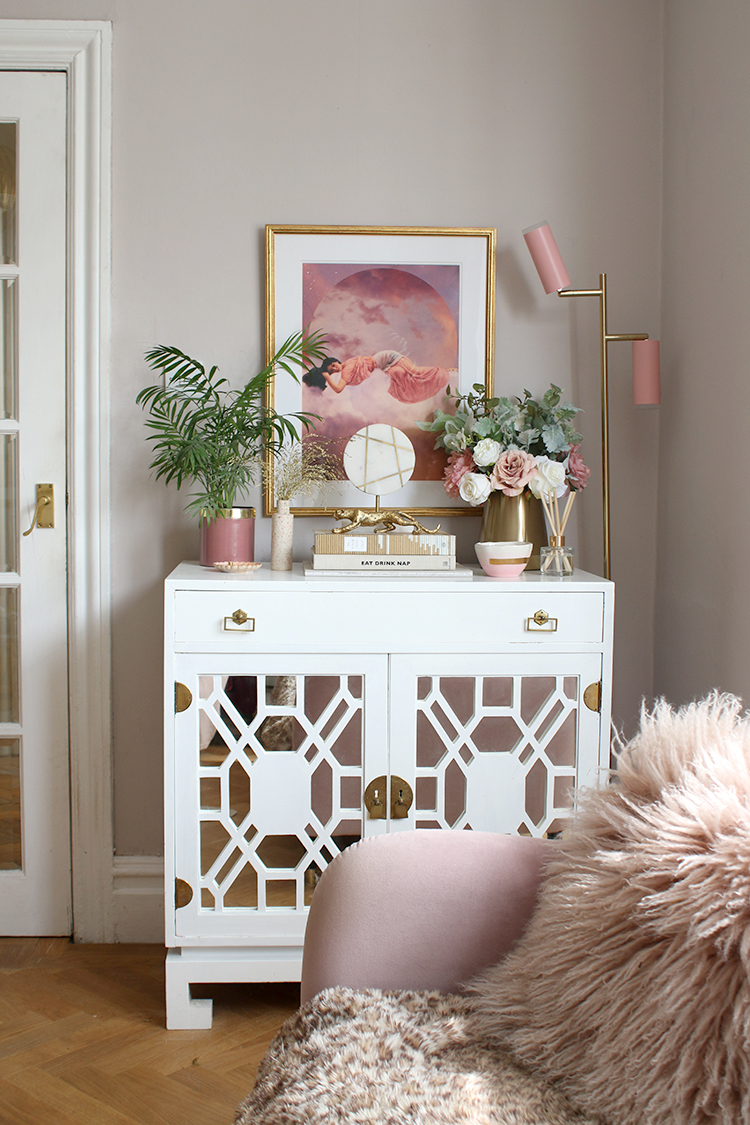
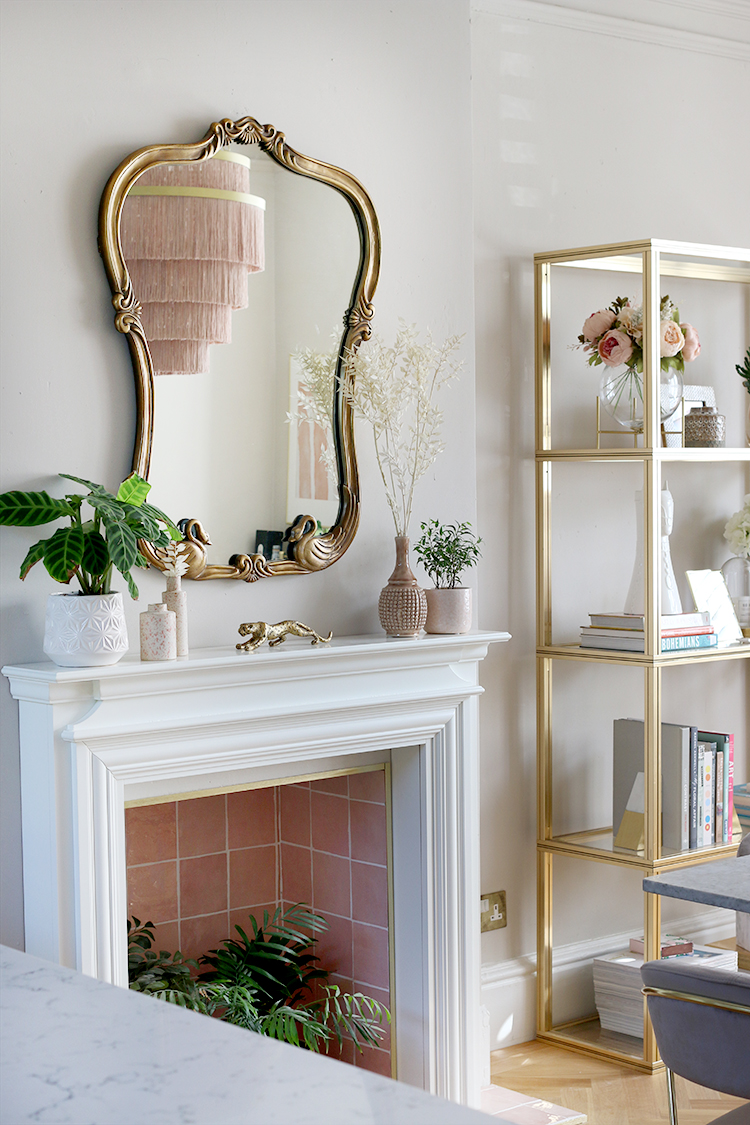
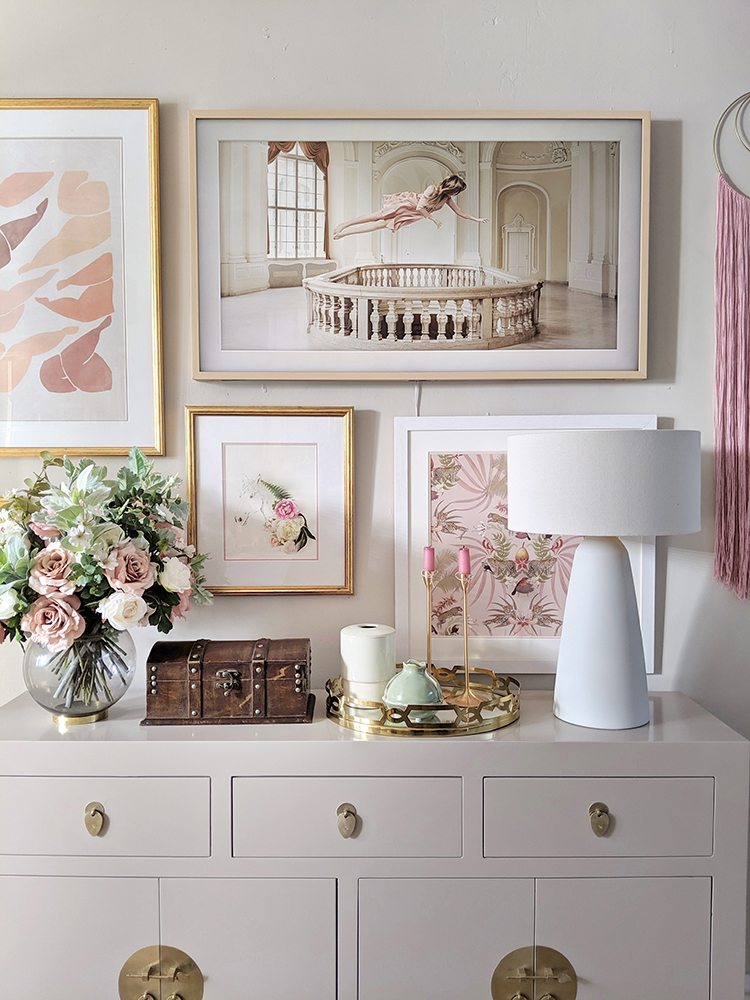
One trick I learned long ago is if you’re taking pictures of a flat surface – like a styled sideboard or a shelf, then pull your items a little closer to the camera rather than have them flat against the wall. It will look a bit strange in real life but it works well on shots you’re taking straight-on.
Get The Lighting Right
So this one is a biggie because it’s probably the one thing I see so many people get wrong. Your lighting is absolutely PARAMOUNT to taking a good photo. First of all, do not – and I’m going to repeat that – DO NOT take photos at night (well not until you master taking photos in natural light). Turn off the internal lights and don’t take pictures with the flash on your camera. All that unnatural light will cast a yellow or blue-ish light on everything, distorting your colours. It just doesn’t look good, believe me.
On the other end of the scale, you also don’t want to shoot with strong sunlight streaming into your home (again, yes, there are times this can create a really interesting shot but I’d recommend staying away from it if you’re a beginner). Anything within that beam of light will be blown out and your camera will struggle to balance the very light parts of your pictures with the very dark parts of your picture, distorting the colour in your shot.
What you want to do is shoot in bright indirect light – this is the best lighting for taking pictures of your home. So keep an eye on your room during the day – since every room faces the sun at different angles, you’ll want to have a rough idea of when your room is bright without lots of sunlight streaming through windows. Your best bet is when you have a bright but cloudy day (not dark grey clouds though) as the clouds will act as a natural filter, creating a soft light through your space.
You may struggle shooting windows straight on as well – I still struggle with this at times! So to start, try to avoid shooting towards a window but shoot what’s being lit up by the window (across the room or just to the side of the window) or consider using a reflector to bounce light around the space.
Straighten Your Photos
Here’s another thing I often see that can be so easily improved. While you can adjust the images post-production if they aren’t totally straight, I find it’s helpful to use any straight vertical angle to set up my image whilst I’m shooting it. When things are a bit off-kilter, it just makes for a strange shot so make sure your vertical lines are actually vertical and your horizontal lines are straight too. Most cameras have some lines to help you position the camera correctly when you’re shooting.
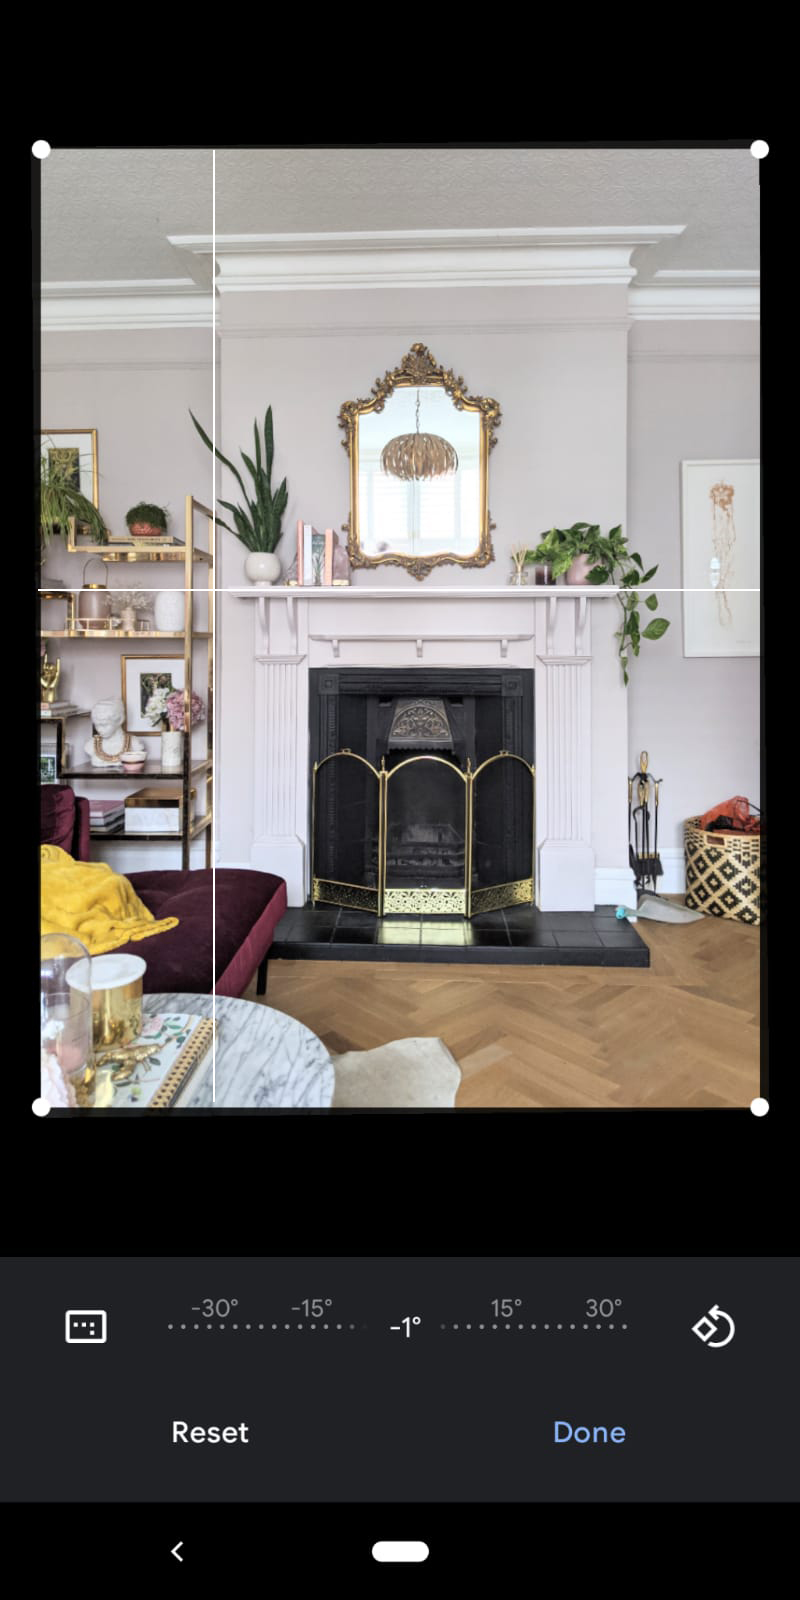
This is something I struggle with at times as I live in a very old house where not a single bloody wall or floor is straight! But if you find a shot is slightly off because your camera wasn’t straight, then use the settings in your camera to straighten the image, aligning it with the most prominent vertical or horizontal lines in your image before posting it.
Focal Points and The Rule of Thirds
Every image you take should have some purpose and so just shooting a random angle of a space won’t have the same impact as shooting with a purpose. Figure out what you want your viewer to look at. Is it a lovely styled fireplace? A stack of books on the floor next to the bed? A gallery wall? It might seem a bit obvious but make sure you’re giving them something interesting to look at.
Once you find your focal point, you can play with this by using the rule of thirds. What’s the rule of thirds? It’s something photographers have used for years as a bit of a guide to taking more dynamic photos that are more pleasing to the eye. The main idea of the rule of thirds is to not place your focal point right in the centre of the photo. Instead, consider moving the angle slightly so that your focal point is either to the left or the right of your shot.
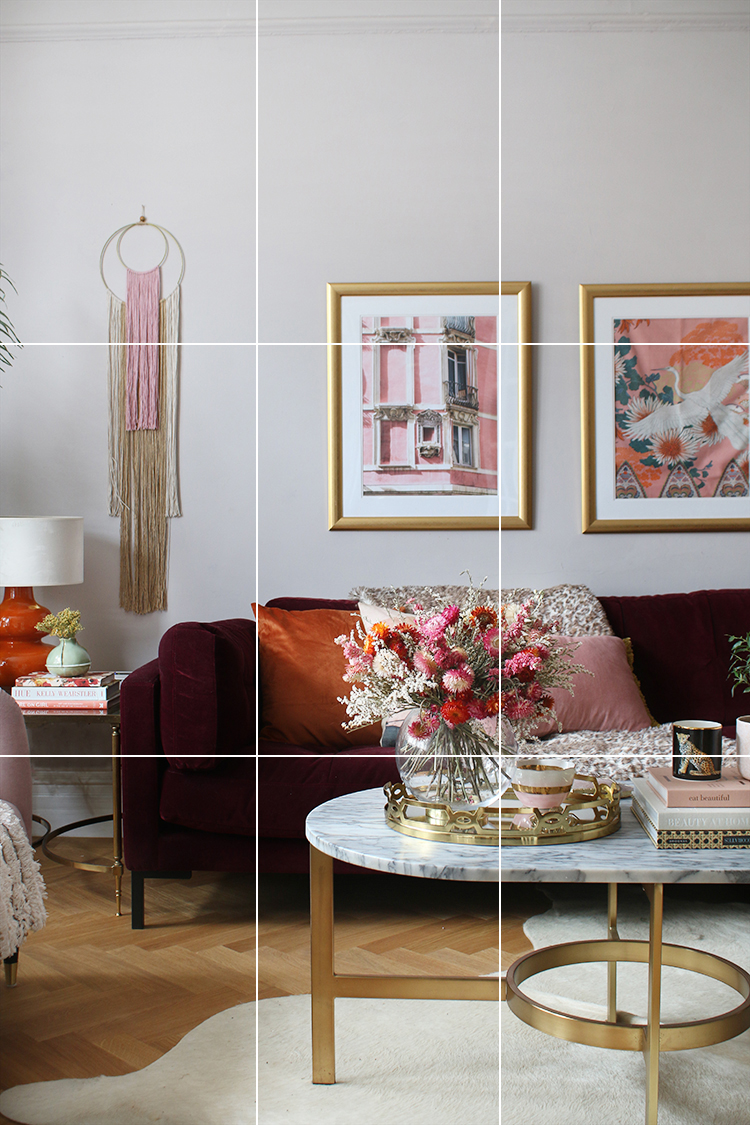
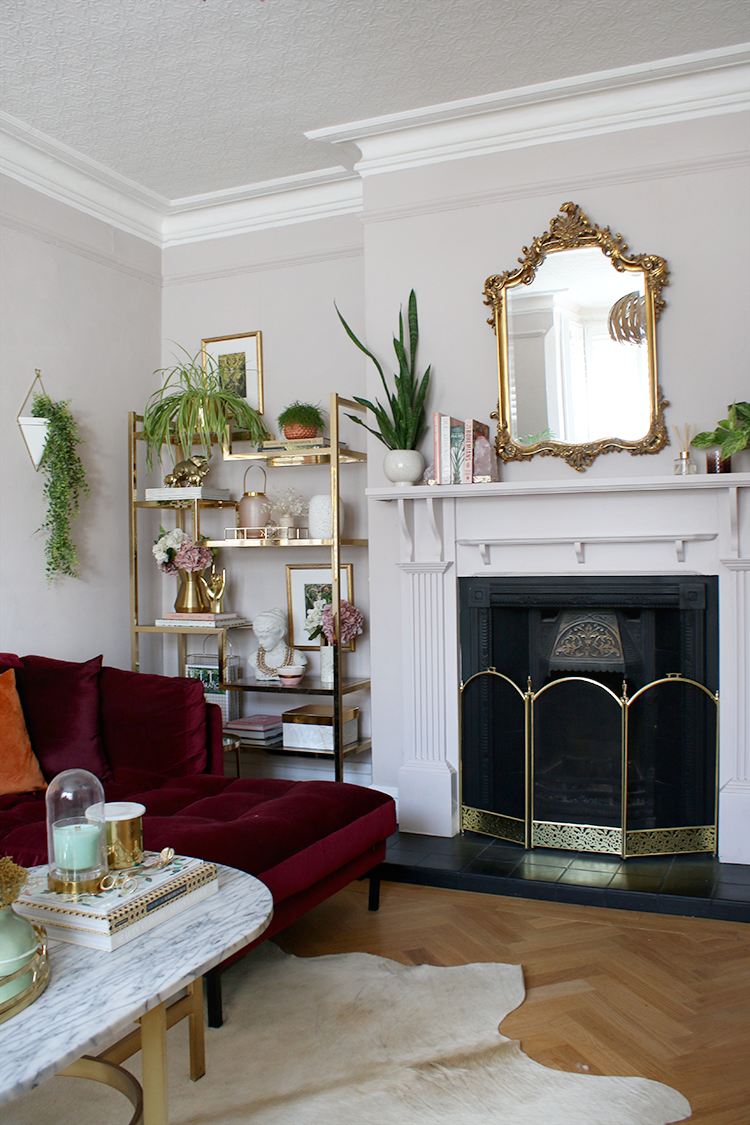
For the rule of thirds, you want to think of your image as having two horizontal lines and two vertical lines breaking up the photo as above. The main focal point of this image – where your eye naturally goes – is the flower arrangement on the table. You’ll notice it’s not right in the centre of my photo – it’s actually closer to where those two bottom lines intersect.

You’ll also notice the line of sofa doesn’t run right in the centre of the photo either. It’s placed along the middle of that bottom line as well. The negative space above the sofa gives the whole shot a bit of breathing room and makes it more interesting than if I’d just taken a photo of the sofa right in the centre of the shot.
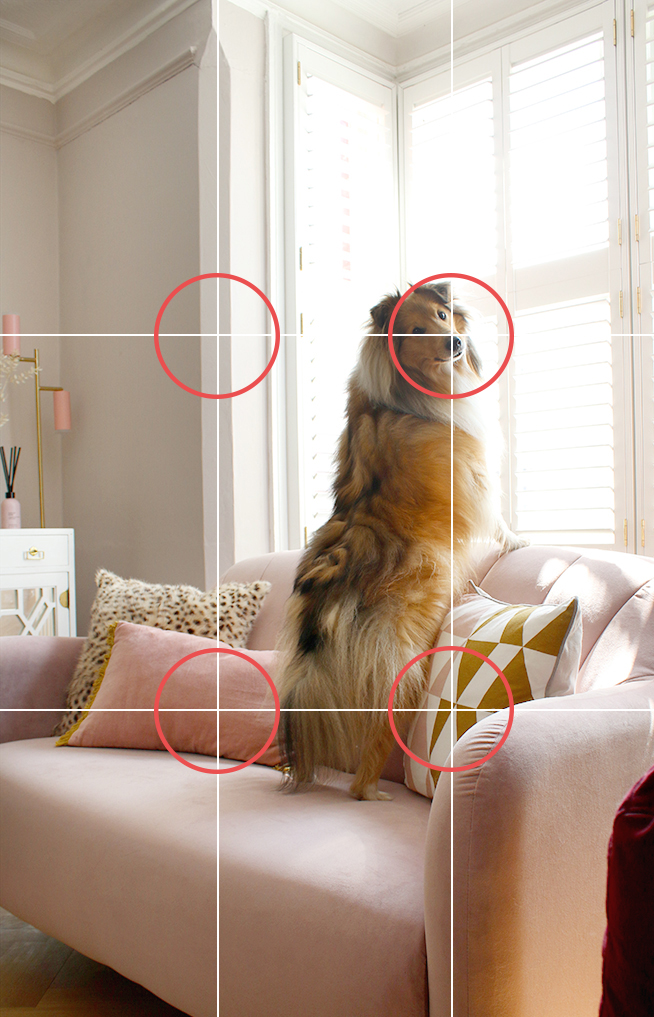
Here’s another example if you’re shooting a person or pet. Your eye will automatically go to Quito’s eyes because he’s looking directly at the camera. Notice his face is right in the intersection of the top right lines and the sofa is centred once again along the bottom third.
This is one of those things that will seem awkward to do at first but after a while, you will just naturally do when you’re taking photographs. Neither of these shots did I particularly think, ‘must remember the rule of thirds!’ – I just do it naturally now without thinking. But when you first start out, it’s a good thing to keep in mind to think about the composition differently and then after a while, you’ll realise very quickly how second-nature it becomes.
Capture a Moment
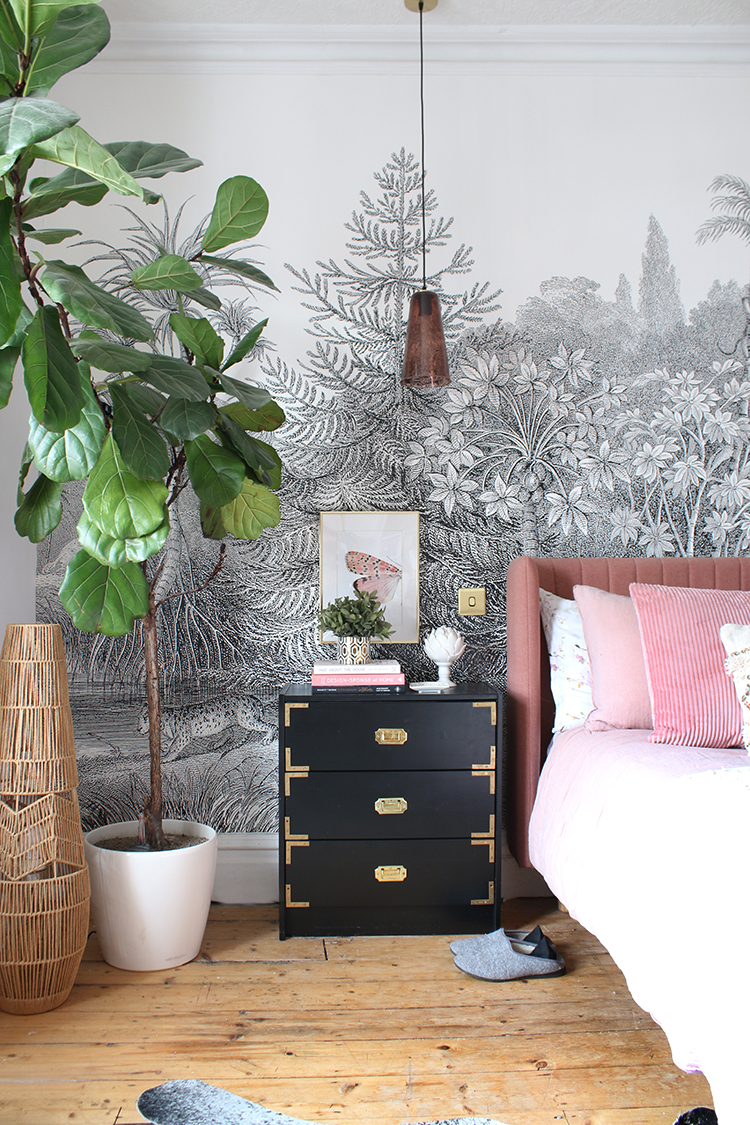
So I wanted to come back to the idea of not making your images too perfect. I think there’s a big difference from removing the dirty dishes from the worktops in your kitchen and removing all signs of life from your home. People want to feel like they’ve just stepped into your home and captured a little bit of life in the process.
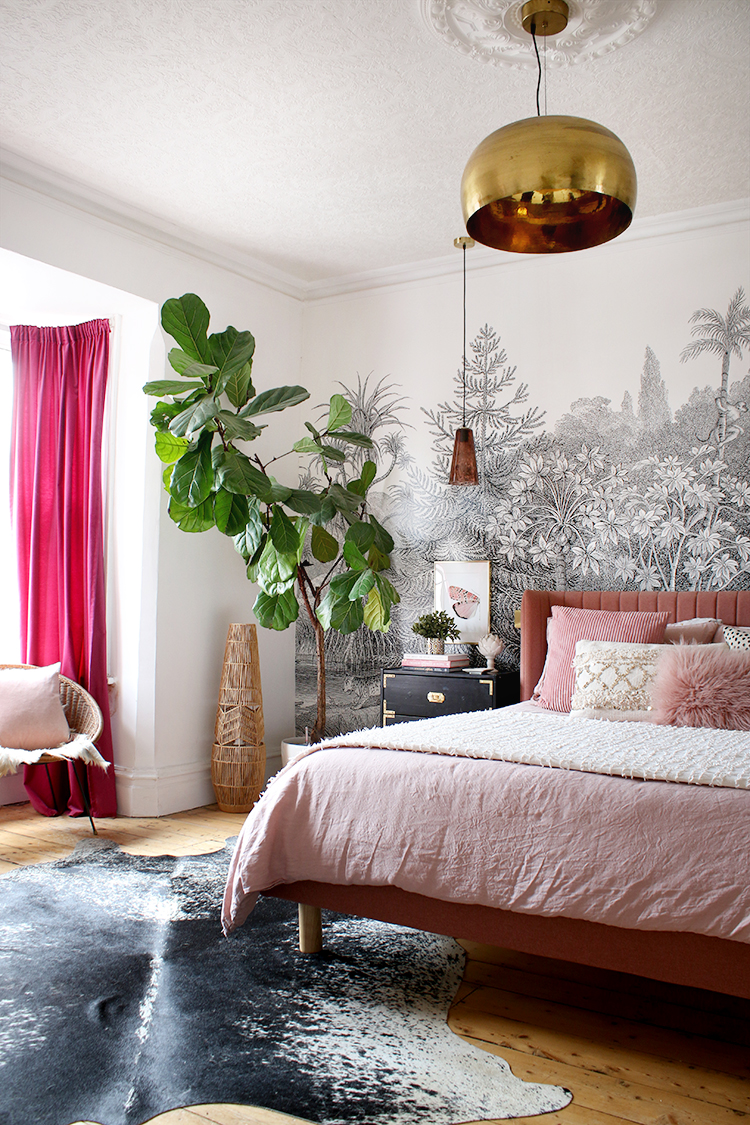
So you’ll see I often include my pets in my images (they always perform well for me!) or I might leave a coffee cup on the worktops or as in the image above, a pair of slippers by the bed. Consider including an open book left on a bed or a magazine open on a coffee table. Allow your pets or a cheeky child to photobomb your shots every once in a while. It just gives people the impression that it’s a slice of life.
Adjust Your POV
Another mistake I often see people make is they will walk into a room, stand in the doorway, put the camera to face-level and click to take the shot. If you find yourself doing this, you may be missing a trick to taking a more dynamic photo. Consider changing your perspective when taking your photos.
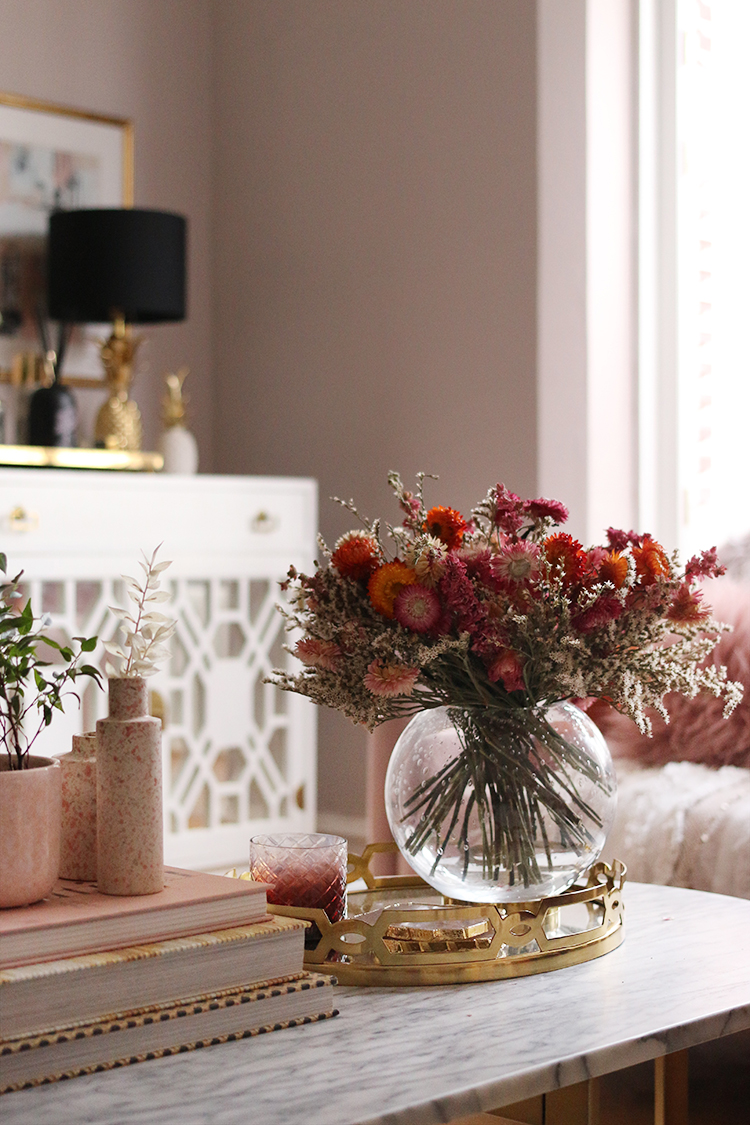
For instance, in a living room, most of your furniture is going to be a little lower for relaxation than say, in your kitchen. So taking the photo a little lower down so that the sofa is at your eye level might be a better way to engage the viewer of your image. You might want to try standing on a small step stool and shooting down on a coffee table or stand in the corner of a room and get a more wide-angle shot. In the shot above, I was sat on the sofa to ensure the flower arrangement was at eye level.
Angle shots work well when you are taking a whole room image but I also find that sometimes it’s nice to take a shot straight on if there are lots of interesting angles like for a gallery wall or a set of shelving. All those straight lines are naturally more pleasing to the eye.
Post-Editing
While I do take most of my images on a DSLR, even those that I take on my phone I don’t do a whole lot of editing after taking the photo. I may make some subtle adjustments to make it look a bit brighter or deepening the darkest tones but that’s really about it. For me, I love for the colours to show at their truest and so making large adjustments or using filters is something I tend to shy away from.
While I understand that a lot of people want their feed to be consistent, I’m not a huge fan of using filters that completely change the colours of the photos, turning everything a de-saturated beige or making blue tones look almost aqua-green. The inspiration for my own photography has always been based on professional interior design photographers who ensure light bright spaces where all the colours look true to life. So you may want to ask yourself if you really do need that strange colour cast filter that turns your image orange? Perhaps a controversial opinion but it may be best to practice getting the best from your photographs so you don’t have a need to stick a filter on it! ;)
I hope these tips have been helpful to you today and I’d love to know if you have any other questions in terms of improving your photography on Instagram? Hit me up in the comments!


Thanks for article, its always good to hear tricks and tips from pro.
Aww thanks Veronika! Hope you found it helpful! xx
These are great, thank you! I love your content so was excited to read this blog!
Oh thank you Rhiannon! You’re too sweet :) Hope you found it helpful! xxx
This is so useful! If I ever manage to get any rooms properly finished, I’m going to try to take some decent pictures using these tips!