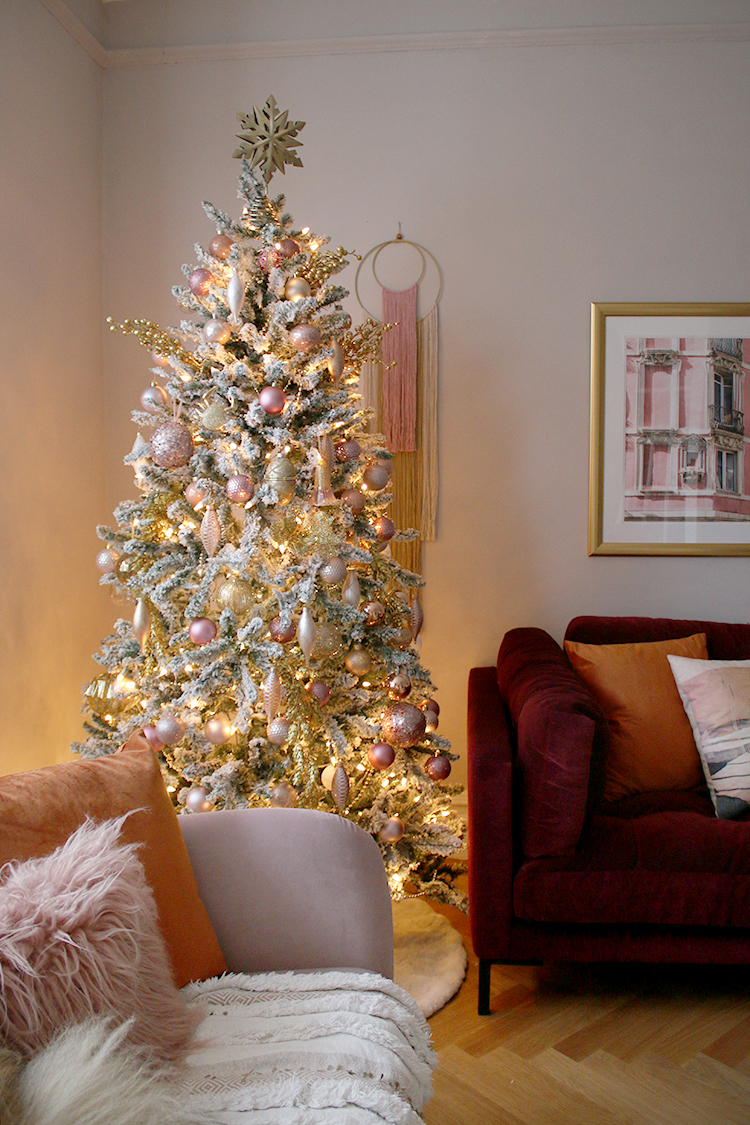
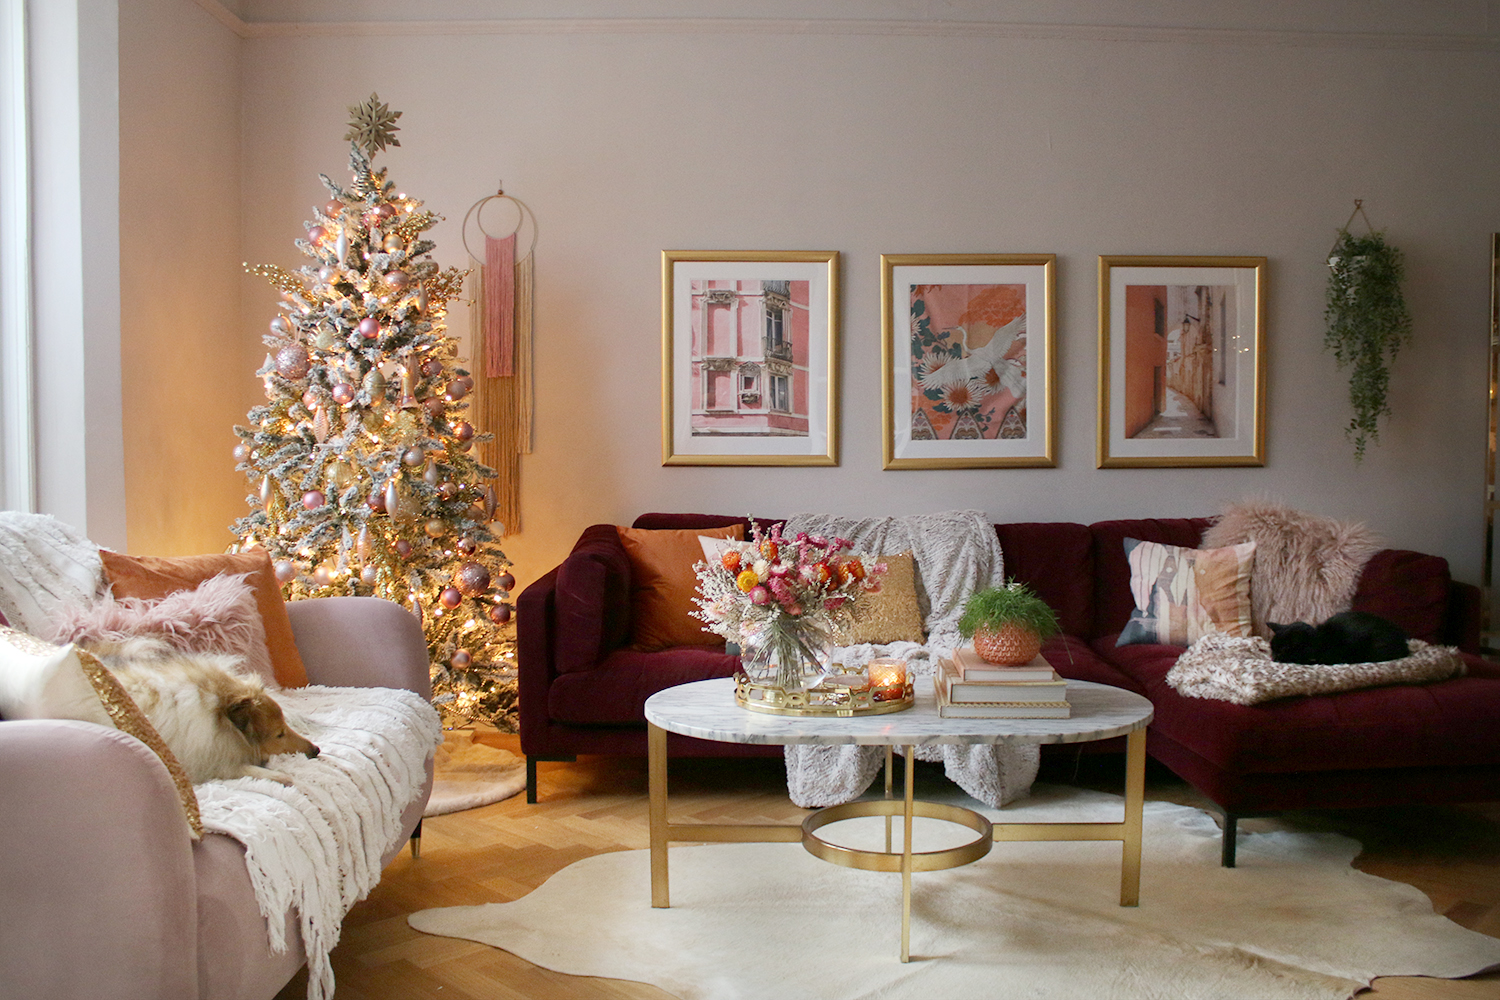
A friend of mine asked me recently if I’d ever done a blog post on styling a Christmas tree as she was looking for some tips for her own. And I realised that after so many years of decorating trees, I never have! So, as I celebrated the start of the festive season by putting up my tree, I figured I’d take some pics of my process and share them with you here today, detailing exactly how I do mine.
The thing with decorating Christmas trees – and maybe one reason I’ve never shared my process – is that it’s so wildly personal. I’ve had plenty of people over the years tell me there’s no way they can create a really stylish tree as it’s something the kids enjoy decorating and so the tree ends up a hodge-podge of mismatched items from over many years. While it doesn’t look like it came straight from a magazine, what it does do is create memories. And, ya know, I get that, I totally do. If that’s the case for you, then maybe having a “stylish” Christmas tree is just not that important, after all, and that’s totally fine.
(Or you can do what another friend of mine does – let the kids have a small one in their own space that they can go to town on and decorate however they like and have a second tree in the main part of the house that you decorate however you wish! Ha!)
But for those of you who enjoy coordinating your Christmas tree to your decor like I do, then this one is for you. I will be honest – this is something I do on my own each year. I stick a Christmas film on (this year, it was The Holiday – a joyous shallow romcom that Wayne hates so I enjoy on my own) or put on the Christmas music and spend a good few hours faffing. It’s utter bliss and I genuinely look forward to this ‘tradition’ that I do on my own! (The mark of a true introvert, no?)
This is not a sponsored post but it does contain affiliate links which means if you click on my link, I may receive a small commission from the brand as a thank you for the referral. You will never pay more for clicking on my links.
So I want to start by talking a bit about what I tend to use personally for my tree because again, it’s up to you what you want to use, I’m just sharing how I do mine. So, you can follow the steps or simply take elements from it and adapt it to your own style.
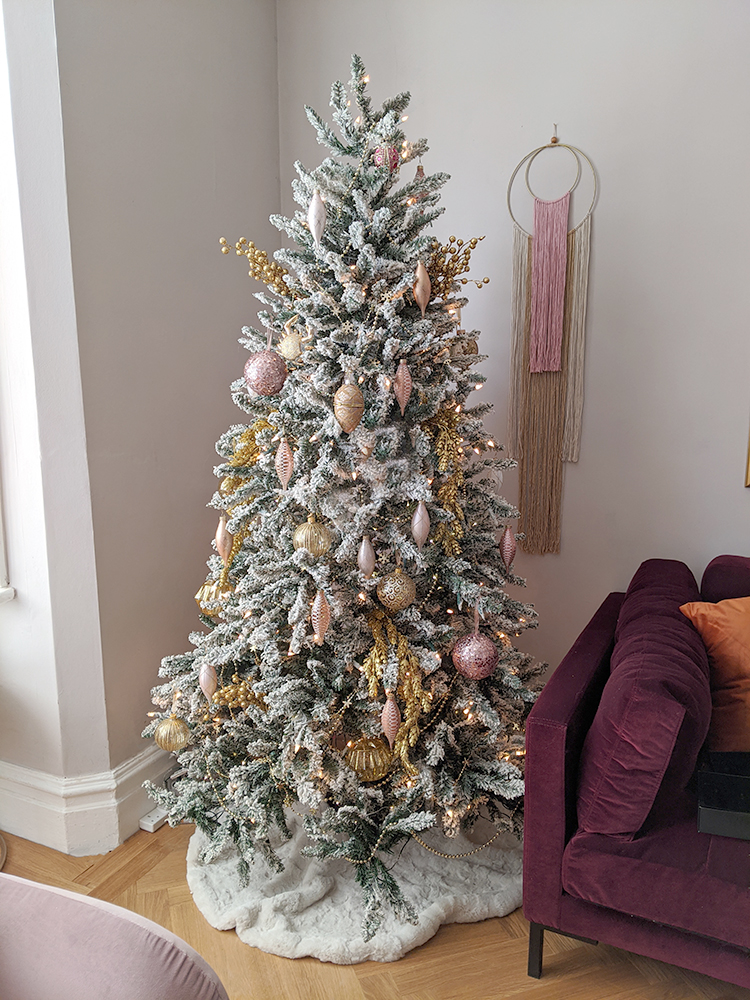
First, I always use a fake Christmas tree. I know there are a lot of people who insist on a real tree but I gave my reasons for that last year in this post so check that out if you’re curious as to why. But one of the main reasons is because I like the symmetry and bushy-ness of a fake one. I just think they look nicer. So, we’ll just get that one out of the way first.
The second thing is that I’ve been collecting ornaments and decor for a long time but over the last few years, I’ve begun to treat my ornaments the same way I treat the accessories in my home – I stick with a semi-coordinated scheme that works with the colour palette of my home. I’ve been slowly adding to my collection year after year, spending a bit more on some really pretty pieces that I’ll continue to enjoy into the future.
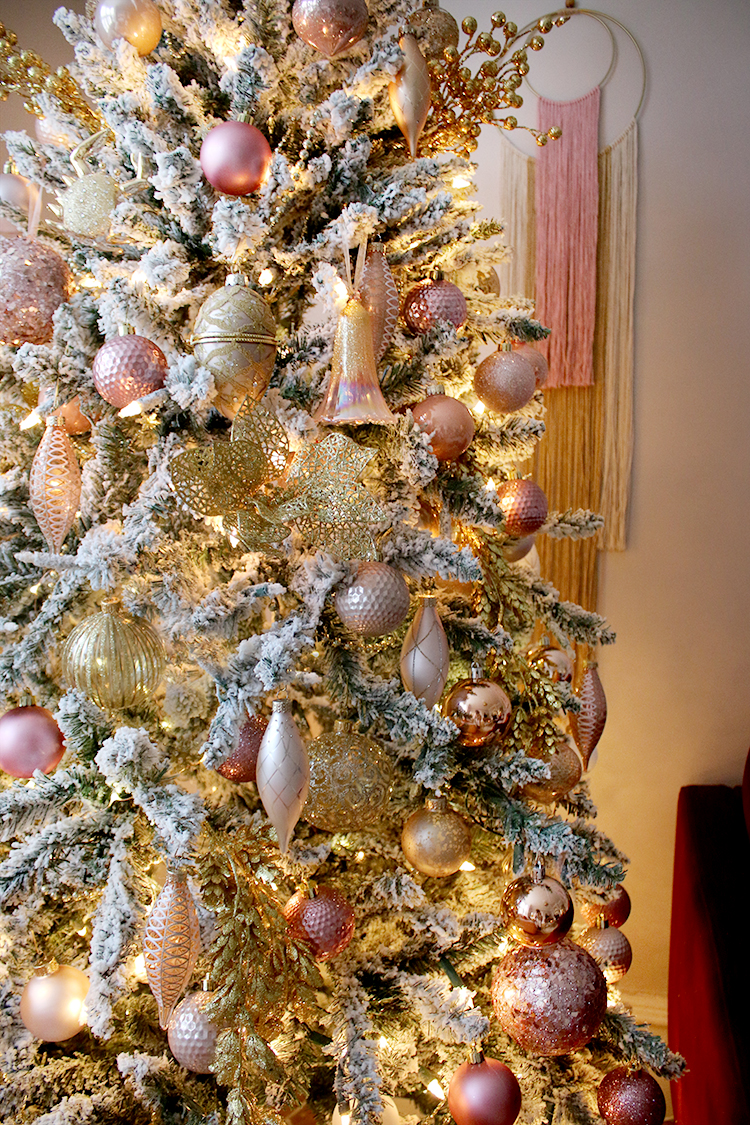
In November before I began decorating, I decided I really love my existing glass ornaments and I so I wanted to invest a bit to add to my collection. My plan is that eventually, most of my collection is glass although it’ll probably be quite a few years before I manage it. This year, I purchased these ones and these ones from John Lewis which I adore.

In terms of colour, I tend to only go for gold, clear glass, varying shades of pink and white. I think having a fairly limited palette is a nice way to create that collection that you can use every single year and I purchased these inexpensive shatter-proof ones to bulk up on some additional colour. In years’ past, I used to change up my colour scheme each year and its a great way to add a new colour simply by buying a large pack of inexpensive baubles in your chosen shade and mixing them in with an existing collection of mostly neutral shades.
For lighting, I also only ever use warm white bulbs on my tree (and everywhere else too). I think warm white looks more sophisticated than the multi-colour ones and gives it a much softer cosy glow than the blue-y white ones.
The last thing is that I’m not into tinsel. If you love it, then its totally okay if you fancy using it but you won’t find it on my tree! Ha!
Okay now that all the caveats are out of the way, shall we get started?
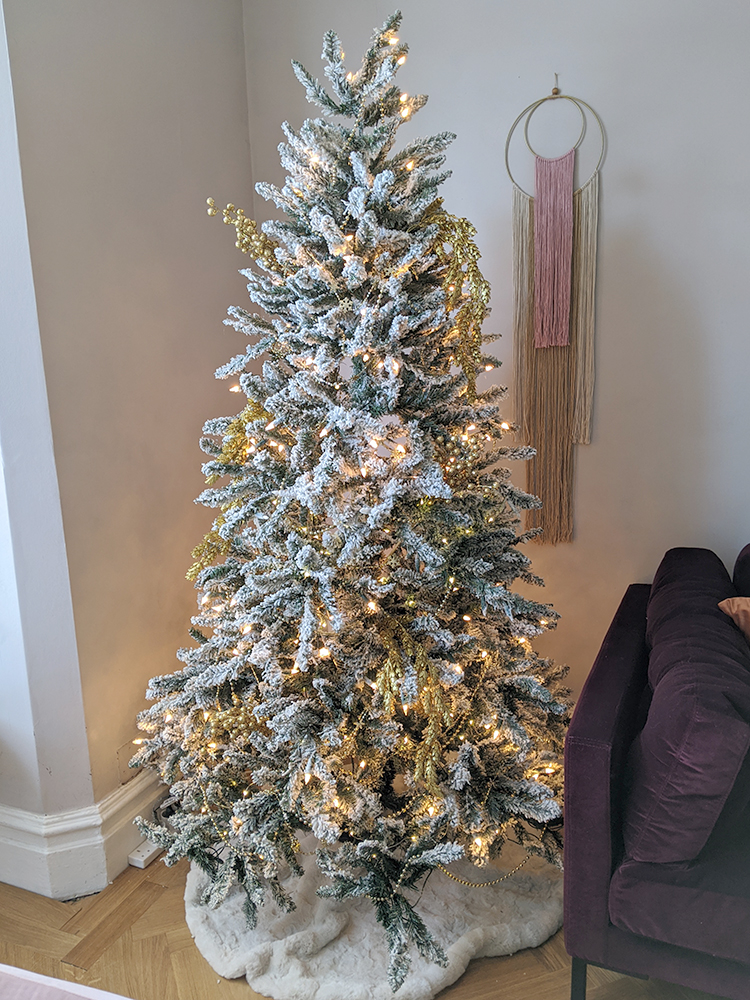
Step One – Start with Lights and a Fluff

If you have a fake Christmas tree like mine, you’ll notice that the branches get a bit crushed during storage. Once you’ve assembled it, then you’ll want to start from the bottom and start “fluffing” the individual branches from the bottom of the tree, working your way around. I splay each individual branch in different directions as wide as it can go so that it creates the fullest tree possible without any big gaps.
I use a pre-lit tree so I don’t generally need to do too much aside from assembling my tree. However, my tree is quite few years old and so a couple of the lines don’t light now (I tell myself every year I’ll get that fixed and then every year, I shover the tree back in the box and forget about it until the following year). So as I was assembling it, I strung some small wire battery-operated LED lights amongst the branches where the lights don’t work.
If you are not working with a pre-lit Christmas tree, then plug in the lights first to make sure they are working (ensuring the plug reaches the socket!) and then work from the bottom of the tree up to the top, winding your lights clockwise in a spiral. I tend to tuck the lights towards the centre of the tree rather than the front so that you have a tree that looks a bit like it’s glowing from within. As you wind the string around, try not to go in a straight line and instead tuck it above and below the branches as you go in a sort of zig-zag fashion.
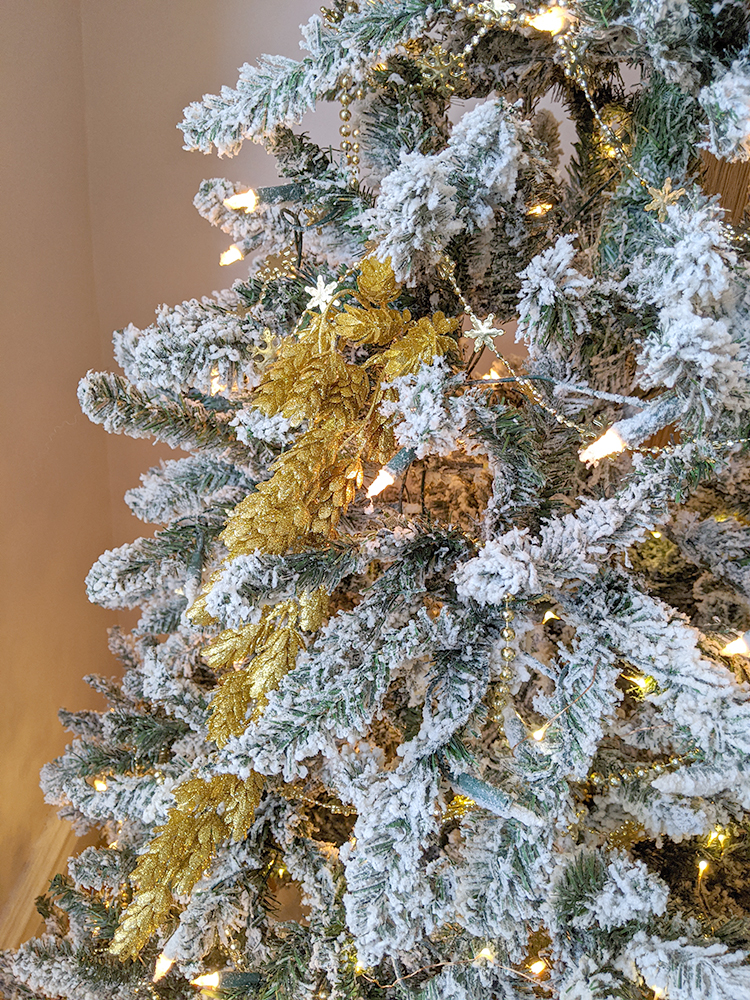
Step Two – Garlands
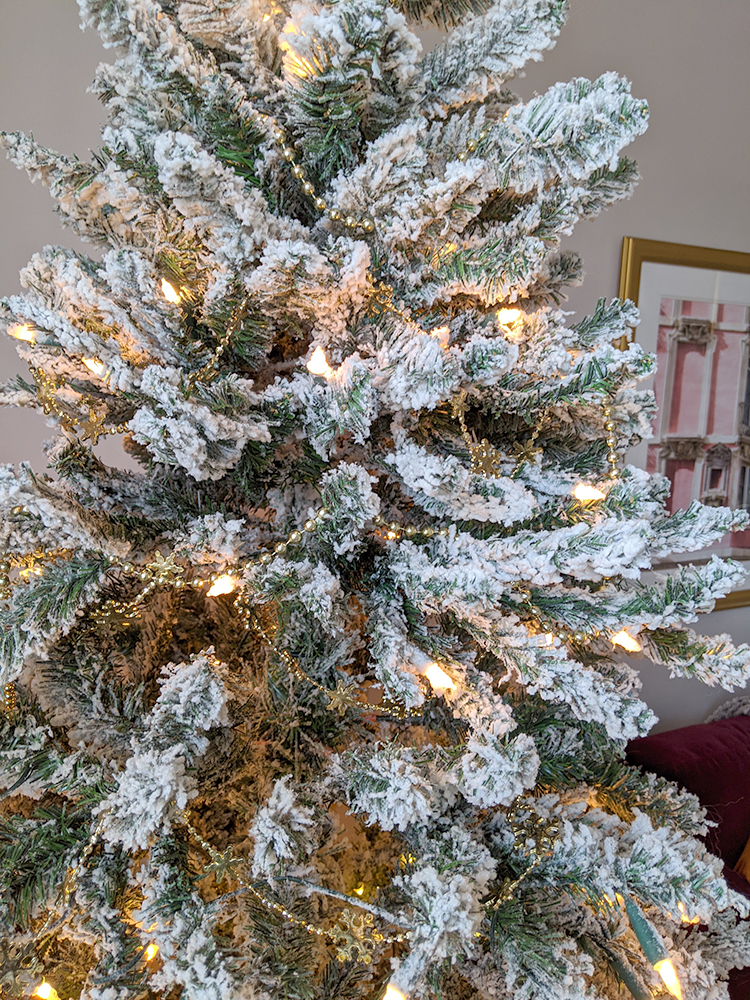
Now that the tree is prepped for decorations, your next step is adding some garlands. I never used to use them in the past and realised how much they really bring a tree together, adding another layer of depth. You can choose whatever you like here – I think a wide wired ribbon can look amazing for instance – but for mine, I have some small gold beads and a few long chains of gold stars that I’ve had for years now.
I wind them in a similar fashion to the lights, starting from the bottom and working in a sort of zigzag spiral to the top of the tree around midway from the centre of the tree to the outer branches as you’ll be putting ornaments in front of them. Make sure you leave some hanging so they ‘droop’ from the branches in a U shape rather than just sitting on the branches flat. You’ll get a much more dynamic and interesting look.
Step 3 – Large Picks
I do love a pick, I just wish I had a few more for my own tree. I think they add another layer of interest aside from just baubles and they’re great at disguising any larger ‘holes’ in your tree. I have three that are soft and drapey and three that stick out (purchased from a garden centre years ago) and so I tend to stand back and just evenly disperse them around the tree starting from the top and working my way down.
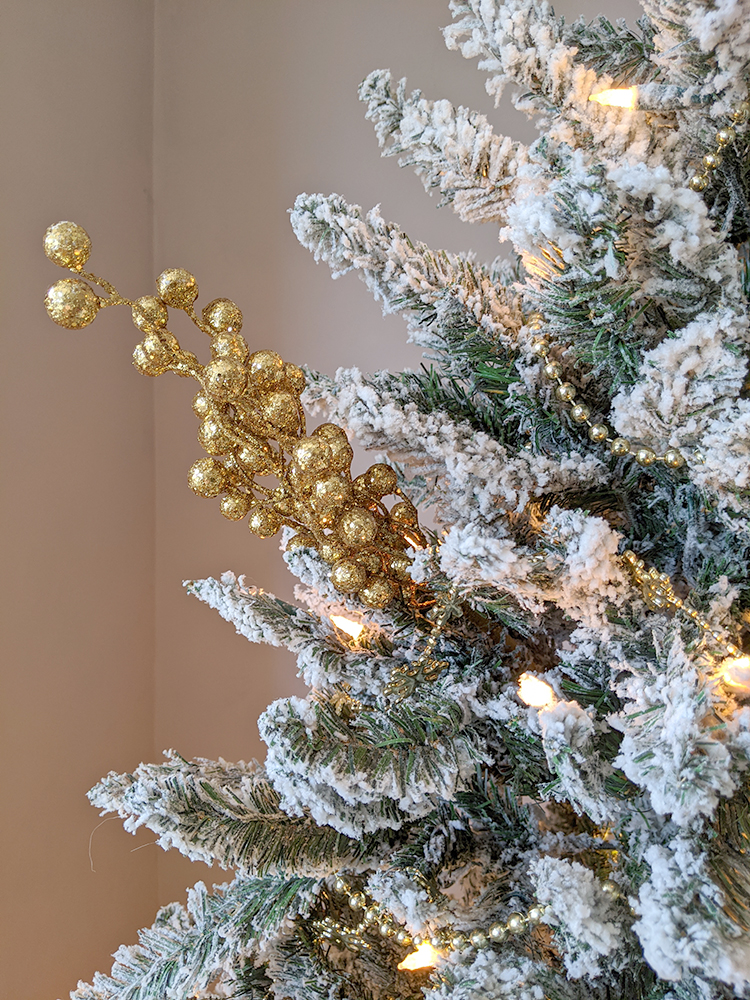
Tuck them into your branches so that they come out slightly beyond the natural shape of the tree. I think they look particularly good towards the top so I tend to start there with at least two on each side and then a few dotted throughout the base.
I ended up moving a few in the process of decorating so don’t think you have to get everything right the first go. Through each step, stand back and reassess and move things around until it looks balanced.
Step 4 – Large and Long Hanging Ornaments
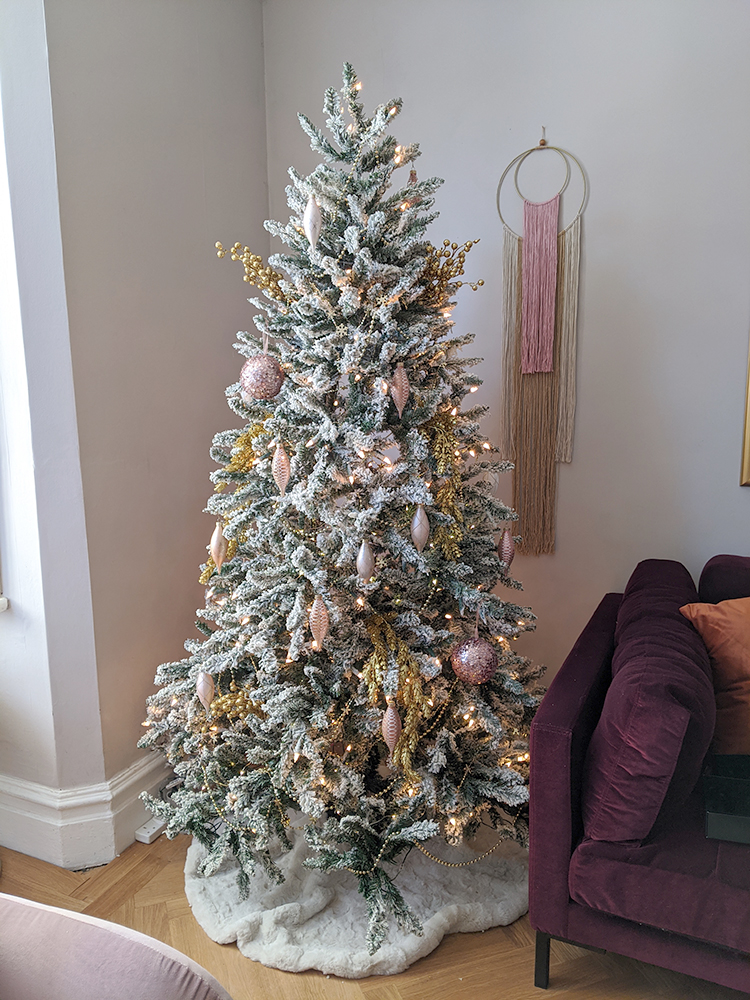
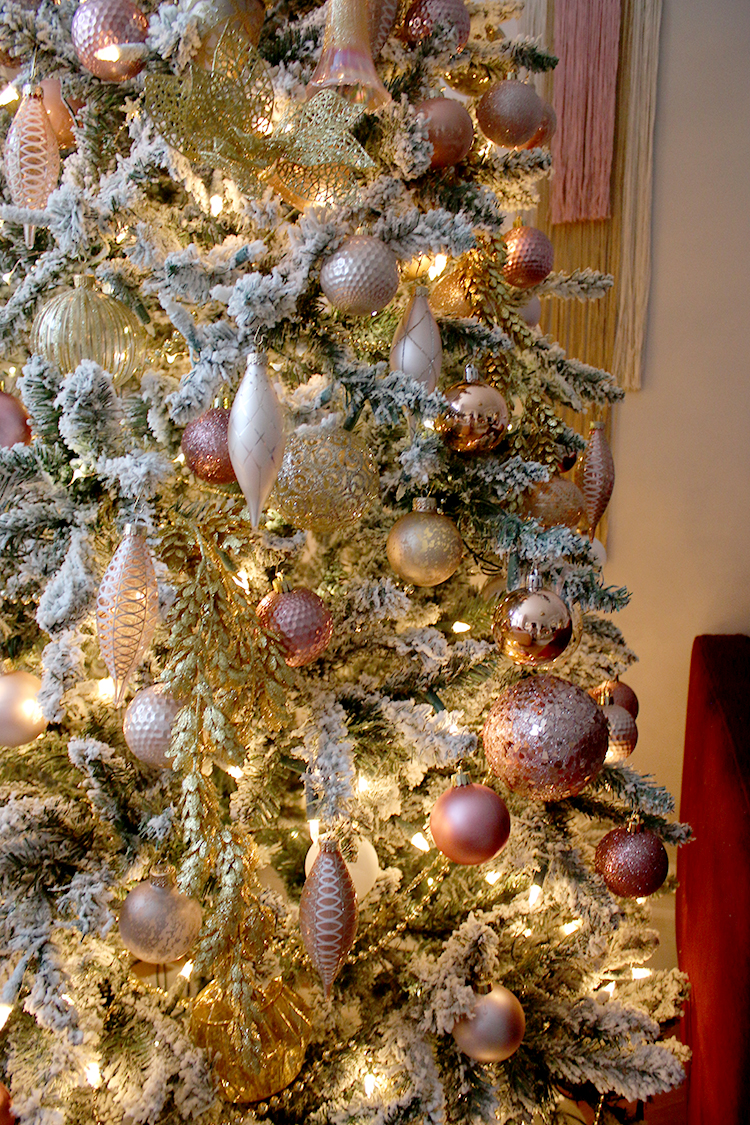
I have a bit of a weird thing about long slim baubles – they need to hang straight down without another branch below it getting in the way. I know, I know, I’m pedantic but well, it makes for a prettier tree in my opinion. And so this is why they are one of the first baubles to go on my tree. Look for spaces where there’s plenty of room for them to hang. If you have an artificial Christmas tree, don’t be afraid to bend and adjust your branches a little to make enough room so that when you hang them, they hang totally straight and free.
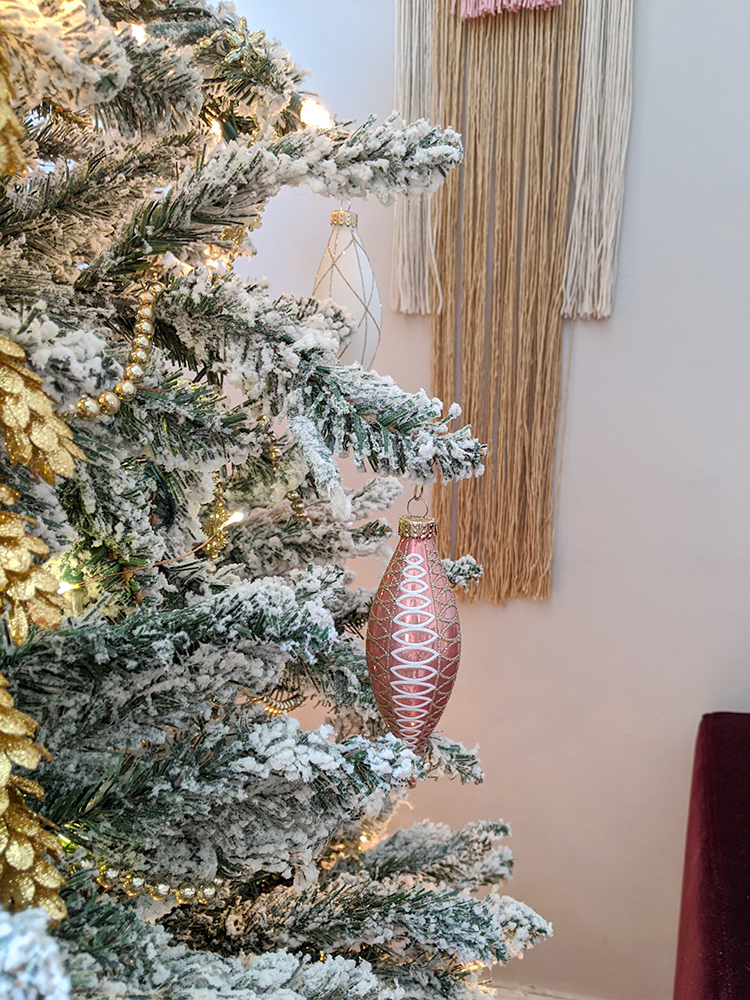
I hang my larger baubles in the same way – I want them to hang free so look for the largest gaps in the tree to fill with these. Hang the long dangly baubles towards the ends of the branches and the larger baubles slightly to the inside of the tree so you can put smaller ornaments in front of them, creating a full layered effect in the process.
As an aside, one thing I have found myself doing is getting rid of the long dangly ribbons that come with a lot of baubles as they are just too long and you’ll end up with your bauble ‘sitting’ on the branches beneath where you hung it. A little bonus tip: I love these ornament hooks as they are fairly short, allowing your bauble to sit closer to the branch they are hung on.
Step 5 – Favourites

For the next layer, I gather all my most favourite ‘special’ ornaments – the ones I really look forward to seeing each year. The reason these come next is because I want to make sure they are sort of ‘front and centre’ of my tree in the most prime positions.

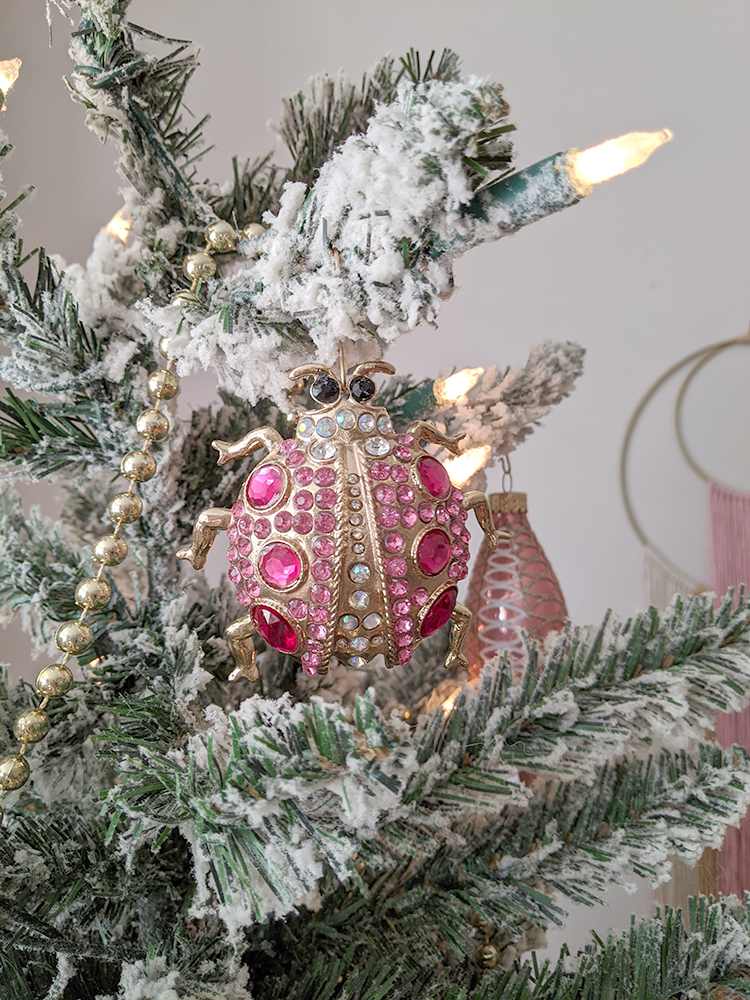
I tend to hang these around eye level and then some towards the top and some towards the middle of the tree. I almost never hang these around the back or on the bottom – first, because no one will really see them there and second, because I don’t want any accidents to happen with the animals!
Step 6 – Fill in the Blanks

I always have some inexpensive shatter-proof baubles in the same colour palette as I’m working with to allow me to now fill in whatever blanks I have in my tree after all the above steps have been done. And at this point, there are normally plenty of blanks especially towards the back and bottom of the tree!
These are your more plain run-of-the-mill baubles you can purchase just about anywhere but a nice variety of colours within your palette, finishes (shiny, matt, glittery etc) and shapes are always good to add that extra layer of interest. This is the step where you can really just go to town, hanging as many as you’d like more or less whereever you desire.
Again, stand back as you go and assess so that you have a nice balance throughout the tree and an even dispersement of ornaments and colour. I would generally say, however, that you probably need more than you think. I love a tree that feels full and I think I’ve made the mistake in the past of just not putting enough decorations on my tree and it feeling a little bit lack-lustre. In this case, more is most definitely better.
Step 7 – The Tree Topper
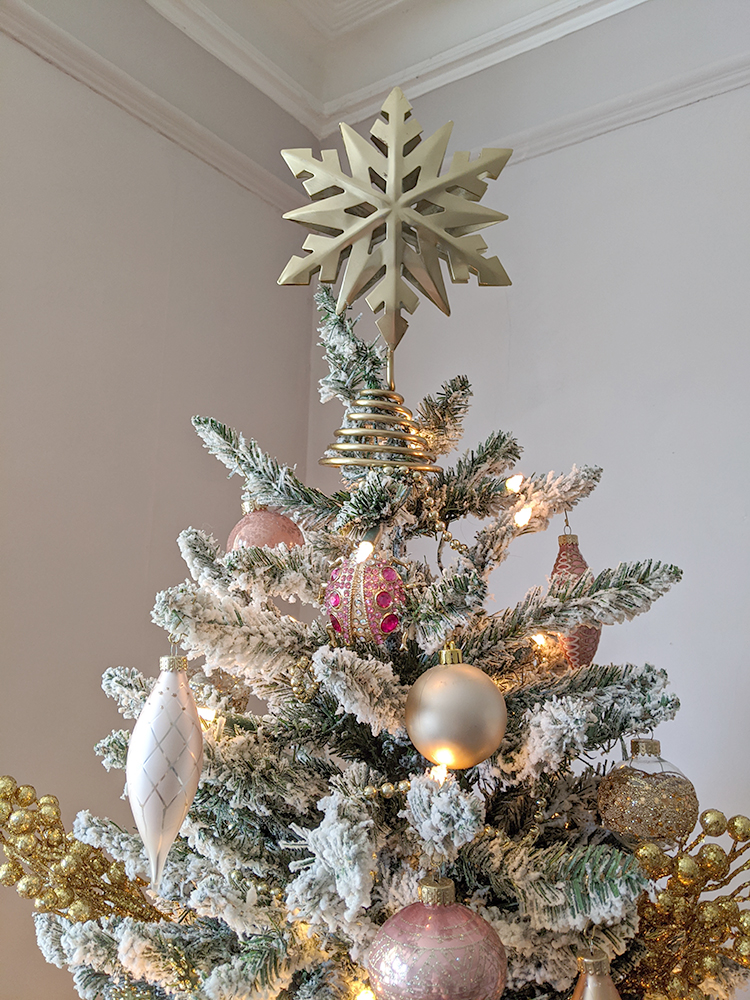
Your last step, of course, is your tree topper. Of course, you can place this on your tree whenever you’d like but I feel like it’s nice to save it to the very end. Like the cherry on the cake!
So that’s my tutorial on how I normally style my Christmas tree. Again, I know everyone is different but this is just the method that tends to work for me! What’s your own method? Anything in my tips you’re looking forward to trying for your tree this year? Let me know in the comments!


This is so useful, thank you! And your tree looks so beautiful!
Picks are a new idea for me, as I’ve never had or used them in the past. They really add that little something! Your baubles are all so beautiful. I think I need to get out my fancy baubles (ooh errr!) and see what colour pack of coordinating shatter proof ones I should get to fill things out a bit. If only I could convince Rob about the fake tree… he’s still deciding! Xx
Snap! I never use tinsel either. I have a pre lit tree too as I hate finding needles six months later no matter how hard I try to vacuum them up. My main set of baubles are red and gold glass ones purchased just after Christmas 1993 in Target on my first visit to California (Christmas in a t shirt – weird…..). I too have added plastic fillers both from sales and charity shops. I decided to splurge in 2013, I went crazy with the tree, I decorated the bannisters and it looked great. My son had married in the September and I wanted to have a really great family Christmas together. I was so glad that I made to the effort as it turned out to be my Mother’s last Christmas. I am just about to get my tree down this afternoon and I will heed all your useful advice.
Merry Christmas and Peace to all.XX
Such a beautiful tree, but I would expect nothing but amazing from your Christmas decor. I’ve never seen any decorator use the color pink as well as you do. It’s different from most, it’s stylish, and it’s wonderful. Keep doing what you do.
You must be an influencer! I did my tree last Sunday and apart from the sentimental “ specials” it’s got a pink theme. I’m really happy with it but tempted by that John Lewis box of 30 to fill it out a bit more.
Like you I have to have all the “icicles” hanging straight down!
Thank you so much for the tips!! Your tree looks stunning and so will mine now!
Beautiful tree, well done! Reading your post I realised that this is exactly how I decorate my tree too, so I’m glad I’m on the right track. I also have a fake tree, mainly due to my allergies, and because I don’t want to keep killing real trees. I got a great quality Serbian spruce from JL, not pre-lit because I figured lights breaking would annoy me, and I wanted this tree to last me as long as possible, for environmental reasons. Baubles wise, for a couple of years now I’ve been wanting to buy some new ones, but we are renovating our bathroom so I deleted my shopping basket at John Lewis at least three times :D I have lovely baubles already but they haven’t changed in a long time, except for adding a few special ones each year. My usual colour scheme is white and pale aqua blue, I’d like to do some white and silver and gold or even white, gold and green. Hopefully next year…
Such a lovely tree! I’m more into the traditional red theme and some of my ornaments are almost as old as me (saved a few since I was five). And I also follow the exact same process except my tree is not pre-lit. So, the only difference in my decorating approach is that I start adding my warm white lights from the top and work my way to the bottom. The effect is the same as yours, but I just find it easier that way…Have a Merry Christmas
I was going to buy a pre-lit tree this year but with a new puppy who chews everything, including power cords and wees everywhere, I might try next year! Your tree looks absolutely gorgeous xx.
Your tree is glorious! The best I’ve seen, looks dreamy and magical. I had to laugh when reading some of your comments, as I too have an artificial tree because of the need for symmetry. My baubles too, have to hang free of the branches around them! I love to match the tree to the room decor. The children have left home now, and thankfully they return each Christmas but there is no need for the odd bits that used to end up on the tree as special as they were. Some of the decorations date back 38 years and new ones have been added most years!
As you say, it’s such a personal thing, just like Christmas is for each of us, individual and with precious traditions passed down.
Hope you have a wonderful break over the festive period. Thank you for sharing all your beautiful tips, treasures and flair with everyone and I look forward to your 2020 revelations!
A very Merry Christmas and happy New Year
Julie