Obviously, summer is my prime ‘DIY’ time because I’m sharing two DIY projects in a row but this one is far easier than laying a whole parquet floor! I wanted a few bits for a small gallery wall I’ll be putting up in the dining room and I didn’t just want artwork so figured a wall hanging might be a nice addition.
Cue me looking at Etsy and seeing probably 100 of them and then thinking, ‘I can totally make one of those myself’! So that’s what I did. Obviously, I’m not the first nor the last person to create something like this but I thought it was such a simple project and it actually came out much better than I’d anticipated which is basically my criteria for any crafty project. Easy + Looks Good = Winner in my book.
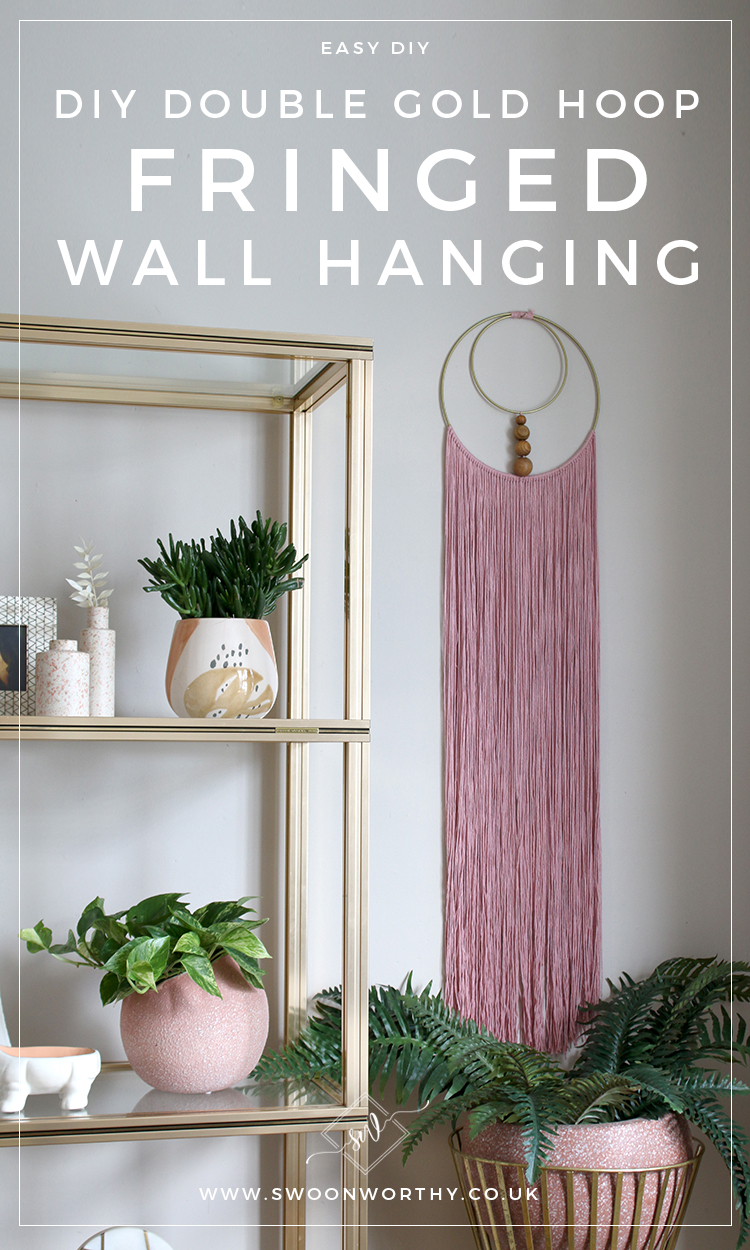
I think the gold hoops really add a little bit of ‘glam’ to it’s boho vibes and of course, I wanted to use a dusty pink yarn to coordinate with my home but you could use wooden hoops if you wanted something a bit more bohemian and of course, you can choose any colour yarn you like. You can also make it longer or shorter depending on where you’re putting it. As an aside, it cost me less than £15 to make so it’s fairly inexpensive too. Basically, it’s pretty versatile and I’m already considering making another!

If you’re curious to see how I made my wall hanging, read on…
This post may contain some affiliate links which means if you click on my link, I may earn a small commission as a thank you from the brand for the referral. You’ll never pay more for clicking on my links.
Materials You’ll Need for this Project
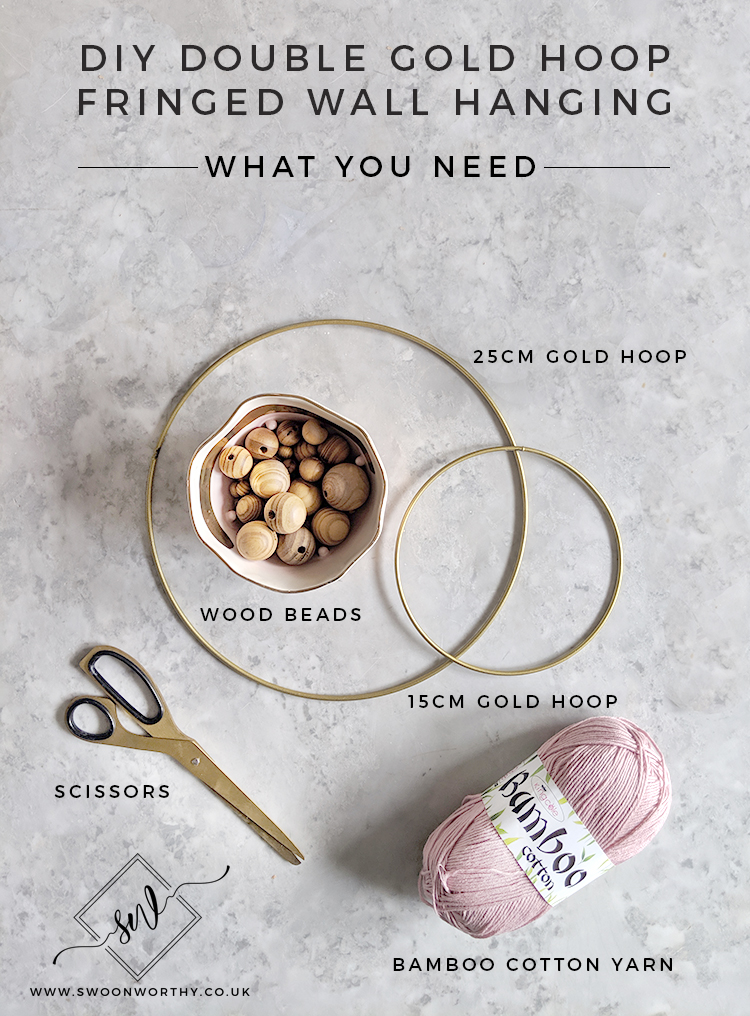
1 x 25cm Gold Colour Coated Metal Ring
1 x 15cm Gold Colour Coated Metal Ring
2 balls/skein (200g) of King Cole Bamboo Cotton Yarn in Dusty Pink
A couple of notes… I used all of one skein (ball of yarn) and a bit of another but if you want to make the project slightly less expensive, you could probably get away with just one especially if your fringe is not as long as mine is or you were happy for it to be a little less full. I also chose the Bamboo Yarn because I like the soft sheen it gave – the threads have a bit of a ‘glossy’ finish. However, you could use a yarn that’s 100% cotton if you wanted a more fluffy/softer look.
I also ended up taking apart an old wood bead necklace I had that I never wear but I’ve linked to an Amazon search above for a whole bunch of different options you can choose from. You could also get plain beads and spray paint them any colour to match your room decor!
How to Create Your Wall Hanging
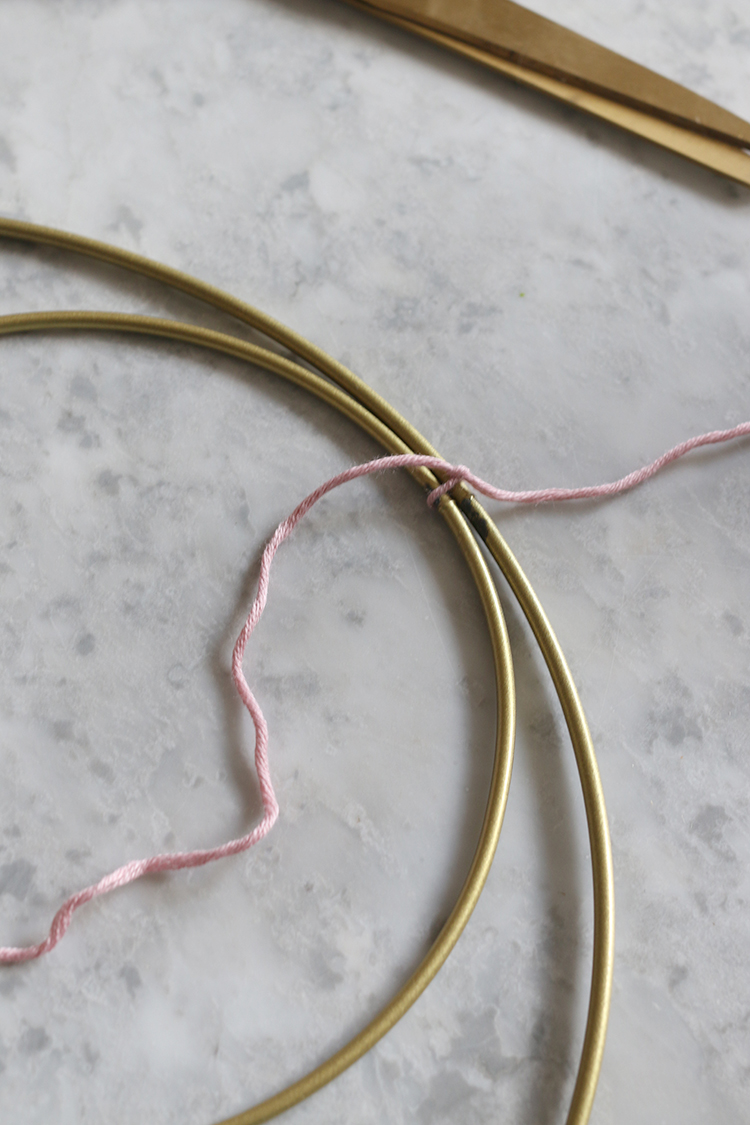
Step 1: Tie a short piece of yarn to join the two metal rings at the top and continue to twist the yarn around the top to hold them securely together. Tie a knot at the back and cut off any excess yarn. You can also use a drop of glue at the back to keep it securely fastened.
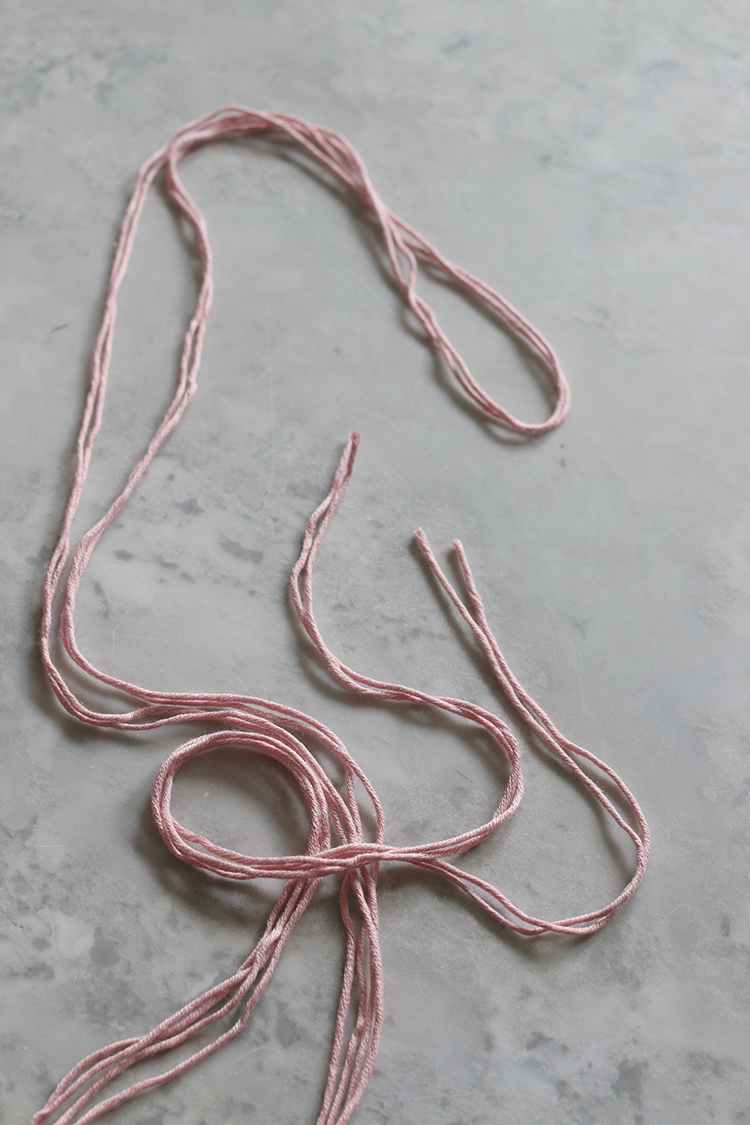
Step 2: For the fringe, start by cutting your yarn to double the size you want it to hang down. For mine, I used a total length of 180cm so each strand when knotted was around 60cm long. I found it went a bit quicker doing 2 strands at a time, simply doubling the length each time and then cutting it in half to form 2 long strands which you’ll wrap around the hoop at the same time. This gave me a thicker knot when done which I thought aesthetically, looked nicer!
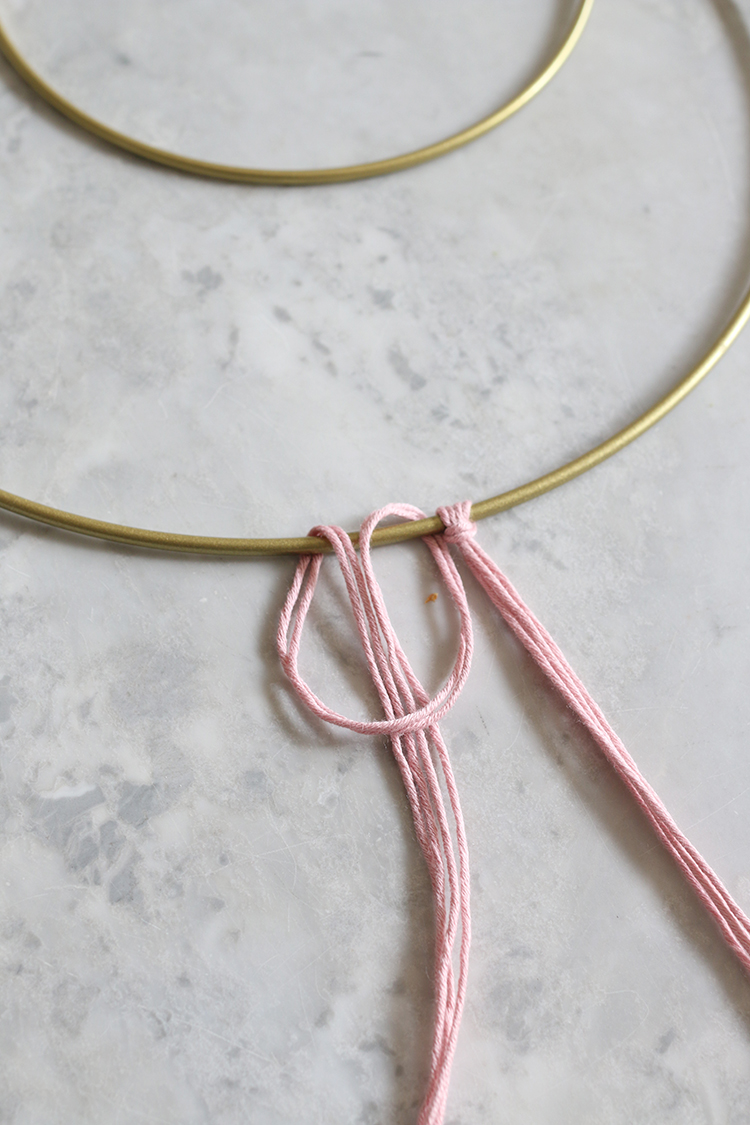
Step 3: Hopefully the image above explains the knot itself but you’ll want to take two long strands, folded in half and where it’s folded, you want to loop that under your largest ring and pull the ends through the loop to form a knot. Make sure the loop is behind the ring so you can see the knot from the front.
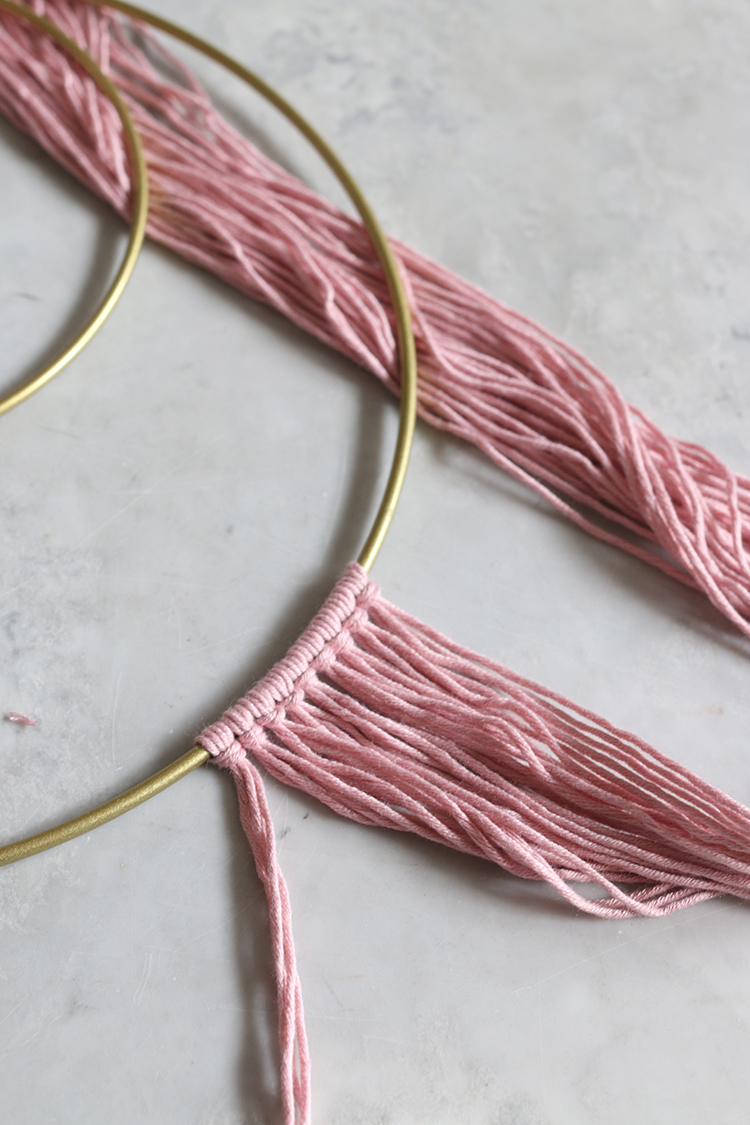
Step 4: Repeat Step 3 many many times until you want to throw it across the room until the strands cover around 1/3 of the largest ring. Adjust and move the knots as you go to make sure they all look the same and line up nicely.
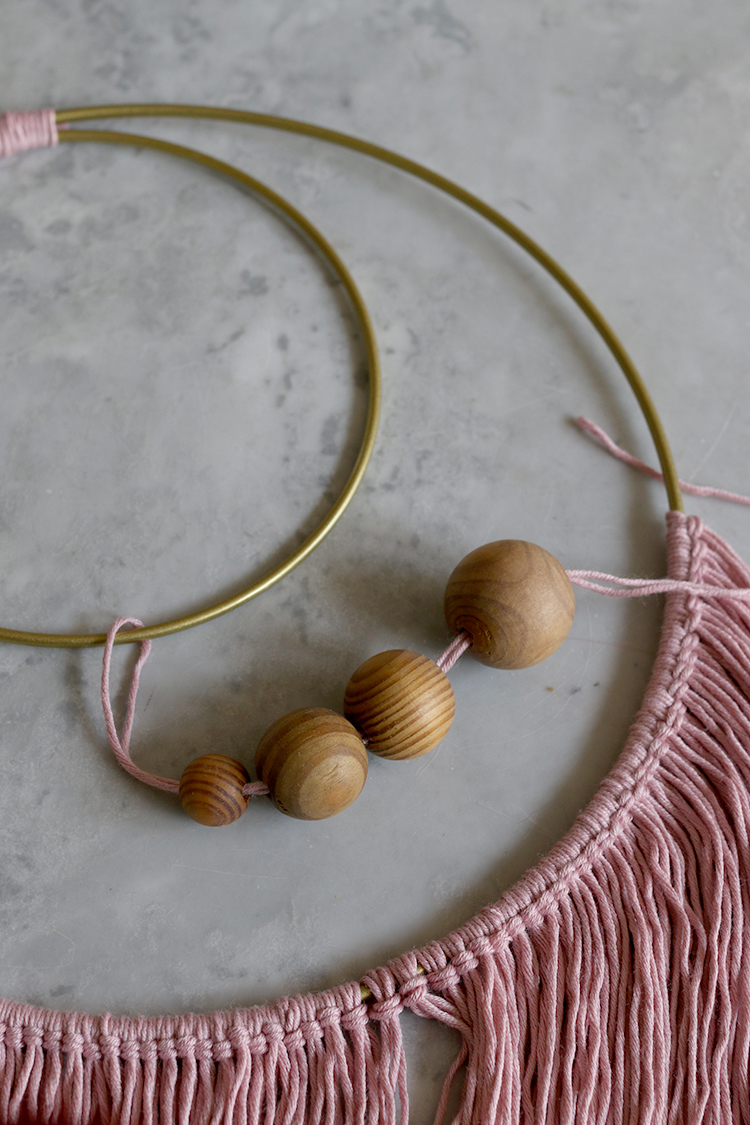
Step 5: Cut another long length of yarn, fold it over the smallest ring at the top and then thread both strands through your wood beads. Tie the ends to the larger ring in the middle of your knots, hiding it within the others, leaving the strands to hang down and blend in.
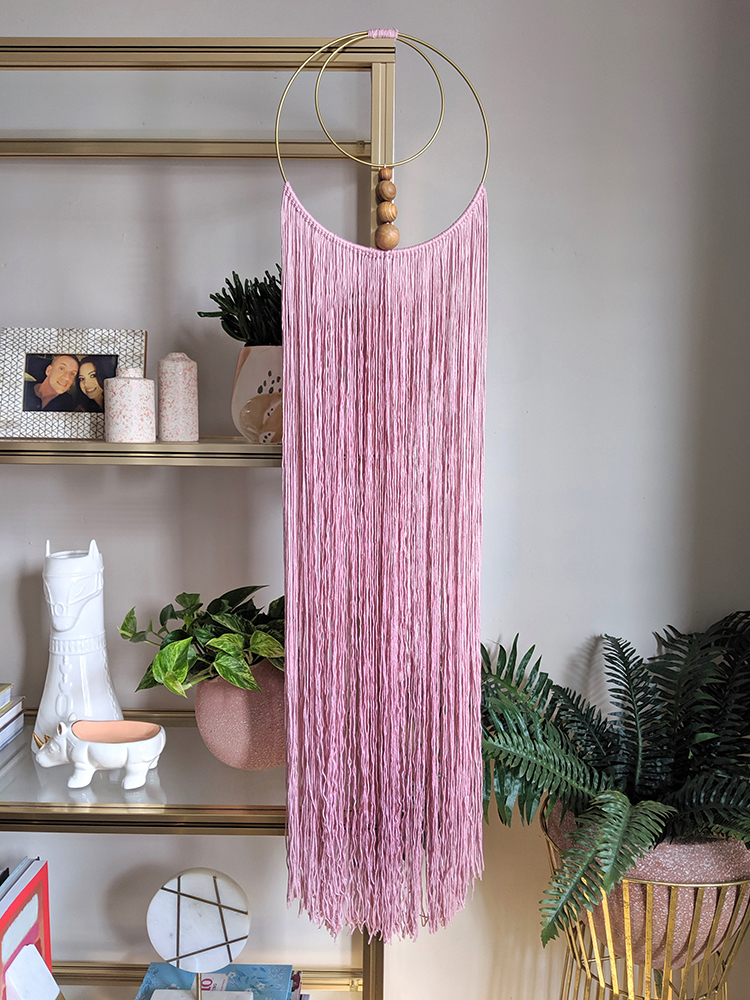
And that’s it! Your wall hanging is ready to be hung! I think all in, it only took me a couple of hours to do and I might do another, adding an additional layer of fringe in a contrasting colour to the smaller ring instead of the beads for a different look next time. Of course, if you want to get fancy, you can search YouTube for all kinds of macrame knots to make it even more bohemian but I quite liked the simplicity of this style.
Is this a DIY you’d try yourself? Let me know in the comments!


It looks great and so clever, love the gold hoops! I would make one too! You’re very clever!!
Aww thank you! I can’t claim any cleverness though – they are all over Etsy! LOL! ;) xxx
Love it! Will make one this winter.
Oh fab! You’ll have to let me know if you try it! xxx
I love how you’ve made this it looks fab, i really think i need to have a go at making one of these, thanks for showing us. Xxx
Ahh thanks Pauline! It was so enjoyable to make as well – you need to let me know if you give it a try :) xxx
It looks really good, and so simple to make. I will have to give this a try, I like the idea of having two colours.
It was so easy to do and actually quite relaxing ;) Definitely let me know if you try it! xxx
Oo! I need something for a room which has texture, but don’t like the 70s macrame look. This is sleek and modern: perfect!
Also, your tutorials are so well explained, thank you.
Aww that’s exactly what I wanted – something a bit more sleek than macrame! But it was so easy to do – let me know if you give it a go :) xxx
So silky! I would only like this in my home with a silky thread, so thanks for the (affordable) tip on using Bamboo! I’m making some ‘wall art’ with fabric in embroidery rings and adding something like this will mix it up nicely. You’ve inspired me :0)
Ahh yes, my crafty friends recommended the bamboo and I really liked how silky it was! You’ll have to let me know if you give it a go – they are SO simple to make and quite relaxing too :) I’m already planning my next one! xxx
It looks really Cool, Thanks for the share :)
It looks great, loves the gold hoops! I would make one too! You’re very creative!!
Thanks for share