Long before we even found our home, while we were still living in our previous home on the outskirts of Manchester, I had a dream. And that dream was that we would have window shutters. I know, it’s a strange one, but bear with me here. I’d seen them on so many homes and loved how stately they looked. I loved how beautifully they framed a window and how they gave you the ability to control how much light you got into a room and how much privacy you had. I’d had enough of flimsy blinds but every time I’d considered them, I was put off by the high prices.
Shutters aren’t cheap. Someone needs to come to your home, measure everything up and then they are made in a factory bespoke to your window specifications and then once made, you need installers to come to your home and put them up. All of that legwork comes at a premium. The dream would have to wait. Once we moved into our current home, that dream was still alive and well but I thought it might be years before we were able to save enough money to have them ourselves.
That is until The Shutter Store got in touch, wanting to know if I fancied trying out their DIY Shutter range. Wait… what?! DIY shutters? How exactly does that work? Well, I was going to find out (and of course, share it with you guys because that was part of the deal!). I have to admit, I was half excited and also half terrified – what exactly does it mean to get DIY shutters?
Well, I found out pretty quickly how straightforward it all was. Essentially, you are cutting out all that legwork for the company – YOU do the measuring up, YOU do the install. The shutters come pre-made to your specifications just like they would from any other shutter company along with frames based on your window size. You simply assemble the frame, attach the shutters and you’re good to go. So it seemed slightly too good to be true but for the sake of research and given the fact we like to do as much on the house ourselves if we can, we decided to give it a go – and, thankfully, the dream became a reality!
Even better news? They operate both in the UK AND in the USA! So my American readers can get in on the action! Even better BETTER news? I’ve got a handy discount code for my UK readers to use at the end of the post so if you are even thinking of getting some for your own home, there’s an added incentive to get them ordered up pronto… Now let’s talk about how easy it all is first, shall we?
Measuring Up and Ordering Your DIY Shutters
Thankfully, everything you need to ensure you measure correctly is on the website and both written, as well as video instructions, are provided to you. It did take us a few read and watch-throughs to make sure that we got all the measurements right. For instance, they provide a PDF template for you to measure out certain aspects of the frame but the first time we printed it out, we realised we hadn’t printed it to 100% scale and the measurements went a bit skew-whiff as you can imagine! Thankfully, we quickly realised our mistake and re-printed the templates out at the correct size.
I also found based on our experience that it really helps when you are doing the measuring to read through EVERYTHING a few times and then go and watch all the video tutorials that The Shutter Store helpfully include on their website. We also watched the installation videos ahead of time which helped us to understand what we’d be receiving and thus, what each measurement we were taking related to.
They do also have customer service reps on hand if you get stuck so a simple phone call is all that’s needed to make sure you are ordering correctly. We even sent in pictures of our windows to get the best advice on what we should be choosing. The Shutter Store are really keen to make sure you are ordering with confidence and so will guide you every step of the way!
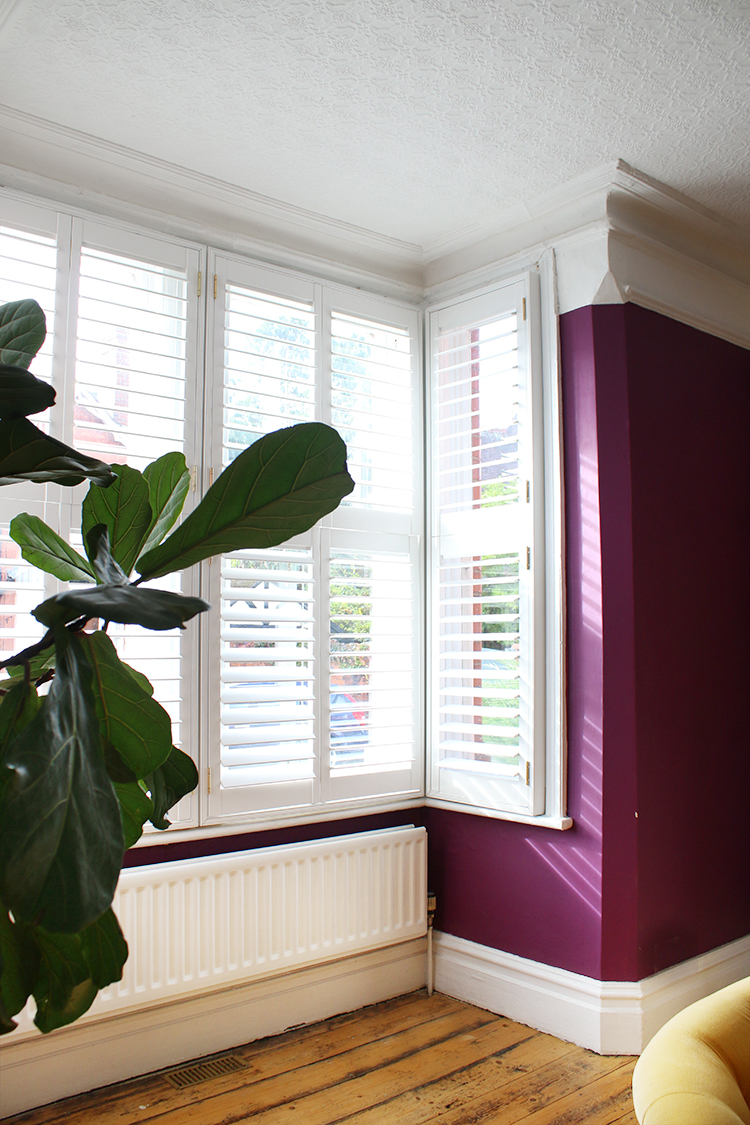
Once we had all our measurements to hand, it was time to place our order! As we have a Box Bay Window, we were essentially ordering 4 different frames – the two side windows contained a single frame with top & bottom shutters and the middle windows would be made up of two frames which contained 4 shutters each. You’ll need to decide which side your hinges will sit and how you want them to open too when ordering. You can also choose from 6 different hinge colours – of course, we went with the brass!

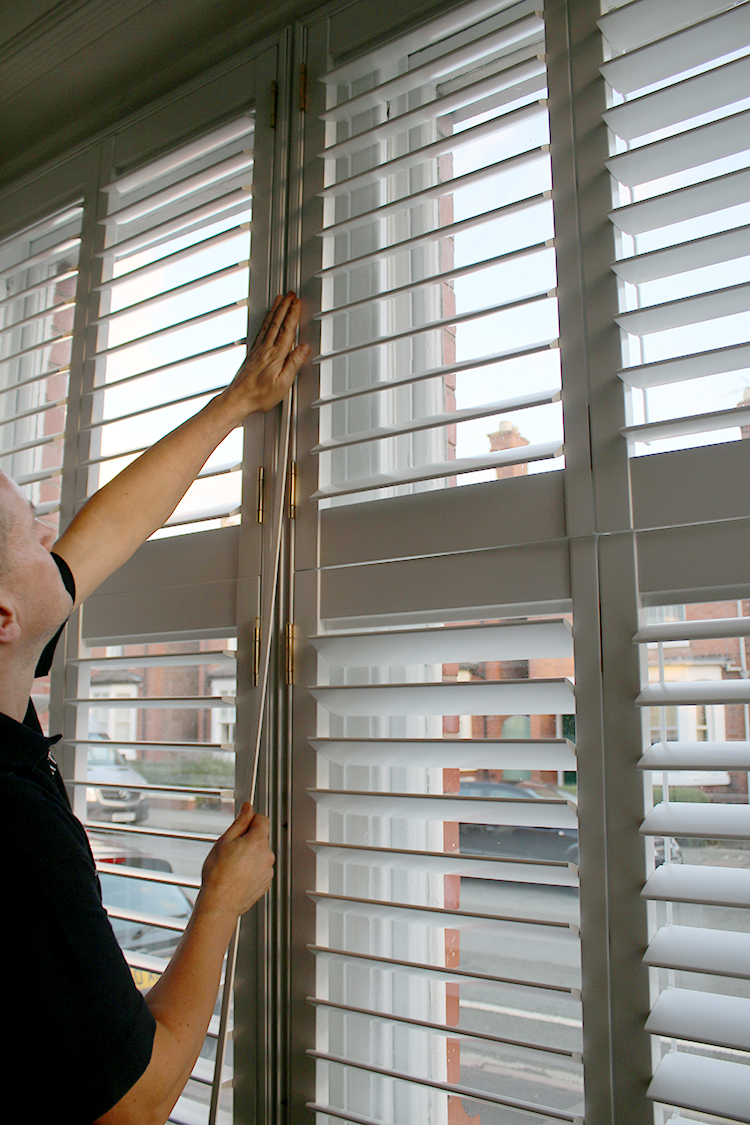
There are a wealth of options available – from various types of shutters (do you want full height? cafe style? tier-on-tier? solid? waterproof?) as well as 20 different paint colours and wood finishes depending on the shutter you choose. We decided on The Shutter Store’s Essential range Tier-on-Tier shutters in Pure White which provide an incredibly structurally sound shutter at a great price. The frame is made from basswood timber while the slats are created using polyvinyl with an integral aluminium core. Unlike wood, they are less prone to any warping and ensure you get a shutter that’s made to last.
DIY Shutter Delivery
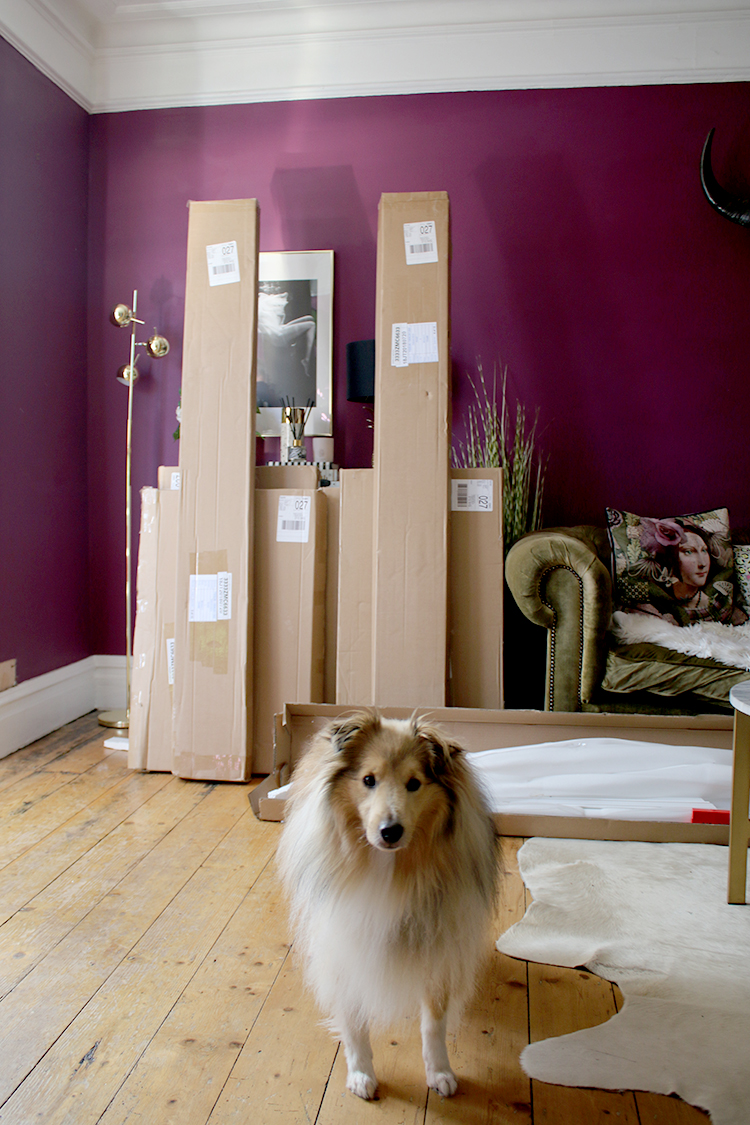
The shutters take between 8 and 10 weeks delivery as standard but if you are in a hurry, they do have an express range which will be dispatched between 3-5 weeks. We weren’t in a huge hurry for ours so went with the standard delivery which for us took the full 10 weeks. You are advised about every step of the process including when your shutters are completed, when they are dispatched and when they will be delivered.
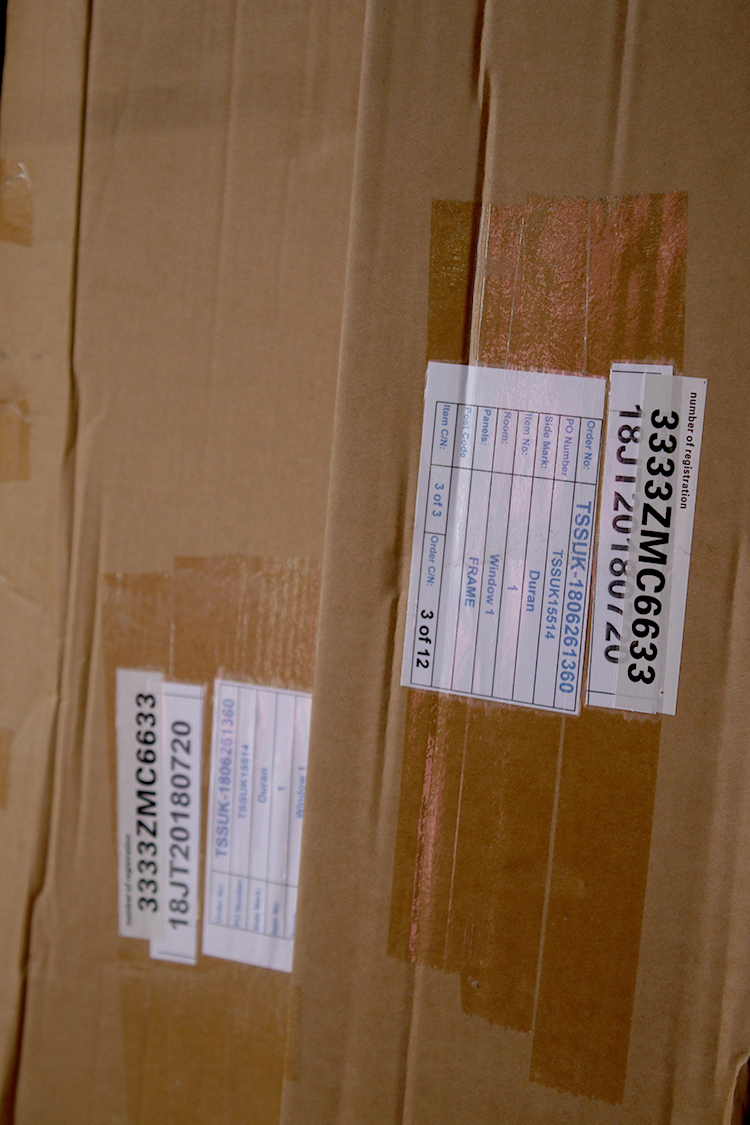
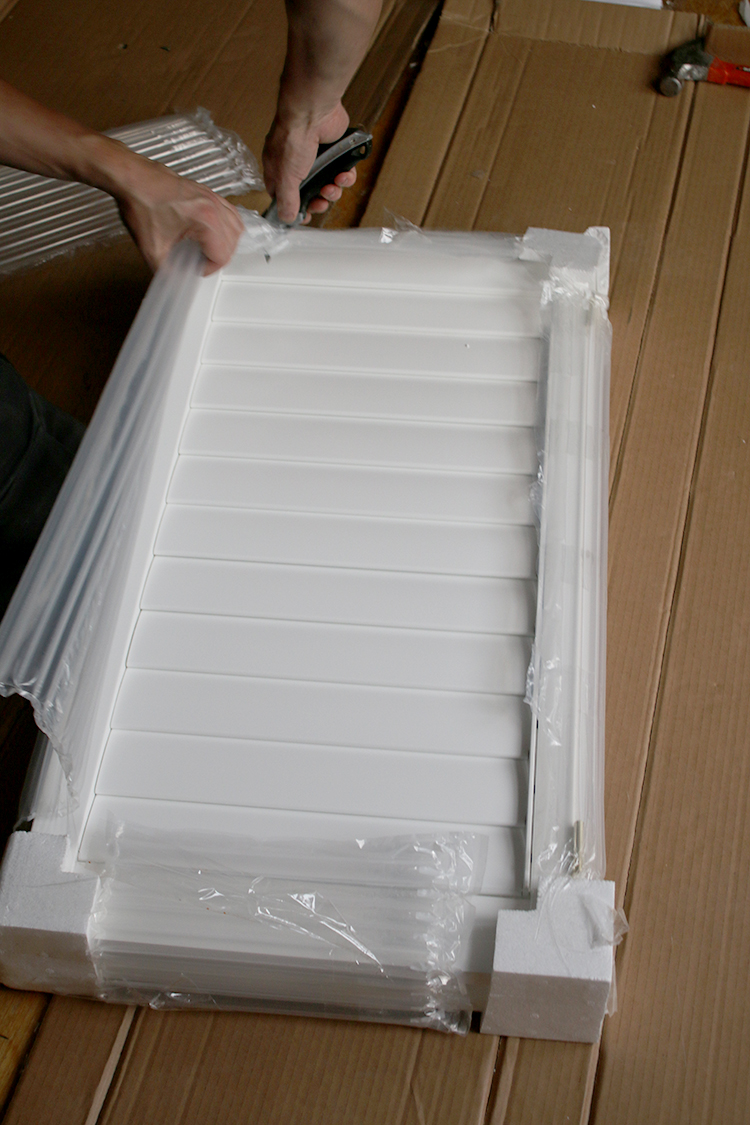
Once the boxes arrived, you’ll see that the shutters are individually packed and marked as ‘Window 1’, ‘Window 2’ etc, according to how you ordered them. The frames are packed separately as well so I’d recommend when the boxes come in, that you organise them according to each window as it will be installed.
DIY Shutter Installation
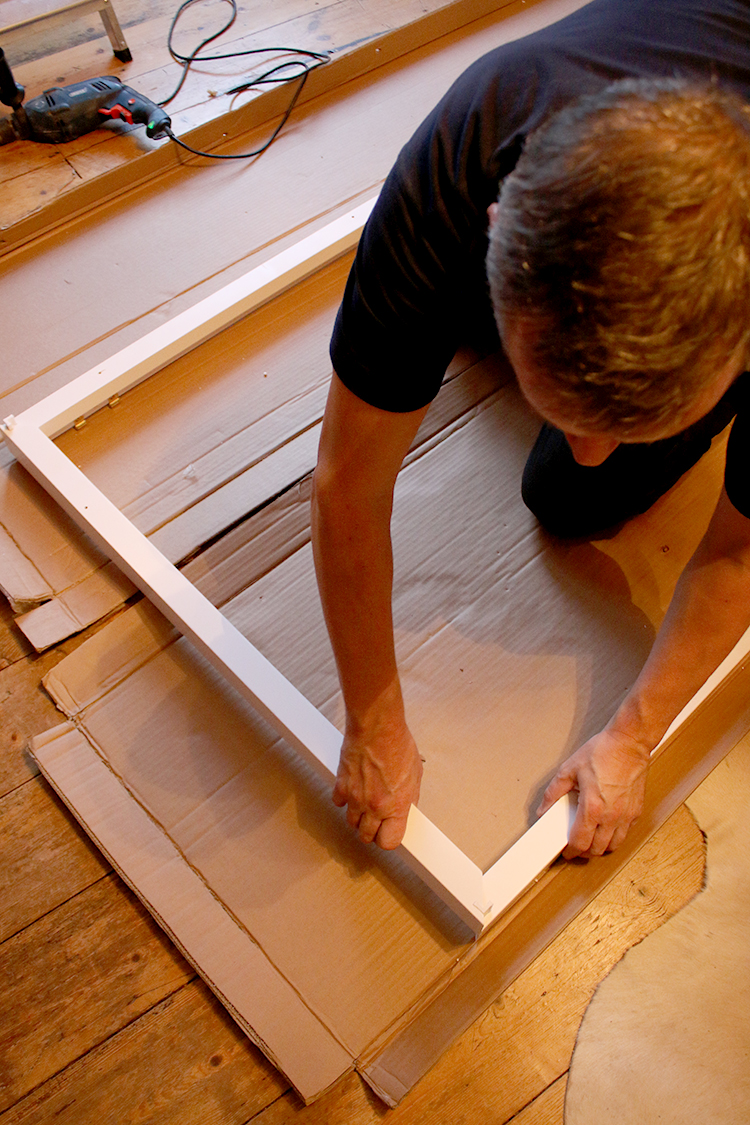
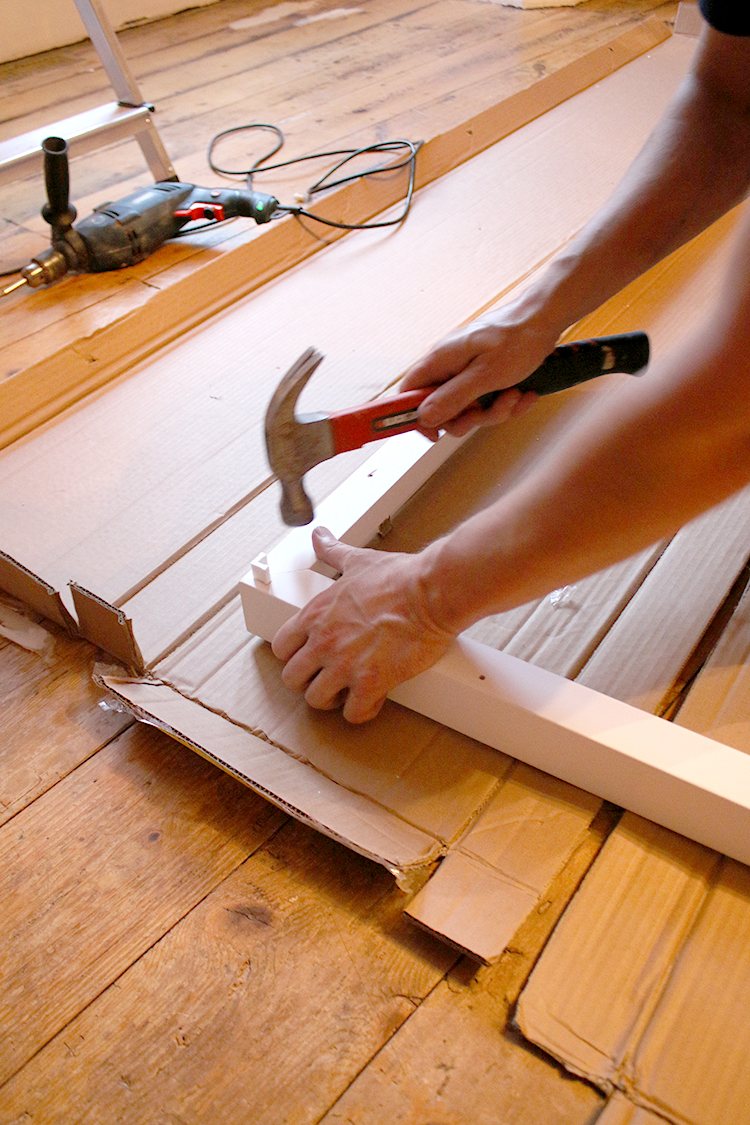
The installation went so much quicker and easier than I could have imagined. You essentially create your frames first – each side simply slotting and locking into the other to create a square.
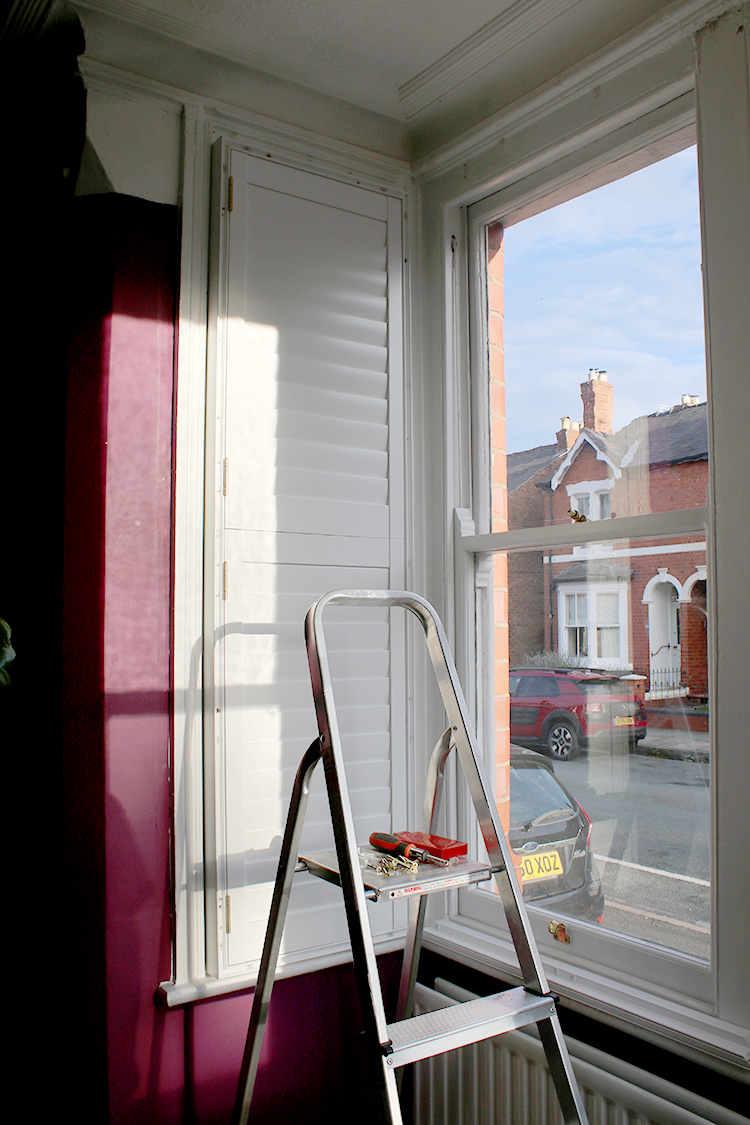
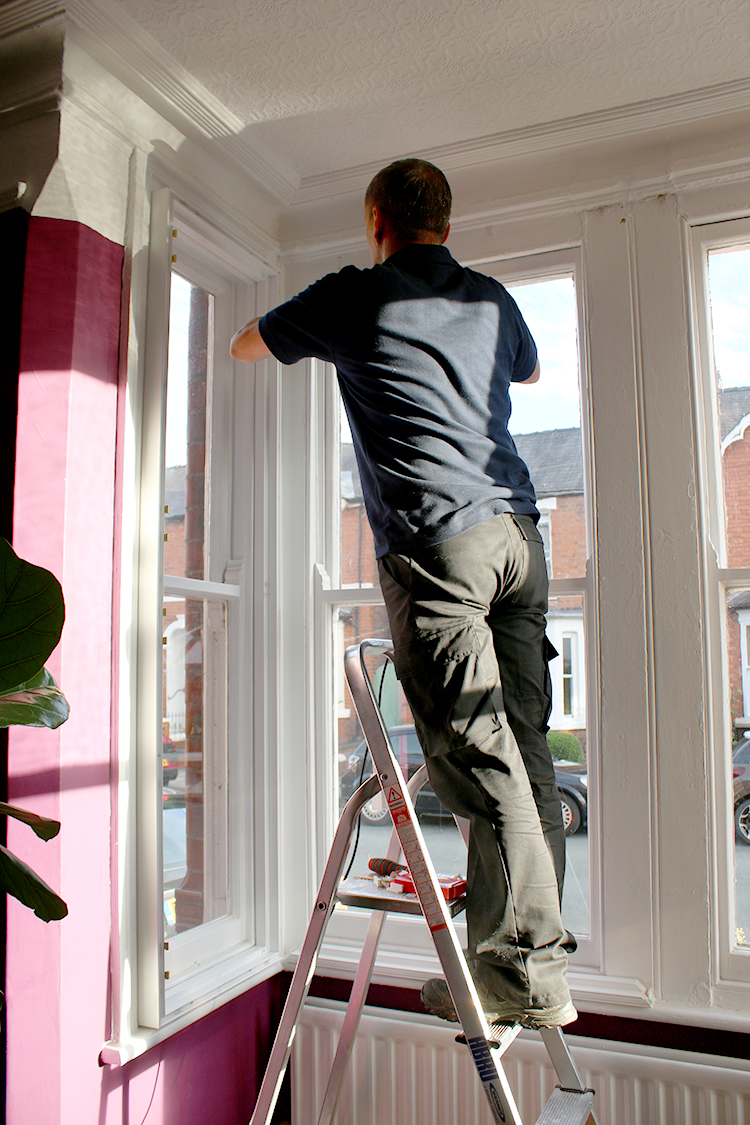
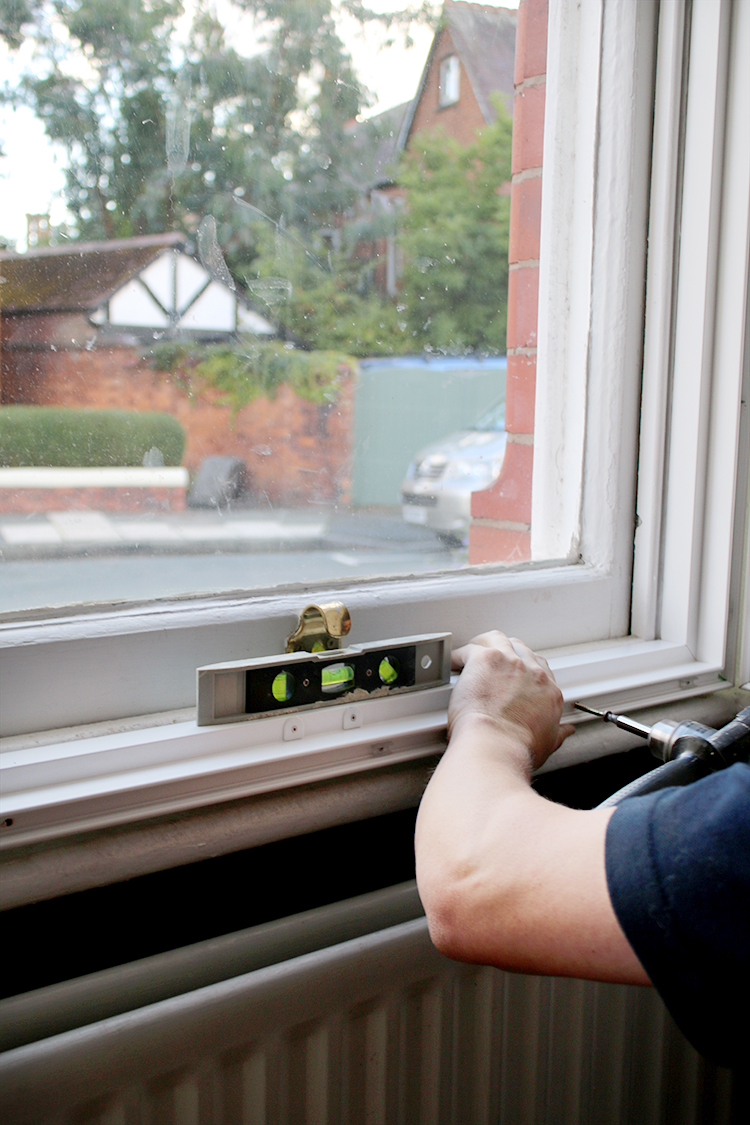
This is then held up to your window frame and then you use the screws provided to attach it to your window frame (all the holes are pre-drilled!). Because the hinges are already pre-attached to both the frames and the panels, there’s no faffing about with anything. You simply hold the shutter panel in place, slide the little drop-in pin in place and Bob’s yer uncle. Do this with each panel until all the panels are in place and your shutter is complete!
The Shutter Store recommend that you only screw in the frame at a few points rather than all of them until all the frames and panels are in place. This allows you a little bit of ‘play’ to make sure everything is straight and plumb as you are installing.
Please excuse how filthy that window is. It has been cleaned since.
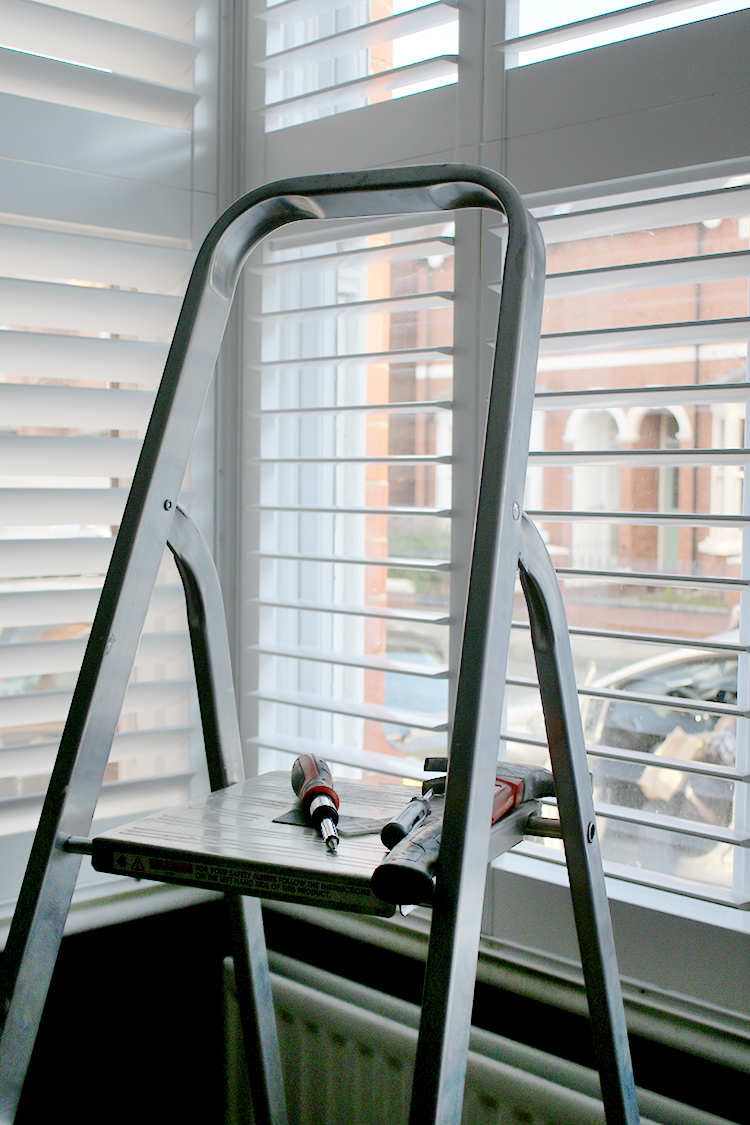
As our window frames are not 100% plumb (it’s an old house!), we did have to make some adjustments to make sure it was all level everywhere and to make sure all the shutters shut correctly. This didn’t actually take too long and the hinges are adjustable as well to make sure everything aligns just perfectly.

Once you are happy that everything is straight, your shutters sit comfortably in the frames and it’s all looking gorgeous, you can finish screwing the frames in place as well as adding an additional screw to each hinge to make sure nothing moves around. Finally, you install the strips that come supplied which cover the screws in the frames for a lovely finished look!
Would I recommend DIY Shutters?
Considering that often shutters are charged at upwards of £300m2 when you go the traditional route of ordering, these DIY shutters are so much more affordable at around £160-£200m2 depending on which shutters you choose. That’s a massive savings, especially when you are looking at multiple windows and large bay windows (of which we have two at the front of our house!). It could have cost us thousands to just kit out two bay windows but DIYing them means we can actually afford to purchase another set for our dining room to match.
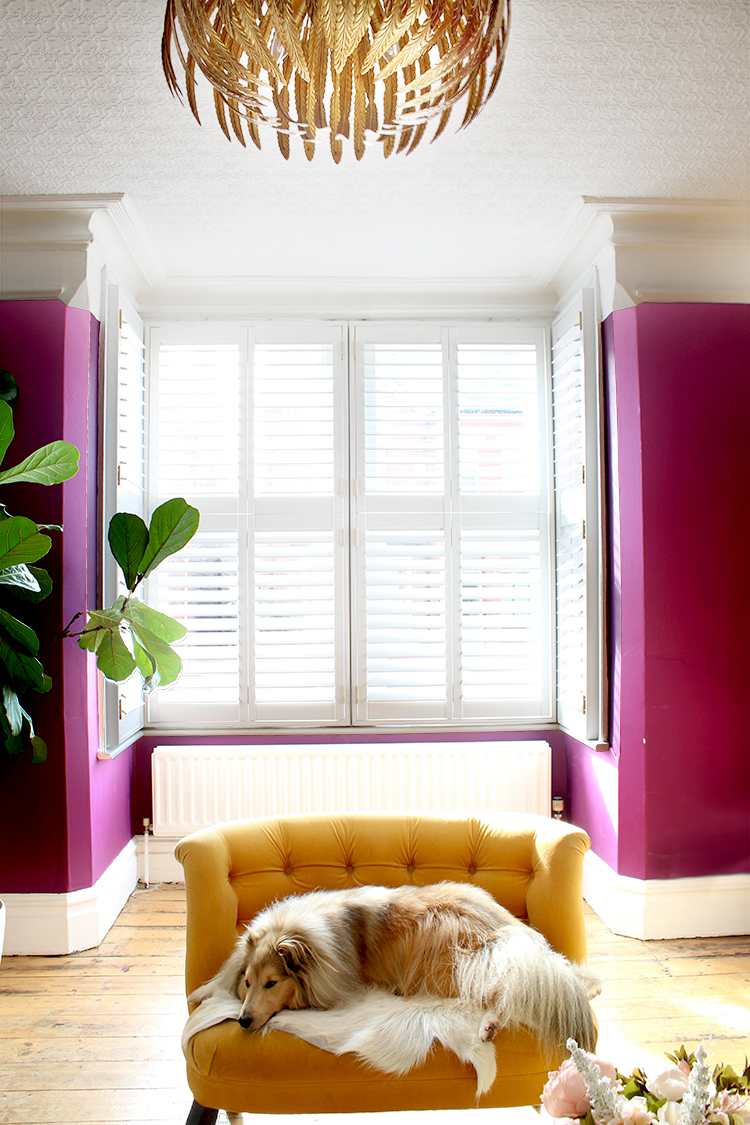
The quality is also outstanding. The shutters are beautiful – solid and stately, just as I’d imagined and incredibly well built. They are actually no different to the ones you’d buy from anywhere else – it’s just a much lower cost because you are cutting out the middleman here, not because they are any lesser in quality!
I’m so excited that this is even A THING. I wouldn’t hesitate to get them again (in fact, we’re planning on getting more) and I think anyone who can operate a tape measure and a drill would have absolutely no problem with ordering and installing DIY shutters from The Shutter Store.
So are you ready to get some DIY Shutters for yourself?
If so, you can get 10% off with my special discount code SWOONSHUTTERS10 at the checkout! This code is for UK-only orders valid from today until the 31st January 2019 and redeemable on non-express orders only. Plus, if you place an order with The Shutter Store from now until 16th October, not only will get them in time for pre-Christmas delivery but you’ll also be entered into a prize draw for a £1000 sofa.com voucher.
I’d love to know what you think of my new shutters and if you realised that DIY shutters could be so easy! Let me know in the comments if it’s something you’d consider!
Disclaimer: I was not compensated for this post but I did receive my shutters free in exchange for my honest review. All images, words and opinions are my own. I only work with brands I really like and think you’ll like too! Thanks for supporting the brands that support Swoon Worthy.


They look great Kimberly, bet you’re really pleased with them! I’ve always loved shutters, and with the tier on tier ones, you have the option of keeping the bottom ones closed for privacy, but still allowing plenty of light in with the top ones opened.
Oh I’ve been looking forward to this post since the teaser! Your shutters look amazing. I’ve always been put off by the cost ( more than the sash window itself in some cases) and how they look on the inside. I love the look from the outside in white but am unsure about white on the inside (we currently have wooden Venetian blinds) but yours look gorgeous xx
Thank you for the shots of the Fur Ball – Quito is just adorable…and it is so nice that he blends so well with your settee!
Love, love the shutters! And they are the perfect for your very Victorian home. It looks perfect. I will take taking up the offer for one small set of shutters – I’m in a condo that I will most likely be selling next Spring and one set is just right for this small window. Thanks so much for this post – and helping out the US fans!
Kisses to the doggie!
Susan Ferguson
They look incredible! I didn’t know this option existed! I’ve been dreaming of blinds for years but the price put me off. Will definitely look into prices for that.
Thank you for this post!
This is an excellent alternative especially as Wayne is such a handy man. I had shutters fitted around a month ago, very pleased with the result as like yourself I had always wanted shutters and when we moved this became a reality for me as well. Couldn’t be more pleased. Your DIY ones look great!
Oh my goodness, they look so good. Your house was made for window shutters! I’m really impressed that you can DIY them and save money. And fitting them would have worried me normally – as you say, with old houses nothing is ever dead straight, therefore it’s good to know you can adjust the hinges accordingly xx
Oh these are gorgeous Kimberly! How wonderful to know you can have shutters without the excessive outlay on fitters etc. Really love how your new home is coming together x
They look stunning I love them, they add so much character to a room. Xxx
I bought one of these a few years ago for a simple hallway /staircase window, thinking I would install it myself.
In the end there was a little bit of adjustment needed due to an out of square window, so I employed a local handyman at a cost of £50 – it didn’t take him very much time at all. He was very complimentary about the quality and finish.
I always liked the shutter and when I was selling my house buyers remarked what a good solution it was. I’d tried curtains, then a roman blind but nothing looked right until the shutter solution. Great from inside and outside.
This is a game-changer. Thanks for bringing to my attention!
Wow Kimberly, they look utterly fantastic! What a fab job you’ve done! This is a great solution for people like you guys who are seasoned DIY pros. We would never be able to do something like this though. My husband is very adverse to reading instructions or watching any kind of video tutorial. He prefers to work out his own way of doing things so it would all be a bit of a nightmare. But what a wonderfully affordable way to get shutters! Lovely photos as usual!
They look great, well done! I must admit, I’d be a bit worried about getting the measurements wrong, but you seem to have mastered it. I love your wall colour by the way, what did you use?
These are great Kimberly! Thank you for sharing.