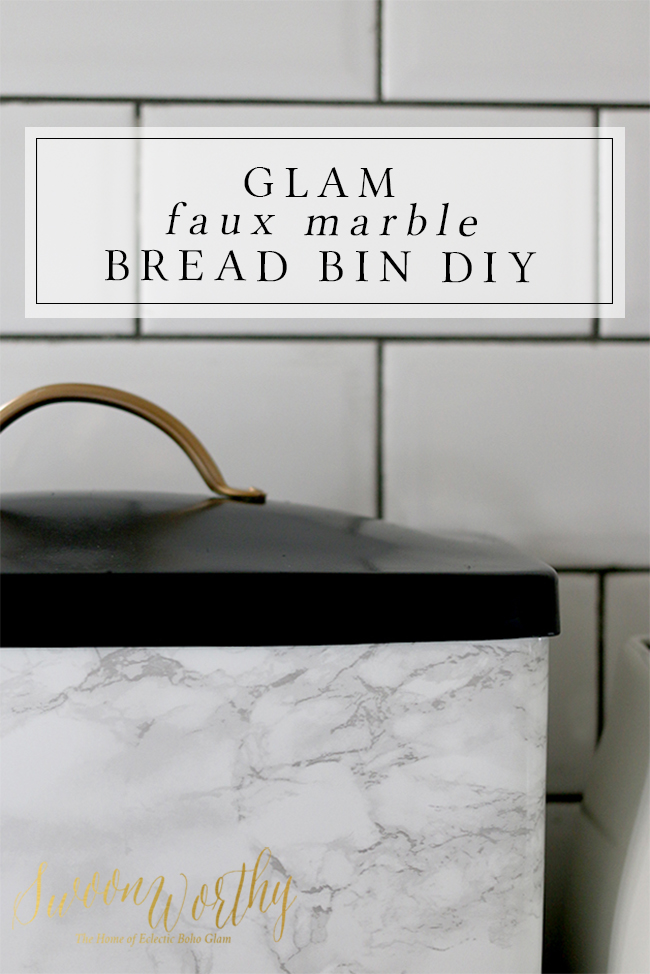
I know that there is no such thing as a ‘glamorous’ bread bin. I know this because I tried to find one and failed miserably. Perhaps bread isn’t sexy enough to warrant fabulous storage – it has very rustic roots in tradition and craft. It’s not the kind of thing one thinks of when they are considering the ultra fabulous. Perhaps I’m wrong and they are out there but Google was no help and looking at a whole host of different online retailers in the UK proved fruitless. Or maybe breadless in this case.
The funny thing is, I don’t even eat bread.* I don’t know if I have a gluten intolerance (it’s possible because since I’ve gone Paleo, I have had it a couple of times and it’s just made me feel sick the rest of the day) but Wayne still eats it on our house and the bread bin is where I store all my ‘healthy’ snacks like nuts and raisins and occasional, those little date bars that Nakkd make. So the bread bin is still a necessity in our home.
*Although I might give a hot cross bun a go this weekend. It is Easter weekend after all. I’m not a total bore.
Here’s the sad before… as you can see it was a little rusty and tired. It’s not horrible or anything but it’s just not my taste any more.
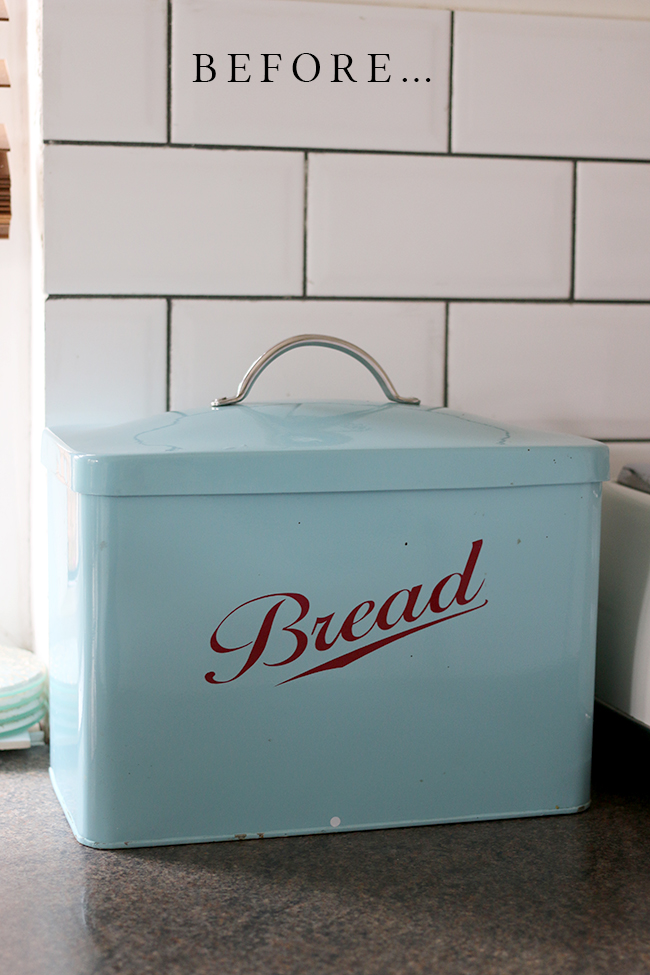
Oh and don’t get me wrong. There are some lovely bins out there (I was marginally tempted by this one) but most of what I could see were very traditional in design or more ‘retro/vintage’ than my tastes or just way too contemporary and spending £40-£60 for something I wasn’t crazy about just seemed a bit silly when I had a perfectly acceptable one at home – at least in terms of practicalities. It’s a great size in that it’s quite tall and fits the area on the wall where it sits nicely alongside my pretty Delonghi toaster. I’ve had it for four years now when I had more of a turquoise and red theme going on in here but since then, tastes change and I’ve gotten tired of looking at one of the last vestiges of my love affair with turquoise. It was kind of like still seeing your ex on Facebook pop up even though you defriended him 2 years ago. After a while, you just think, ‘enough’s enough’.
And I’d gotten to that point due to another purchase. Yes, the Decorating Domino Effect strikes again. So before I get to my DIY, I need to share the whole reason I even did it in the first place:
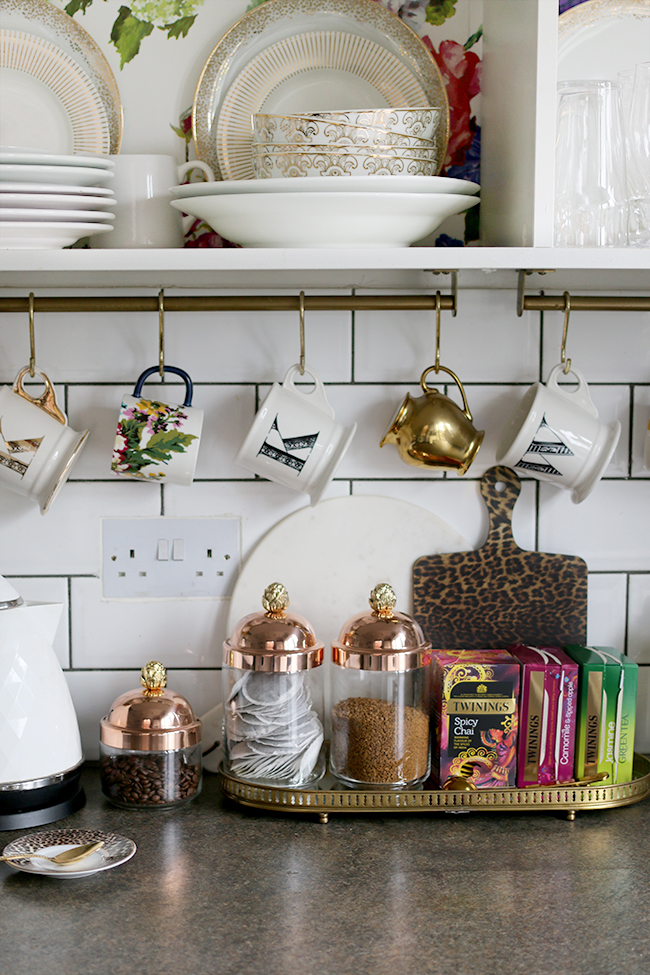
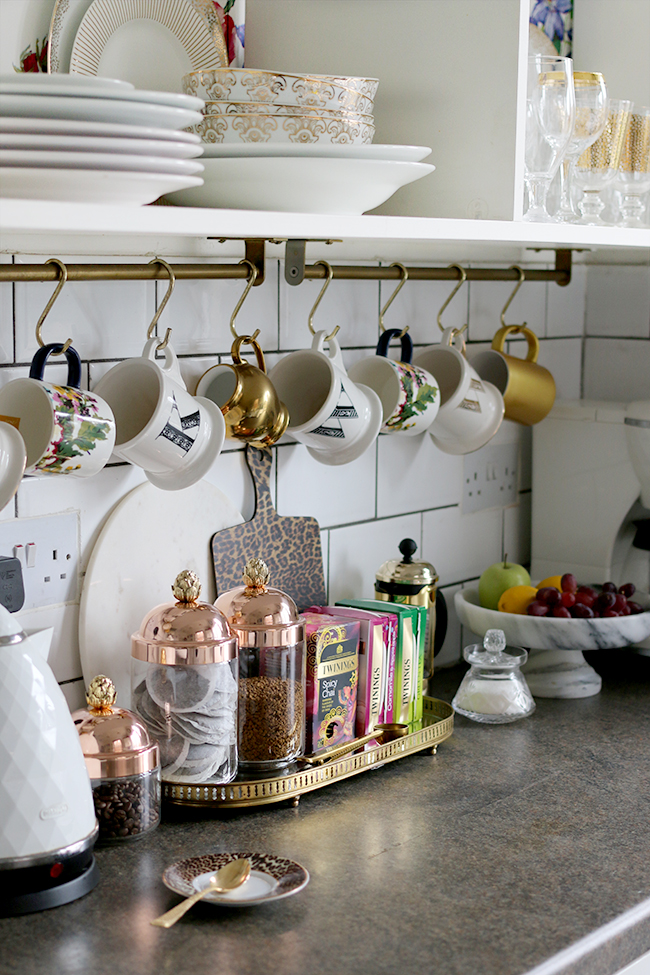
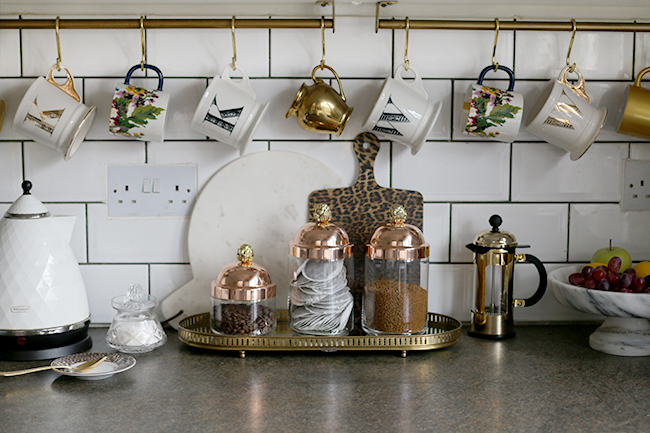
Because I decided to splurge on these beautiful Ruffoni glass jars.
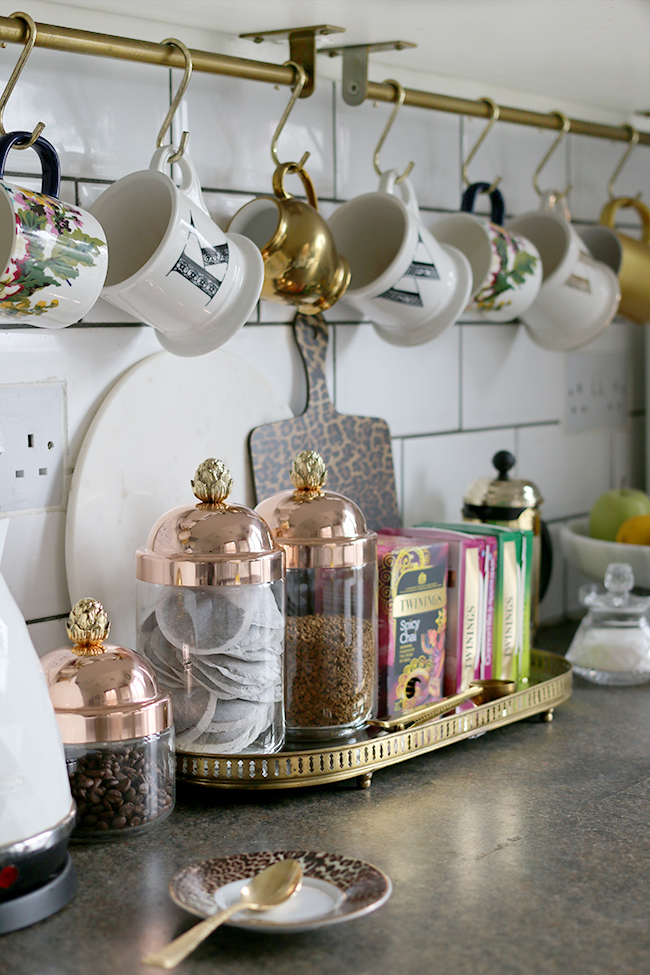
I know, right?! Talk about utterly fabulous storage. But well, they are super pricey. Don’t get me wrong, I realise spending this kind of cash on some storage jars is really nuts. I saw them originally when Michelle from AM Dolce Vita’s posted them on her instagram account. There might have been a sharp intake of breath. There might have been some sweating and dizziness. There may even been some tears. I was either infected by some alien virus or I was in love.
Now here’s the thing about a splurge purchase because that’s what this was for me (for you, this might be chump change or perhaps spending more than £30 is a splurge – only you know what ‘splurge’ means to you. Also, ‘splurge’ is a stupid sounding word for something so beautiful as these jars). You know I am all about getting good deals and DIY (see bread bin makeover down below) and saving the pennies. But there are certain times when a splurge – when you can afford it of course – can be good for the soul and good for a room. I always say you should treat yourself to at least one or two splurge items in a room if you can swing it. It’ll elevate every other thing in the space. However, you should have the same physical and psychological reaction to it that I described above. You have GOT to love it, to desperately want it, to not be able to picture your life without it. Don’t waste the money otherwise.
I duly checked my bank account. Everything for the dining room remodel has been paid for now and I was able to save a few pennies here and there for that one. All my bills were accounted for and everything else in terms of fiscal responsibility were covered. I’ve had a few busy months work-wise and I had the cash. So yeah, this splurge? It had to happen.
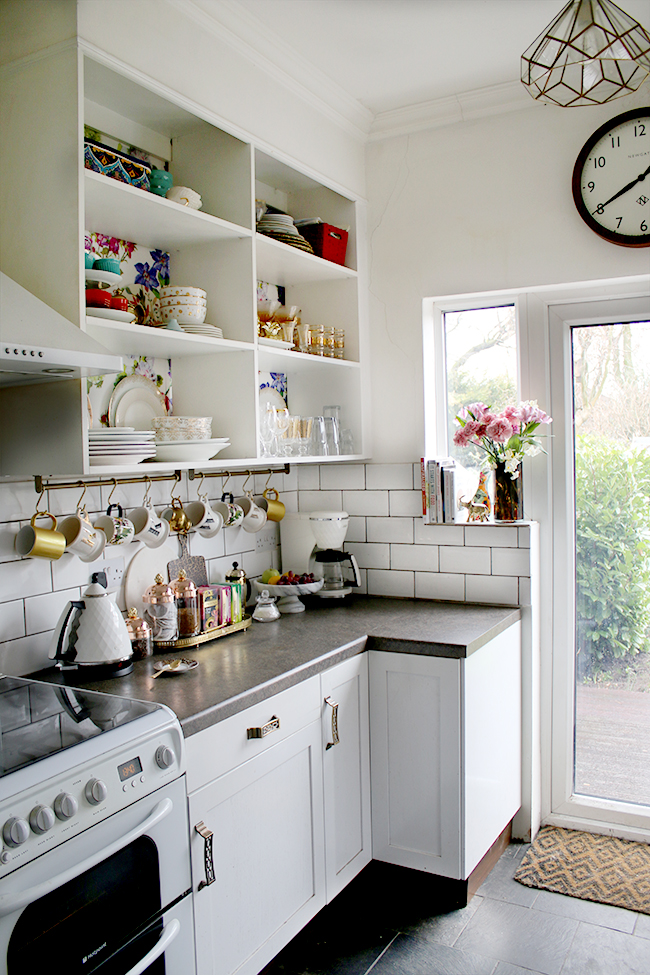
I also decided to change up the tray that was here before (you can see it in this post) – I had a large gold one which I liked but it was always a bit too big and took up too much room and the truth was, we weren’t drinking every single thing off that tray every day. So I pulled out the ones we did use on a daily basis and everything else went into our pantry cupboard out of site. I like that it’s a little clearer here now and those new jars don’t get lost amongst everything else. I may also have gone ahead and ordered a couple of these…. although now I am thinking I need to start drinking posher tea because my Twinings boxes look a little sad and out of place – SEE WHAT I MEAN. Decorating domino effect.
Perhaps I should leave those in the cupboard??
Also, I realise my kitchen worktops are ugly as hell. I can’t wait to replace them!!
Anyway, fretting about non-posh tea aside, it was only once I’d placed my order for the jars, I realised then and there that the bread bin needed a makeover. At first, I was just going to spray paint it white and then I ran out of spray paint half way through the job. Whoops. While I was waiting for it to dry and contemplating a trip to the DIY store (and trust me, I didn’t want to go – I’ve been there half a dozen times in the last 2 weeks, they practically know me by name now and it’s embarrassing), I spied my marble contact paper*.
*This post contains affiliate links indicated by an asterisk – you don’t pay any more but I’ll get a few pennies to spend on pretty things for the kitchen! Win win!
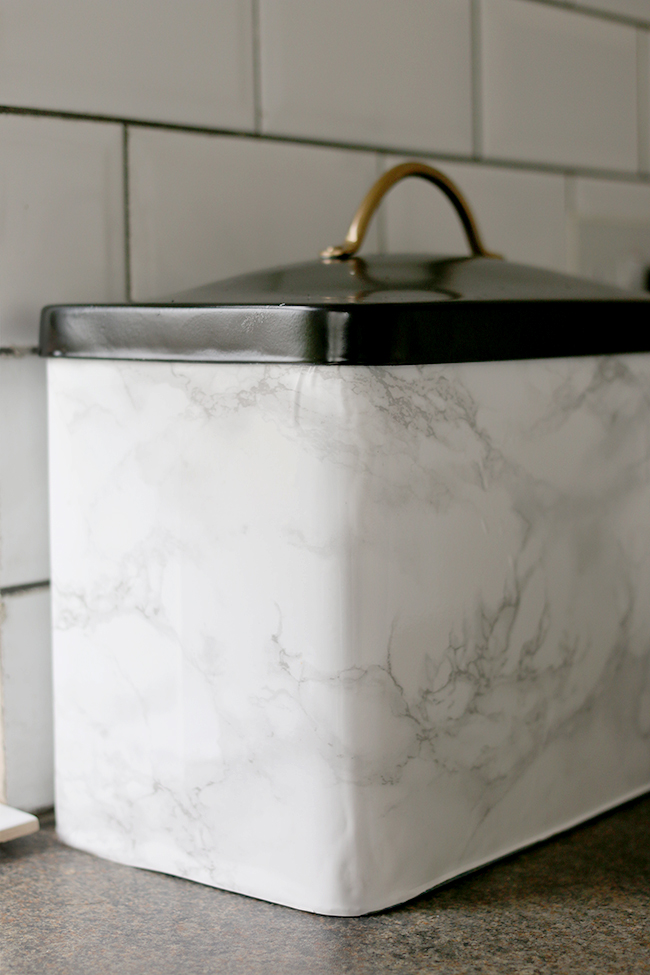
So a DIY was born. I simply wrapped the base in contact paper, smoothing it down with a scraper as I went to get the bubbles out and then spray painted the bin top in black spray paint*. Of course, the silver handle had to be spray painted gold
* as well. I just used a bit of frogtape*
to mask it all out. It was ridiculously easy and took me about an hour all in.

I love the new look. Every time I passed it for the following day, I remarked to Wayne, “I’m so happy about that bread bin.” which is probably the weirdest sentence ever uttered. I wish I had a Cricut machine to make a little ‘Bread’ decal in gold foil for it to finish it off but well, I don’t. Maybe I’ll order one from Etsy if I get around to it.
Now obviously the kitchen has a long way to go before I’m actually happy with it. I’ve chosen my tiles, I am waiting for a few samples for the countertops to come in and I’ve decided on the colour of the cupboards. Once we are finished with the dining room (allowing a little breather from the chaos of course), we’ll start on this project.
But these pretty glam additions can hold me over for a little while longer.
So…. while I realise you must be thinking I have stock in the marble sticky back plastic industry (I don’t), what do you think of this quick and easy DIY? Would you ever spend a ridiculous sum on storage jars? Talk to me.


COOOOL!
Loving the little updates. The storage jars are fab. And look here: https://madeheart.com/en/product/2016753789/Small-handmade-decorative-polymer-clay-fridge-magnet-for-kitchen-golden-long-loaf.html
Might be a little addition for the new glam bread bin!?xx
Oh my goodness, that is SO freaking cute! Love this idea, thank you!! xx
That’s gorgeous, you’re full of fab DIY ideas! The marble looks very realistic. And, oh my, I love the Ruffoni jars…
Aww thank you Rachel! If given half the chance, I’d cover my entire house in marble sticky back plastic! LOL! xx
Oh the glamour of your kitchen !
Those jars, just WOW!
Absolutely inspired bread bin makeover, only you could makeover a breadbin Kimberly.
Stunning xx
Thank you so much Karen! It’ll be a bit more glam once we can replace those ugly worktops – stay tuned ;) I’m probably the only one who cares about a glam breadbin! Haha! xxx
OH SOooooo SWOON WORTHY! Love both, bin and jars. Wouldn’t add a thing to bread bin…gold handle takes the stage. Your kitchen is such a joyful treasure party, I would be giddy every time I entered it too! I enjoy a nod to eclectic glam and vintage in my digs too -although it’s mostly farmhouse! Ha! Love quirkiness & unexpected surprises at home. You rock it with great charm & with cozy comforts. Smiles, Kathleen
Aww thanks Kathleen, that’s so nice of you! Eclectic Glam Vintage Farmhouse sounds freaking amazing if you ask me ;) xxx
Fabulous idea with the bread bin, generally speaking they are a bit sad looking I agree, but your bin is surely going to start a trend in marble bread bins! Also love the copper caddies, and yes there is definitely a time to splurge..nice one!Happy Easter! Sharon
I was surprised with how much ‘marble everything’ there is out at the moment that no one has done a marble breadbin yet – perhaps I need to start that trend! Ha! Thanks so much Sharon and Happy Easter to you as well lovely!! xxx
Hmm. I have a vintage white enamel one. It holds my mail. Might need to rethink this. So you put bread in it…….?
Hahaha! Well if it was up to me, there wouldn’t be bread in ours either – Wayne and his damn carb addiction! ;) xxx
I am totally bummed I just spent £30 on a new bread bin which actually, doesn’t even ‘go’, when I could’ve done something similar. Fail. But oh my. Those jars….!!
Awww sorry Sue! Why are there no great bread bins on the market?! So frustrating! Yeah those jars… goodness, I keep going into the kitchen just to ‘visit’ them! Yes, I am that sad. xxx
Sad?! Sounds perfectly normal to me ;-) Enjoy those babies!
Good lord woman, that is inspired! I love it! I’m totally swooning over your bread bin. Such a great idea. And those storage jars are to die for. I totally agree that if you feel that way about a product and can afford it (or save up for it) then you must have it. If it makes your life happier it’s worth it.
Aww thank you lovely! And totally agree – if you can swing it, then why the heck not, right? Life is too short not to treat yourself every once in a while ;) xxx
How absolutely fabulous! You know it’s not quite my own style, but I love those jars in YOUR home, the perfect fit. I think it’s ok to splurge on something really nice every once in a while and I think it’s better to have fewer things of better quality (and therefore generally more expensive) rather than lots of cheap stuff. Besides, you’ve “made up” for it with your fab bread bin DIY ;-) Happy Easter to you both xo
I love makeovers like this! So fab, it is completely transformed and looks so at home in your kitchen. Plus I love that you have used something you already had rather than throwing it away and buying new. Inspiring! Even if it is just a bread bin :D xx
As you know, that bread bin is fantastic!! (And I must buy marble sticky-back plastic and start covering EVERYTHING!) I love how the black lid and gold handle really set it off perfectly and it goes so well with your kitchen and your style. You couldn’t have bought a more perfect bread bin (even if glam ones did exist out there!)
And wow – those storage jars!!!! BEAUTIFUL! And why the hell not get them if you love them?! It’s your damn money – you work hard for it! What is the point of working your butt off just to buy necessities and pay the bills? You can afford it, so why not treat yourself and bring a bit of joy to your days? You will get your money’s worth every time you go into the kitchen and they make you smile (as you most likely gaze adoringly at them, occasionally reaching out for a fond caress…) It’s a sad life it you can’t spend your money in the way you want to make yourself happy!
Oh, and I love those copper mugs!!! They are going to look so great – and pick up the copper from the jars – fabulous choice!
And… (am I ever gonna shut-up?) … eeeek so excited to see the kitchen changes when you start on them! Too much excitement!!! xx
You’ve certainly succeeded in creating a glamorous bread bin! We want to redo our kitchen and I’ll be opting for metro tiles – love your grey counter top and the unusual door handles!
Suze | LuxuryColumnist
Gah! Great idea! I have two spare rolls of marble paper and a “vintage” bread bin hiding in a cupboard cos it doesn’t match my current style. This is so happening!!
Also, I recently found some copper topped storage jars and a set of cutlery in Dunnes (cheap-ish Irish store) that I’ve been humming and hawing over. You’ve decided for me, I’m totally having them. Mwah!
Hi Kimberly,
It’s really nice experience to visit on your blog ! I found you on another & came on yours. Well it’s nice to know more about Ruffoni Jars that you shared here for your fans.
Love it so much now. Perfect
Isn’t that just the smartest bread bin now? Fab makeover! And those jars… SO pretty! I’m walking away right now so I don’t dwell on them anymore… I can’t afford to!
Ooooh I love this simple idea – looks so glam! SO clever you are! xxxx
Wow what a clever idea? What sort of size does the marble paper come in? I’m hunting around as I write this trying to find something to cover it with! Love it x
YEP, YEP AND YEP. I couldn’t remember what your bread bin looked like before, but damn girl. It looks so much better now! I love when you’re able to update something you already have in stead of buying something brand new. Although, those Ruffoni glass jars … They are speaking to me.
this is a test 132 12 1 10 4
Aaaahhh! OOoooh. It’s fate. I have the same toaster, and about to change my countertop for marble (okay, not real marble, but it will look amazing).
CONTACT PAPER. How do I not have any yet.
ps. I’ll be back.
Nice! i thought your logo was on it from the first picture. That would have been nice lol.
Wait! What is that bin covered with? I love it!!!! I want to copy your entire kitchen .
I am so ecstatic that I’ve just discovered you! I love, love everything. I wish if you could share where to find an exquisite ellectric kettle like yours. I will have to lock myself and catch up on all the beauty – feast for my eyes.
Hi Ines, Aww that’s so nice of you! Sure, the kettle is a Delonghi Brillante in White: http://amzn.to/2sDt6HR xxx