So the last time I talked about the dining room remodel, we’d managed to put the pine flooring down while Wayne suffered from a sore throat that turned into strep throat. He lost his voice for a while and we lost about 5 days of work time because I insisted he rest at that point and he didn’t have the strength to argue with me.
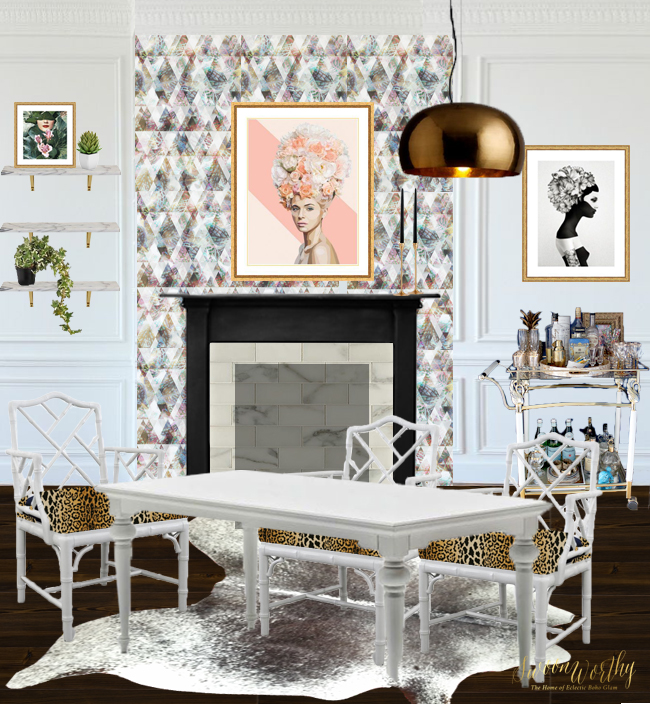
The final room design and plan for the space – Check out my post here for more details.
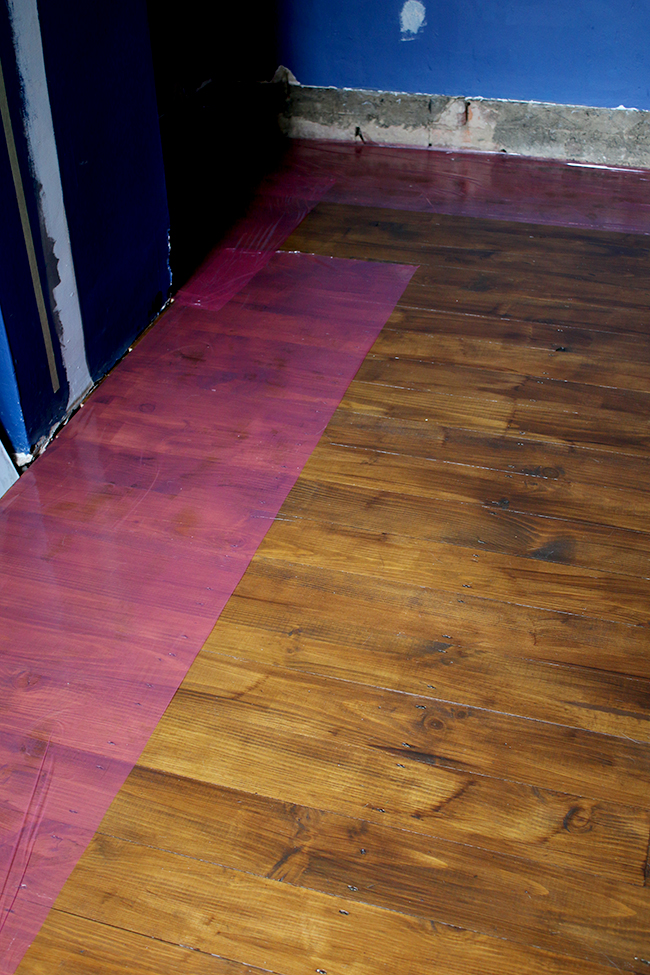
The weekend that followed, he was feeling better and managed to get the last two pieces of flooring fitted so I started on the staining. Every time we’ve done the flooring in this way in the house (first the living room, then the office) we used 3 coats of Ronseal Dark Oak* and topped it with 2 coats of Bona Mega Silk Matt
*, a clear protective varnish that gives them a wonderful finished sheen without being too ultra-glossy.
*This post contains affiliate links indicated by an asterisks – You don’t pay any more but I’ll earn some pennies to buy a few pretties for the dining room so it’s a win-win! ;)
I’m not sure if Ronseal has changed their formulation but following the 3 coats of Dark Oak stain, we realised the stain wasn’t really dark enough to match the flooring in the other rooms. It looked beautiful and had we not already gone so dark in the other rooms, I would have happily left it but the intention is to have all the floors match.
So after a brief discussion, we decided to leave the floors with the 3 coats of stain, cover them to protect them and get on with the other work at hand. The Bona Mega takes 5 days to fully cure and I was itching to start on the walls (so desperate I’ve been to get rid of the blue as the sky was finally brightening and I really REALLY wanted to lighten this space). Yep, I’m horribly impatient. The final coat of stain and varnish on the flooring could wait.
This weekend we decided to get on with the walls. I knew it was going to take some doing getting rid of that dark colour so on Friday, I went to the DIY store, picked up some white paint, a plastic sheet for the floor, a couple of rollers and trays. On the wall that divides the kitchen from the dining room and just on the left alcove, the previous owners had used a thick lining paper on the wall and it’d been peeling up for ages (to the point where both the dog AND the cat had been messing with it, pulling on it, etc) so in my typical act-now-think-later style, I decided I’d had enough of it.
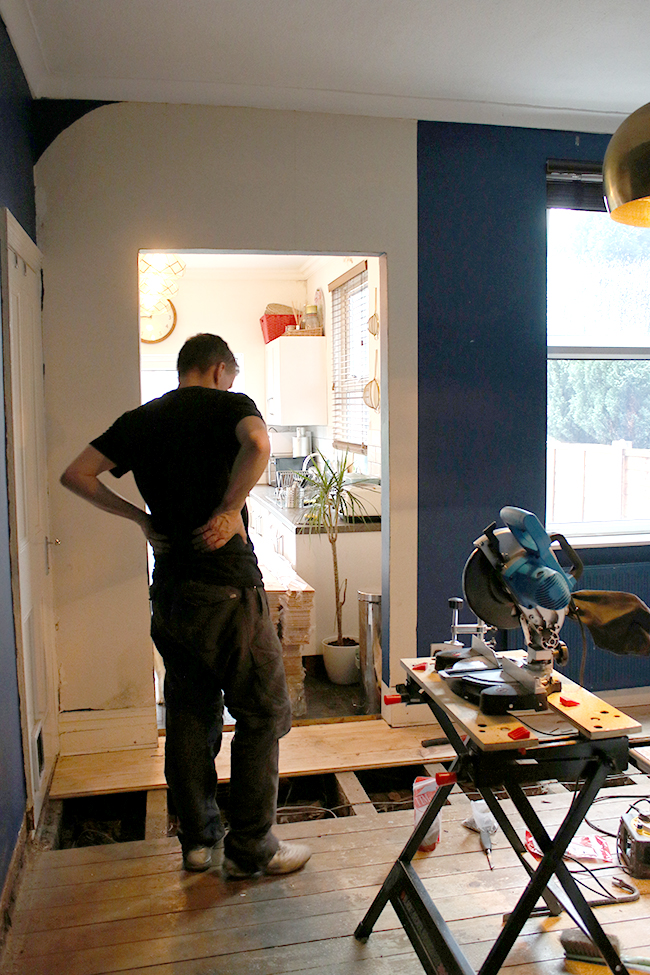
You can see in this picture where I’d already started stripping it back – that’s why the wall is half-white!
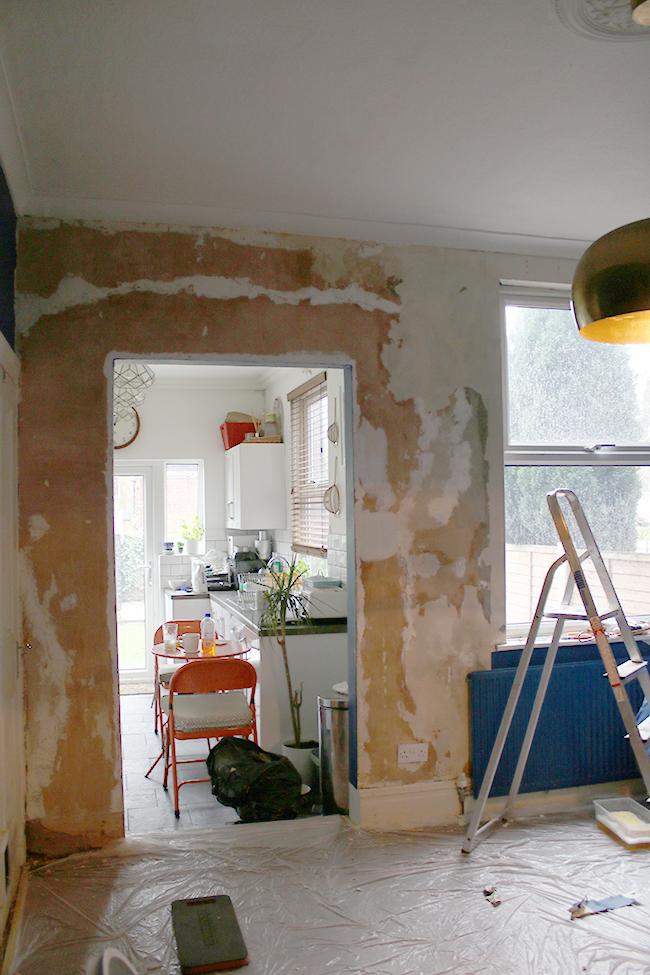
It pulled off in rather large satisfying strips but what was left behind was a thin layer of paper stuck via adhesive to the bare walls. We hemmed and hawed about what to do about it but finally, we realised it would all have to be stripped back to the bare plaster. This is the kind of thing you have to be prepared for. Yep, I wanted to get on with painting but that wall needed sorting before we could even dip our paint brushes.
Half-way through removing the lining paper – check out our makeshift dining area in the kitchen. Classy.
So out came the wallpaper stripper* and the tools we needed and we got to work. It is horrible messy work removing old wallpaper and I fully realise whomever moves into our home after us is going to have a job removing all the wallpaper that I’ve added but well, such is the joy of home-ownership – doing what you want in your own damn house because you want to. So yeah, I have to afford the previous owners the same privilege. Ho-hum.
Once the wall was stripped back (which took most of Saturday), we knew we’d have to do some serious patching and we didn’t have enough filler on-hand because we’d used so much on the other walls already! The other thing that happened was the thin plastic sheet we’d put on the floor was virtually destroyed within 5 minutes of putting it down with our mental animals chasing each other around on it and our cat Meisha deciding she needed to attack it every 2 minutes (she’s just weird). So I went back to the DIY store that evening (our wild Saturday nights, what can I say) and picked up something a little more heavy duty to protect the floors, a pot of quick drying filler*, white oil-based gloss for the doors and frogtape
* which I was out of.
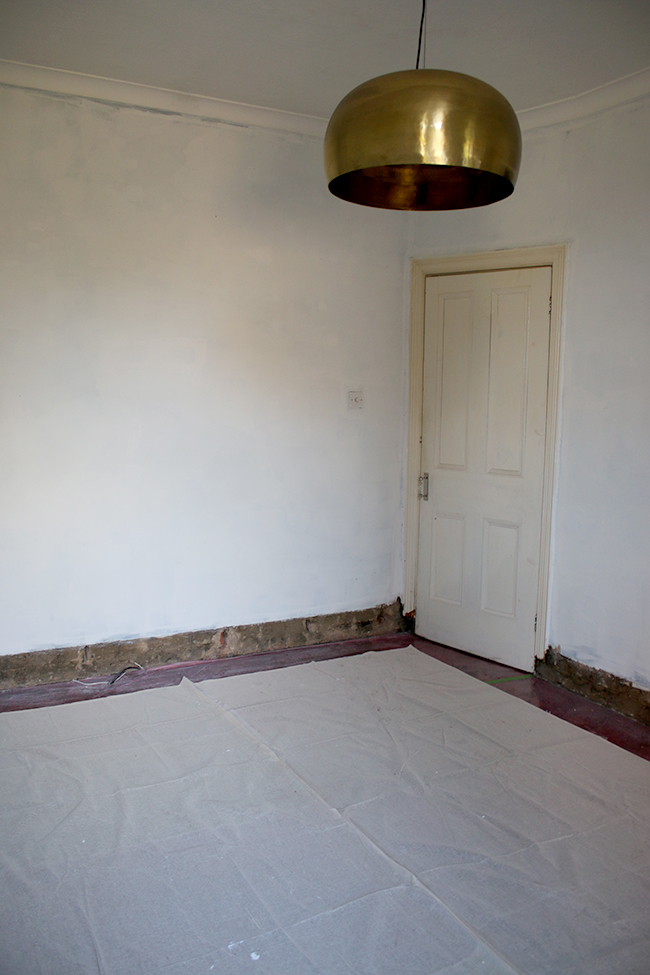
On Sunday morning, I cleaned the floors and we decided to try the floor protection products I’d chosen. I picked up a self-adhesive plastic that comes on a roll which sticks to hard floors without damaging them. This stuff was magic and I wish I’d known about it before! (I couldn’t find the exact product online but this is really similar*.)
We stuck it all around the edges of the floor and then laid a large water-proof canvas in the middle of the room. This combination worked SO well so I thought I’d share that.
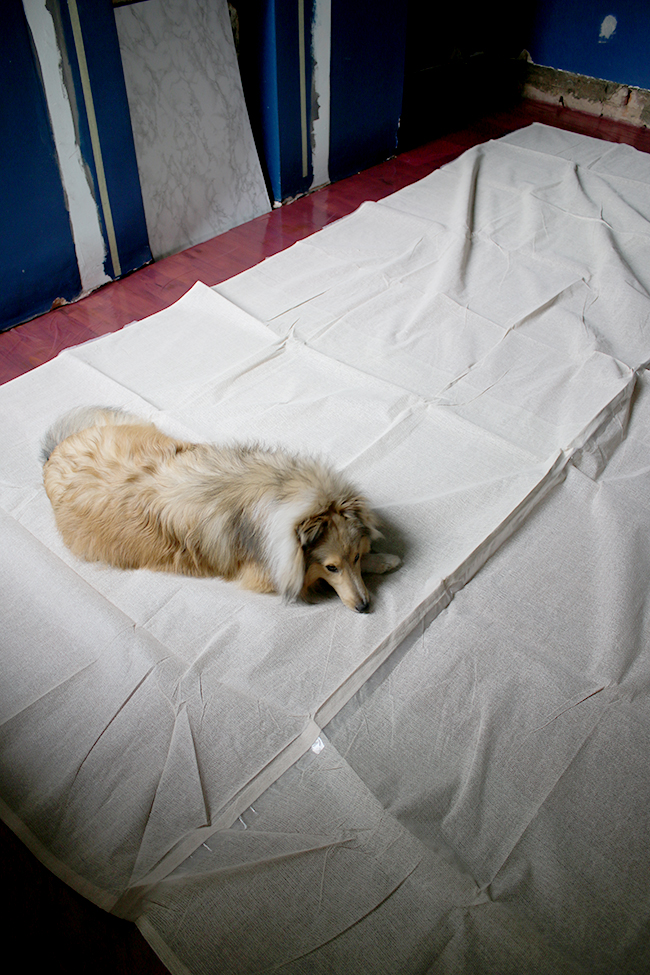
Quito seemed to like it as well.
Anyway, Wayne went about filling, patching and sanding the walls and I started on the painting. We did 1 coat of white paint all the way around and I was stunned at how bright the room started to look. I got excited. THINGS WERE HAPPENING.
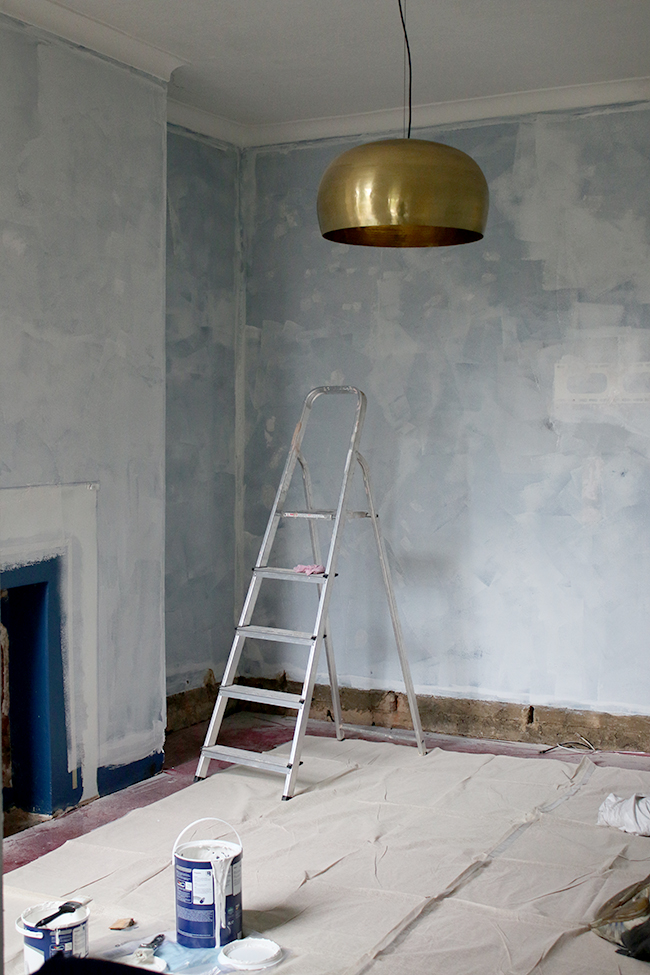
First coat of paint is on!
By 3pm on Sunday, we’d completed the work for that day, Wayne showered and while I waited to go in next (the plan for me to do the 2nd coat of white paint today), I just thought, ‘Sod the shower, I want to get this done now.’ I’m so impatient.
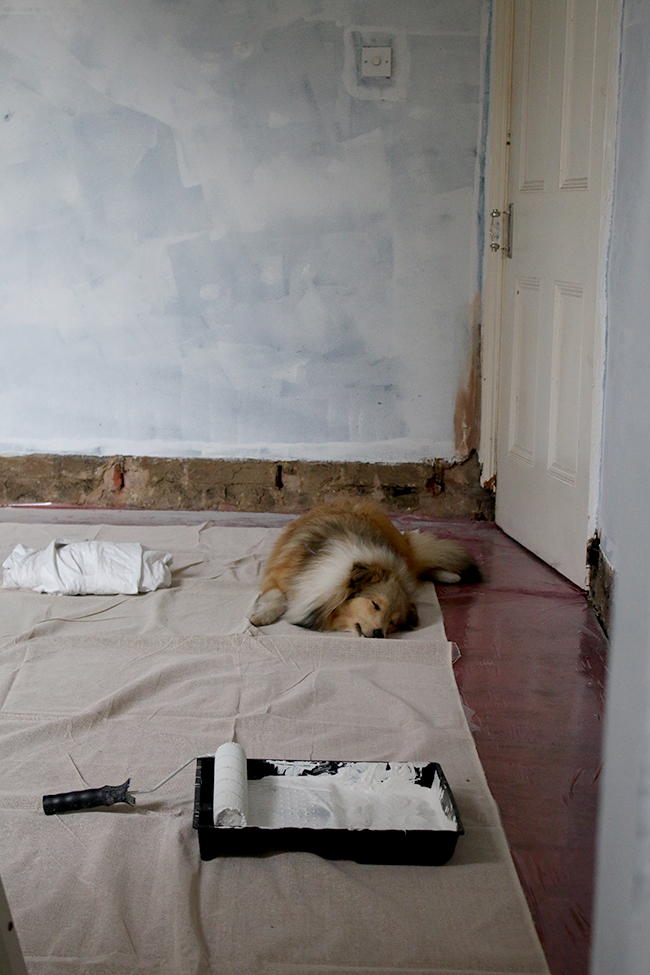
Quito had clearly had enough by this point.
At 3:15pm, I said to Wayne, now freshly showered and changed, “I want to do the 2nd coat now. I’ll have it done by 4:30pm!” He shrugged and told me to go for it if that’s what I wanted to do. So I pulled all the paints back out (we’d already cleaned up by then) and started on the second coat, chasing the light as I went. By 4:35 pm, the room had it’s second coat.

Now I used Dulux Brilliant White Matt paint for this. I know from experience using this paint (I’ve used it LOADS of times before) that it goes on looking like it’s barely covering anything but dries nearly opaque. I was pretty scared I’d have to do 3 coats of white before I could use the final 2 coats of grey paint but to be honest, it’s covered so incredibly well that aside from a few little patches which I’ll be going over, the room can now be painted in my final colour (which, nope, I haven’t chosen yet because I needed to lighten the space first in order to test the paint colours).
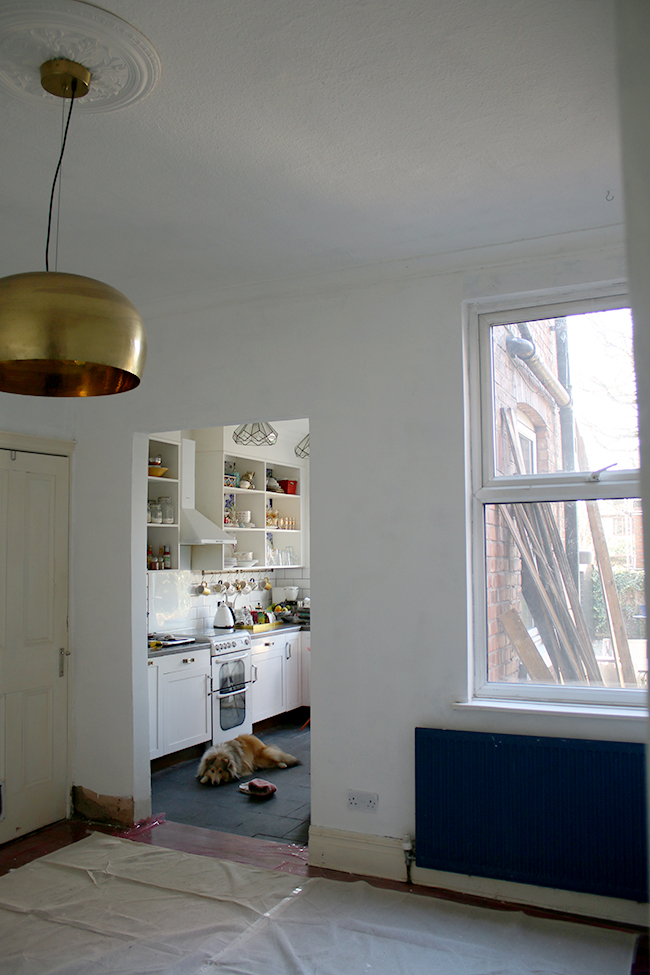
Excuse the messy kitchen in the background there! The radiator still needs to be painted of course.
That will be 4 coats in all (2 coats of white + 2 coats of grey) to cover the dark blue but well, it’s not exactly difficult work (aside from the fact my hand was aching from the roller and my thighs were killing me last night from going up and down the ladder 400 times) so it’s totally worth the trouble.
I can’t get over how horrible and yellow my doors look! Of course, they will be repainted and I also need to replace the handles – first of all because they are chrome and well, I can’t not have brass handles and secondly, because one of them is broken and has been for literally YEARS and I’ve just ignored it. So those need to get sorted.
So that’s how far we’ve gotten into the dining room remodel! As you can see, we still have loads more to do but well, the only way to get to the final vision is to keep cracking on with each little piece of the puzzle. On Tuesday, we’ll be getting in the new skirting boards, dado rail and architraves from The Skirting Board Shop who are one of the lovely sponsors of my project (more on those soon) so we’re going to try and get those fitted this week. And then we’ll move on to doing the wall trims, tiling and finishing the fireplace and flooring and painting the room in it’s final colour. I also need to sort out the doors, paint all the skirting boards and give the ceiling a fresh coat of paint, plus wallpapering the chimney breast and of course, all the final finishes! Lots to come so stay tuned for all that!
Can you believe how much brighter the room looks just with the white paint? I’m loving it already and it’s still a building site! Ha! Did you do any DIY this weekend? Any projects you are working on?


Coming along Kimberly, it’s going to look fab! I’ve got to try and paint would effect laminate in the retro caravan makeover I’m doing. Any recommendations on a good sealant coat to paint on? Jx
Thanks Jane! I’m actually going to be doing a post on painting laminate furniture but I’ll email you my suggestions ;) xx
First weekend in forever I haven’t spent DIYing! Went up to Glasgow for a wedding which made a nice change.
Already can picture how great this is going to be when it is finished – the space is so bright with the white. And I too have known the late night trip to B&Q before closing for more filler. Even if you think you’ve got enough, you’ll inevitably need more.
Quito is growing up to be such a beautiful chap – his fur is gorgeous. Does it take loads of brushing or is he naturally handsome?! x
Aww thank you! Your weekend sounds much nicer than mine! Ha! Oh yes, late night shopping at B&Q… so cool, no? ;)
As for Quito, he actually doesn’t need brushing very often – maybe once a month! His coat is naturally that nice! Wish my hair was as well-behaved ;) xxx
HI Kimberly
Your ‘yellow’ doors aren’t your fault. If you used brilliant white eggshell – or gloss – over time the oils in the paint break down and discolour. If you use a tinted white the oils are already coloured and they stay true for much longer. Which also means that you can touch things up without the patches looking odd.
Diane x
Ya know, I have never found a white oil-based gloss that doesn’t yellow with time!! When you say a tinted white – what do you mean by this? This is really helpful so any detail you can share, I’d so appreciate it! Now I wish I hadn’t bought the gloss paint!! lol xxx
Hiya
What I mean by a tinted White is one that is already pigmented. So any of the companies that do whites (Silica White by Fired Earth is a good one) will stay true and not discolour. And you’d be surprised at how ‘white’ a tinted colour looks when it’s actually on your woodwork. The reason brilliant white oil based paints discolour is that over time the oils oxidise and because there’s no tint in it the oxidisation is noticeable. So your yellowing doors etc are just doing what is natural for that product. I don’t know if water based eggshells also discolour – largely because I haven’t used brilliant white water based eggshell often enough to see what happens over time – but because so many companies have now gone to all water based formulations, if you do want the hard wearing properties of oil, go to a trade decorators merchants and ask them to mix your white in a trade base, sometimes the mix is just not right, but most often they’re pretty close to the tester pot.
Diane x
Yes, it makes total sense and I knew it was due to oxidisation but didn’t know how to rectify it! Very interesting to tint the white – I will definitely have to look into it! I have never noticed water-based whites going yellow myself but the oil-based ones always seem to after a few years. Thanks so much – definitely food for thought and I’ll look into the Fired Earth paint as well! TY!! xxx
Lookin good friend! We have about 15 projects we are about to start work on. It’s gonna be a busy Spring.
You and me both baby!! At least the sun is out, definately motivates me to do a bit of work ;) xxx
Wow! Things are coming along splendidly. I am enjoying all your hard work ;)
Aww thanks Sheran! It’s hard work but terribly satisfying ;) xxx
Looking awesome! I love when a room gets a major paint change. It is just so motivating to keep going when you see the difference, especially in a small room. Can’t wait to see it as you continue :)
Aww thanks Lynne! It’s amazing when you make a really big change like that – I’d forgotten how much light this room actually gets ;) xxx
Hi Kimberley,
I had the same problem with yellow woodwork in my house, I became quite obsessed with trying to find a paint that wouldn’t go yellow! I decided to repaint woodwork in water-based gloss instead.
I used Zinsser Bullseye 123 plus as an undercoat and then Leyland Trade fast drying water-based gloss. Its still got a slight shine to it but not as much as oil-based and no yellow so far. Just a thought?
The room looks great though and cant wait to see it finished!
Emma
Aww thank you for the tip Emma! How long have you had it? It seems my limit for white paint is about 3 years before it goes yellow so curious as to how long yours has lasted :D Thank you!! (You guys are such a wealth of information – I love it!!) ;) xxx
Wow looking good ☺ive drove keith barmy this weekend (nothing fresh about that lol) i couldn’t make my mind up where to start for our next project, so we’ve started 2 at the same time, oooppppss xxx
Hahaha!! Bless him! I’m desperately trying not to start anything else whilst this is going on but it’s so hard not to get the bug – LETS DO ALL THE THINGS NOW!! Good luck xxx
I re-painted about a year and a half a go so I suppose only time will tell if it will remain white? The tinted white gloss option sounds interesting though too. Good luck with it!
Oh, this is gonna look SO good! I seriously don’t know what I enjoy more: tearing things down and doing the renovation itself, or the final result. :D
It looks awesome already, loving the transition.I’m currently doing a light refurbishment of my flat which has turned into a major one lol…i just want to do everything NOW, so completely understand. Cant wait for the next update :-)
Its coming along! Hang in there : )
I cannot believe what a difference two coats of paint makes. And I have to say mad props for taking down all that wallpaper first. That’s something I’m really digging these days – doing things right even if it takes eight times longer. I’ve done my share of skimming by on the basics in the past and it almost never works out in the long run. There’s so much satisfaction from doing things in a right and considered way. I am so living vicariously through your dining room right now!!!
p.s. QUITO’S FACE KILLS ME.