It’s Wednesday so that means it’s time to share my progress on my office space which is being completely redone for the One Room Challenge™!
For those of you who aren’t familiar with the One Room Challenge™, Linda from Calling it Home chooses 20 different bloggers to all makeover one space in 6 short weeks! Every Wednesday, we all share the progress on our rooms so be sure to check all of them out at the end of my post – there are some amazing makeovers taking place and I’m sure we can all use the encouragement at this crucial stage!
Catching up? Start here: Week 1
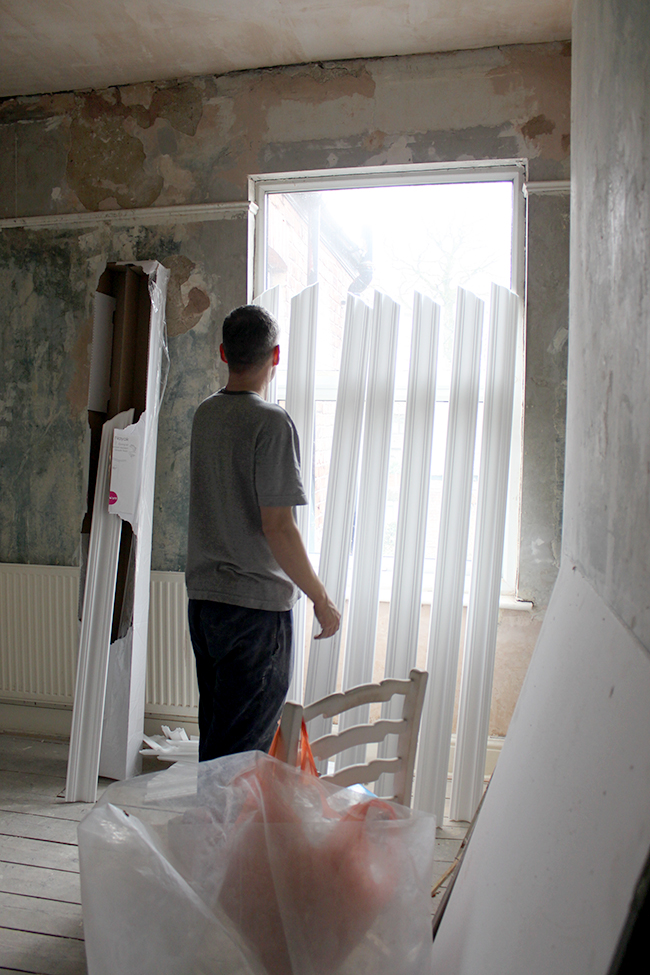
So last I shared, we had scraped all the walls back to the original plaster. Every one of the old walls still looked pretty rough and so they all needed lots of patching with filler and plaster. We spent a good few days just getting the walls prepped and waiting for plaster to dry – it’s not pretty work but entirely necessary.
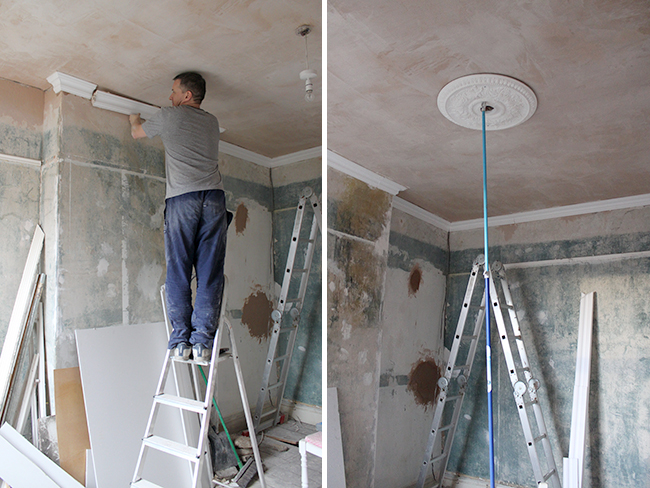
Now, I absolutely love the juxtaposition of ornate ceiling roses in older homes (ours is over 100 years old!) with modern light fixtures so it was something I was keen to do in here. The original cornicing (aka ‘crown moulding’ to my American brethren) was fairly plain but Edwardian homes of this era were sort of caught between the ornate look of the Victorian times and a scaled back, cleaner look of the early 20th century so we decided on a simple cornice combined with a more ornate ceiling rose.
While the original cornice would have been made out of plaster or wood, things have moved on and they are now made out of really easy-to-hang lightweight polystyrene. Once it’s up and painted, it’s really difficult to tell the difference between the materials and with walls as non-straight, uneven and crooked as ours (did I mention it’s an old house?), we needed the flexibility and “bend-a-bility” allowed in the polystyrene so that’s what we went for. The ceiling rose is actually plaster though (and quite heavy, thus the rather sexy pole holding it up whilst it dried!).
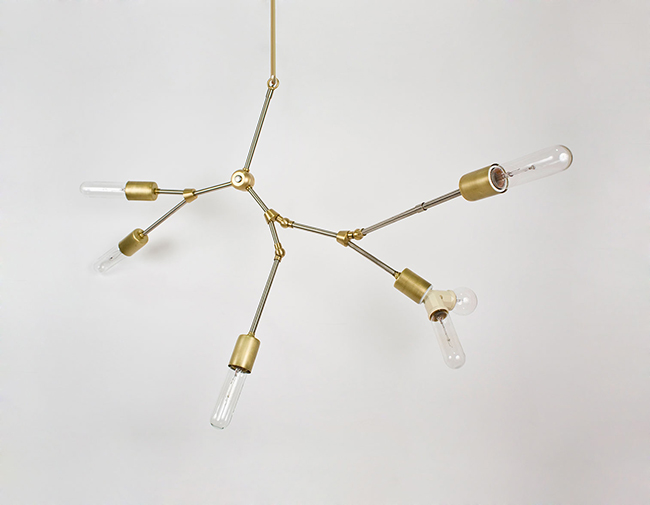
Now, I chose the Lindsey Adelman Make-It-Yourself chandelier ages ago for this room and we still need to build it (we’re making a few changes to it to make it UK compliant) but I think it’ll look great contrasted against the ornate ceiling rose, don’t ya think? Anyway, I’m getting distracted by pretty – more on that hopefully soon!
Once the cornice and ceiling rose were up, we covered everything in a light coat of primer to allow the paint to adhere a little better – so it all looks a bit uneven and messy but once the paint goes on, it’ll look a lot better!
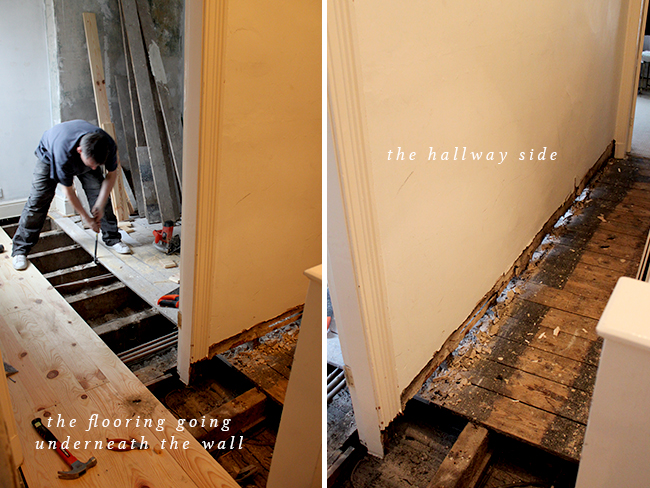
After prepping the walls, we Wayne started on the flooring. While our original plan was to restore the old original pine floors, at closer inspection, they were actually in pretty bad condition (boo!). So we decided to replace the flooring with like-for-like pine tongue and groove and salvage as many of the boards that were in decent shape for the rest of the house when we tackle the flooring in other rooms. Even the boards which were in bad condition will be recycled on future projects – nothing goes to waste around here!
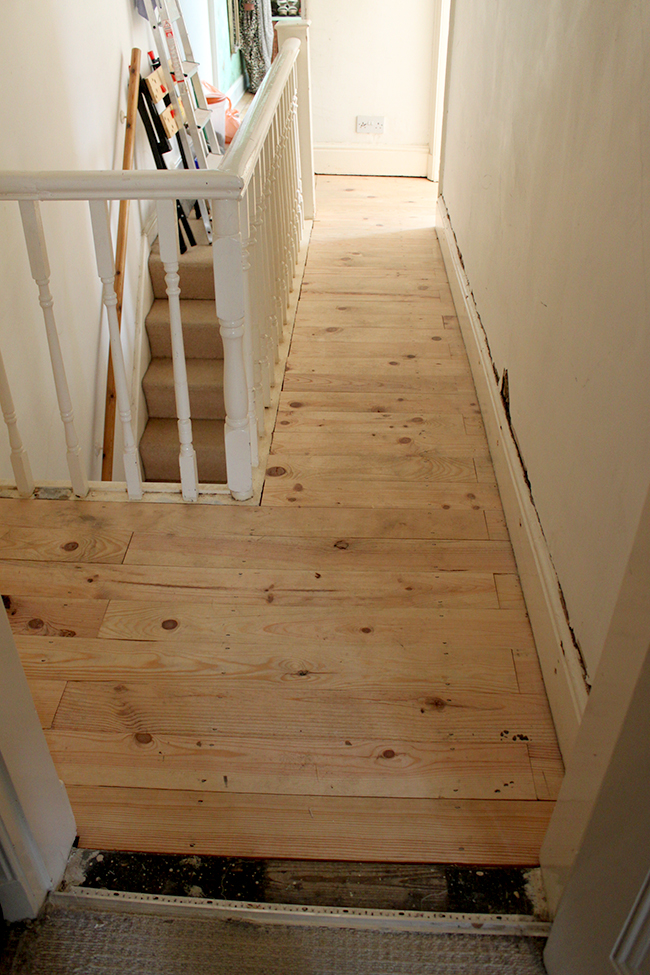
The challenging thing about the floors is that they actually went from the 2nd bedroom, under the wall and into the hallway. So the boards needed to be replaced in exactly the same way. The bonus of course is that we’re killing two birds with one stone here – we’re getting nice new flooring in the hallway as well! (The hallway, by the way, has never been touched in this house and needs plenty of work but one job ticked off the list is definitely welcome around these parts.)
Wayne got all the flooring down in about 10 hours. The progress has been lightning fast, I’m just hoping Wayne doesn’t burn out before it’s all done! ;)
Here’s the hallway side of things – so much better already!!
And here’s the room! Oh my goodness, after all the chaos and mess, it’s finally starting to look like a proper room again!!
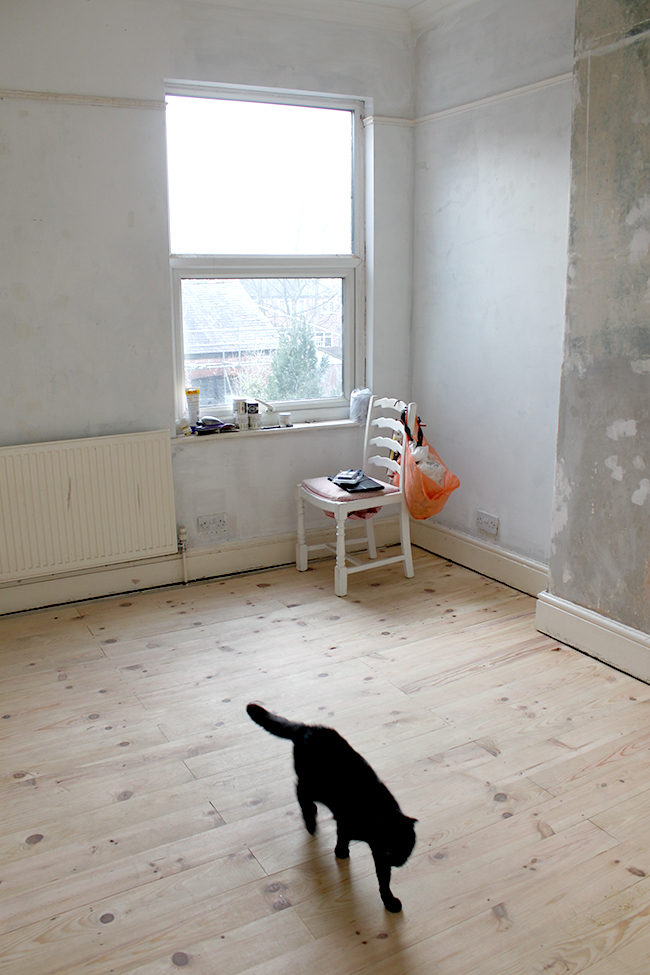
Pablo of course had to quality inspect….
The new flooring has already made a massive difference to the feel of the room – no more gaps in the flooring and there’s very little prep to do in terms of sanding. The boards can be stained and sealed straight away.
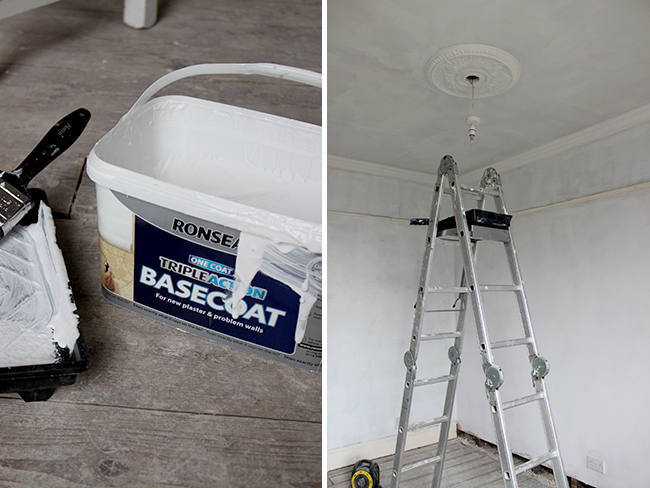
But first?? We need to paint the walls! As you can see I’ve been getting my pink paint on… trying to decide on a colour.
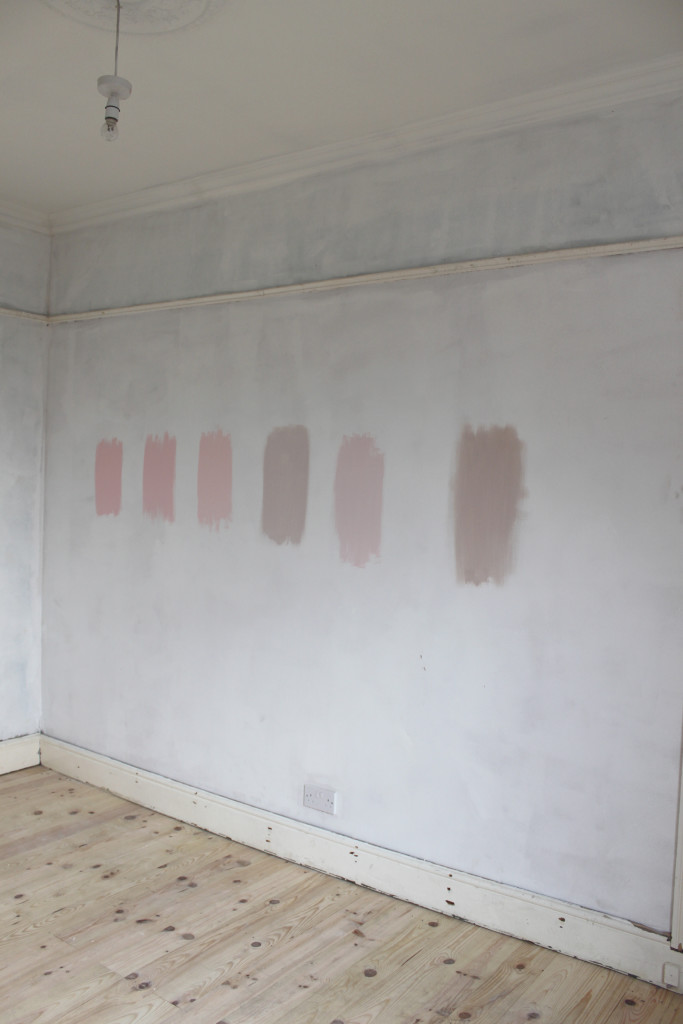
I’ll be talking more about the paint colour next week so be sure to come back next week to see what I chose!
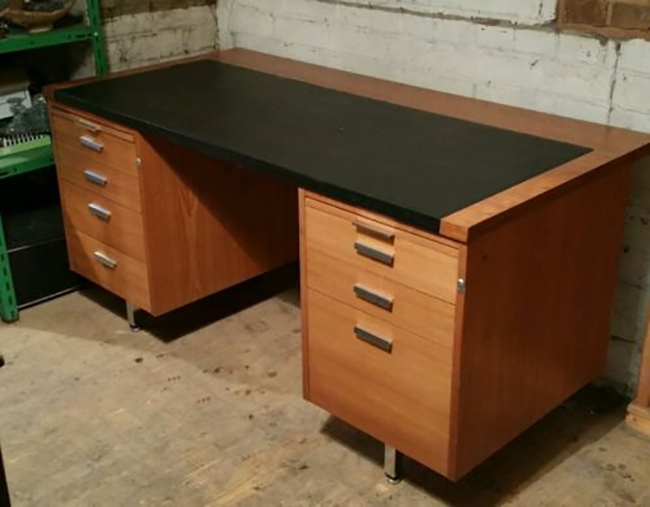
I also picked up this old desk from eBay for £130… (this is the listing image)
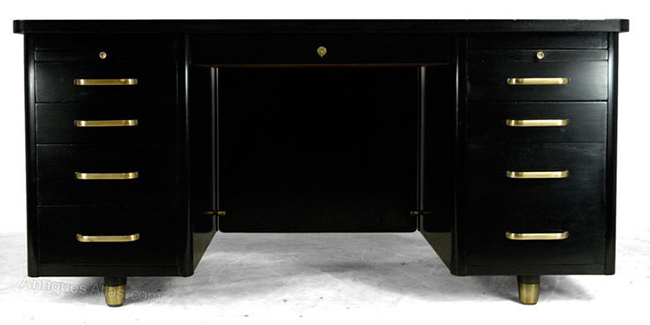
My intention is to turn it into something that looks a bit like this… (this one costs £1500!) But I think with a decent coat of black satin spray paint and some new handles, it’s possible, right? Fingers crossed…
Be sure to come back next week (or subscribe for updates!) to see how far we get over the next week…
And now, do you want to see what all the other 19 participants are up to? Of course you do! Check them all out below.


Man you’ve been busy! Those floors look so fresh!
I’m dying already. That rose medallion and fixture is everything. This is so fun to see this in real time :) xo
Y’all are such Pro’s! You make everything seem so easy and although your home is old (in age) you push forward without any hesitation. Good job, btw…I love your plans for the desk!
What a progress! Honestly, I haven’t done anything in my ORC yet. Well, Easter is my excuse:)) In fact, I can be a little lazy with my project as there is not as much to do as in yours!
Oh, and I forgot to say congratulation on your interview at beingfreelance.com, it was great and very inspirational:)
love the plans for the desk and the light and i vote the pink that is second from the right! i love the blush tone!
So amazed by your progress! I’m interested to see which pink you pick; from the samples, I’m partial to the third from the left, but they’ve all got something going for them. Can’t wait to see how your desk turns out. That will be a great transformation in itself!
Oh my gosh this room is going to be lovely! What a ton of work you’ve (or Wayne) ;) has accomplished already! I will be jumping in to the party tmrw (for the 4th time) and can’t wait! Love the inspiration desk and your wallpaper I saw on Instagram! Good luck!
I am still dying over the beautiful bones in your home! LOVE the traditional medallion mixed with your light. Going to be stunning!
Oh that desk is gonna be killer! And i loooove the medallion/chandy combo…and the floor boards…and the wall color options. Cant wait to see your choice love.
I´m so jealous, Wayne does all that work “for you”. I can´t even convince my husband to take off old wallpaper before we put new on! (although it MUST be done, so probably I will have to do it).
A quick question: How high are your rooms (in cm please)? I saw it in your livingroom too, that you use two crown moldings, one right under the ceiling and one lower. I´m thinking about doing the same in our bedroom so that the surface I want to put wallpaper on becomes smaller. Like this I can afford a more expensive wallpaper since I need less. I´m just afraid, the room (250cm high) would look too low like that.
Loving your pink room already! xo
Ooooh girl…snap snap SNAP. It’s gonna look SO GOOD!
I’ve heard tell of a fella that could spray paint that desk lol!
I’m loving what I’m seeing! I love that you’re making the DIY Lindsay Adelman chandelier, loving those shades of dusty pink and that desk… WOW! I’m cheering you on!!
Have been following you from across the pond for at least a year. Am thrilled for you that Linda is exposing your talent to more of us. You’re a rising star!
This is such a great space for an office! Love the lighting fixture you picked! I’m sure the room will turn out beautiful!
love love love your desk idea…how fab! Can’t wait to see which paint you’ve chosen xx
I had no idea a ‘make it yourself’ lighting store existed. Love this. Floors under walls….now that is amusing and different. Fantastic to have the hall done, too.
I have full faith that you can turn that old desk into a look alike of the expensive one. Especially with all of the progress you have made on your room!
Wowza you’ve been busy!! That is so much work, and looks so so great!!! Love the floors, and can’t wait to see the pink!
Oooh, those floors! You guys are knocking things out like crazy, can’t wait for the paint, I’m a pink girl all the way!
Those floors! What a huge job, but it will be so worth it! They are totally gorgeous already. And, that’s a perfect desk for your inspiration photo! Black paint will be stunning. You’re off to such a great start!
It looks so much better already! I love the floors and that desk…wowza! Keep on keeping on girl:)
This is a super exciting makeover and PINK walls are making me giddy!
KILLER desk. Can’t wait to see the rest.
Awesome! I know how much work that was – way to go you guys!
Wow! You two have been so busy! I love it and can’t wait to see more! You haven’t asked, but I’m voting for the third from the left color- gorgeous!
wow, the floor made soooo much difference!! It’s already looking great. Can’t wait to see what wall paint you’ll go for! Well done!
WOW that desk….LOVE.Looking forward to seeing your flooring completed too
I love everything, the medallion (I’ve always wanted to do that), the floors, and your idea for the desk – I bet the black paint will transform it!
I still can’t get over how you replaced the floorboards under the wall like that. I think it would break my brain and I’d cry out of fear of the wall collapsing. Although, you’re not removing them all at once, so I’m assuming it’s a lot safer than my imagination.
And that desk. And the light fixture. Not to mention the geometric wall light art. I can’t wait.
I admit, when Wayne told me how he was going to do that, I was all, ‘Whaaa?’ but he clearly managed it without the wall falling down so ya know, you go Wayne. I wouldn’t have attempted that myself either! lol xxx