How many times can you makeover one really cheap pine chest of drawers? Apparently, the answer is infinitely.
Because this chest of drawers has actually seen FOUR makeovers including the one I’m going to show you today. I can’t seem to stop myself but it’s just so easy to give it a different look that I thought I’d share the process with you today.
But first, I want to take you through it’s incarnations. It started out as just plain pine long ago (it must be at least 10-11 years now so I don’t have a picture of it) and I think it cost me about £50. All that time ago, I painted it a creamy white and put some chrome shell pulls on it – that’s makeover #1. It was originally in the bedroom of my old house but I used it in the dressing room when we moved in here until I replaced it with a larger set of drawers.
Once that happened, I decided to use it to house our extensive DVD collection in the living room. I painted it black and wallpapered the drawers with leftover Cole & Son’s Cow Parsley wallpaper to tie in with the colour scheme back then. That was makeover #2 which you can read about here.
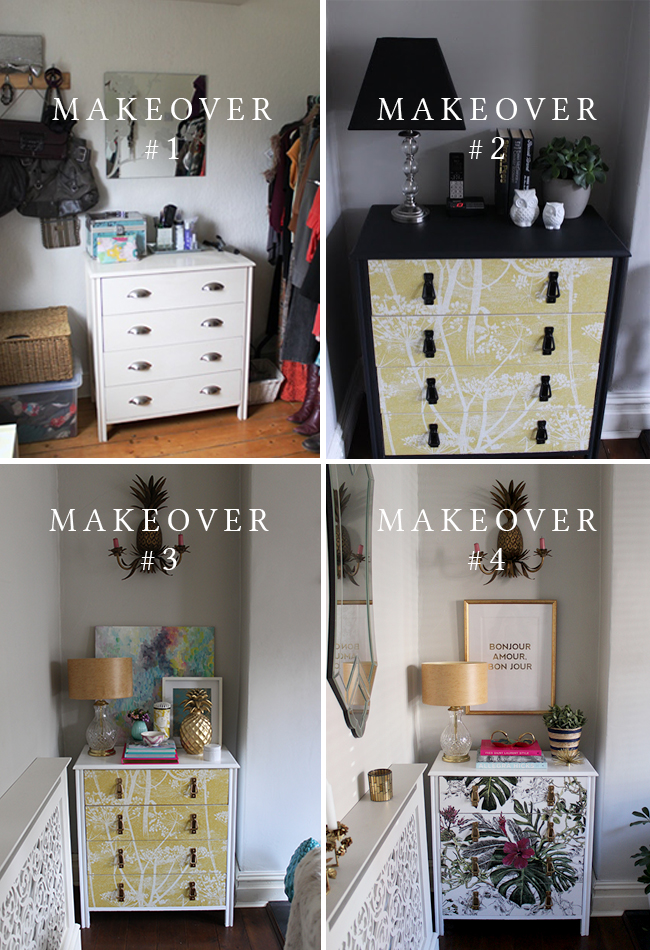
Then when we DIY’d the new TV stand, the black suddenly no longer worked. So I painted it white and spray painted the handles gold. So that was makeover #3 which you can read about here.
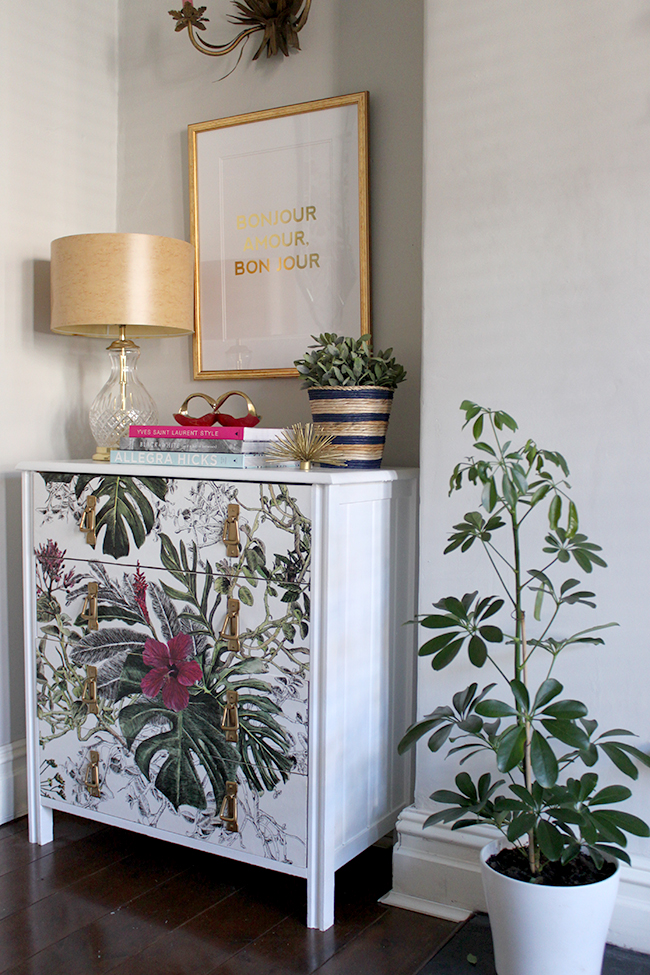
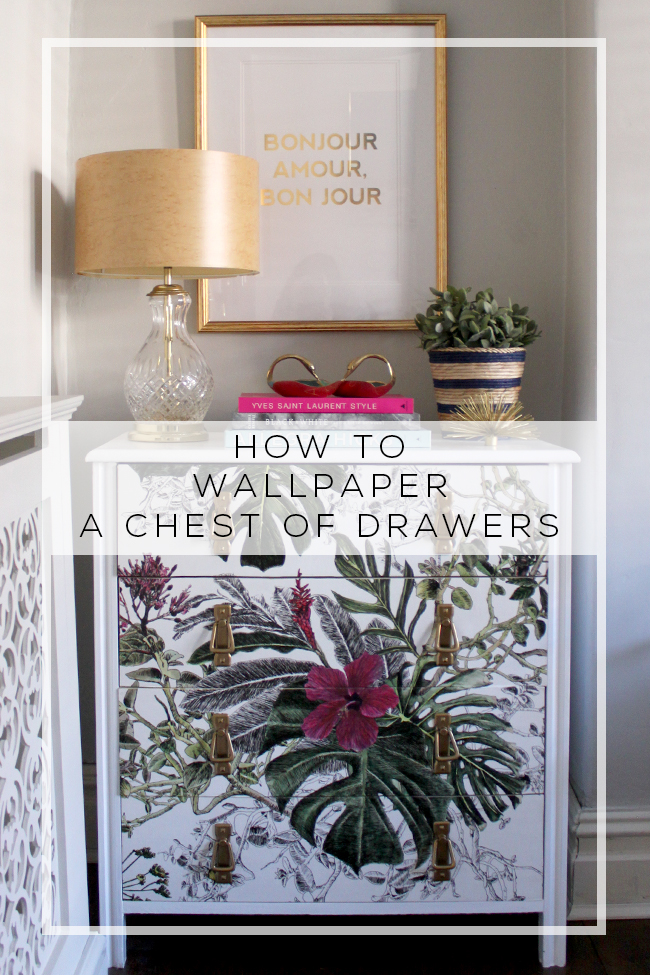
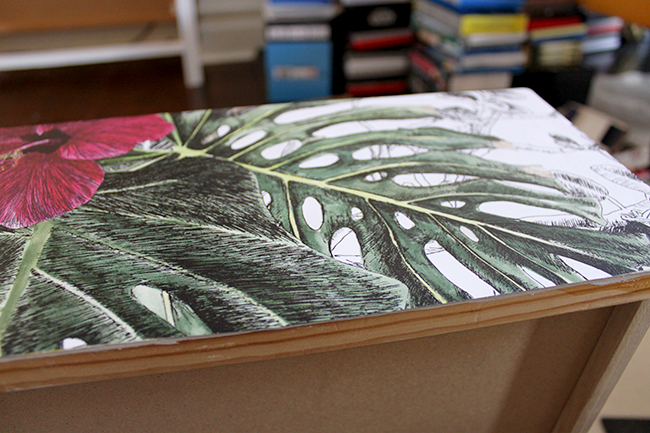
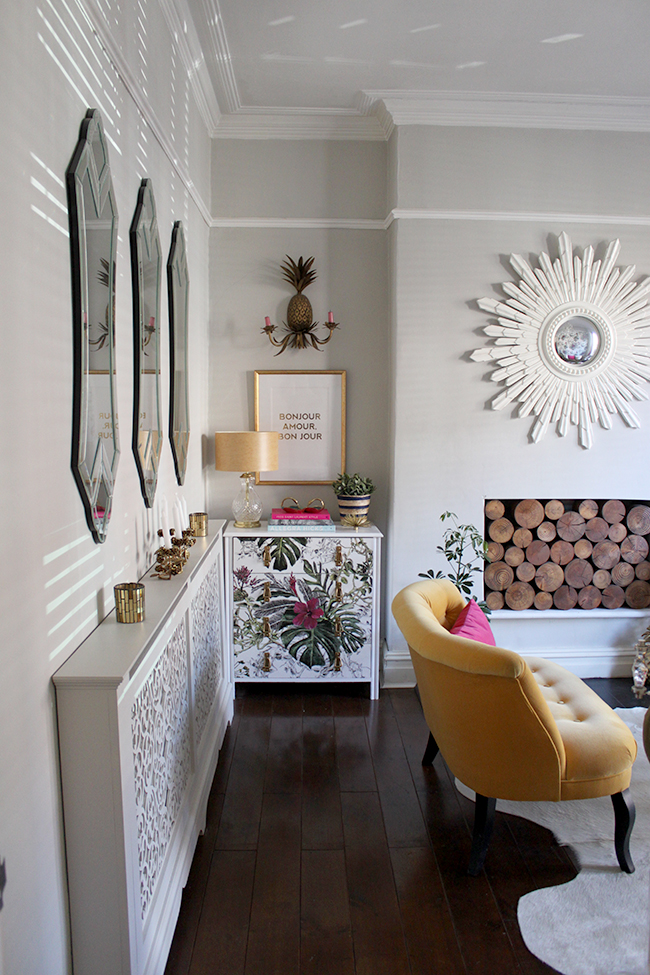
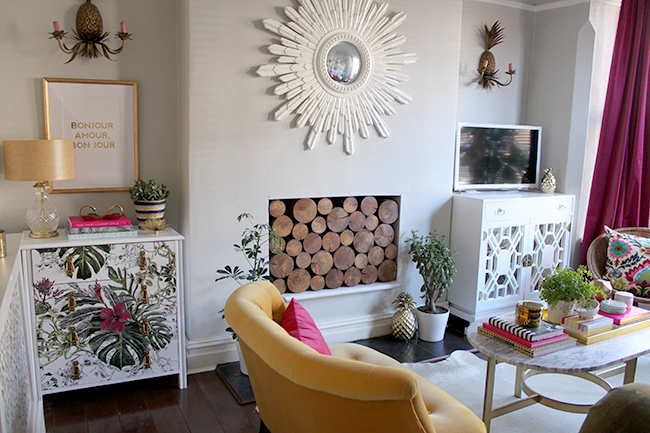
Well, as you probably know, the wallpaper in here changed recently to my beloved Sian Zang Summer Tropical Bloom and alongside that, a new palette was introduced. The yellow still worked fine with this new palette but I knew when I put it up that I’d want to change out this little chest of drawers to match the wall and pull the olive/raspberry palette over to that side of the room as well.
Alas, I had barely enough wallpaper in my one roll to cover the wall, nevermind an extra metre to cover this little chest of drawers. Happily, Sian Zeng sells her wallpaper in one-metre lengths as larger samples where you might want to see the entire pattern repeat and she happily sent me one of these to allow me to cover my chest of drawers.
This post may contain some affiliate links which means I get a small commission if you buy via my links as a thank you from the brands for the referral. You will never pay more when using my links.
How to Wallpaper a Chest of Drawers
(it’s remarkably easy!)
Materials:
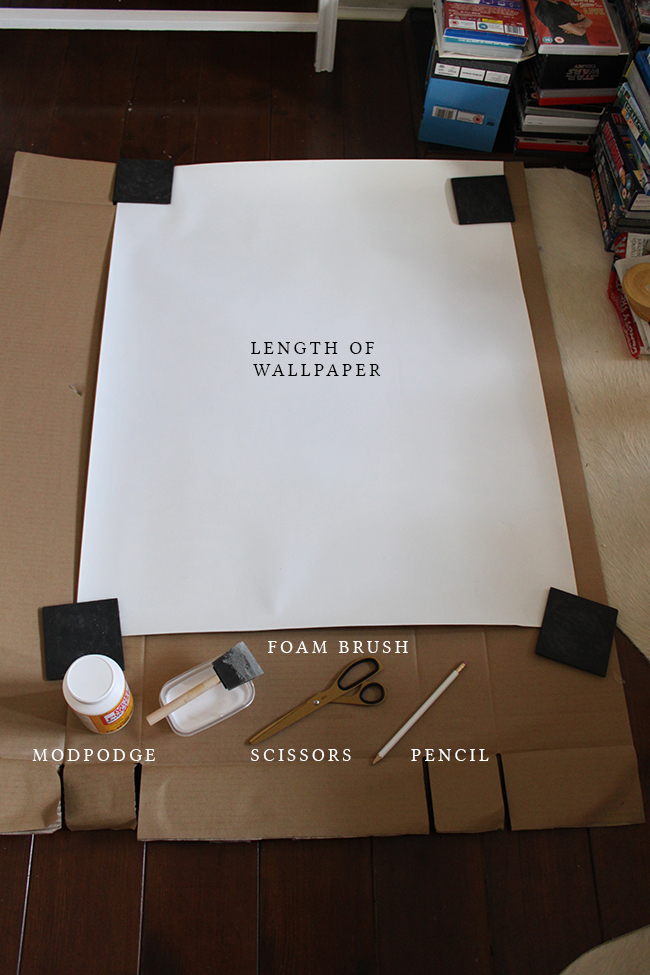
- Your wallpaper
- A pencil
- Scissors
- Modpodge in Matt Finish
- A sponge brush
- A small screwdriver (or similar poking device) (not shown)
Instructions:
Step 1
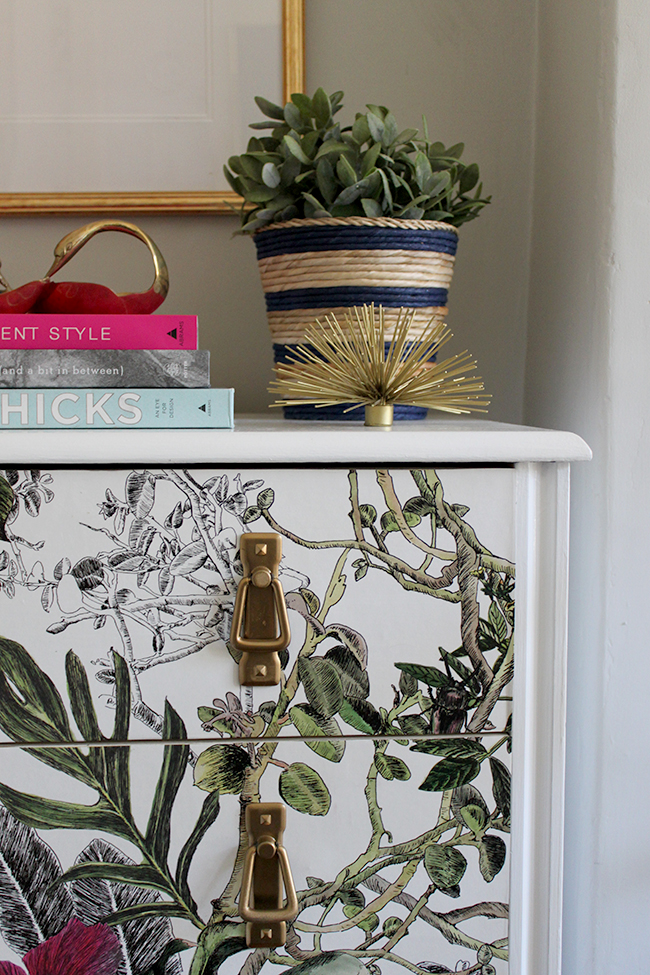
Decide first which part of the pattern you would like and where. As I knew I wanted the dark pink blossom relatively centred on my chest, this meant that my bottom drawer would align with the bottom of my wallpaper sample and any excess would come from the top of the sheet. You may need to remove from both the top and bottom to get the positioning of the paper on your drawers right.
Step 2
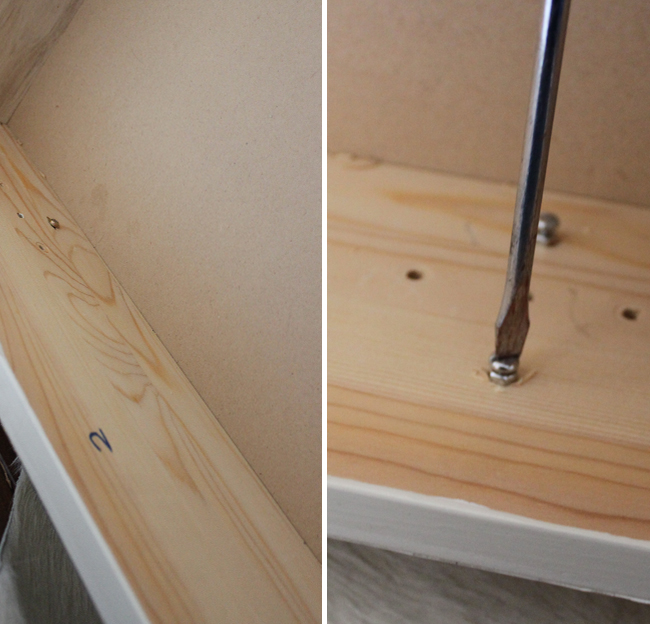
Mark the inside of each drawer with a number as you take them out – this is optional but it may make it easier to remember the order in which to paper them. Remove the hardware from your furniture. If you are replacing the hardware, now’s the time to drill for the new holes. Obviously, I was re-using the same hardware so I didn’t need to do that.
Step 3
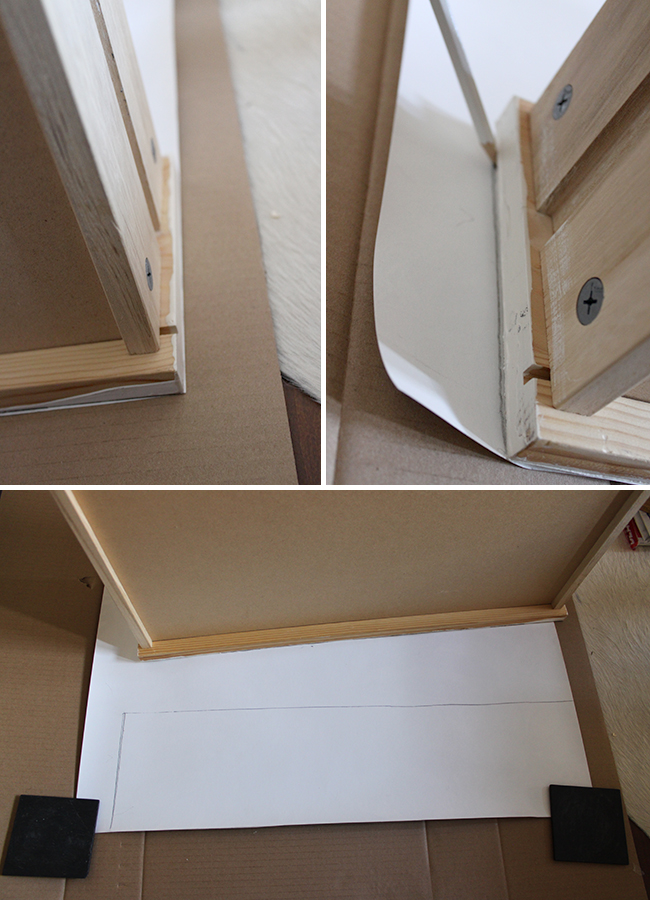
After laying out the paper with the pattern side down, I started with the bottom drawer, aligning it with the bottom of the wallpaper where my pattern would start. Using the bottom of the wallpaper and side as a straight edge, I positioned the drawer front on the paper and simply traced around the other two sides with a pencil.
Step 4
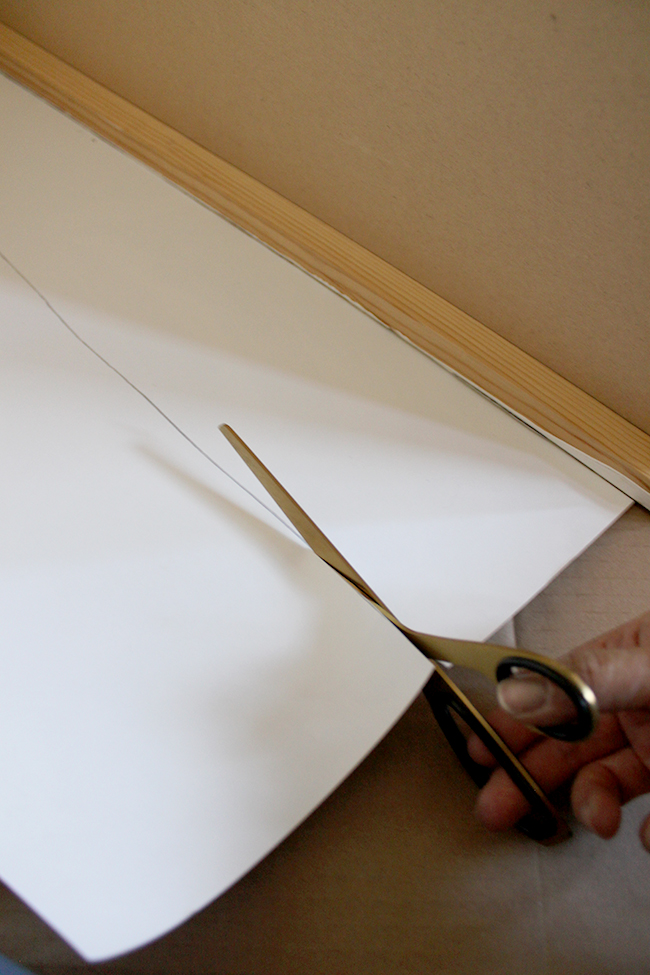
I then carefully cut out the paper.
Step 5
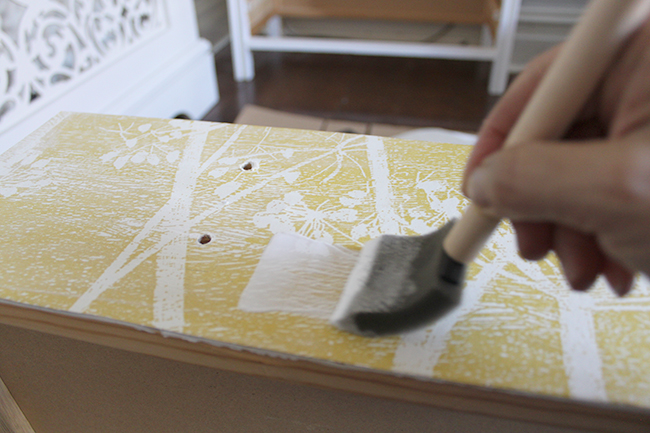
Using a sponge brush, I covered the drawer front completely with Modpodge, taking care to ensure the edges were all totally covered in the glue.
Step 6
I then pasted the paper to the drawer front (make sure it’s the right way around!), smoothing it down and making sure it aligned perfectly at the edges.
Step 7
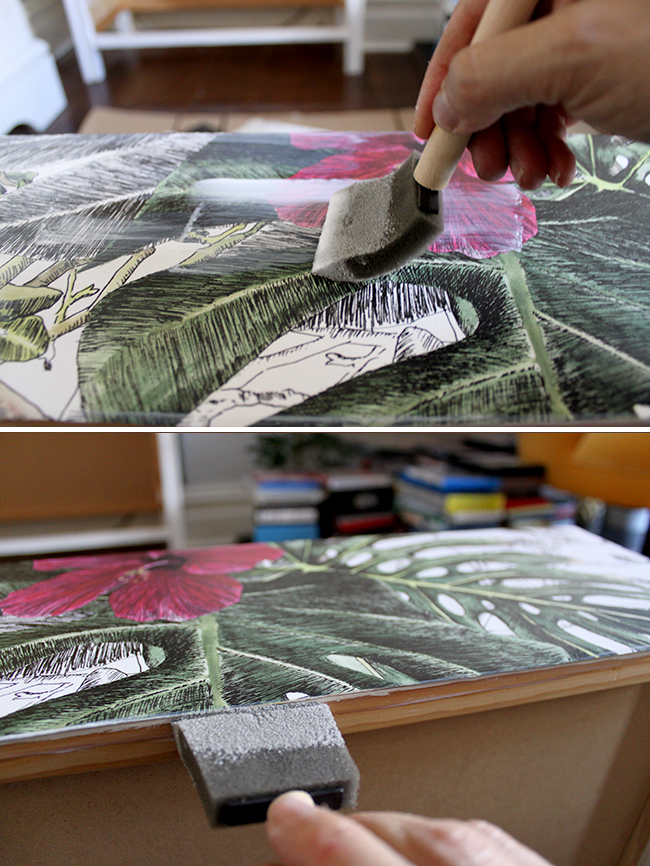
I then covered the top of the wallpaper with more Modpodge to seal it, again taking extra care around the edges to ensure it was completely stuck down around the whole drawer.
Step 8
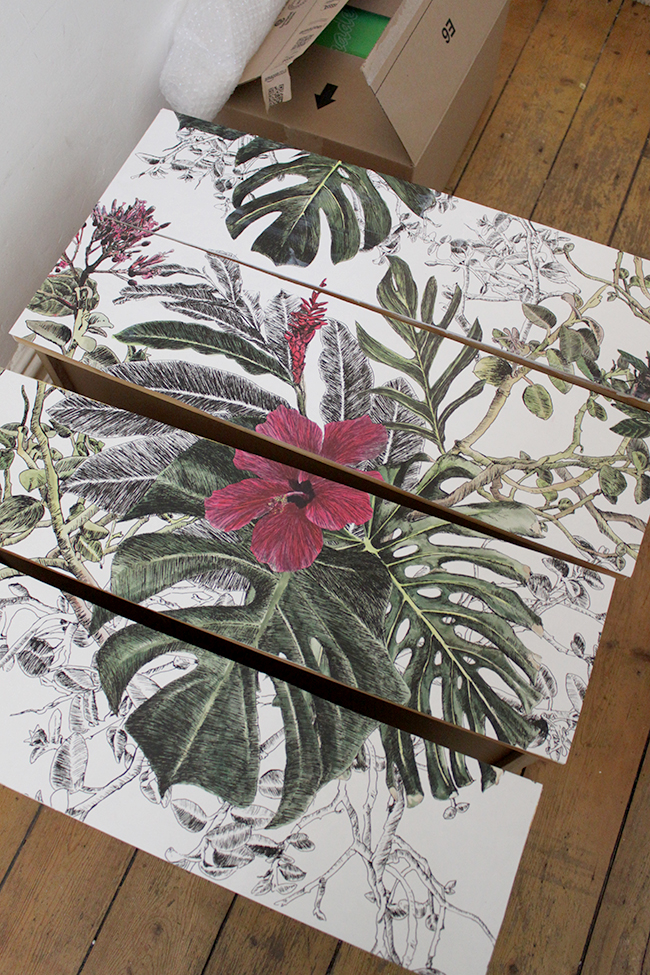
For the next drawer, I again aligned the bottom of the paper where I had just cut to the bottom of the drawer front and repeated tracing, cutting and gluing. This continued until all the drawers were done. Make sure you place your drawers the right way around – you don’t want to accidentally paste one of the cuts upside down ;) The Modpodge goes on white but dries clear and creates a protective bond so don’t worry if the pattern looks a little cloudy – it will dry clear.
Step 9
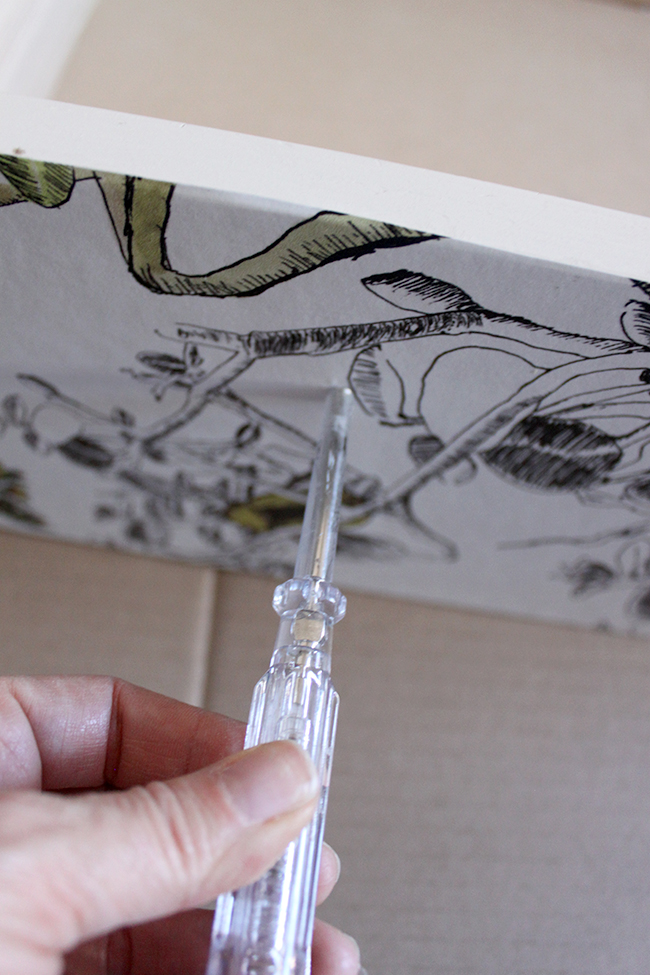
Once all the drawers were done and the glue was dry (it doesn’t take long, less than an hour) – I used a small screwdriver to poke the holes where the handles were to go through. I reattached all the handles and admired my handiwork!
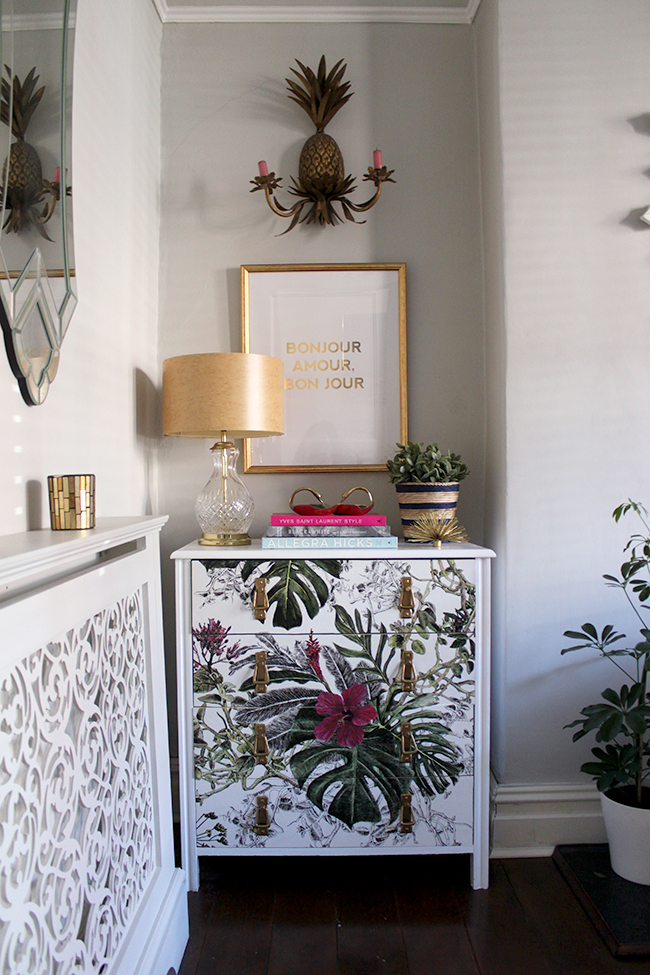
At some point in time, I’d love to replace this chest with something a bit taller, a bit more vintage and in a wood finish but for now, I’m really happy with the new look. I considered getting new hardware for it but to be honest, I didn’t fancy spending the money on it, knowing it was just a quick fix (the whole thing took me less than an hour).
You can see how it now ties in better with the rest of the room and I really like how the white background of the paper works nicely with the white TV stand.
So that’s my little makeover for the day! What do you think of the most recent chest of drawers makeover? Or do you think it’s time for me to scrap this thing already and stop making it over?! ;) Do you have any furniture that’s been made over multiple times? I’d love to hear your thoughts!
Disclaimer: I received my wallpaper sample at a discount for my review from Sian Zeng, but of course, as always all words, images and opinions are my very own. Thanks for supporting the businesses that support Swoon Worthy.


jaw-dropping gorgeous!
Instead of Modpodge (I’d never heard of it) I use Protective Decorators Varnish. From your description it’s the same stuff and can be purchased at decorators merchants in the UK. Its fantastic to extend the life of wall paint as well, it dries flat and is totally washable – excellent with kids or pets in hallways for example – and it seals paint on woodwork as well. I’ve used it when doing up furniture on top of emulsion paint, its very robust and really stands up to the knocks.
Ahh good tip! Modpodge is a bit like PVA glue so I imagine you could probably use that as well – I have only ever used Modpodge though so that’s what I can recommend ;) It’s essentially glue and varnish in one xxx
Yup, that describes exactly what the decorators varnish does. PVA has a shiny finish so you’d only want to use that if you were after a gloss effect. The Decorators Varnish also comes in different finishes, satin, gloss, dead flat and may well be easier to locate here than Modpodge. xxx
I love this idea, and your tutorial is fabulous. All of the looks have been great.
Want to try and do wardrobe doors. Would wallpaper paste be better on a large area?
This is my favorite of the transformations, that wallpaper fits so well in the space.
Kristina does the Internets
Kimberly, your living room getting better and better!
I am now green with envy, it looks gorgeous, i always look forward to reading your blog, please keep it up Kimberly i’ve been really ill and reading your blog as helped me through it many thanks flower xxx
Aww Pauline, you sweet thing. I’m so sorry you haven’t been well and I hope you have a very speedy recovery! Big hugs sent your way xxx
Dear Kimberly, do you know Midas? He was the ancient king of Phrygia and everything he touched became gold!!!! I think you have this “touch”!!!!
You turn ordinary items into extremely interesting decorative elements.
I am waiting the final post for your home office just to take ideas for mine.
Have a wonderful week :))
This is a great idea! You’re a genius. I love this.
I really loved the white with the yellow wallpaper – but I have to say this new look is stunning!! Really striking, I love it! And it really does work well with the TV stand.
And there is no limit to how many times you can make over a useful bit of furniture – especially when you make it look so good each time!
xx
This is an amazing DIY! Obsessed with the wallpaper you choose!,
So good! I totally love it and for some reason those amazing pulls remind me of tassels from further away which also looks so good.
Love this! So inspiring and yet such an easy makeover! Thanks for making me think about what I could do with my scruffy pine :-)
Love that you are using what you’ve got and updating it as things change! This is my favorite look for that chest of drewers (so far…LOL)Love that wall paper!!
Looks fab and I love that you mix it up! I have a rast hack and I am so loving seeing this inspo :) xo
I think modpodge sounds like the product I have been waiting for all my life! Do you use the matt or the gloss? Thank you :) x
I used the matt on this one but you could get a gloss if you need extra protection against staining as I reckon it’d be easier to clean! This doesn’t get used a whole lot so the matt was fine for this one but if you are doing something like a table top, I’d recommend using the gloss ;) xxx
Thanks Kimberly, I might try both! I’m doing up a fabulous vintage drinks trolley that is the same shape as the round Rockett St George one, but the trays need covering. Also doing drawer fronts on a console table. I suspect there may be more to follow though, I love decorating furniture with wallpaper, it’s just always looked a bit ‘bodged’ until now. Thanks for the recommendation :)x
Oh that sounds amazing! Yes, Modpodge works wonderfully for things like this – it’s actually considered a decoupage glue but works just as well on large surfaces.
Also, you might want to consider covering the trays in your bar cart (Lucky find! the one from Rockett St George is beautiful!) with something like marble effect sticky back plastic. You can see I did the top of my chest of drawers with this and it’s pretty damn amazing stuff: http://www.swoonworthy.co.uk/2014/08/dressing-room-mini-makeover-how-to-diy-a-carrara-marble-slab-for-under-a-tenner.html/
Good luck!! xxx
Wow, that looks fantastic! I had pondered something sticky-backed, but I wasn’t sure about the effect it would have. That looks incredible though, I think I’m going to have to have a look around.
Whilst I’m talking to you, I’ve just managed to find the auction link from when I found the trolley…
http://www.the-saleroom.com/en-gb/auction-catalogues/crows-auction-gallery/catalogue-id-srcro10036/lot-2dbd94d3-7542-4cf1-8069-a43e0112b829
I know you’ve mentioned Wayne spraying things for you, is there any product you could recommend to respray the metal sections? They are looking a little bit tatty. I think I’ll either stick with a similar colour to what it is now or go for a stainless steel effect.
Thanks for all your help, you’ve given me so many ideas! x
Oh that’s a great trolly!! Eeek! Well, if it were me (and this will come as no surprise) but I’d go metallic gold on that baby – Montana Gold Gold Chrome is my go-to gold spray paint (I’ve used it all over my house) and gives a nice metallic finish ;) Just make sure you leave it to dry for at least 24 hours before messing too much with it or it will mark! xx
I know, I’m so glad we found it. I won a Rockett St George voucher and was agonising over the additional money I’d have to put in, when my Mum spotted this one on thesaleroom. So I managed to get a lovely trolley, AND treat myself to some Rockett St George bits.
I’d love to have gold, but our kitchen is very stainless steely and it’s for the breakfast room that leads into it. I’m thinking about doing a similar colour scheme to your dining room in one of our spare rooms though, and I have a feeling that the gold is going to come out in force there! Grateful for the recommendation on the brand, thank you. The last thing I want to do is make a cock up when it has so much potential!
I was just thinking about something like that! What a coincidence :D Great work!