Do you have the Bastille song stuck in your head now? Because it was in mine ALL BLEEDIN’ DAY Saturday when we knocked the plaster and lathe off the wall in the soon-to-be guestbedroom/office. So you’re welcome.
I warned you in my last post that we have a lot of work to do in this room. As much as I would have welcomed a quick paint job and the subsequent filling-with-pretty-things, with this room, it just wasn’t going to be possible. No, the wall that was subjected to dueling hammers and crowbars (dueling because both Wayne & I had fun doing this work) was so weak and so old that you merely needed to press upon it with two fingers and the whole thing sort of creaked and buckled under the meager pressure. It’s not a load bearing wall (thank goodness), just studs and lathe and plaster and being like 100 years old, it needed rebuilding on both sides (the other side is the hallway).
So we decided to just get the messy stuff started. This is DIY, my darlings, and it’s messy and it’s dusty and you will need to wear very attractive gear like face masks and goggles and gloves and old clothing to do it. Because, by god, if that dust can go anywhere, it will certainly do so. And then you will spend the rest of the weekend cleaning. Joy.
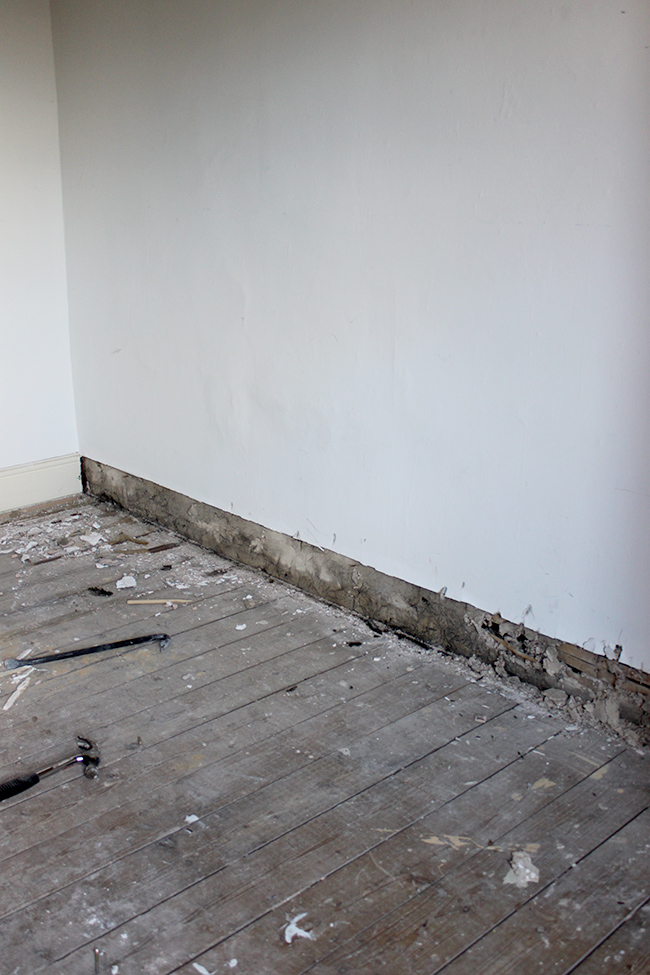
Wayne removed the skirting boards first because the flooring (which I’ll talk about in a minute) actually goes from this room into the hallway and the wall had been built on top of the flooring so those needed to come off regardless.
Now, it’s actually pretty easy to take a wall like this down – take a hammer, start pounding into the plaster and it sort of loosens. And then take a crowbar or the back of the hammer and start pulling.
Repeat, repeat, repeat… until the room is so dusty you can’t even take a clear picture.
And look at the mess… good times.
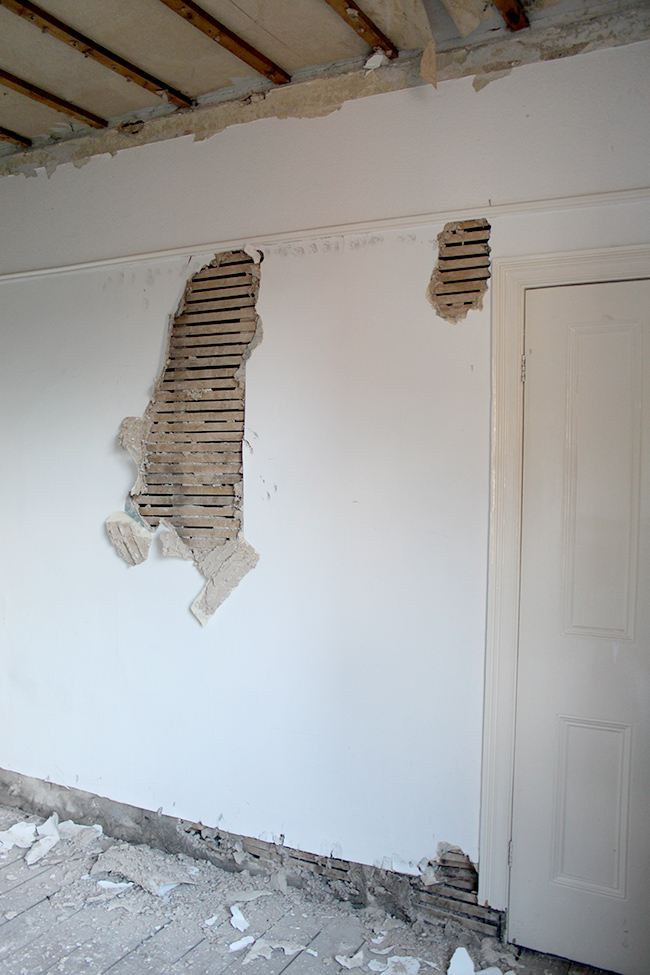
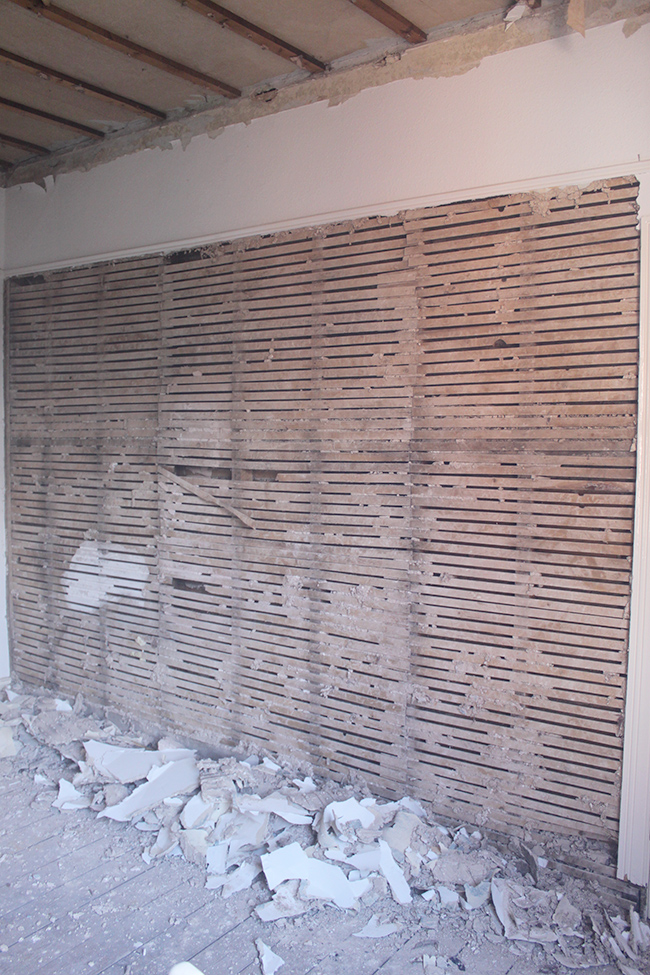
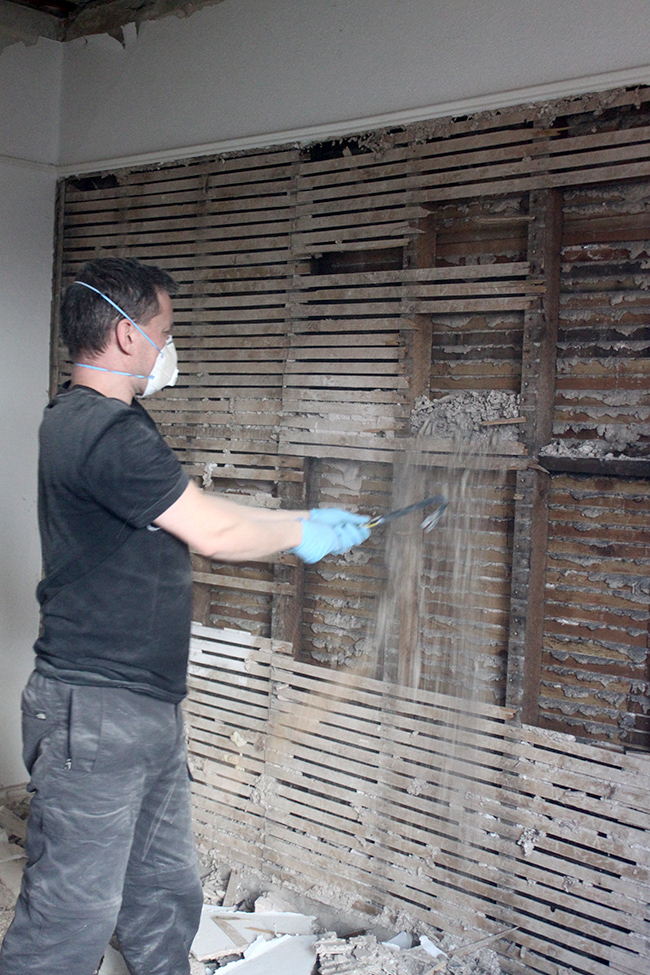
Oh but you aren’t done yet! Oh no, now the lathe (those little skinny bits of wood stuck to the studs) needs to come down. The mess is only just beginning. (and please note, Wayne is not wearing protective goggles in this picture but as soon as I realised he’d started without them, he was scolded and made to put them on. Safety first, kids.).
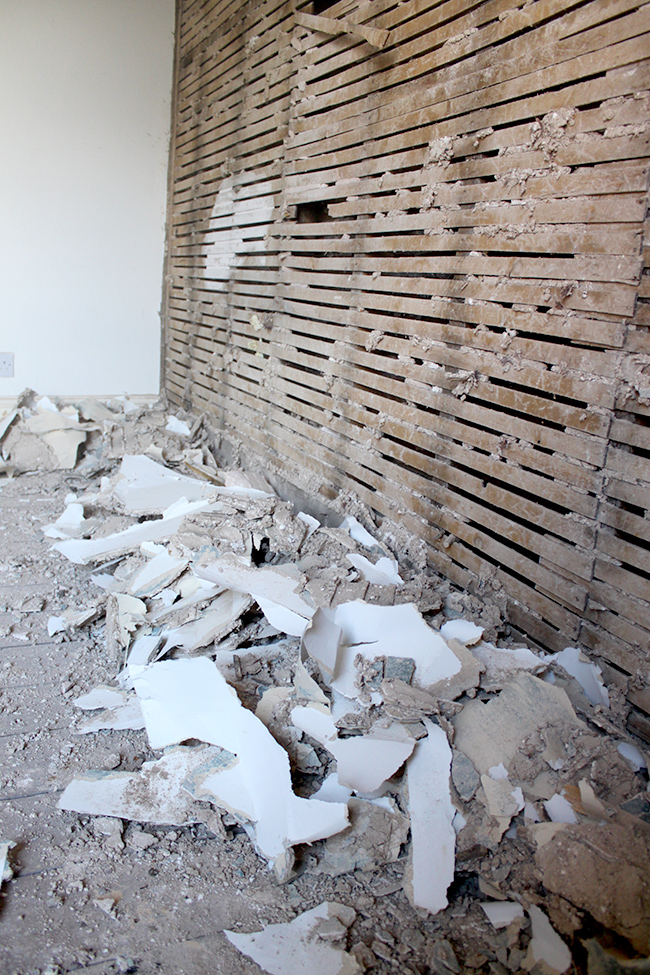
All that crap pouring out of the wall is the old plaster that had decayed and fallen as rubble between the lathe. Now you can see why the old wall was so weak!
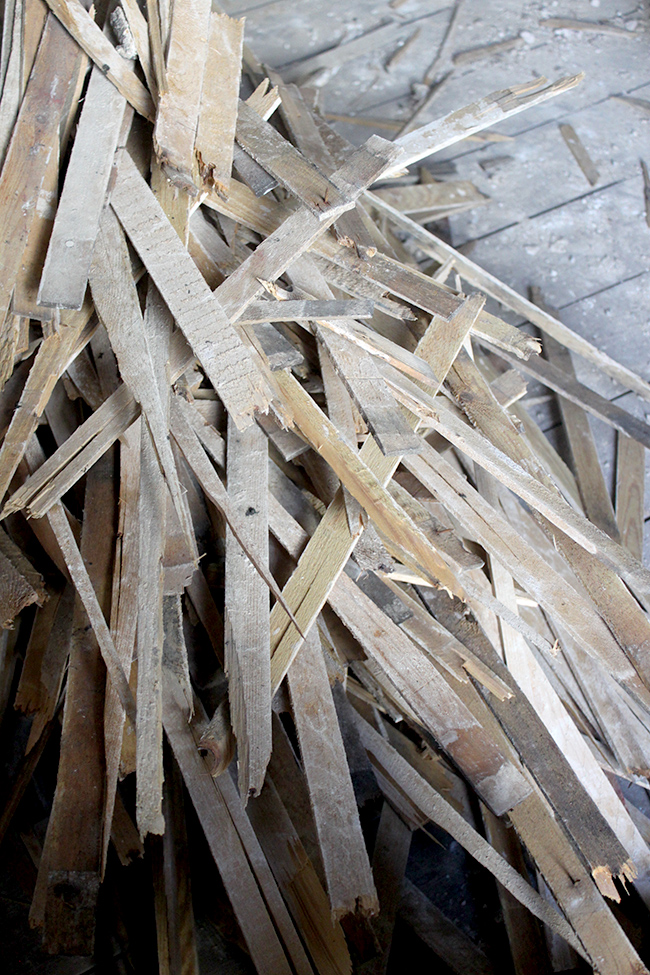
And you end up with this fine specimen of rubbish, all ready to be cleaned up…

So the wall has now been stripped back, ready to receive a healthy new dose of plasterboard (drywall). Before that, however, the ceiling needs to be boarded and plastered… which is on the agenda for next weekend. Good times.
Getting back to the flooring in here – we’ve decided to replace the old pine floors with new in this room (similar to what we did in the living room long ago). The reason for this is because the floorboards aren’t in the best shape and there are big gaps between them meaning we’ll have to pull them up and reset them regardless. And because the flooring goes straight through that wall to the other side in the hallway, it would be easier for us to just pull them up, salvage what we can for when we eventually refinish the floors in the master bedroom and the downstairs hallway and replace them with like-for-like new stuff that we can just easily sand and stain – it’s actually quicker and less expensive for us to do this so that’s the plan. Anything to get this room to finishing stages as fast as we can!
Very shortly, I’ll be sharing how the design of this room has evolved slightly from my initial thoughts 6 months ago. Apologies for the lack of pretty pictures in this post! With any DIY, it always has to get worse before it gets better! Stay tuned for more soon…
And now sing it with me!! “And the walls came tumbling down in this city that we loooooooved…”


Wow, so much dirt and work! But very exciting!
So much dirt! So much dust! OH GOD lol xxx
Yikes! Not started the major bits of renovation on our new house yet (we’ve not even been in a month yet!) but when we do I imagine it will be something like this. Such a lot of work, but so exciting to have a clean fresh slate to start with at the end of it, and to know you’ve done it all yourselves!
Best of luck with the rest of it, and I hope the dust isn’t escaping into the rest of the house too much! x
Thanks so much! Whilst I love this part (we’re DOING something! Pretty room at end of this!) I also hate it (the dust, the endless cleaning!). I really wish I could just fast-forward this part ;) xxx
Wow, that looks in equal parts fun (because hammers!) and horror (because dust!)!
Ever since I moved into my place, I’ve had trouble with mold in one corner of my living room. Now, I don’t know how things are in the UK, but here in Germany the standard reaction of your landlord is to blame you for somehow living wrong – not opening your windows enough to get the old, moist air out and the new fresh air in, and/or just doing stuff like drying laundry inside, having too many plants, and probably breathing too heavy.
The house I live in was sold in October, and the new landlord came over to look at the mold situation, and he thought there might be a broken spot on the exterior wall (and sure enough, there were holes, so rain water could just soak into the wall and feed the mould on the inside, i.e. my living room wall).
To find this out, he had to chisel off some of the plaster. He told me it might get a bit messy. A BIT. I had no idea how much dust there could be in one flat. After he was done chiselling stuff off, filling in holes and replastering (which apparently necessitated about 10 hours of sanding the damn plaster down) the dust had gone everywhere. Even in the bedroom, which is a far away from the living room as it can get. And I swear it even got into the sheets.
Anyhoo, I spent two days, cleaning it all, and then I called my mother and told her about it, all triumphantly. She just said “Yeah, you’ll have to do that at least two times more, because it takes a while for the dust to settle.”
It turns out she was right. I hate that.
So I love that I can just look at the pictures of you and Wayne tearing down your walls, and then enjoy the finished product, WITHOUT THE DIRT. :D
I’m pleased you can live vicariously through our project without having to constantly be cleaning! LOL! And yes, I think landlords here are the same (well, some of them are idiots – like anything else, you get good and bad) and a ‘bit’ was always going to be an understatement. Even the cats right now are gritty when you pet them. Good times. xxx
So exciting – we have almost completed a renovation on an 1800’s beach house and it was such a fun project – lots of work and a few surprises, but so worth it in the end. Can’t wait to follow along on the transformation to the guestroom/office!
Thanks so much – it’s definitely a lot of work but very very worth it! It’s just getting through this bit, it’s a good feeling when the messy stuff is finished though! xxx
You are my hero. Well, and Wayne. :) xo
LOL! If you like your heroes covered in dust and wielding hammers than we’re here for you! ;) xxx
Ah, I remember the walls we had like that all the way through out first house. It’s so much more satisfying tearing down walls like this than plasterboard! But sooo much more dirty :/
Gotta agree with you there! It’s actually quite fun and then the realisation hits you that you have to clean it all up! It’s these times I really wish we had kids so we can make them do it. (JOKE!!) ;) XXX
I know it sounds fairly ridiculous, but I would love getting my hands dirty on a project like that again! It’s way too long ago that I’ve done a “proper big job renovation” and I somehow miss it. Don’t miss the mess though… ;-)
You’ve clearly forgotten the mess and dust!! LOL! You are more than welcome to come around and help out though so you can be reminded ;) xxx
Egads, the mess! To some, DIY is spray painting a lamp. For you and Wayne, DIY is mess-making take-down-the-walls and start over. Good on you!
May the force be with you both. Drywall is my nemesis. Drywall and laundry that is.