So in my last update about the garden, I shared with you some of the rather embarrassing ‘before’ shots. Yes, the west side of the garden was a mess and we desperately needed help to figure out what to do with it! Thanks to the experts at Homebase, we had a product that would make us look like actual gardeners and no one would be the wiser. Except for you kind folks (but that’ll be our secret, ok?)…
The product Homebase offered us to help us look like expert gardeners was a product called Garden on a Roll which is basically an entire side garden border, created by a gardening expert – in a box. Seriously.
Here’s a little video explaining it much more coherently than I can…
If you can’t watch the video, here’s what it is…
You’ll receive an inspirational garden border theme that is easy to plant and which importantly makes garden maintenance easy to do for years ahead. Be inspired and discover some great garden ideas! Choose from a selection of beautiful garden border themes designed by award winning TV gardener Antony Henn.
Each garden on a roll kit contains everything you need including quality garden plants, garden tools, instructional DVD and book. Plants will include a gorgeous mix of flowering border plants, perennials, shrubs to evergreens that have received the RHS award of garden merit. The bio-degradable paper garden plan shows precisely where to position your border plants, whether as ground plants or on a raised bed, so that everything is in exactly the right place. Simply cover over with bark chippings or compost and watch your beautiful plant and flower border flourish!
So erm yeah, how genius is that?! You simply prepare the area, roll out the biodegradable paper and start planting. That’s it. Instant garden border. Gotta love it.
The scheme I chose (and there are quite a few to choose from) was the Mixed Sunny Border – it assured us of a great mix of perennials and shrubs that would provide interest all year round. The thing I hated about our garden when we first moved in was that the entire thing died in the colder months – there was just nothing attractive about it from around November all the way through March – that’s a long time to be looking at ugly. We’d already taken a few steps to add some shrubs but I loved the idea of having different flowers blooming all year too. So it was perfect for us, especially as the east side of the garden gets sun pretty much all day long – well, as much as we get oop North ;)
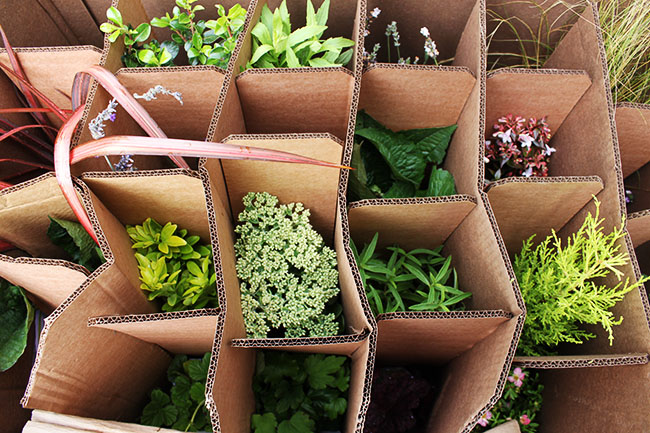
The image above shows the selection of plants we received with it – there were around 23 in all to cover our 60cm x 6 meter long stretch. That’s a lot of plants that I didn’t have to research or plan out!! Hurrah! But before we could get to planting, we had a big job of clearing to do.
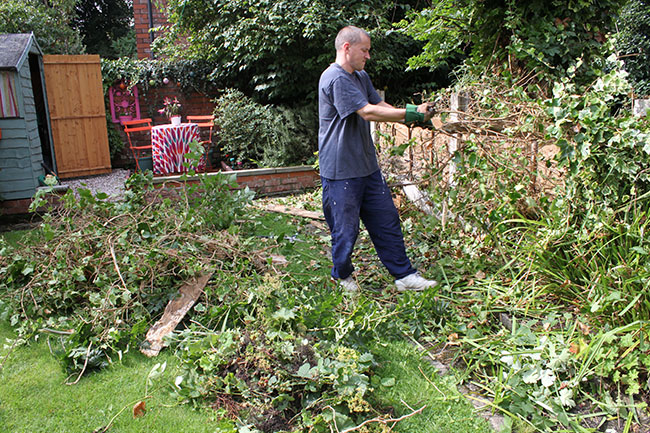
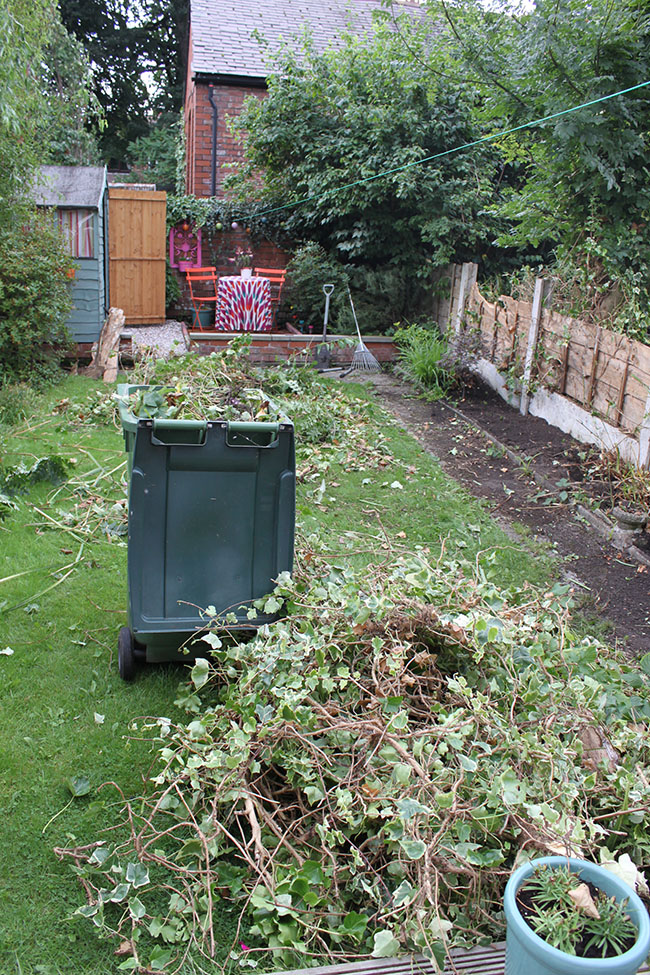
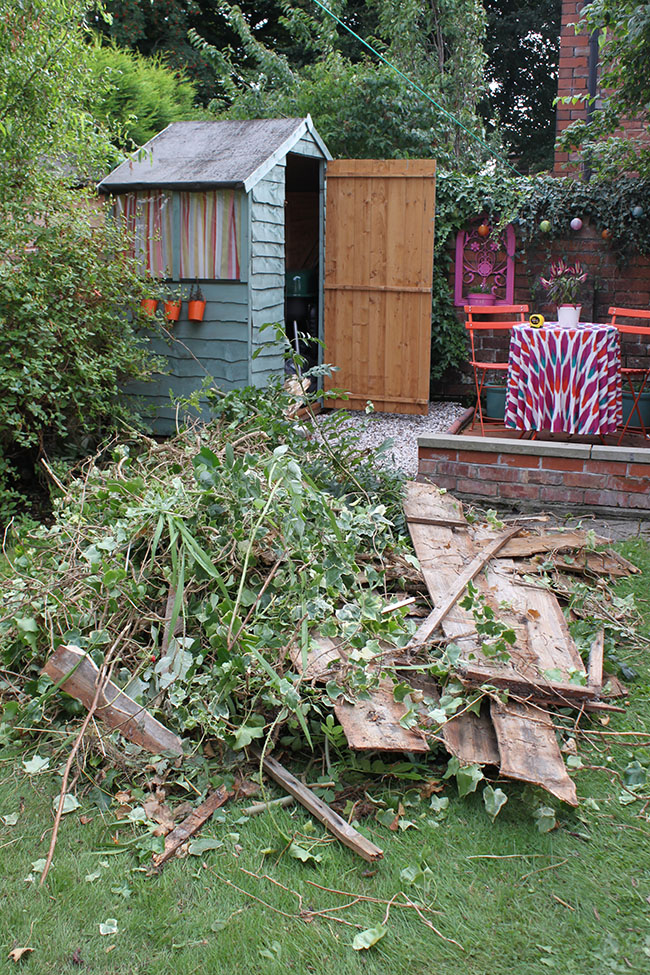
The existing plants and ivy were taking over and so we knew that our first step was removing nearly everything to give us a nice clean slate. This was by far the hardest part of the entire makeover and took us an entire day to dig out the border and remove the old fence from one end to the other, including replacing the door into the garden at the side return.
Wayne started on the ivy along the fence while I tackled digging out the existing plants, weeds (horrible ones with big spiky thorns!) and roots along the border.
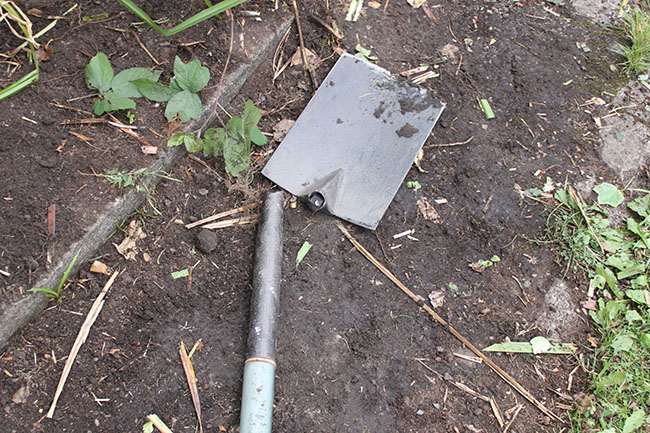
Don’t let this picture fool you into thinking Wayne did all the hard work. He most certainly did not. In fact, by the end of the day, this is what happened to my trusty spade.
Defeated.
But was I defeated? No, no I was not. Even through thorny weeds and spiders crawling up my arm and bugs in my hair (OH THE HORROR) I carried on. I’m a martyr for the cause me.
So this is what things were looking like about three-quarters of the way through…
And this is the devastation that was our garden…
Yeah. It’s gotta get worse before it gets better, right?
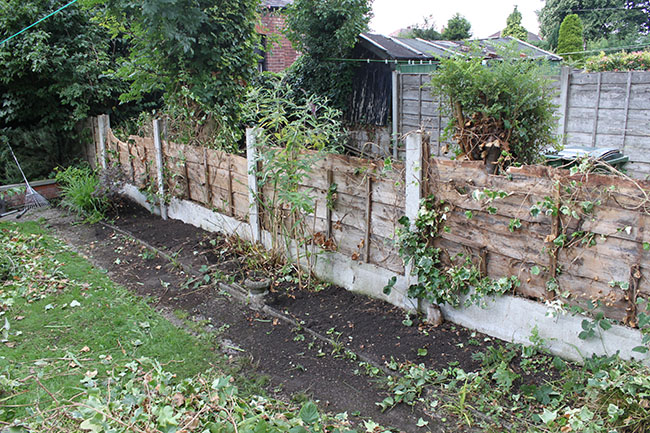
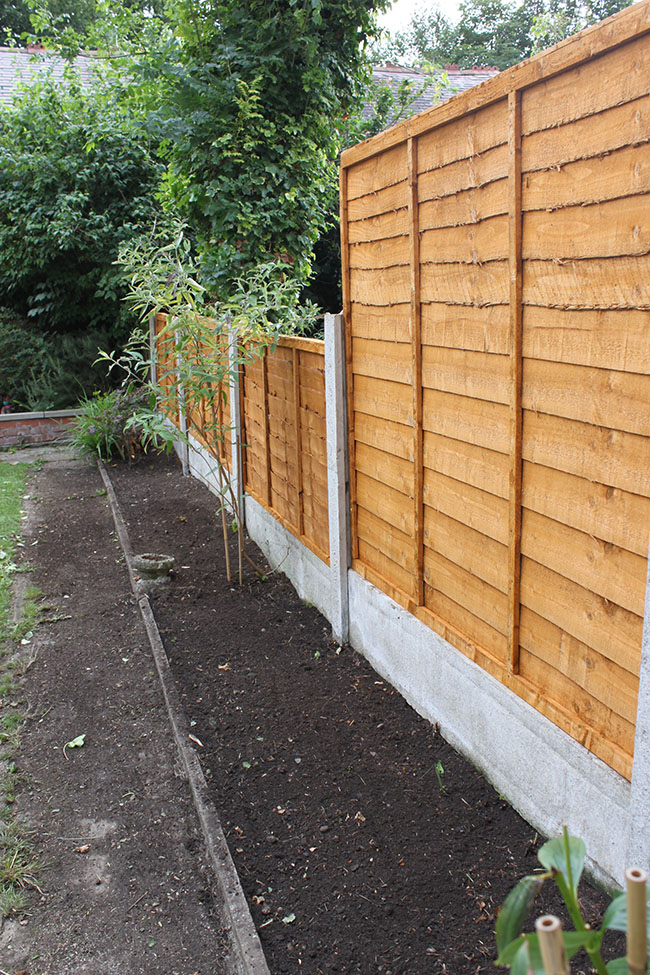
Finally, after removing all the ivy and digging out the entire border save for a few plants we wanted to keep (ones we’d planted ourselves since we moved in and the peonies), we could finally get started on replacing the fence panels.
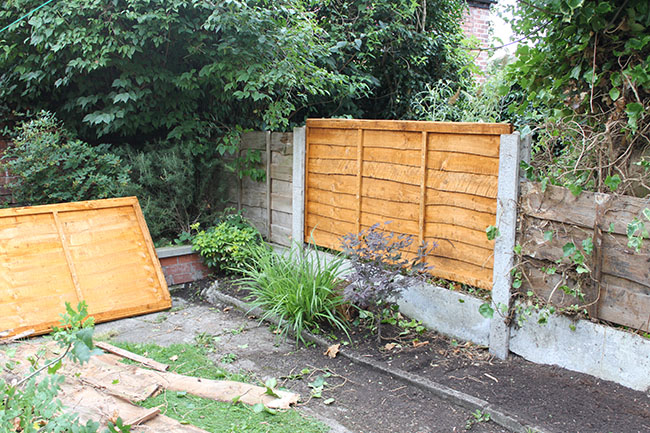
One of the things we wanted to address was that we want our garden to be both neighbourly but also provide us a bit of privacy. We live on quite a typical Edwardian street and for my readers not familiar with properties like this is in the UK, they are built quite close to each other. So our gardens are all right next to each other with a fence dividing each of them.
This has both good points and bad points. The good thing is that we’ve actually been able to get to know our neighbours – the low fencing on each side gives us the opportunity to chat towards the end of the garden (and happily for us, we actually really do like our neighbours!). The downside of course is that you have less privacy with 3′ fences! So as a sort of compromise, we replaced one of the 3′ fences nearest the patio with a larger 6′ fence, leaving the rest in their smaller size for that little bit more privacy near to the house.
Once the fence was in and we filled three whole green bins of garden waste (our neighbours on each side volunteered their own bins bless ’em (see told you they’re nice!)), we were left with this…
Well, that’s better no? Especially when we’d started with this…

Even after filling 3 full garden waste bins we still managed to fill 8 black bin bags full of garden waste which was then taken to the tip along with all the other DIY rubbish we had at the side of the house. There was a LOT of stuff removed.
At the point where it was all cleared away, we were nearly at the point we could start planting our Garden on a Roll!
But even Pablo was looking at us incredulously that we’d manage it all within a 3 day weekend…
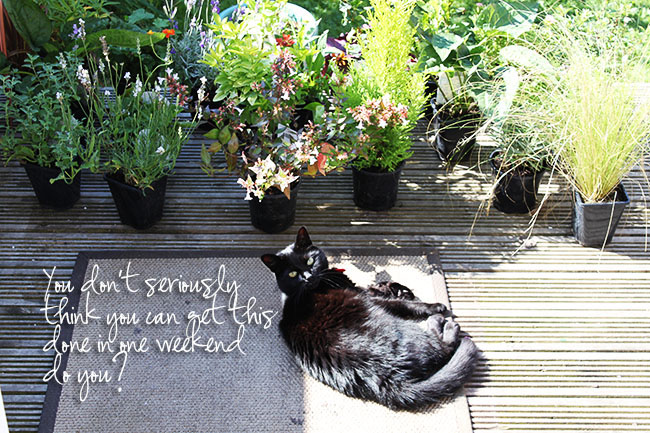
Stay tuned to find out if we did!
This post and project is in association with Homebase and some of the items used in our makeover were provided to me free of charge for my review. All words and opinions expressed and images shown, however, are very much my own.


Wow you did work hard and what nice neighbours letting you fill their bins too. <br />Do you and Wayne want to come stay with me for a weekend and dig out my border?!?!
Ooh, it's looking so good already! I love the idea of the garden on a roll, it takes all of the gardening guess work out (I'm a terrible gardener lol). Can't wait to see it all finished! :)
fabulous! that is all!<br /><br />michele
Love the Garden in a Box idea. Well done Kim! Great team work, look forward to seeing the results :)
Oh I am excited to see the final result well this is a lot of work but love all the little plants you have ready to go<br /><br />Ali of Dressing Ken
This is a fantastic transformation and I love those fence sections ( and your kitty)!<br />XoNancy
Wow! You have a massive garden. lucky you. It'll be worth it in the end.