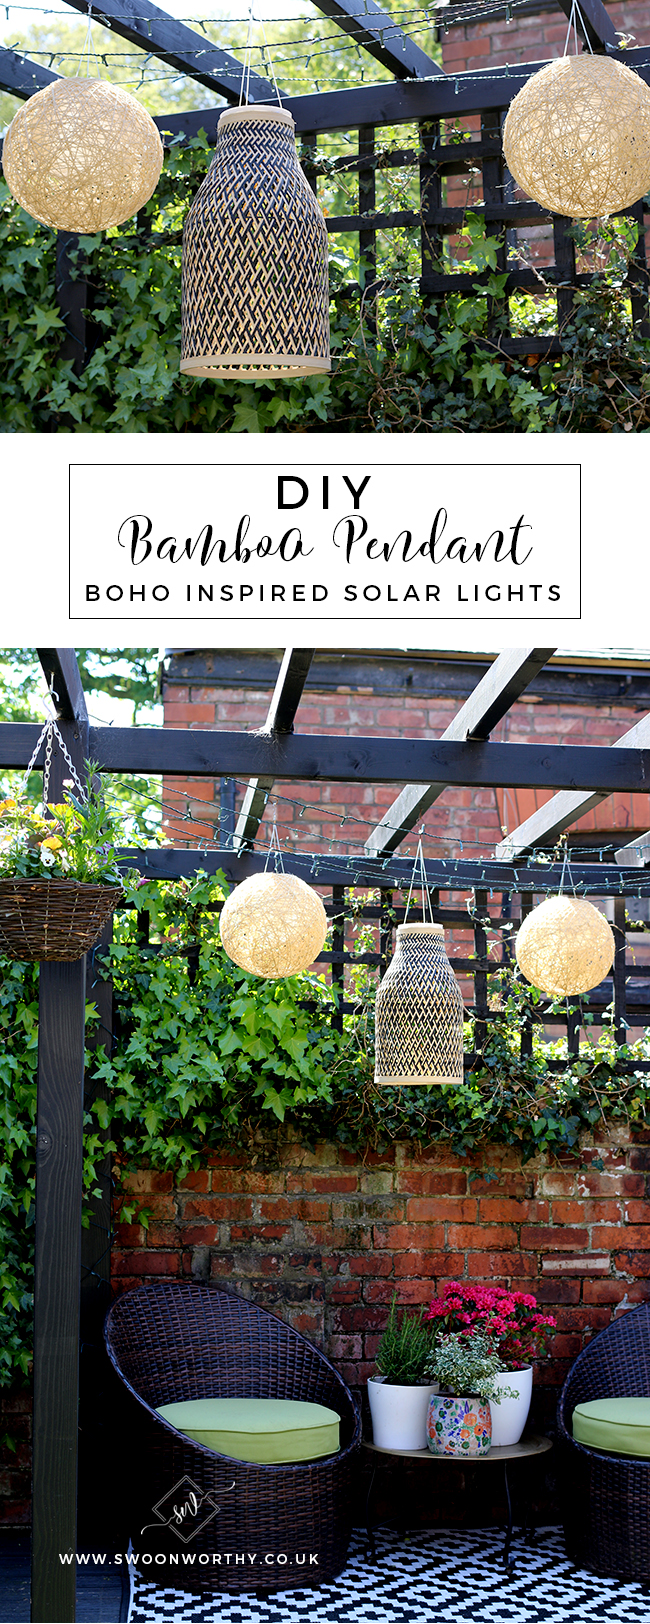
On Monday, I shared some of the updates we’ve been doing to get the garden summer ready. I love my pergola that we completed last year and while the entire thing is wrapped in tiny solar lights which light up at night, I wanted to include some larger hanging solar lights as well to finish off the space. At the time, I couldn’t find anything I really liked so opted for some simple Chinese-style hanging lanterns which were fine but didn’t quite make my heart skip a beat.
What I really wanted was to introduce some natural textures and in my head, I was set on bamboo or wicker lighting for a bit of a boho vibe. The problem was, I couldn’t find any I liked. So, I figured I’d just have a go at making them myself!
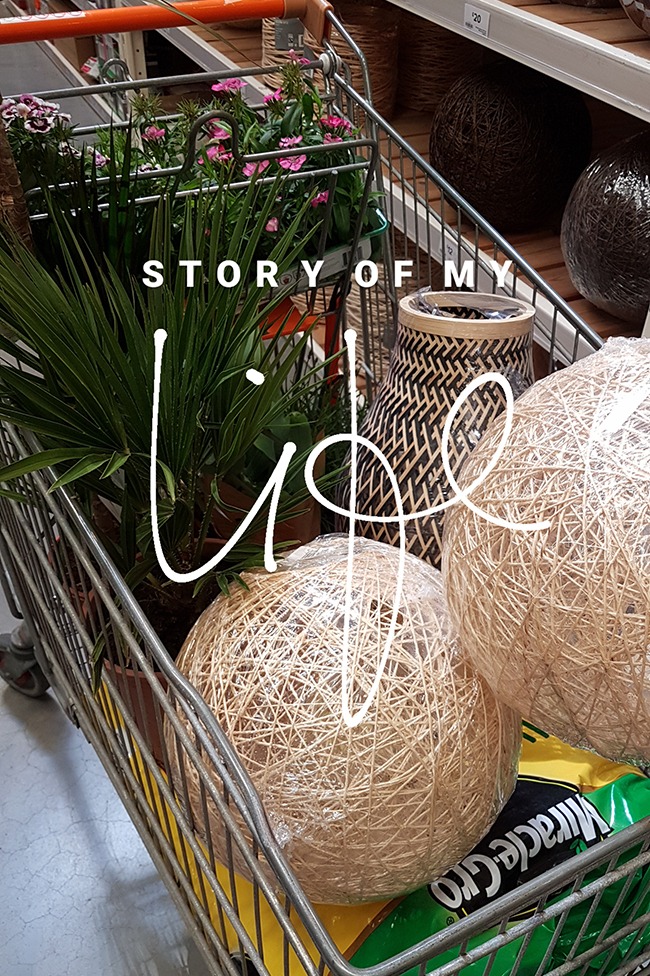
I got the actual pendants from B&Q and then worked with some stuff I already had around the house. As a little background info, I had these solar Chinese lanterns from last year but they were looking a little worse for wear. True confession: I had left them hanging out over the whole of winter (I know I should have brought them in when the season ended but I didn’t). Of course, they just got grimy and didn’t look so hot anymore.
In no way sponsored by B&Q but honestly, I feel like I live there over the summer.
Despite the fact they weren’t looking too great, I didn’t want to buy new solar lights because the solar bits still worked. So I decided, since I’m a cheapskate, because I’m so thrifty, I could reuse them!
So this is what I did and what you’ll need as well if you fancy doing this yourself.
Materials needed

A set of 3 white Chinese lanterns
2 twine ball pendant shades from B&Q
Stanley Knife (or similar craft knife)
Silicon sealer * (I used this as I knew it would be waterproof and we already had it around!)
Instructions for the round twine ball solar lights
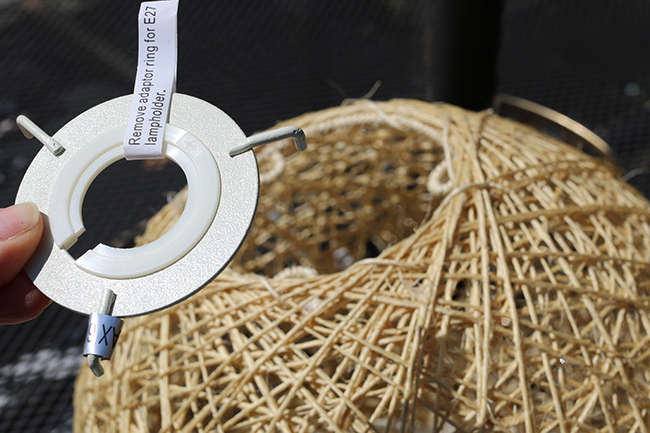
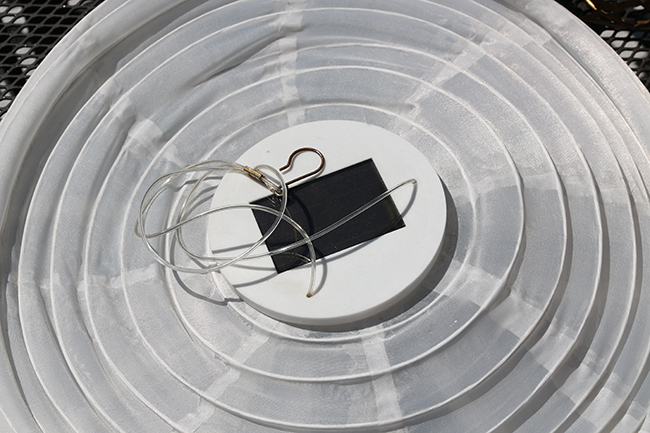
Remove the centre light hanging fixture (the white bit) from the pendant
Discard the steel wires that prop the paper lantern open and fold it up so that it can squeeze through the hole at the top.
Re-pop open the lantern inside the pendant and adjust so that the hanging bit is facing upwards.
Hang up!
Instructions for the larger bamboo light
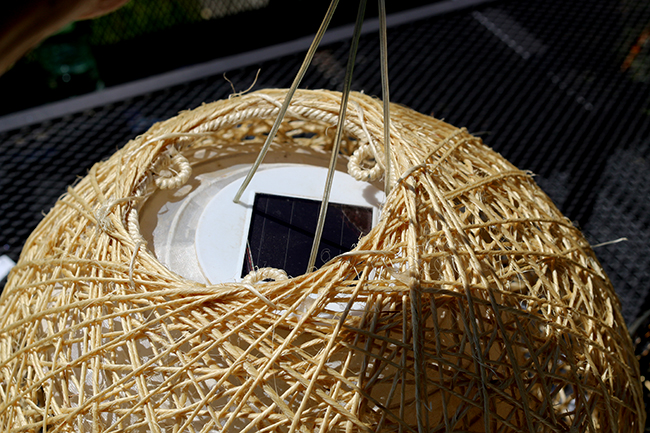
Now I got seriously lucky with this one as the very top of the larger paper lantern just happened to be the perfect size for the top of the larger bamboo light.
So if you want to replicate this with a different bamboo pendant, then you’d have to make sure the round solar charging bit fits snugly into the opening of the top of the pendant.
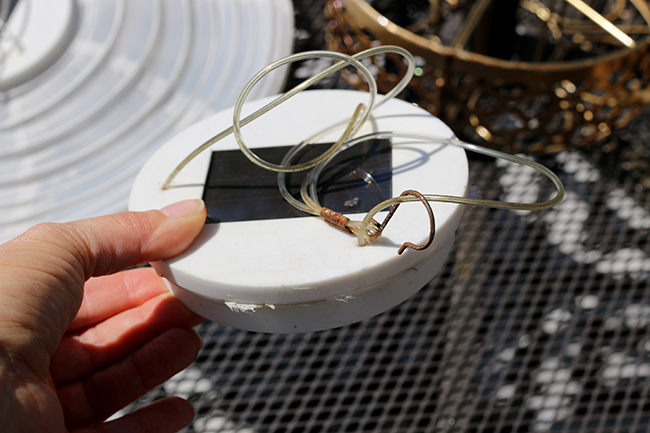
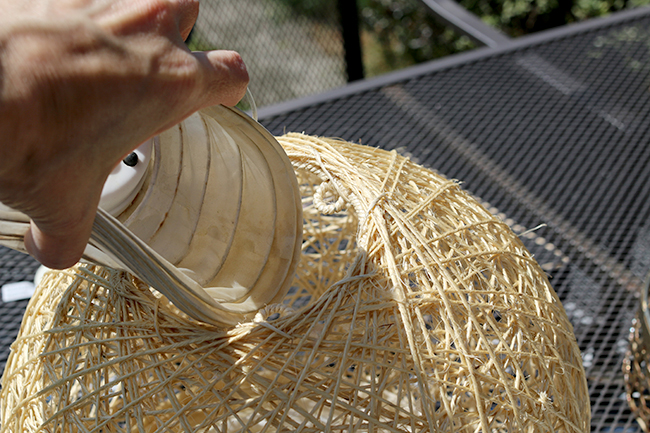
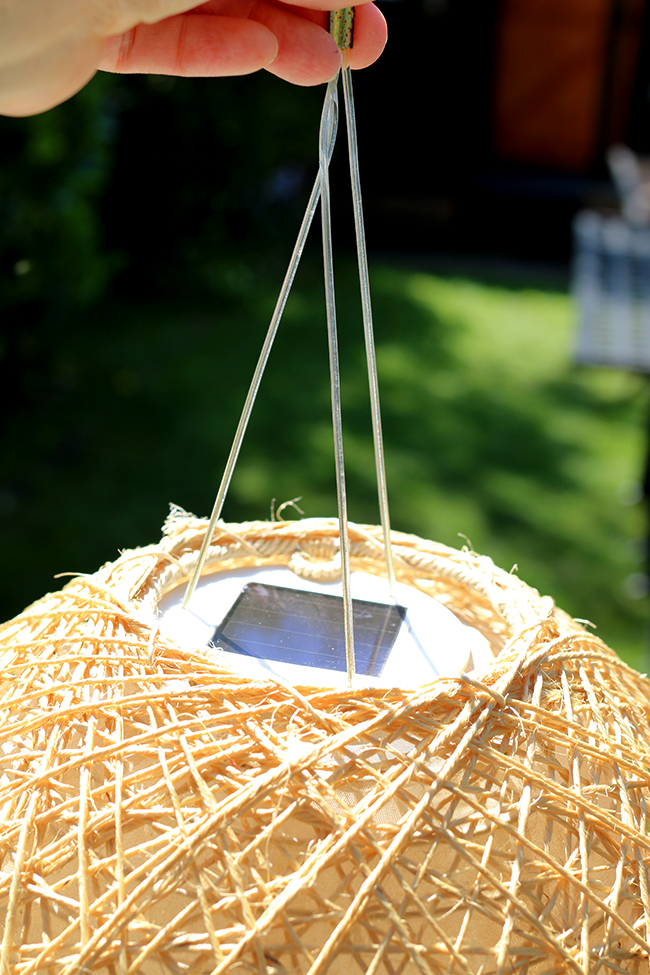
Cut away the paper from the top of the paper lantern using the Stanley knife and remove the wire so that all you are left with is the solar panel and hanging wires.
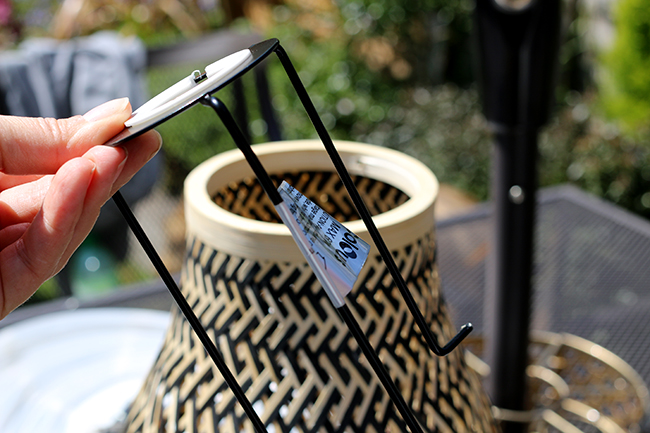
Remove the metal bit from inside the pendant (I just had to pull it gently and it came out) and discard.
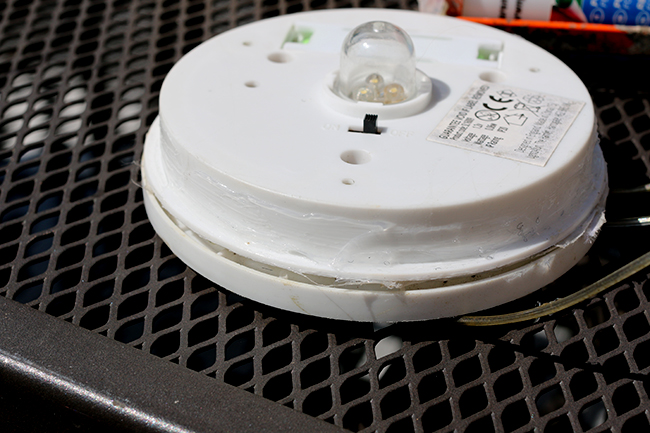
Use some a clear silicone sealant around the edge of the solar portion that you just cut out and place inside the bamboo pendant so that the hanging wire and solar panel is facing upwards.
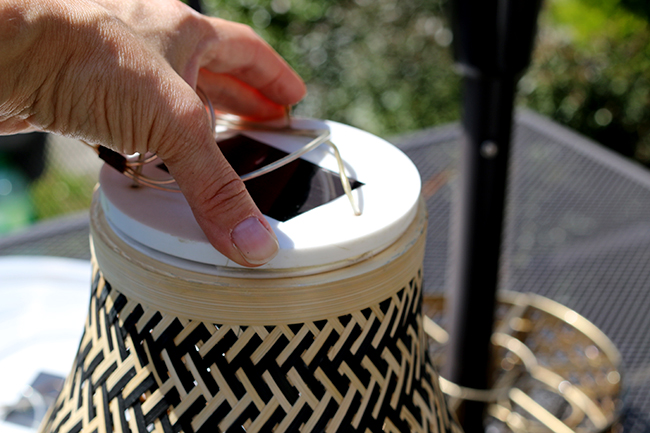
Once the glue is dry, hang and enjoy!
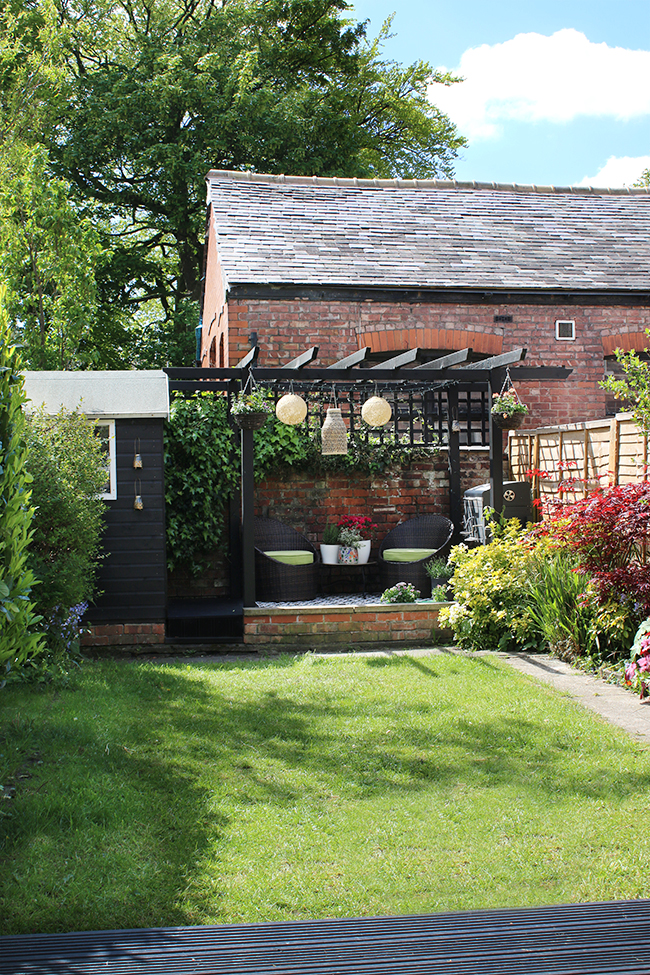
I’m so happy with how these bamboo-style solar lights came out and I love how they give a bit of a bohemian vibe to this little patio area. I still need to style this area with a few more plants and accessories but I’m happy with the progress so far! So what do you think of my simple DIY today? Is it something you’d try?


How/why did you start your life in UK? Thanks!
I married an Englishman in 2001 – we didn’t stay together but I decided to stay in the country :) xx
Chuffing love these, and they fit and look just right, and yes it’s some thing I would happily like a go at. Thanks for the post flower xxx
Ahh thank you! I quite like ’em myself! :D xxx
Very thrifty and innovative!! They look great – and such a good idea to re-use the working part from the ones you had! xx
Aww thanks darling! Figured it was a bit of a waste otherwise ;) xx
What a clever recycle, the new solar lights look amazing!
I know i was supposed to be looking at the lighting but I was distracted by your garden layout. ay have to steal that idea for my own garden planning.
What a fantastic idea. They look amazing, as does your entire garden! I hope you have a lovely weekend. xx
You are so clever. I was looking for large lanterns for the pergola last year and had my heart set on Moroccan style metal ones. After a few clunks to the head they soon came down! These look amazing.
What a clever idea, well done for creating such unique lighting for your garden
Looks wonderful! I need to build a Pergola in my back yard too. Lovely DIY x
I love your pergola seating area, it looks fab. That’s such a clever idea to adapt those lanterns, they look perfect in their new role.
I must say the decor is mind-blowing!
Such a great idea! Love the look
Yah, I love the look. That’s such clever idea to combine those stuff. Thank you for your sharing!