The floors in the living room were in some serious dire need of help when we moved in. It was one of the things that made us gasp when we turned that key for the very first time, that made us question if we had done the right thing in buying this house.
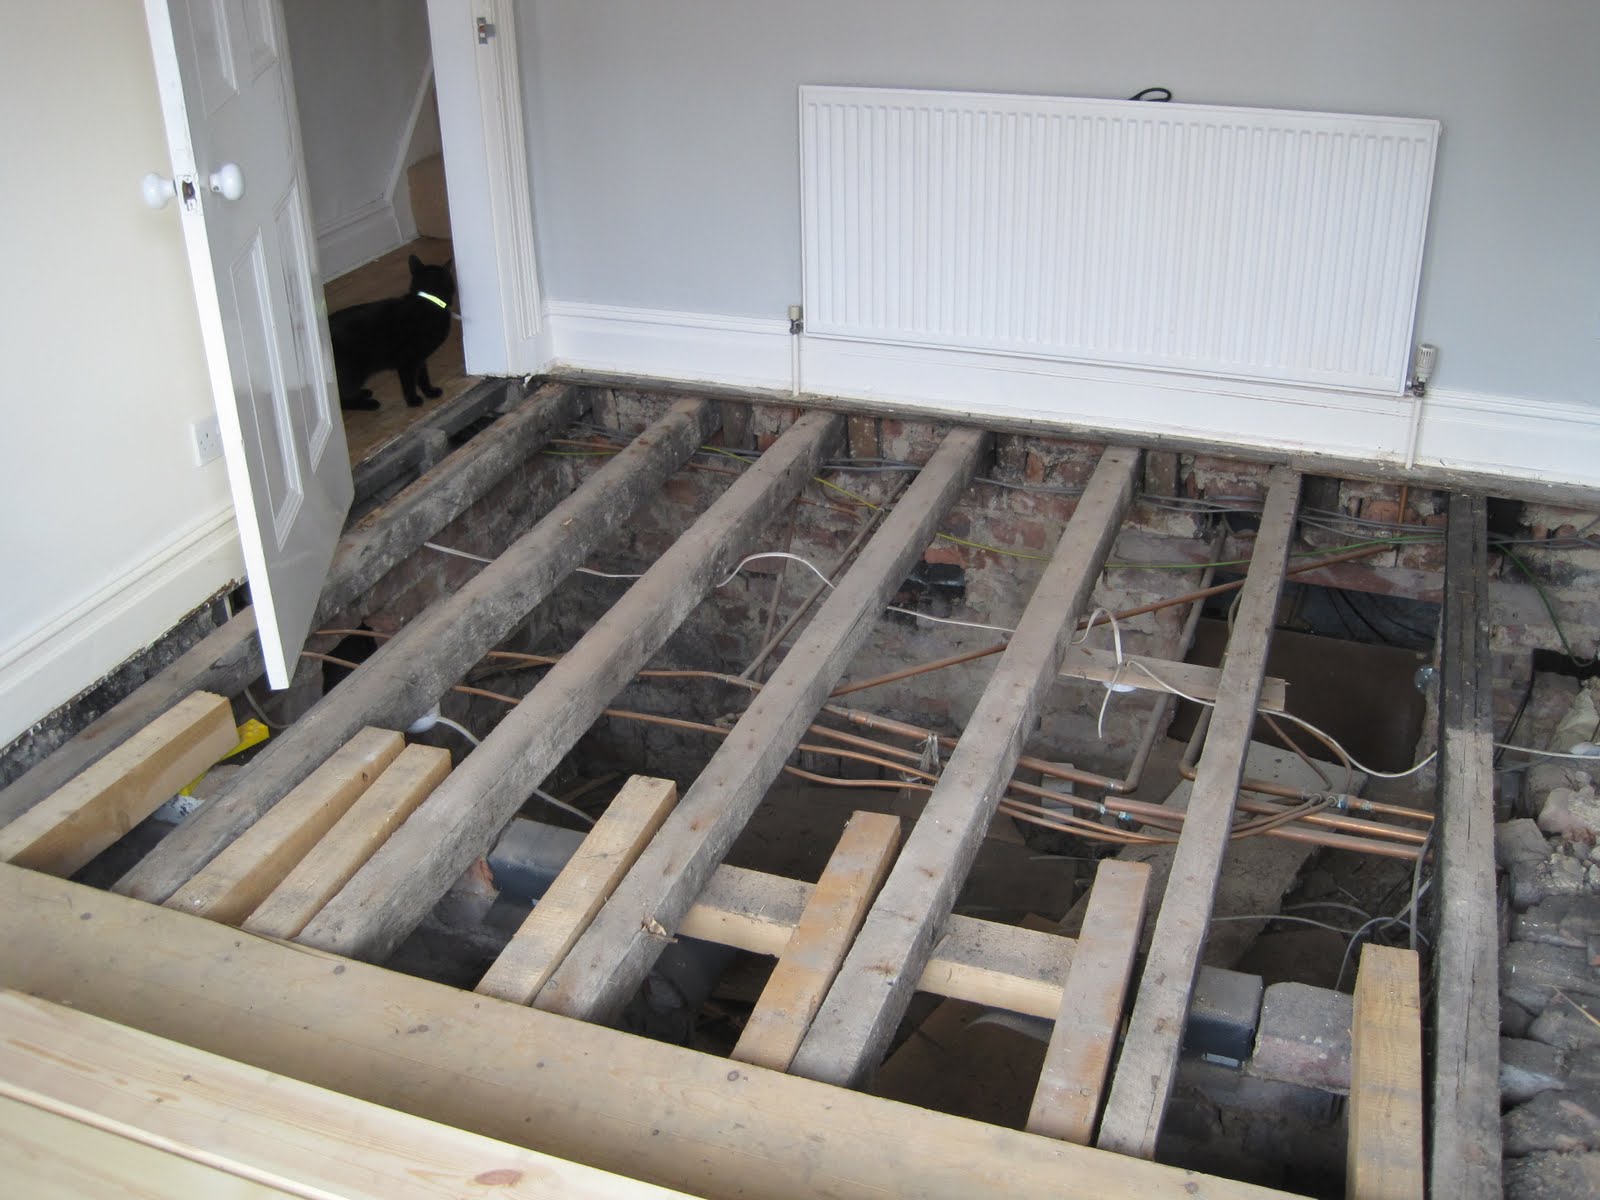
See, the previous owners had said in the list of fixtures & fittings that they were taking the carpets in the living room with them. Which honestly was okay with us because it was a creamy beige colour which would not have worked quite so well with our planned colour scheme and we wanted to take the floorboards (which we were told were hiding under the carpeting) back to a good condition. However, this is what we were greeted with:
 |
|
| Pablo makes a hasty escape |
Aside from the usual paint spatters, dirt and everything else that goes with a very old floor, it appeared that half the floorboards in the room were new(er) and half were old – not sure if the old flooring was original to the house or not but they certainly looked old. On top of that, there was a hearth missing so where the fireplace (long ago removed, sadly) would have been, a large slab of concrete sat, threatening to fall to pieces. Yes, very sexy.
 |
| Our concrete hearth. You can also see quite clearly the split that divided the old floorboards from the new. |
We lived with those floors for about a month before W got sick of my nagging we tackled them but once we did, it was with a vengeance. My dear boyfriend, W, took a whole week off of work to complete the job.
We could have just ripped out all the flooring and replaced it with a beautiful, brand new hardwood floor already stained to whatever shade our little hearts desired but this would have cost us in excess of £600 for this room alone even if we had installed it ourselves. And that would also mean committing ourselves to doing the same for the rest of the downstairs as eventually, we’d like all the flooring to match. So we were looking at costs of well over £1500 even if we did the work entirely ourselves.
Understandably, we started looking at other options.
While we could have spent a lot of time and money restoring the old floorboards, getting those to match the new ones would have been more of a task than we wanted to undertake (have I mentioned my impatience?) and the old floorboards weren’t in particularly good condition so we took the decision to just replace the old floorboards with like-for-like pine and match them with the new(er) ones. The choice was pretty economical as well – the cost being less than half of what it would have been to buy finished wood flooring. Added to that, pine floor boards would have been the original material of the floors when it was built around 100 years ago and further to that, we were still getting wood floors! I do love me some wood floors.
After everything in the room was moved to the dining room & spare bedroom, the work of removing the old floorboards could begin.
 |
| The old floorboards are removed. |
 |
| Thankfully, the joists were sound and only required a few nails to secure them completely. |
I wish I could take some credit for all the work that went into these floors but I would merely come home each night and marvel at the work my W did during the day.
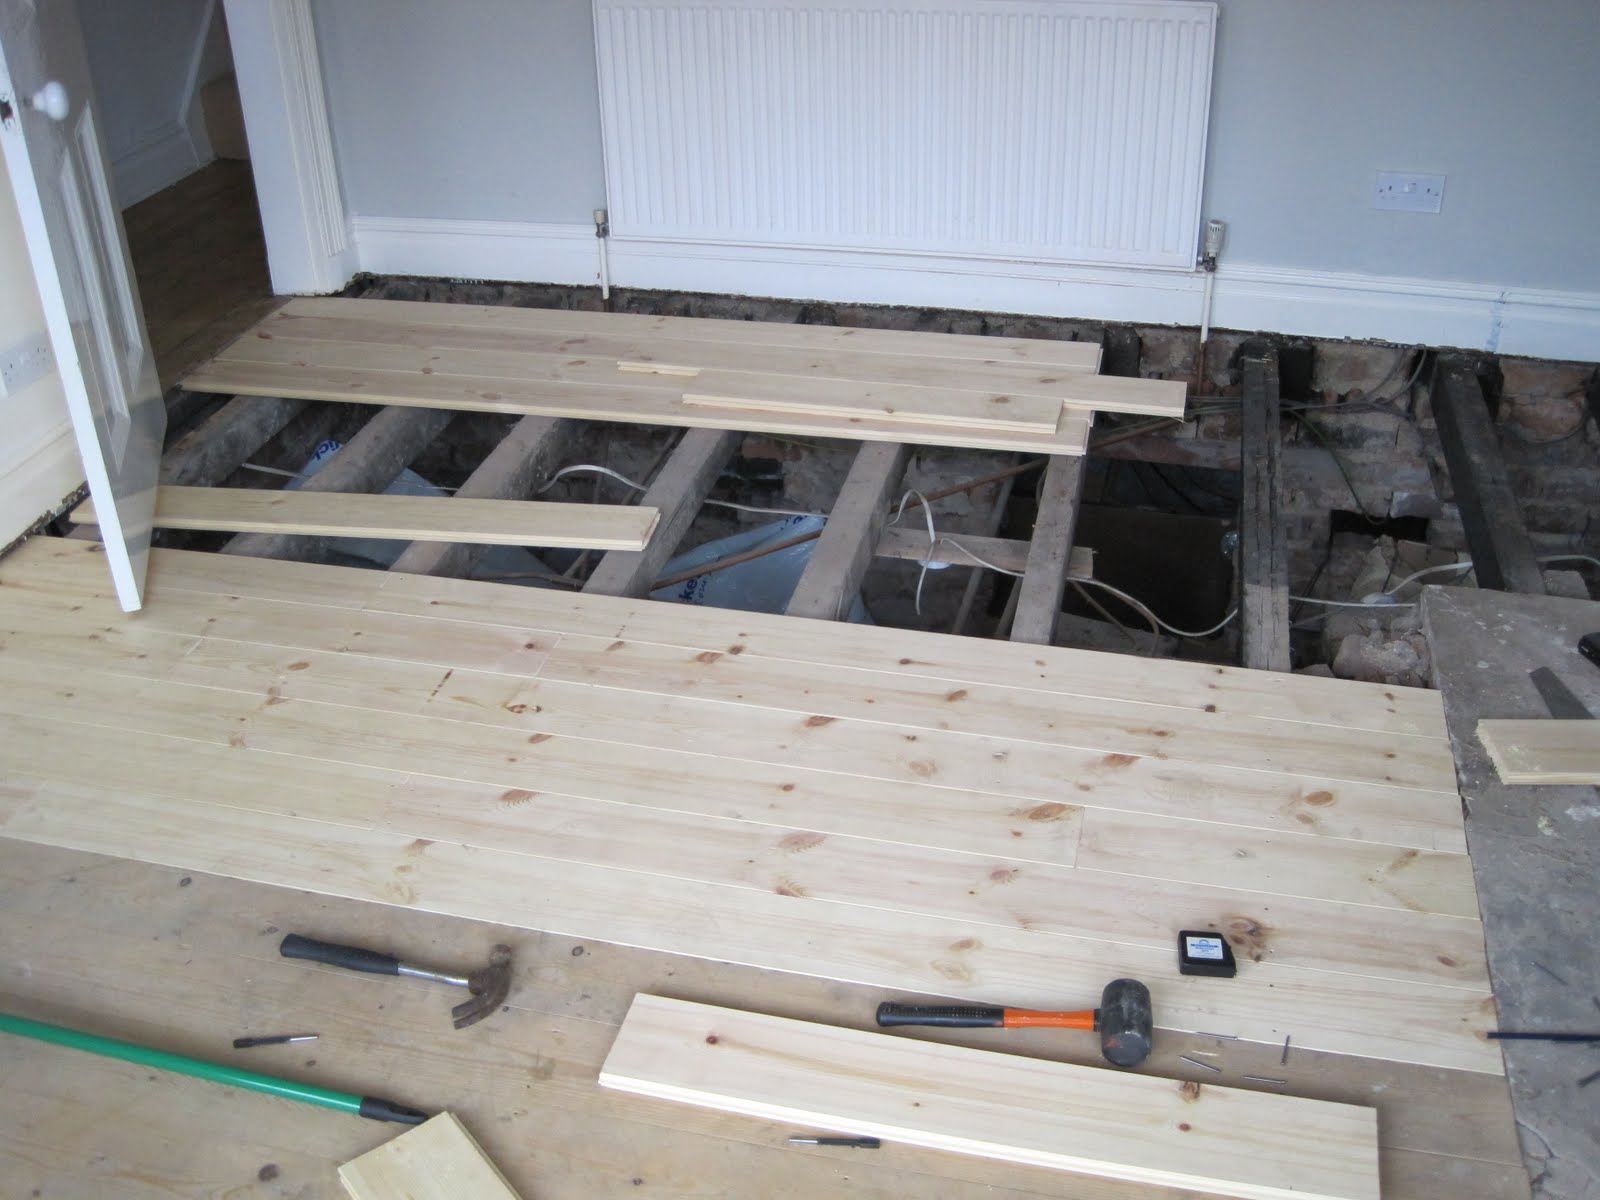 |
| The new floorboards are laid. |
 |
| Ta da! Nice new floor. |
The floors were then lightly sanded. We didn’t need to use an industrial floor sander that you rent for a weekend because the floorboards were new with no wear, paint or stain. If the floors had been previously finished, in order to remove the finish and years of gunk and dirt, we would have rented an industrial sander.
Nonetheless, a handheld sander did the job rather well and the floors came up beautifully. You could barely tell there was a difference between the brand new floorboards and the only new-ish floorboards.
Once sanded and thoroughly cleaned, white spirit was applied to the floor to remove any oil or residue so that the process of staining could begin.
Originally we ordered a stain online from the same company we got the poly from. It looked great in the 3cm x 3cm square on the website but once we applied it to a bit of leftover floorboard, the colour came out entirely too black with very little warmth at all. Yes, we wanted dark flooring but not quite that dark. Note to self: Do not rely on 3cm x 3cm computer images to choose a colour that will appear through your entire downstairs.
Since we couldn’t use the stain we ordered, this necessitated a quick trip to the local B&Q and we picked up wood stain by Ronseal in Dark Oak and crossed our fingers that it would deliver the colour we were hoping for. After testing it again on some leftover pine, we determined that 3 coats would get us the rich, dark colour we wanted.
W applied the first coat of stain with a foam roller and left approximately 8 hours before applying the second coat. Once we had applied 3 coats of stain over the course of the weekend, we declared the colour was nice and dark and yet still rich enough to see the grain of the wood. So following the 3 coats of stain, came 3 coats of poly, also applied with a roller.
We used a product called Bona Mega Silk Matt which had received rave reviews online as it performs fantastically and is environmentally friendly too. Although this stage took most of the time – about 3 days to apply allowing each coat 24 hours to dry between each subsequent coat, it gave us excellent results and we are very very happy with the finish. Bear in mind, you don’t have to leave it 24 hours between coats but we wanted to be sure the floors could be walked on and kneeled on before applying the next coat with no worries.
The result was wonderful – a fantastic soft glossy sheen – not too shiny, just lustrous.

Our gorgeous new floors. They make SUCH a big difference to the feel of the room.
The skirting board then needed to be painted. The beading around the skirting board had to be removed when the floorboards came out and so we still need to replace the beading, and before installing it, we need to paint it to match the skirting board – yet another project to be completed before the big reveal of this room! All in the details baby!
 |
| My gorgeous wallpaper against dark floors – but you can see where the skirting board is now missing the beading! It’s been given a fresh coat of glossy white paint in the meantime so the line of the flooring looks a lot crisper than in this picture. |
We have also just this weekend begun to replace the hearth. The broken concrete was cleared out, the area re-concreted and filled and W laid some new tiles that I absolutely love. We still need to grout and complete the beading around the tiles to finish the project off but I’m hoping this weekend we can tick that job off the list.
Most of the decorating for this room, however, is nearing completion and I’m very pleased with how the room is coming together. I am still waiting for one critical element to be delivered at the end of the month – my new absolutely gorgeous sofa. This, in my eyes, is the most crucial piece of the room and without it, the room is just incomplete. More on that later.
There is also the matter of curtains. I want to tackle sewing my own so this will take a little bit of time as well as I’m not an expert seamstress! However, I may show the room before the curtains are completed. More about that in a future post too!
In the meantime, we are loving the new floor and eventually will be tackling the other floorboards in the house now that we know what we’re doing! Namely, the hallway at the entrance of the house and the dining room – both of which will require an industrial floor sander as they have been (badly) poly’d and they need to be brought back to the unfinished wood before we can stain & poly again to match the floors in the living room.
Lots to be done so please stay tuned. I can’t imagine that we’ll ever run out of projects for this place!
Oh and W keeps looking at the kitchen and going, ‘We really need to paint those cupboard doors… it’s starting to not go with the rest of the place…’ I knew I loved that man for a reason. I will have my white kitchen eventually!
Have you diy’d flooring in your home? How’d it come out? Did you save lots of moolah? Share your story in the comments…


The floor looks amazing. Well done.<br />Can't wait to see the finished room.<br /><br />Cx
I love, love, love your floor!!! I stumbled across your blog looking for info about installing new pine floorboards to use as flooring – unfortunately the house i have just moved into has no old floorboards – they have all been replaced with fugly chipboard, yuk! How has your floor stood up to the test of time?
Hi Laura! I have to say, the floors are still AMAZING. We still need to do the flooring in the hallway and in the dining room but I wouldn't hesitate for one second to use the Bona Mega again – it's held up beautifully and honestly, there's been SO MUCH change in that room but you'd never know it looking at the floors. They still look fab. Hope that helps! xxx
That helps a lot Kimberly – thanks for taking the time to reply. Its always great to hear from someone else's experiences and I think that's my mind made up – pine floorboards it is! I'd read that the new pine is not as durable as the old stuff, but I like to think the odd dent here and there will just add to the character :) <br /><br />I had a good read of the rest of your blog and
Hi, we have just laid new floor boards and got the ronseal dark oak varnish but after two coats it’s so much lighter than yours (maybe because I’m using a pad the coats are thinner?) I’m hoping the third coat will make all the difference. If not I’m considering doing one coat of the ronseal walnut, do you think that would work? Thanks for your wisdom! Claudia
Hi Claudia, I think they’ve changed the formulation of the stain since we did the living room floors (this post is from 2010). When we redid the flooring in the dining room last year, we realised this ourselves as 2 coats did not give us the same colour as the living room floors. We found a 3rd coat was necessary. However, what I would recommend is testing it on a spare piece of flooring to make sure the colour is correct for you. xx