I’ve been wanting to share my tips on shelf styling with you for quite some time so I thought given I have a lovely shelf sat in my living room, it was a good opportunity to do just that. Of course, there are a million ways to style a shelf and that’s probably why the hashtag #shelfie is so damn popular over on Instagram and how it became a ‘thing’. Showing off a pretty shelf (or in this case, a shelving unit) gives us the opportunity to express our own style and personality and every single one – even within the same house – will be different. For me, I love all things gold and glam with a little touch of bohemian and so that’s essentially how I’ve styled mine. Your results will (and should) vary.

However, whatever your style, I think that the way you approach shelf styling can actually be methodical as well as creative. I have previously deconstructed styling a coffee table in the past as well as a bar cart, breaking it all down into the basic elements that I tend to always use and shelf styling is really no different in that respect. So walking you through my process today (there’s even a gif!) might give you some ideas on how to style your own shelves in your own way.
Caveat 1: I feel like I’m going to keep repeating this until we finally change things but I feel the need to just start by saying we only just moved a month ago into our home so I haven’t yet updated the living room and the paint, wallpaper and carpet were the choices of the previous owners. Still, it’s fine for now and so I’m working with it until we get around to getting all that good stuff done!
Caveat 2: Because I know I’ll get asked, the shelving unit is vintage (Pierre Vandel from the 70’s). You can read more about how I came to acquire this beauty here.
Step 1: Assess the Space
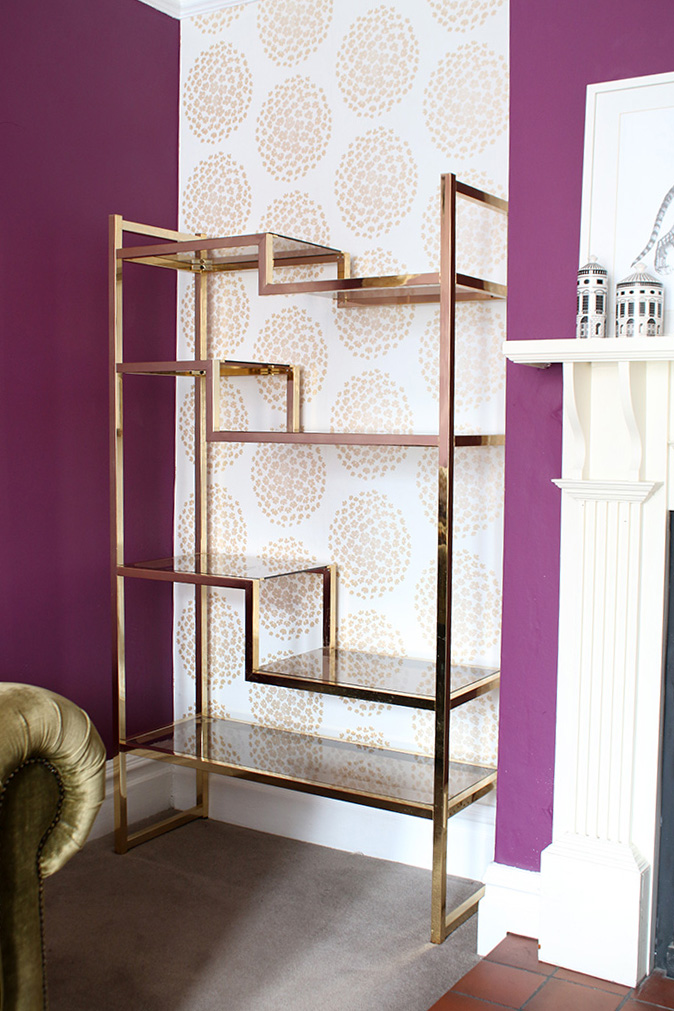
Now for this particular shelving unit, we can see that there are shelves at different heights and widths. You might have something similar if it’s built-in or you may be able to adjust your shelves to accommodate various heights of items. But what this does is gives me an idea of the space I have to fill and the shapes of objects I might want to use.
For instance, the right side of the bottom shelf is quite long and wide but not particularly high whereas on the left side, I have quite a bit of height to work with. So I’ll use the negative space there to decide how big or wide my objects going on those shelves might need to be whilst also giving some items a bit of breathing room.
Step 2: Gather Your Supplies
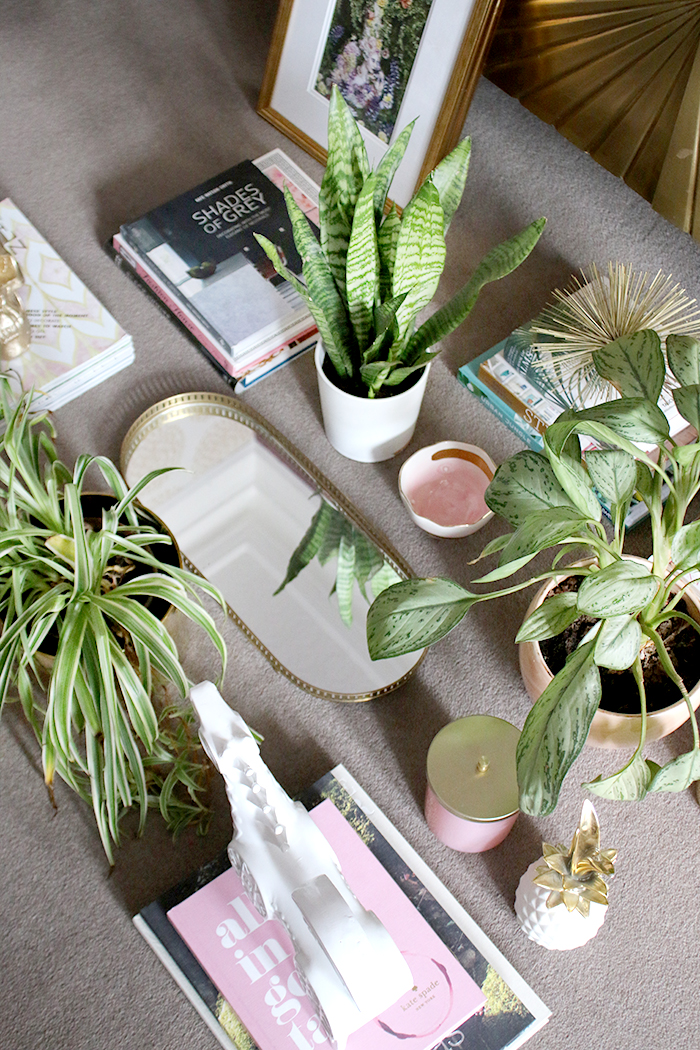
I normally have a loose colour theme in my head (use the existing elements of your room and your own tastes to guide you) so for this, I knew I wanted to use gold (always gold with me), white, green and a few touches of pink. There are other colours as well in there but those were my main four. My second step was to gather supplies that work within that colour scheme. I will normally do a bit of a whizz around the house and see what I have that might fit and I’ll just put everything in a little pile somewhere – in this case, the floor!
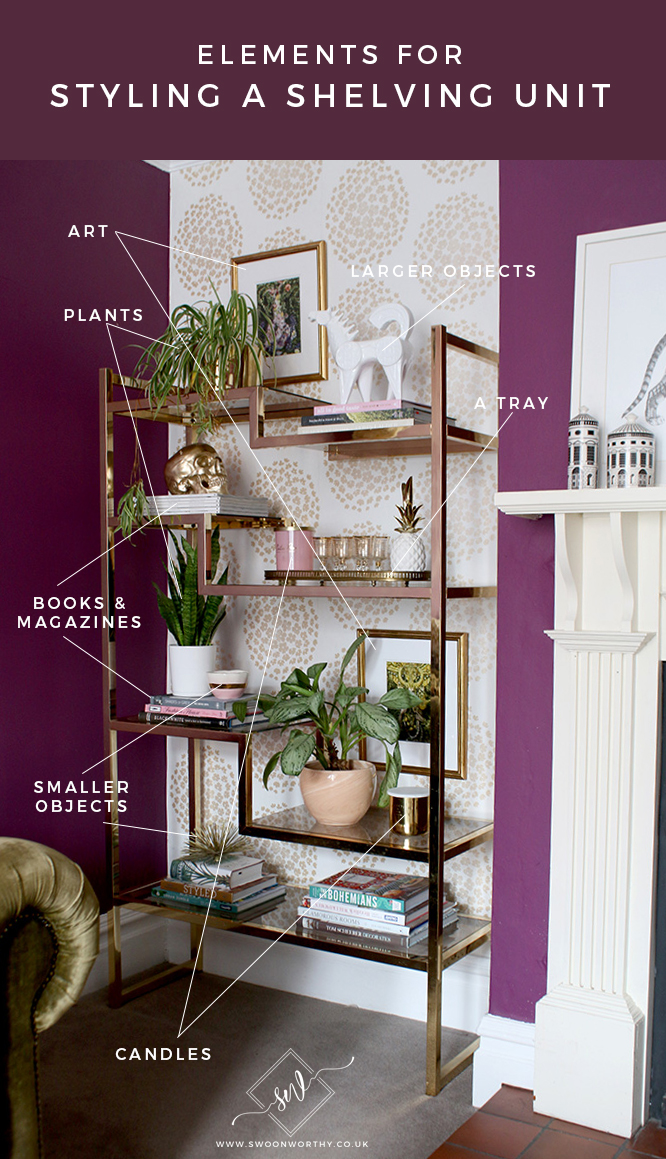
What will you be looking for? Books, candles, trays, objects, baskets, boxes, vases, plants, flowers, smaller pieces or art or picture frames and anything else that catches your eye. Make sure you have a good variety of items in different sizes, shapes, heights and textures and look out for anything quirky or interesting that will bring personality to your display. There really are no hard-and-fast rules here!
Step 3: Start with Books and Magazines
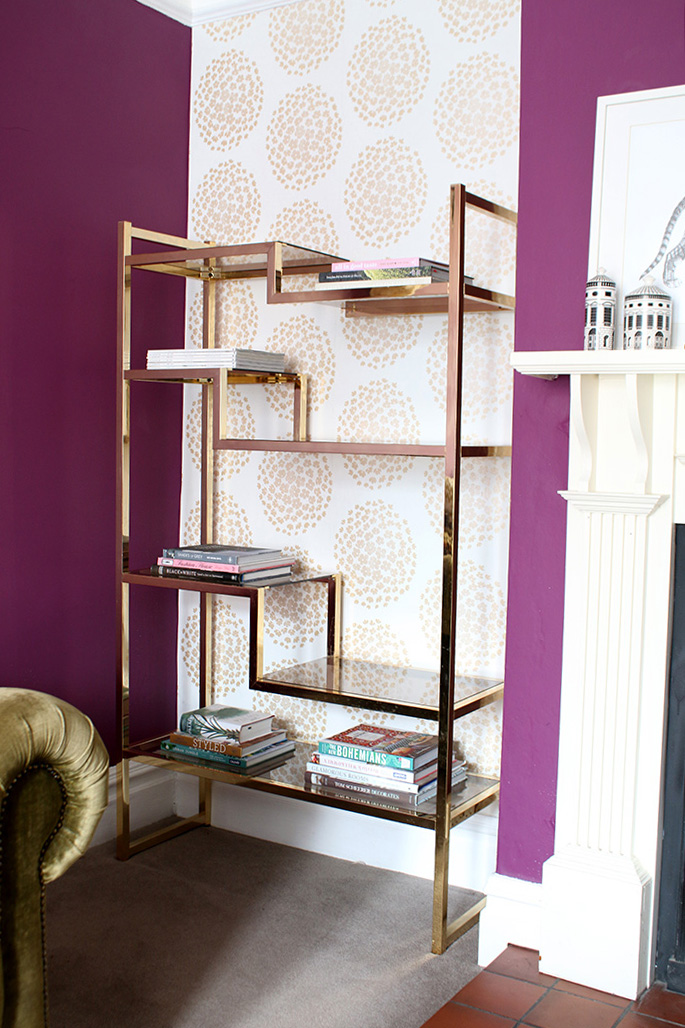
I knew I wanted books in my shelving unit so I started with placing a few stacks on various shelves. Of course, you can place your books vertically as well but – perhaps bizarrely – I don’t own a single set of bookends (!!) and so I decided to only stack them horizontally here. I also included a stack of magazines so if you don’t have a lot of books but are a bit of a collector of magazines, this works too.
As you can see, I stuck pretty closely to my colour theme when it came to choosing what books I’d use on my shelf. So most of the spines are either pink or green with a few black/grey/neutrals as well. You don’t have to be this pedantic, of course, but it does make for a more pulled-together final look!
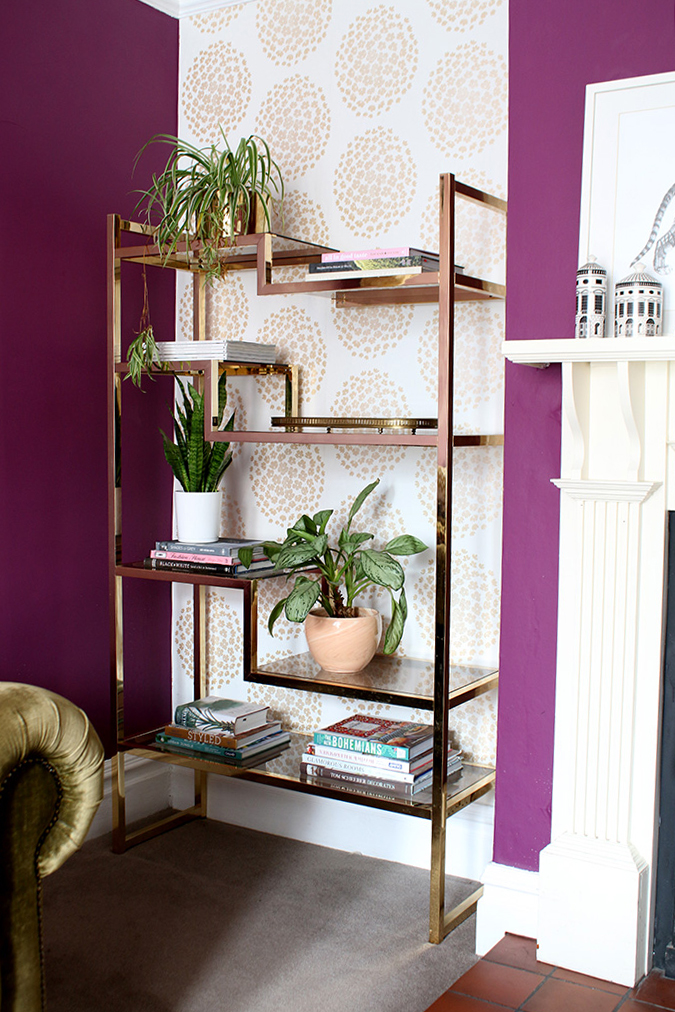
Step 4: Add Some Life

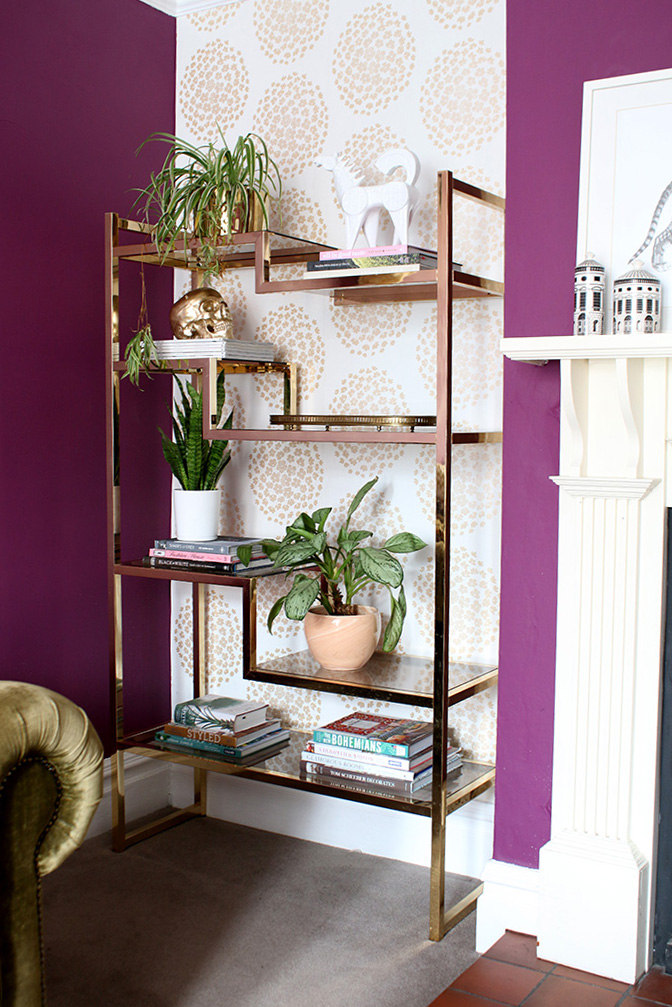
The next step for me is adding some life. There is pretty much no surface which cannot be improved with plants in my opinion. Now, at this point, I’d advise to only start with your larger plants. You want to start with your biggest items before moving on to the medium and small. And plants – due to their lovely leafy nature – are great for filling in some of that blank space without overwhelming it. We can see now there’s a nice variation between width (the books) and height (the plants) and we want to keep repeating this pattern, varying the relationships between your items so that you have items that take up space horizontally and items that take up space vertically.
Step 5: Add a Tray
So as you’ll notice in Step 3, I didn’t include books on every shelf. So what else can be used to create that horizontal effect I wanted? A tray of course. Trays are another one of my go-to’s when it comes to styling almost any area in my home and they are perfect for corralling smaller decorative items to make them look a bit more purposeful and less like just a bunch of random stuff you haven’t bothered to put away.
Step 6: Add Your Larger Objects
Next, I’m moving on to a couple more larger pieces – in this case, a white ceramic horse and a gold skull. I purposely chose an item that was a little higher on that top shelf given the amount of negative space I had to fill and for the second squarer shelf, I chose something a little shorter and wider. So let the space you have dictate the size of the items you use. I find it’s normally more effective to use one large item that commands a bit of attention than a bunch of tiny ones to keep things from looking a little too cluttered.
Step 7: Layer In Medium Sized Objects
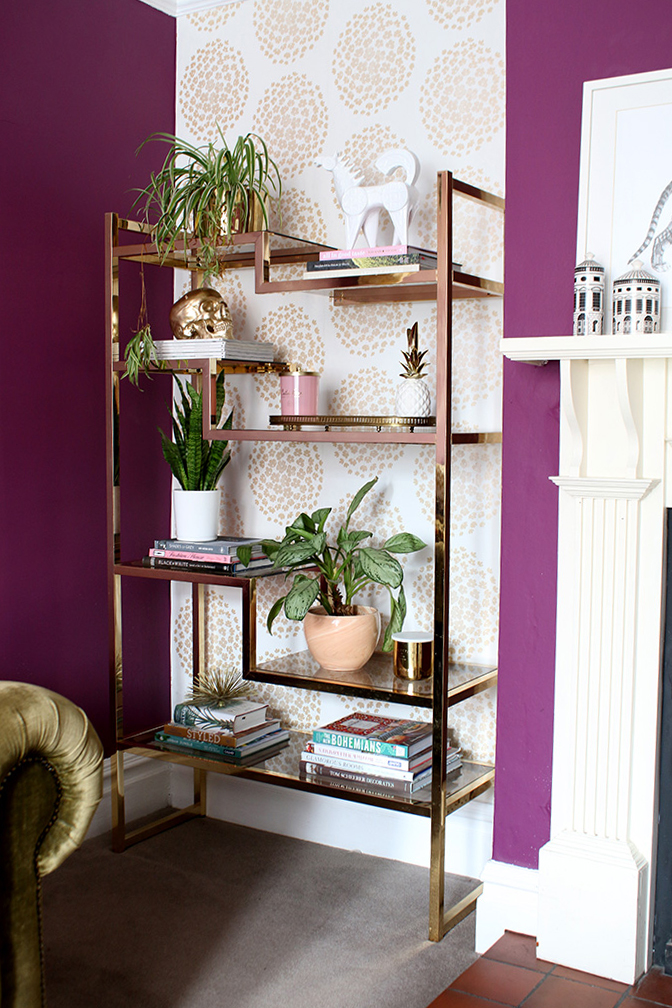
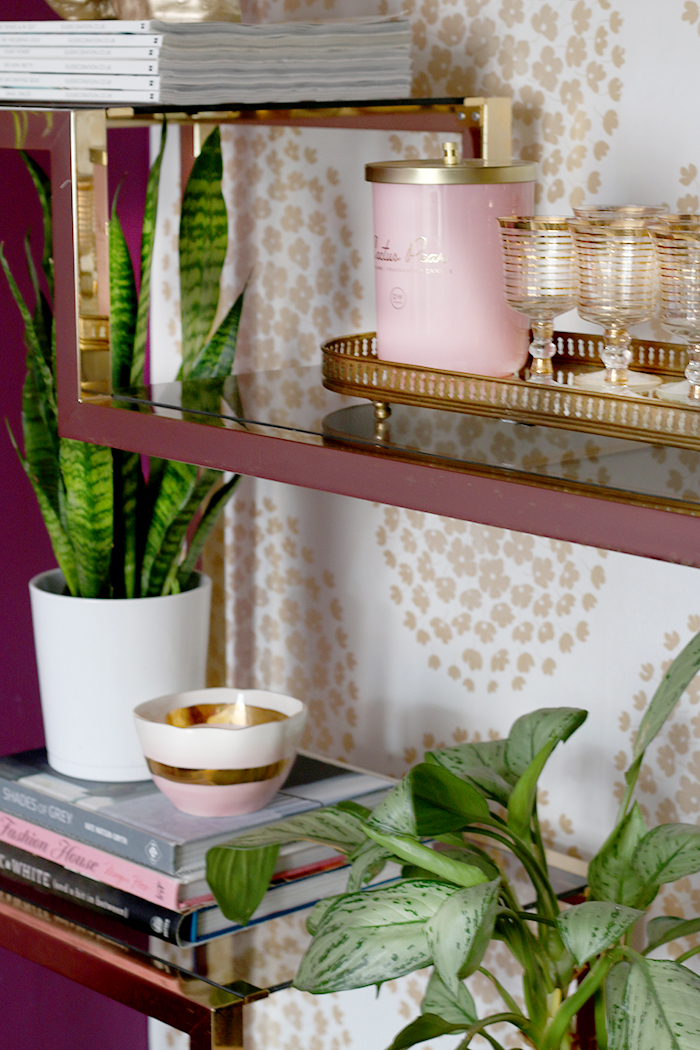
After that, I can move on to medium-sized items. I always like to include candles on shelves because I think it looks pretty at night so I included a large pink candle and a ceramic white pineapple, a small gold urchin on the bottom shelf and another candle next to the plant in the peach pot.
Bonus Tip! In between every step, stand back a bit and assess if things are working. You might find you need to swap out one large item for a different one or change around the books or add a dash of colour somewhere to balance things out. You’ll almost never get it perfect on the first go so give yourself a little time to tweak throughout the process.
Step 8: Layer In Your Smallest Items
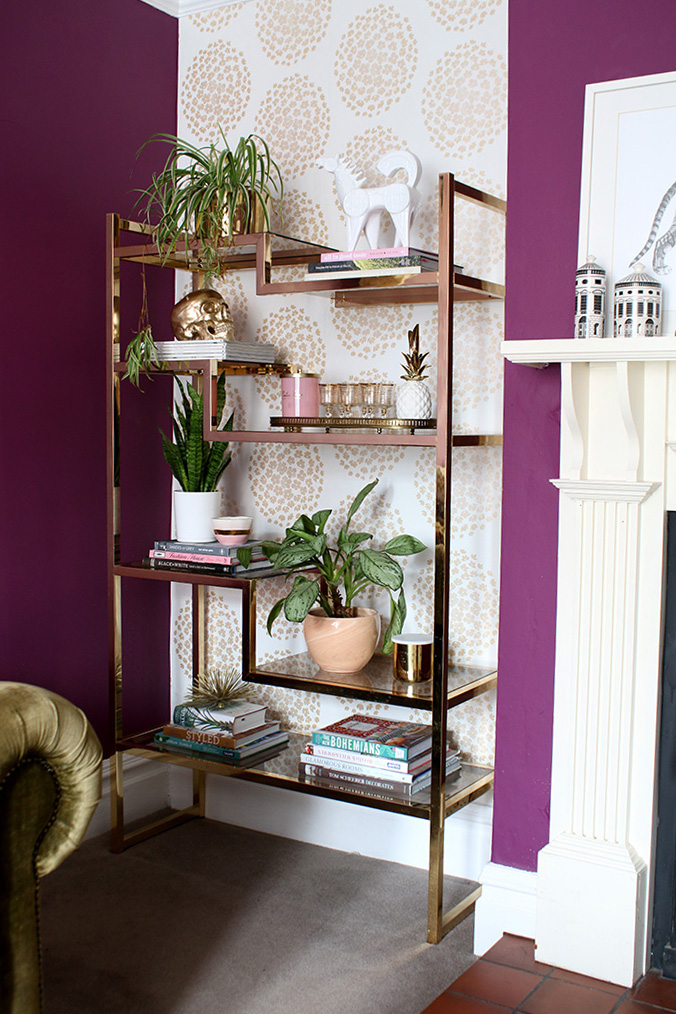
So once my medium items are there, I simply look to see if there are any smaller or awkward spaces that need a bit of filling in. This is where your smaller items will come in. A little pink and gold bowl and a set of vintage glasses finished off the look. Resist the urge to fill your shelves with lots of tiny things here – it’s always better for a shelf to have slightly too little on it than to be overly cluttered. (Obviously, “too cluttered” is subjective and as a maximalist at heart, this is my version of slightly more restrained – yours will probably look very different!) ;)
Step 9: Add Art
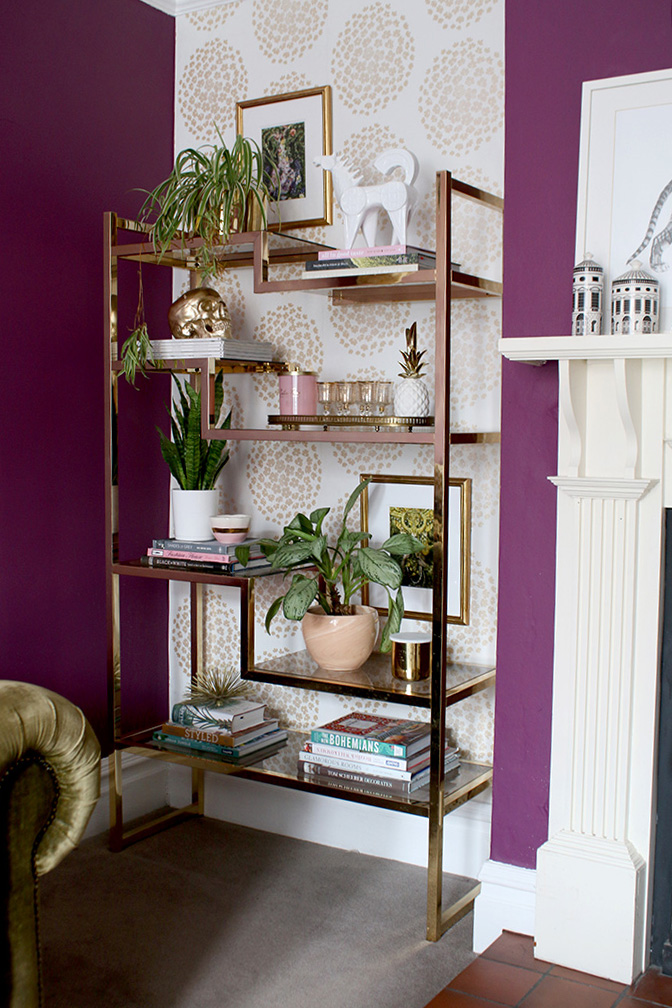
Now I could have easily left it just like that and called it done. However, I felt like something wasn’t quite right. The largest shelf (3rd down on the right) felt a bit off somehow. Remember, that odd numbers always look more pleasing to the eye and after trying a few items out to balance it, I decided perhaps the best thing was to have some art behind, creating my eye-pleasing triplet of items and creating a more layered effect. I chose another piece of art for the top left as well to balance it all out.
Of course, this probably could have been Step 4 or 5 perhaps but well, this is real life and how the shelf ended up looking like this! But if you are looking to add small pieces of art to your shelving, try to do it when the largest items are going in so you can layer in front of them!
And that’s it! My shelf is done. Here’s a little breakdown of everything that I included in my shelf styling if you wanted to pin it for future reference…
And here’s a cute little gif I made showing exactly how the shelf was done step-by-step.
I do find a gif quite satisfying, don’t you? (Okay, maybe that’s just me then).
And here of course, is the finished look in the context of the rest of the living room. Complete with sleeping dog.

Anyway, I hope you found that following my thought process was helpful! Would you want to see more styling tips? If so, anywhere in particular that you struggle with? Otherwise, I’d love to hear if you have any of your own tips so do share in the comments below!


My favourite blog ever! Finally found a way to express how i want my home to feel.. eclectic glam !! I adore all your tips, tricks and pics!! Keep them coming xxx
Really helpful post! At the moment I am in the ‘shove everything in boxes wherever there is space that is not the floor’ stage, but one day (I swear I’ve been saying this to you for years! ha!) I will have some shelves ready for styling and then I will be back to this post. I am certain mine won’t be as elegant, but it will certainly help them not to look too piled on, which is my tendency!x
This is so inspiring! I really want to run out & buy a shelf unit!! I love all your blog’s, you’re the absolute best! Looking forward to the next one! xxx
Ok. You just inspired to go and restyle the shelves in our passageway …. we have a really long passage with shelves on one side and a gallery wall info the other. The shelves had got rather … ahem … dusty and the children had moved things around so they didn’t look styled anymore.
My feeling ous that I need more plants on the shelves. Have my eye on a few. I also have rather a lot of photos of the children at various ages … I decided to put quite a few of them away.
I pilfered quite a bit from other rooms but I’m going to have to buy some tall things because I’m not quite satisfied with the ratios. Do you have any rules of thumb on ratios or is it just by sight?
Yours is truly the most inspiring decor blog I’ve come across. I aspire to your the glamour pig your house – when my hubby and 3 girls stop making a mess (and leave home 😂).
Kimberly, I absolutely love these shelves AND the way you styled them even more!! Your diagrams are so helpful. ❤️
I’ve just bought a Tassimo coffee pod machine, which I’ve put in my living room. As we don’t really drink alcohol, this is my version of a cocktail bar! At the moment, I just have the pods in the cardboard boxes they come in, at the back of the unit I’ve put it all on. I have a tray with a couple of cups, sugar bowl and teaspoon on, and the machine is next to that.
I want to style it though, and have been wondering what to use to put the different pods in, as I don’t want to get those wire pod holders. Maybe a nice bowl, although I’m also playing with the idea of incorporating a vintage glass cake stand somehow (maybe in place of the tray).
There is a little bit of room at the other end of the unit (an Ikea Kallax 2×2), so I’m thinking a tall plant could go there to add height and life.
I think I’m going to be fiddling with it for a while, to try out what looks good and works for me.
So, after that long preamble, when you’ve got your kitchen finally done, it would be good to see how you style gadgets like coffee machines (if you do!)!
Your styling of the shelf unit looks good. Those pictures behind the top and bottom shelves definitely make a difference to the final look. The only thing I would change is the white horse, because with the pale wallpaper behind it, I think it disappears into the wall.
A beautifully set out shelfie and a really helpful post. I adore the colours you have selected and everything looks balanced and right.
I am lucky enough to have very deep windowsills in my cottage and would love some inspiration for styling them up. I have to be careful with books and art as the sun can damage them, and of course I still need to be able to open the window without everything being blown over! Help & suggestions gratefully received x
I’m in love with that shelf! Saving this post for later when I can apply your tips – thanks!
Angela at Blush & Pearls
Right I’m definitely re doing my shelving units next week. I must get plants & a tray first. Love this approach – I used the coffee table one last year and I’m pleased with that. I think my shelf is currently too book heavy – just love books but maybe need to move some off & move in the plant life! Thank you!
I loved the gif too. Totally works for me. I can watch them over and over – yes I need to get put more!!!!
Lovely! And indeed the gif is very pleasing to watch! Wondering how you will paint (if, actually) the tiles in front of the fireplace- black gloss? White and black check?
The art of shelfie is totally lost on me (love things inside cupboards, not on them) but since I have a few shelves in London house, I am getting better at it- trouble is, the set up has been the same (but for dusting rearrangements) for the year now- time to flip bits around?
Kimberly this is SO helpful – I just adore the way you style shelves and vignettes so for me as a novice this post was everything! You wouldn’t think there was a method to doing it, but it totally makes sense. I soooooo want a shelving unit like this – crying over here that you got to it first!
And YES to the GIF – love it love it <3
Catherine x
Gorgeous! Thank you so much! ❤️
I would love to try this. My space for such a piece has a
*lot* of trailing cables lower down/on the floor though. Is there anything i could place on the floor under the shelving unit that would hide cables but still look good with the shelving unit? 🙏🏻
That’s lovely!
I’d love to see how you approach styling your jewelry and accessories. I have a lot of fun necklaces, scarves, bracelets. I do not have a walk in closet * oh gawd, how amazing that would be!*
So how do I keep it out — so I can see it and therefore wear it — but not junky and cluttered and messy. Know what I mean?
Absolutely stunning!! x
Really enjoyed this post, I’ve got a lot of things and some times it feels all wrong. I struggle with places like my fire place mantle it always looks too full if I take somethings off then it looks empty can’t win, I think i’m going to go for a faff. Xxx
Loved it, entertaining and inspirational. I have a white bookcase, that’s full of books and a few photos, it looks rather drab, do you have any inspirational suggestions please.
This was great. How to style a shelving unit can definitely get a little overwhelming, especially when you have a lot of ideas hitting you at once. This step by step guide has solved my problems and can take a deep breathe and relax next time I find myself needing to style any shelf.
Thank you Kim
xoxo