Okay, this is less of a tutorial and more of a ‘show and tell’ but you’ll have to excuse my excitement. Because this is just too easy and tutorials are really completely unnecessary.
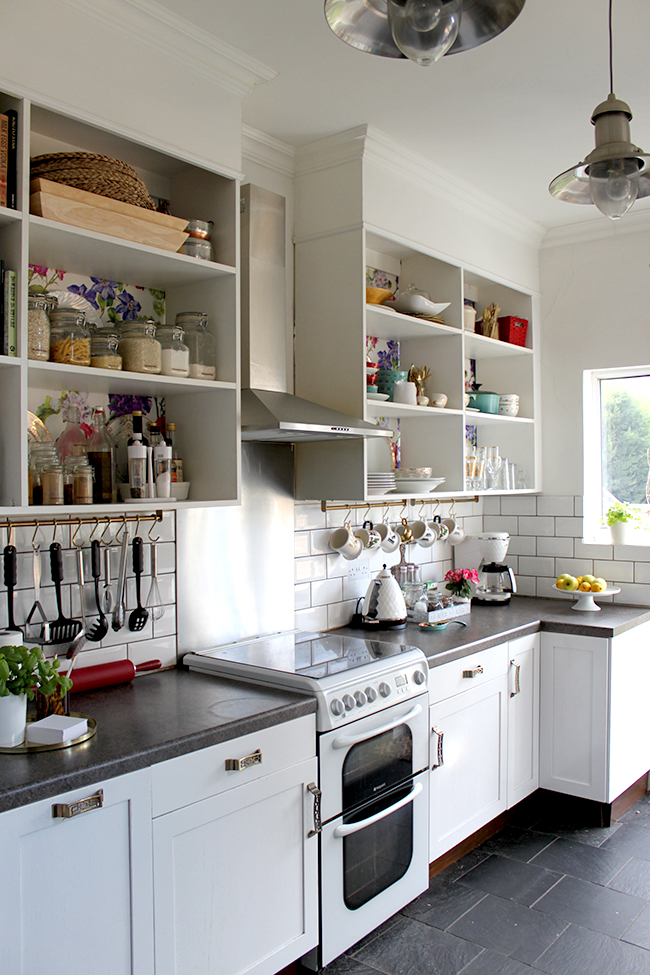
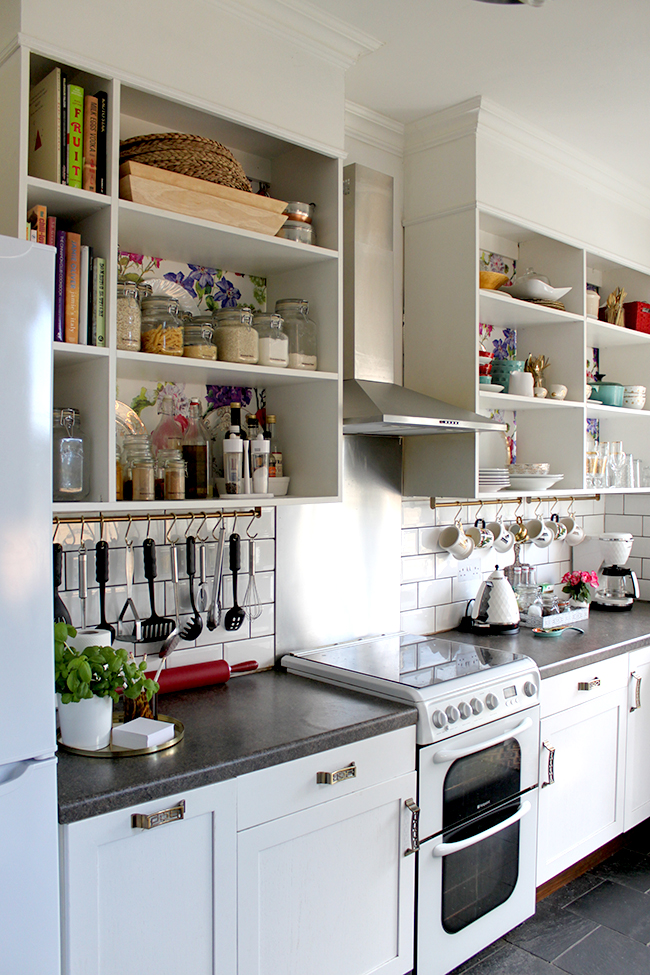
If you are familiar at all with my kitchen, you’ll know that I’m not adverse to ‘letting it all hang out’ – not that I am starkers when I cook (I mean, who wants hot oil splattered on their nether regions? ……… Oh wait, I suppose some people do) but no, no, it’s not that. It’s that I like SEEING STUFF. I know that there are many people out there who are what you might call ‘open storage adverse’ so if you are one of these people and you want to look away now, that’s completely fine with me. Everyone else, read on.
Now, as I said in my 2015 Goals post, I really want to go back to giving the kitchen the attention it deserves. The poor thing had a ‘good enough’ stamp stuck to it’s forehead about a year ago and it pretty much hasn’t changed much in all of this time.
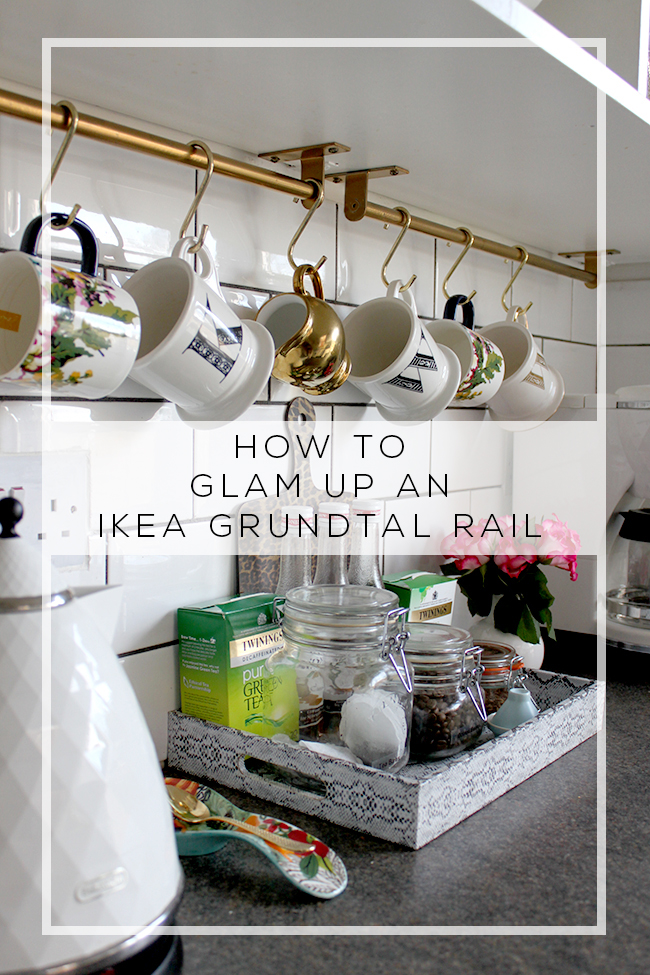
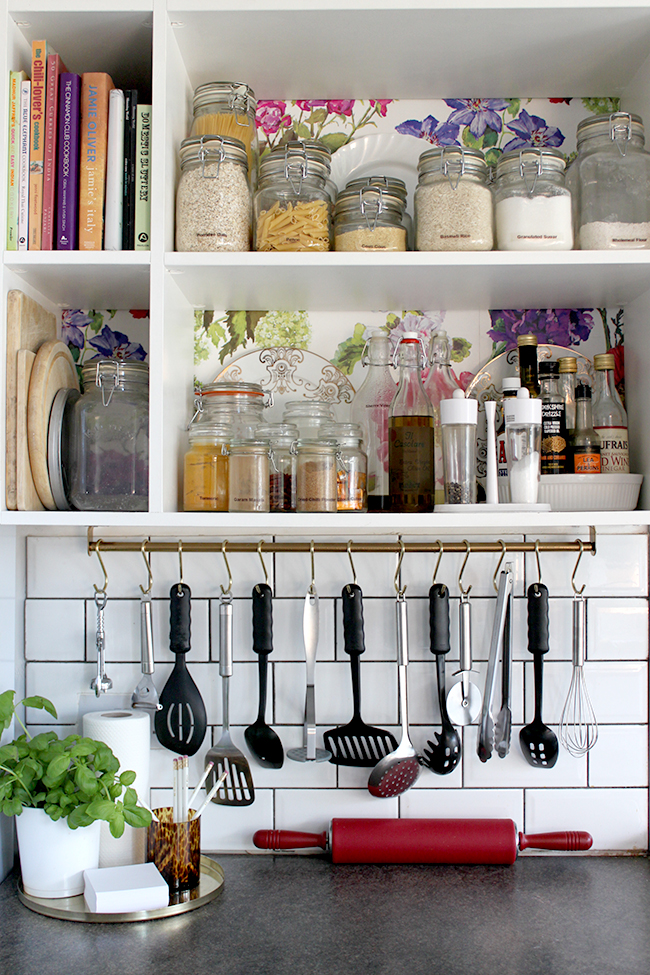
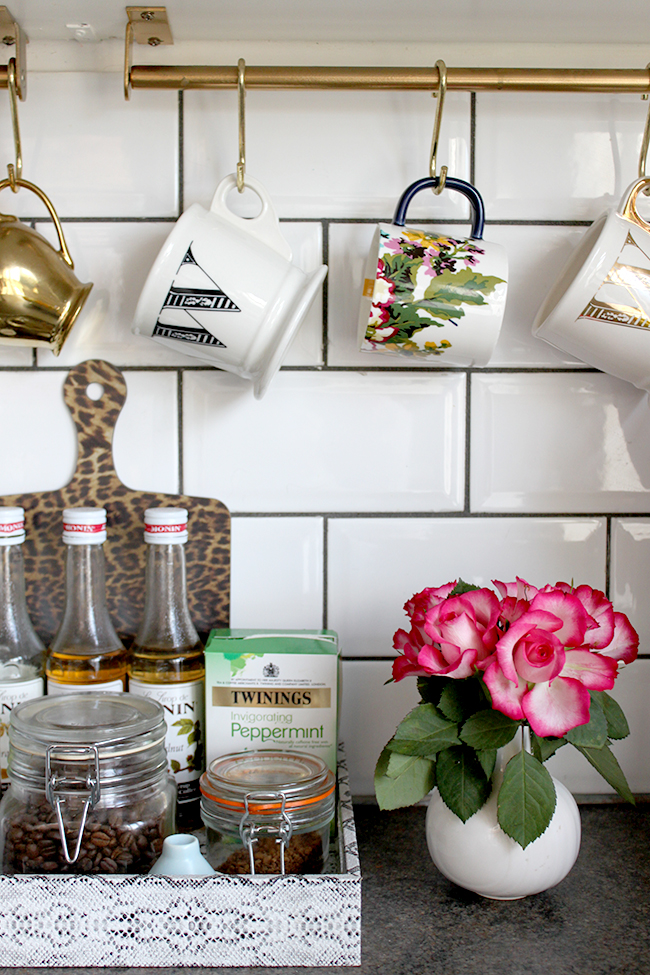
One of the things I’d been itching to do for AGES was to change the finish of the Ikea Grundtal Rails (just £4 each guys) where my mugs and utensils hang. I think they are supposed to be installed on the wall but I decided to hang them directly under the cupboards which gives them a slightly different look.
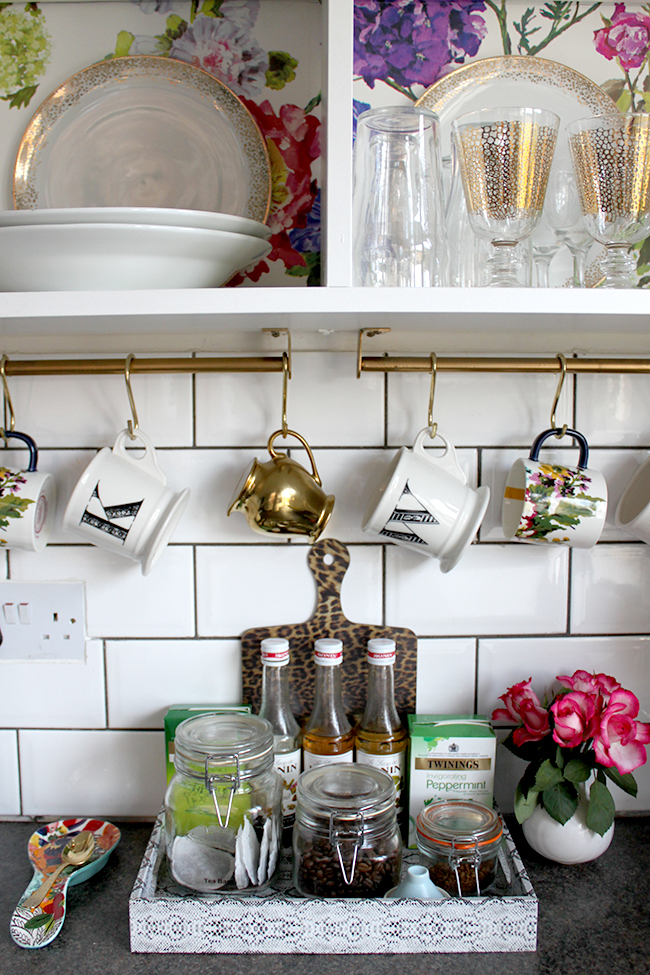
I’ve introduced a lot of brass and gold to the kitchen and while I don’t mind at ALL the look of mixed metals (I’ve certainly had it in here for a long time), I really do want to start considering bringing in more brass/gold and replace some of the chrome/stainless items.
All I did was take down the rails, spray painted them with two coats of Montana Gold Gold Chrome, left them to dry for 24 hours and hung them back up. For those who need more details, here you go.
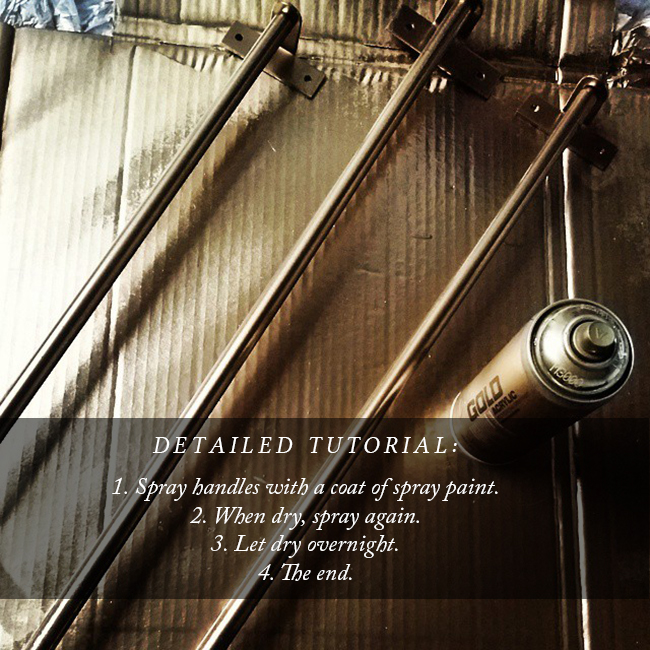
I told you it was unnecessary.
But my god, I love them. WHY DID I WAIT SO LONG?
Now, I know this is not exactly a meaty post (“Ughhh sure, you spray painted something gold, Kimberly, that’s great, can we get on to actual real DIYs now please?”) but it’s SO effective that I hope you’ll excuse the fact this isn’t exactly rocket science.

There are two other areas that I’m hoping we’ll be addressing rather sooner than later as well – that stainless steel cooker hood (extractor fan for my US readers) and the stainless steel splashback have got to go. It looked fine when we had a stainless steel cooker but now, I look upon it like some kind of demented King: “You no longer please me! Away with you! Off to the dungeon!” So I don’t have a dungeon but I have a few ideas so that’s good enough.
The second thing I am desperate to address is the lighting. I get a lot of love for those pendants but the stainless steel ‘Industrial’ look is as far away from my style as it really gets and I just feel like they no longer ‘speak’ to the rest of the space. I am trying desperately to find something affordable I love but it’s been a little bit of a battle. Trying to find brass lighting that isn’t either very traditional or very industrial is absolutely IMPOSSIBLE in this country. I have actually wailed about this on Twitter but it doesn’t seem to have miraculously birthed a lot of lighting options for me out of thin air (not surprisingly).
So I may be DIY-ing something in the future. I haven’t decided yet.
In the meantime, here’s a little before and after action because you know how I love me a good before and after.
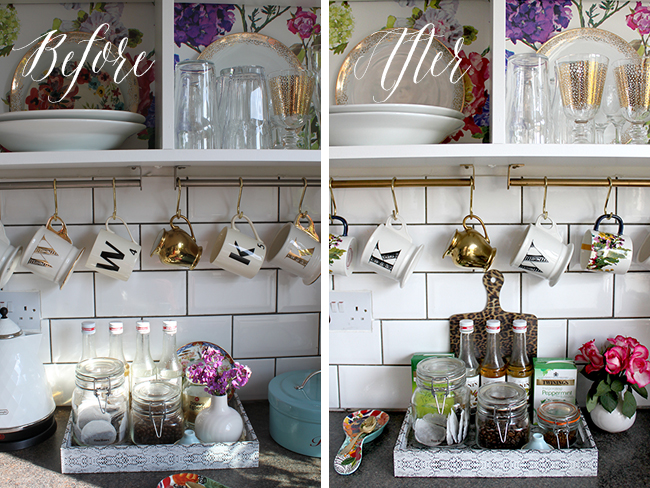
Ahhh so much better, no?
So what do you think of this simple swap of finishes? Any ridiculously easy DIYs that you’ve done recently that have made a big difference? Do tell…


This was actually really useful as I’m planning on doing something similar with clothes rails, so good to know it can be done! Looks lovely, too. How about these pendant lamps for the kitchen? Brass, under £100 and co-ordinate with your fabulous kettle and toaster :-) http://www.bodieandfou.com/products/aston-brass-pendant-light
Ahh good call Alice! They would match really nicely with my kettle ;) The only issue is that I’m really looking for something that allows more light everywhere – these kinds of pendants will probably create very direct pools of light and as we don’t have any spotlights, it would cast some wicked shadows everywhere else. I know, I’m a pain in the arse! Now you see why I’m struggling to find something appropriate ;) xxx
Recently redid my kitchen. Yes, my son installed high-hat lighting in ceiling which doesn’t particularly turn me on. However, what makes the lighting just perfect is subtle dimmable under cabinet lighting — can’t imagine my new kitchen without it!
I’m tore up from the floor up about mixing metals and your kitchen looks spot on. It’s a subtle enough change that really makes a statement and ties in with the brushed gold hardware in the rest of your kitchen. The devil is in the details.
And this is giving me the right amount of inspiration! I got Robert a Nespresso machine for his birthday and I’ve been trying to style the damn thing into our kitchen. But I see you’ve a dedicated tray for such area. I am stealing this idea. Yes I am.
Aww thanks my dear! And yes – that’s my little ‘coffee/tea station’, somehow created just by corralling it all in a tray. TRAYS ARE MAGIC. Do it! xxx
It’s the little details! The rails look so perfect in gold! Gild all the things!
Love it! I love how gold spray paint makes everything just that more beautiful :)
Such a simple idea, yet a world of difference! I’ve just bought some copper spray to transform a white Ikea clothes rail and a shiny silver wire wall unit in my son’s room, hope they turn out as well as your little project! x
Glorious if you asked me. I love how bright and happy your kitchen is.
Sometimes the quick simple DIYs are the best – such an effective change!
I love your open storage, but don’t know how you keep it so neat and pretty looking. So organised!
I hope you find the right lights (although I’m very fond of the current ones!) – so frustrating when you can’t find what you want.
Maria x
Love it and I need to come up with some easy DIYs again ;)
Love this Kimberly. I love that you hung them under your cabinets too #rebel. Also might I add I adore your kitchen. Im completely and totally a fan of “letting it all hang out”. Im in the middle of reno-ing our little bungalow kitchen and all of our upper cabinetry is open as well as a portion of our lower cabinets. Your kitchen def makes me happy:)
I absolutely love how this looks!! I am planning on doing the same in my kitchen! I was just wondering did you need to do anything special to hang the rod due to the weight of the mugs? Are just screws enough to hold that weight?
thanks!!
The screws were absolutely fine for the mugs! They are nice and sturdy, no issues at all. It might depend upon what they are screwed into (this is MDF) and if you are nervous, you can always use a rawl plug but these ones are holding up just fine :) HTH! xxx
Thank you so much for getting back to me! I am excited to try this in my own home! I will be installing this soon!
Hi Kimberly….just wondering where you got the brass hooks from? Also has the spray paint lasted ok? I was worried the hooks moving around on it would eventually chip the paint. Anything I’ve ever sprayed gold (as I spray so much ikea stuff gold haha) has always ended up chipping. Maybe you know of a way to stop this!? Thanks!
Hi Diane! I bought the hooks originally from Cast In Style but they don’t seem to do the brass ones anymore. I have, however, found them on eBay here:
http://www.ebay.co.uk/itm/10-X-3-75MM-Brass-S-Hook-Hooks-Kitchen-Clothes-M2661-/251160998232?hash=item3a7a5cb158:g:nSMAAOxylwpR5Uyi
and here
http://www.ebay.co.uk/itm/10-x-BRASS-PLATED-75mm-3-S-HOOKS-Kitchen-Rack-Pots-Pans-Utensil-Hanging-Storage-/191878656764?hash=item2cacdbf2fc:g:5bcAAOSwfC9XPI8Q
Although those are a little bit smaller than the ones I have (mine are 3.5″ and these are 3″ but they’d do the job!).
As for the finish – I’ll be honest, I thought the rails would chip eventually as well but they really haven’t. I think that’s because I don’t really move/slide the hooks around that much – I simply take things off them and put them back! ;) So they’ve held up remarkably well! The only thing I will say is that the gold paint has darkened a bit over the years so they aren’t as bright as they were when I first did them! I might end up respraying them purely for that reason alone eventually :) Hope that helps! xxx
Thank you so much Kimberly! And for finding me the hooks which are perfect. I just felt like my kitchen was really lacking something it looks so plain. I also want the exact same cups as you have on show haha. I’ll have to teach my husband that it’s the nice cups that hang on the hooks haha! I’m also gutted I hadn’t seen your diy faux marble shelves last year before I hung plain thick white floating ikea ones in my alcoves….very sad :(
Haha! I got rid of most of my ‘ugly’ mugs so he knows now which ones go where although he doesn’t always put them up in the right order!! LOL! But then I’m bit OCD about stuff like that ;) As for the shelves, why not cover them with the marble contact paper anyway? Might make you love them again ;) xx
Haha that’s hilarious! My husband never really gets it. I love my cushions neat or I feel stressed, yet he comes along and throws them all off into a pile grrr! That is a good idea yes! Thanks again!
Loved the whole idea of it. Thanks for sharing these good staff! Keep up the good work!
wow. Thanks for sharing the ideas.
“this is less of a tutorial and more of a ‘show and tell’ “- I think you know how to play with words. Awesome….
Can you tell me where you got the beautiful drawer/door pulls from, on your lower cabinets?
Sorry, it was so long ago and the kitchen has been updated now but at the time, I got them from eBay! Alas, I can’t help more than that! xx