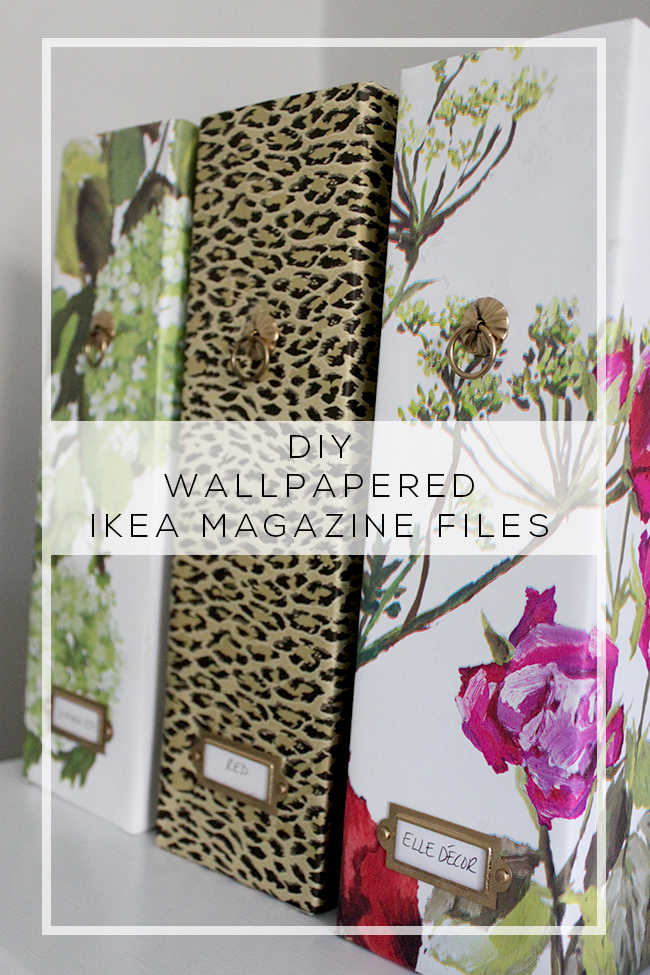
I just wanted to share a little crafty project I tackled recently, taking the very plain and basic Ikea Flyt magazine files and turning them into something worthy of being shown on a shelf using some leftover wallpaper.
It was a really simple project and given that I’ll be needing plenty of organisational help once we complete work on the Office/Guest Bedroom, I figured I’d get a jumpstart by making these. They were so simple to create and cost me less than £15 for all 5 – a far cry from the £12-£20 EACH that most sites were charging for something that wasn’t just your basic boring file.
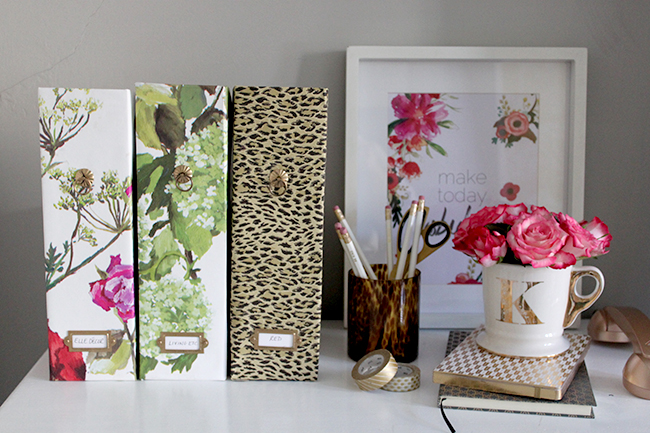
I fashioned a little ‘desk’ out of the chest of drawers in my living room just to show them off but I think they’ll look rather lovely hanging out on my sideboard in the office – once I actually buy one!
Here’s what I used:
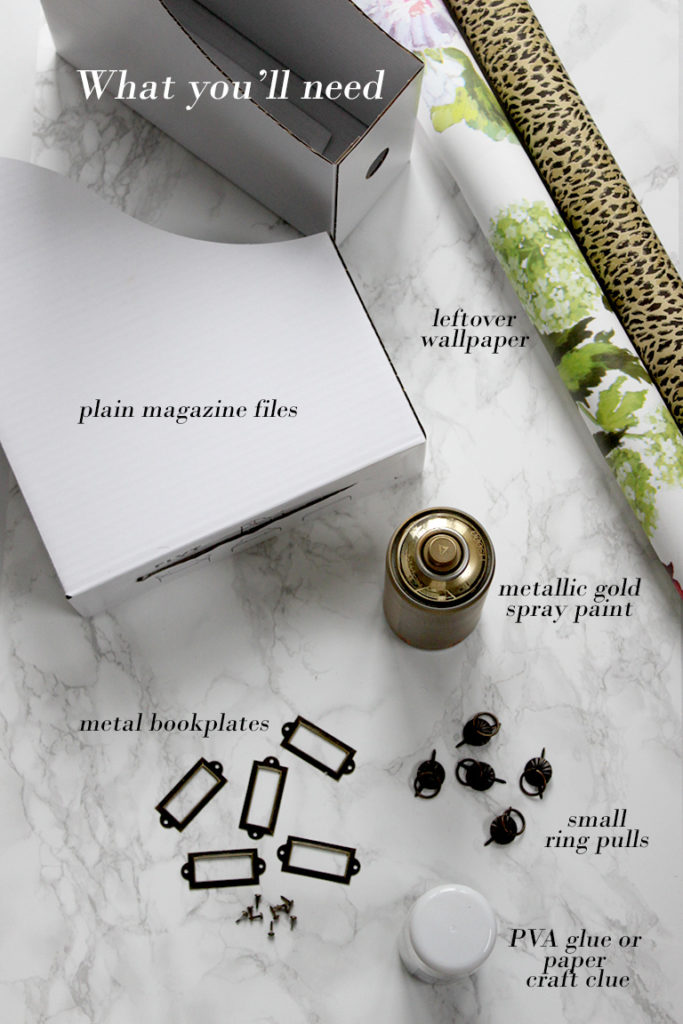
- Simple cardboard box files (I got mine at IKEA for a mere £5 for 5)
- Leftover wallpaper (or wrapping paper) in complimentary patterns or colours
- Metal bookplates (I got mine here)
- Small decorative ring pulls (I got mine here)
- Metallic gold spray paint (optional)
- PVA Glue or Paper craft glue
- A foam brush to apply the PVA
- A pencil
- Scissors
- A small screwdriver
- A large piece of cardboard or old newspaper to protect your work surfaces
And here’s how it’s done…
Now I found the bookplates and ring pulls in an antique gold but I wanted mine to be a shiny brass colour so I spray painted them and allowed them to dry. You can skip this if you are happy with the finish.
Start by laying out your wallpaper pattern side down. The wallpaper has a tendency to curl so you’ll see throughout I used some little brass elephants to help me hold the paper down at the edges! Now start by laying the box file on its shortest end, allowing enough paper on all sides to create one continuous pattern. You’ll then trace each side in succession until you have fully traced every side.
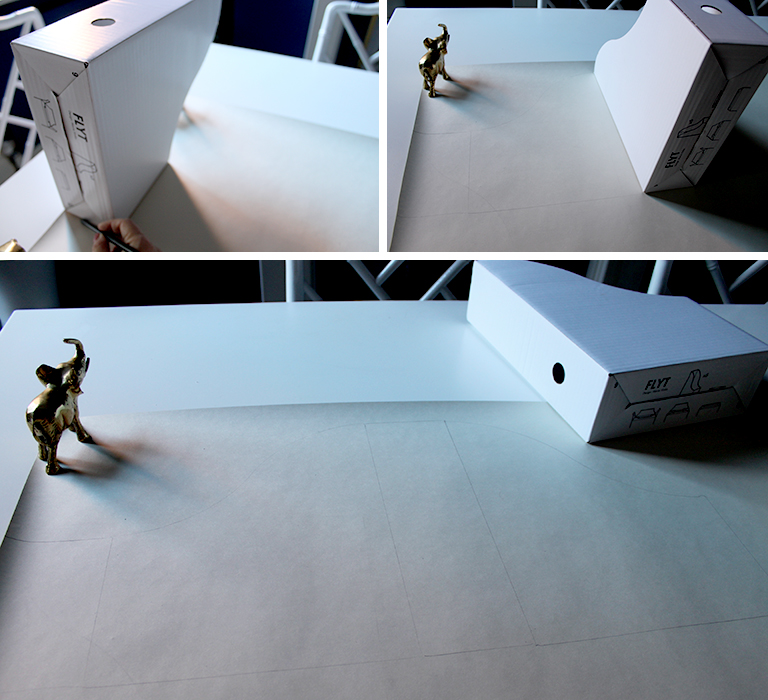
Next, cut out your pattern as a whole but leave approximately 4cm on all sides to allow for an overlap when you are ready to cover the file.
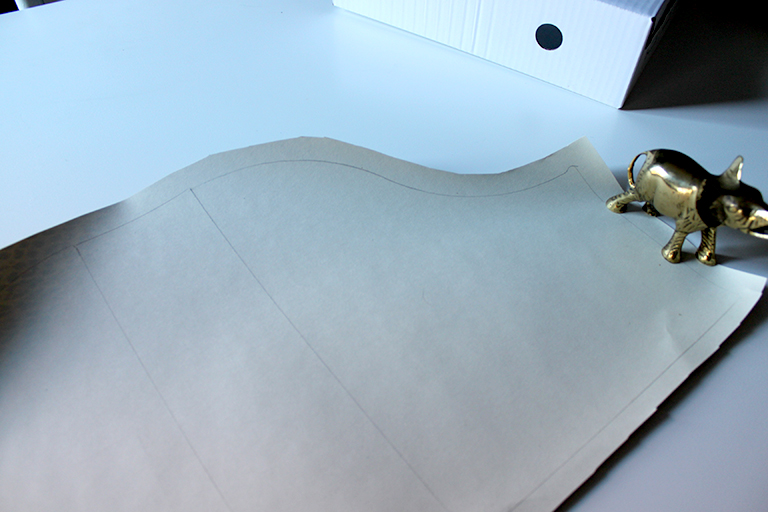
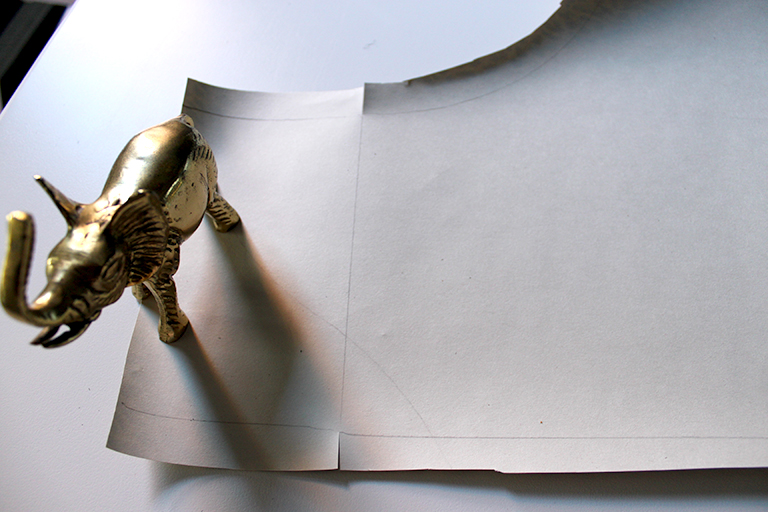
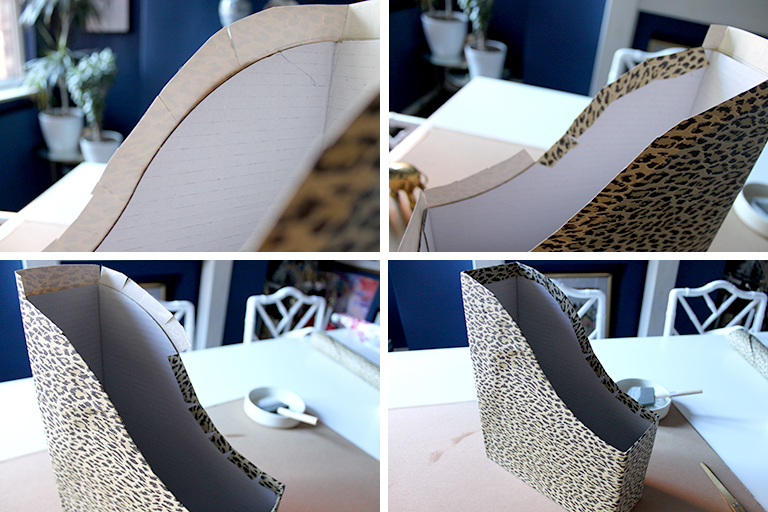
Cut small incisions in your paper just to your original outline everywhere there is a vertical line (indicating where the corners of your magazine file are) on your paper.
Lay down a piece of cardboard or newspaper to protect your work surface and brush a layer of PVA glue all over your paper paying special attention to the edges.
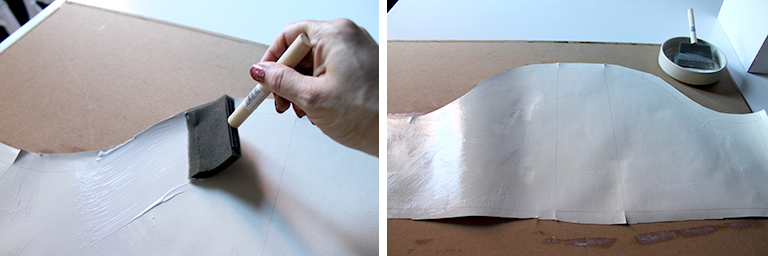
Lay your magazine file so that the back spine is aligned to where you traced it originally and press it down firmly. Wrap one side of the paper and then the other, smoothing and pressing down and then overlap the paper at the front. At the bottom, fold down the side flaps and then the longer ones.
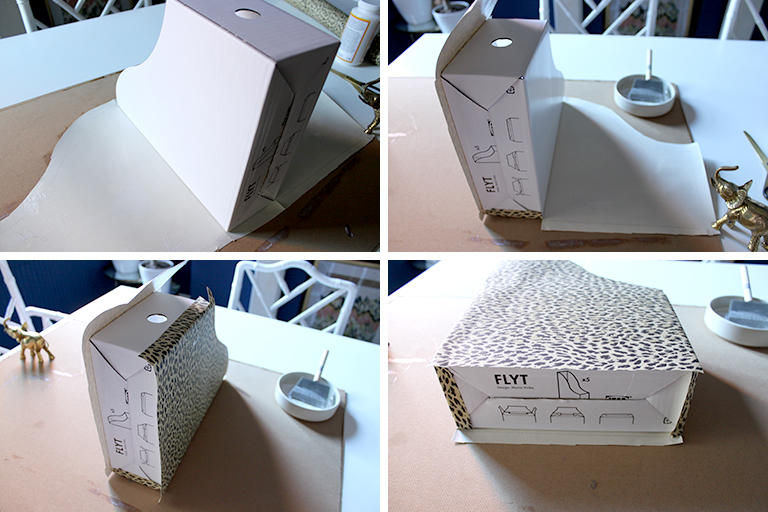
Where the edge is curved, make small incisions just to the point where the paper overlaps the edge of the file every inch or so. This will allow you to fold the paper without it creasing. Fold it along one curved edge, smoothing as you go and then the other curved edge. Then fold down the inside top and bottom. If your PVC dries a bit by this point, just use your brush to apply a little more to stick it down securely.
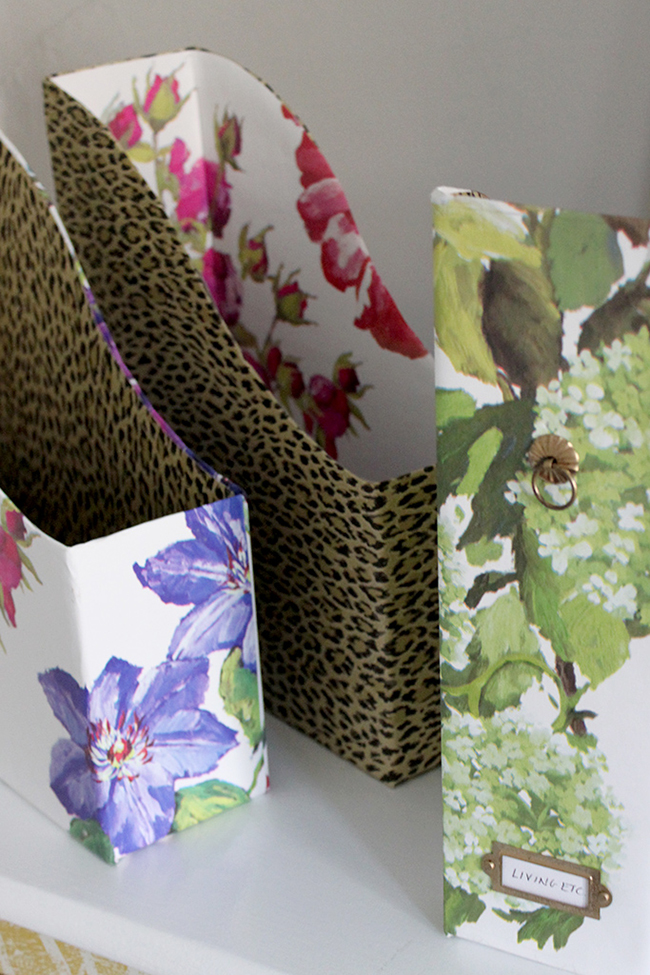
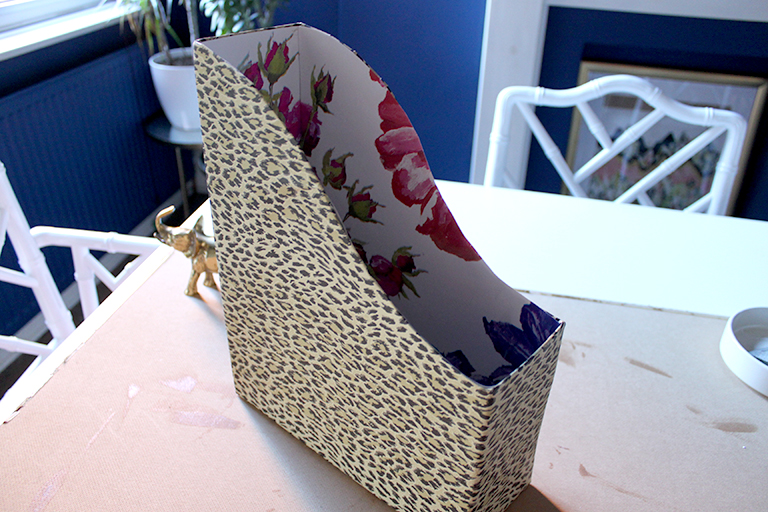
Now you can actually leave your file like that if you like but I decided I wanted to line the insides with a complimentary wallpaper. Simply trace the sides and back onto another paper and cut exactly to size.
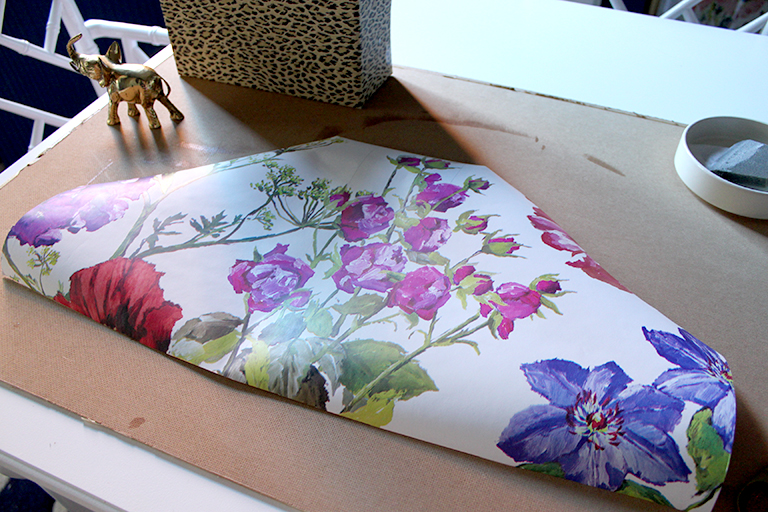
Cut into 3 individual pieces (you may have to trim these down a bit at this point) and use the PVA glue to apply to the inside of the file.
Now to attach the ring pull and the book plate, simply locate where you want them to go and using a very small screwdriver, create a small hole in the back to insert and press into place. (Excuse my glue-y hands in the picture!)
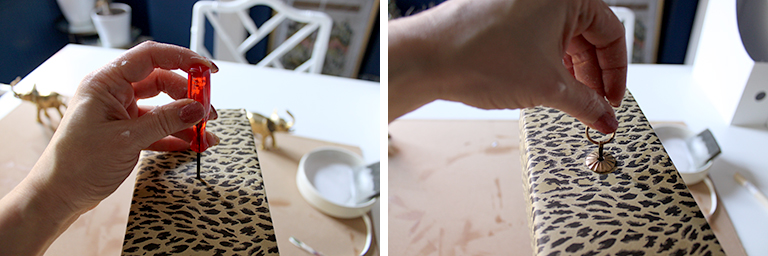
Repeat with the bookplate and insert your own tag and you’re all done! I did this with five file boxes, reversing the paper and insert on each one for a mix-and-match look.
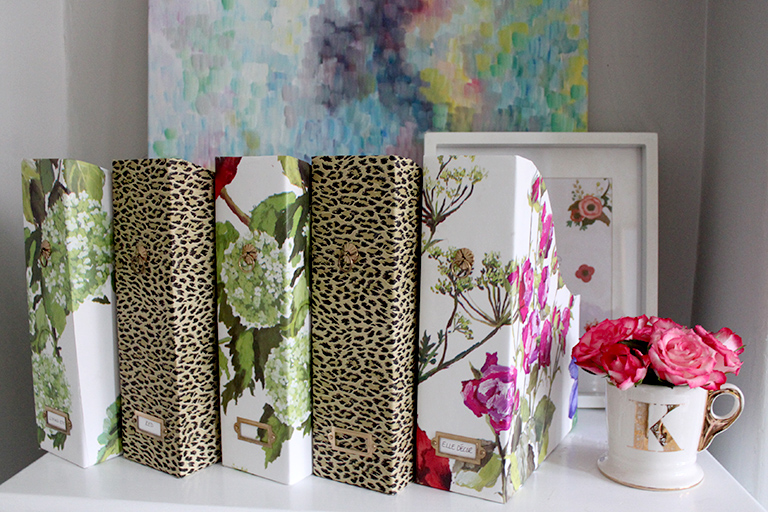
Now I have a personalised set of magazine files that look great and that I’m proud to have in my own home office.
Is this a project you would try? What colours and patterns would you choose?


They’re gorgeous – love them!
Aww thank you! :D xxx
Those are quite lovely.. Brightens up the are with a touch of class. Where do you find such beautiful paper
Thank you! The floral wallpaper is Designer’s Guild Alexandria Wallpaper and the leopard print is House of Hackney Wild Card – both were leftover from my kitchen and dressing rooms :) xx
So much attention to detail and so so pretty!
Thanks so much Julia, I’m pleased how they came out :D xxx
Good idea! Isn’t the paper too thick to properly wrap it though?
Hi Stephanie,
Once you ‘wet’ the back of the wallpaper with PVA (or Mod Podge which is what I used for this), it becomes a lot more malleable and easier to work with. As you can see, I got a really nice finish and there were no problems wrapping it :) If you have a look at the steps on the AO site, you can see how I did it – really simple! :)
Hope that helps!
K xx
Love the wallpapers you’ve chosen, we’re a big fan of covering files- my mum usually does it in fabric (since she has a ridiculous fabric stash!) but it jazzes up our office shelves a treat!
Oh, and I love the new site design by the way! xx
Using fabric is a great idea! Thanks Hollie :D xx
They look so pretty! The little pull handles are such a sweet touch :)
Cheers Meera! It’s always the little details that make a difference, no? ;) xxx
You are so talented Kimberly and you always inspire me with something new:)
Aww you are too sweet Anna! *blush* xxx
Oh these are the bees knees, Kimbo. I love the two patterns you used and how they compliment and play against each other so well. LOVE the pull and bookplates. They totally make it well lush. Mad props.