This post is going to make it look as though we got loads done on our bathroom but the reality is, that tiling is a pretty instant-gratification type process.
To think about all the work that went on in the past 6 weeks with the ceiling, the plumbing and the wall preparations that just don’t give you the wow-factor and then spending a few hours slapping some tiles on the wall and going OH WOW IT LOOKS LIKE A BATHROOM… it’s just the way with certain things…

So this weekend, we decided to get some more tiles on the wall. We were only able to do one full wall and most of a second because we ran out of tile adhesive and by that time, it was about 4:30pm and we were both a bit knackered from stressful weeks. So that’s what I’m going to share with you but I hope you like it regardless.
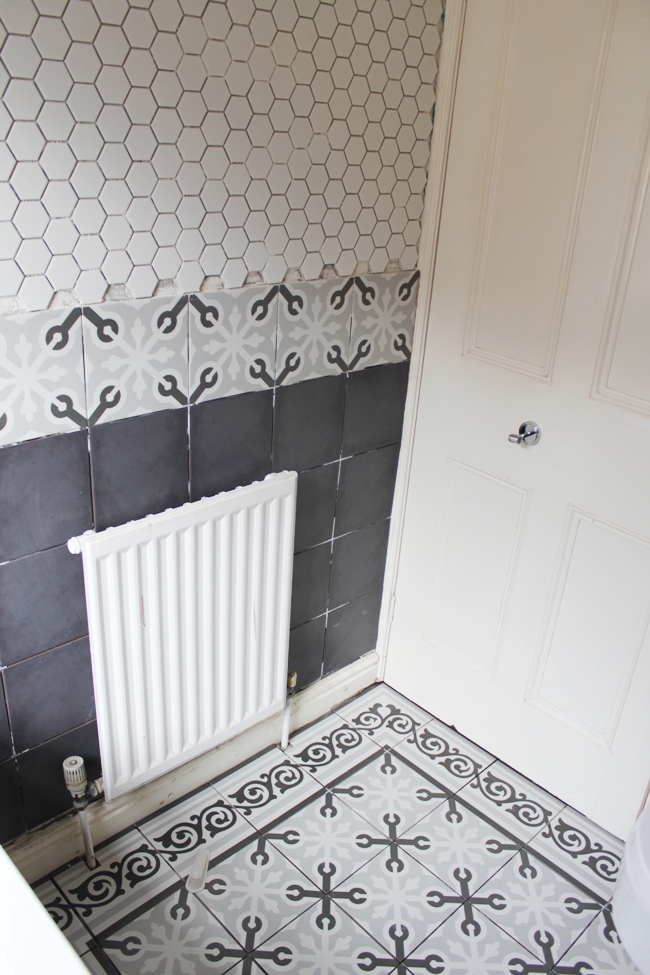
Now, I’ve loved hexagon tiles for a while now – that honeycomb pattern adds such a graphic element to a space. And they were a BREEZE to put up. Wayne said afterwards that every bathroom we do in the future has to include hex tiles because he found them so simple to install! ;)
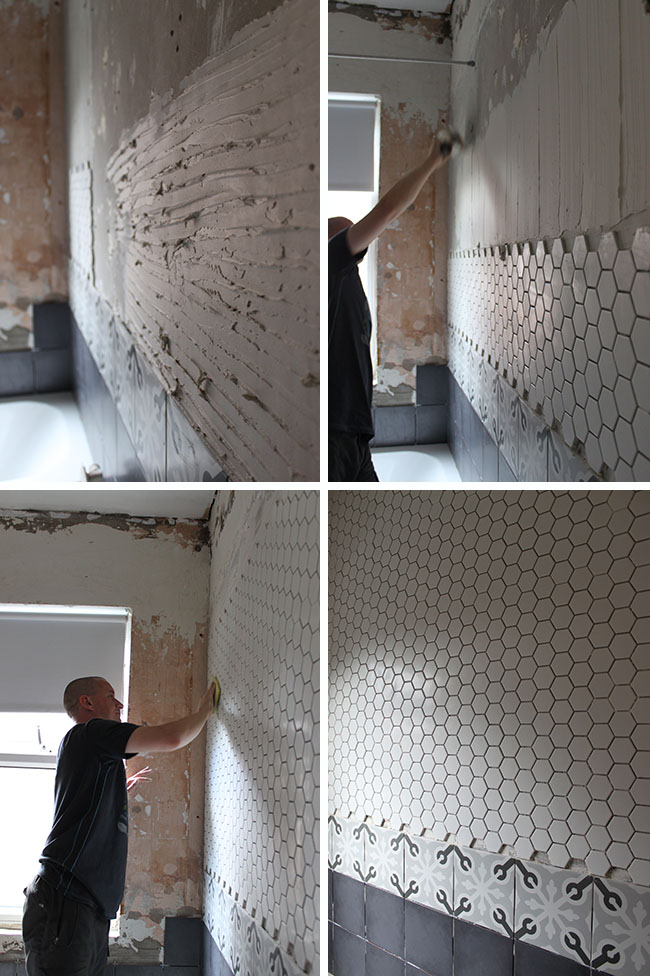
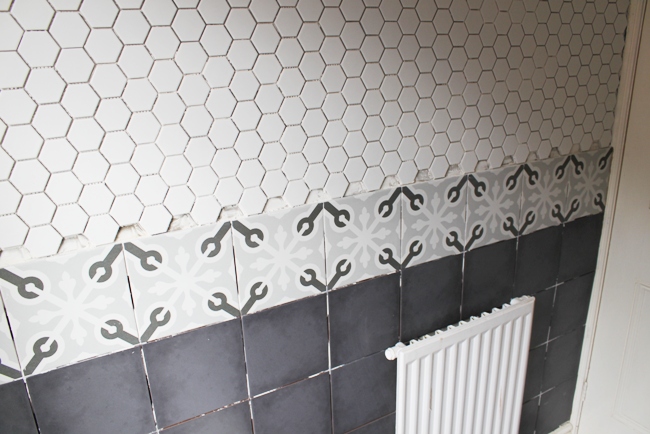
As you can see, we also put up a border of the Fired Earth decorative tile that matches the floor tiles along this wall to tie the scheme together. The radiator has yet to be painted to blend in with the tiles obviously.
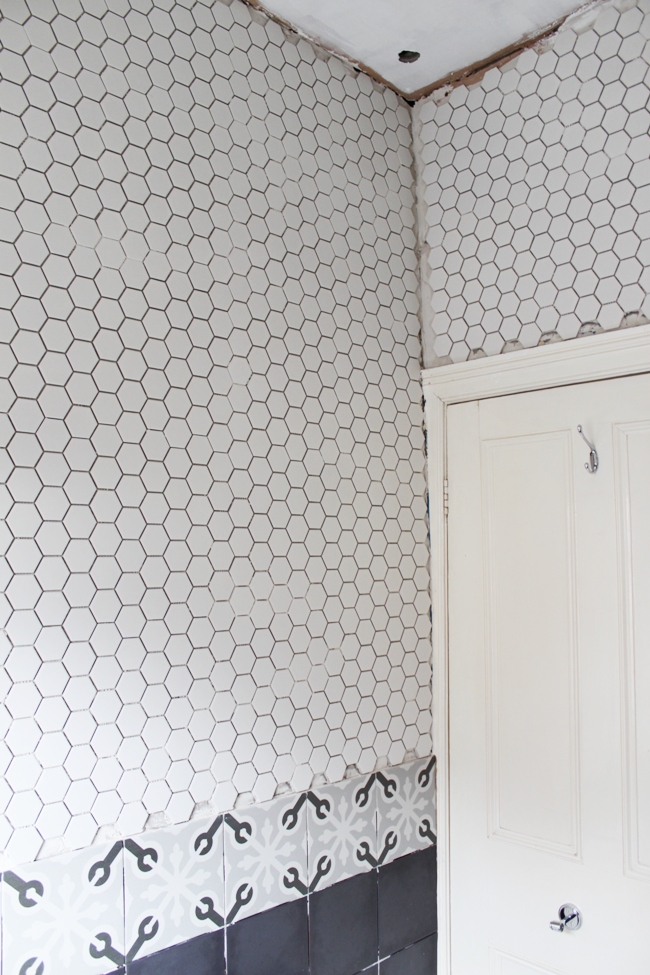
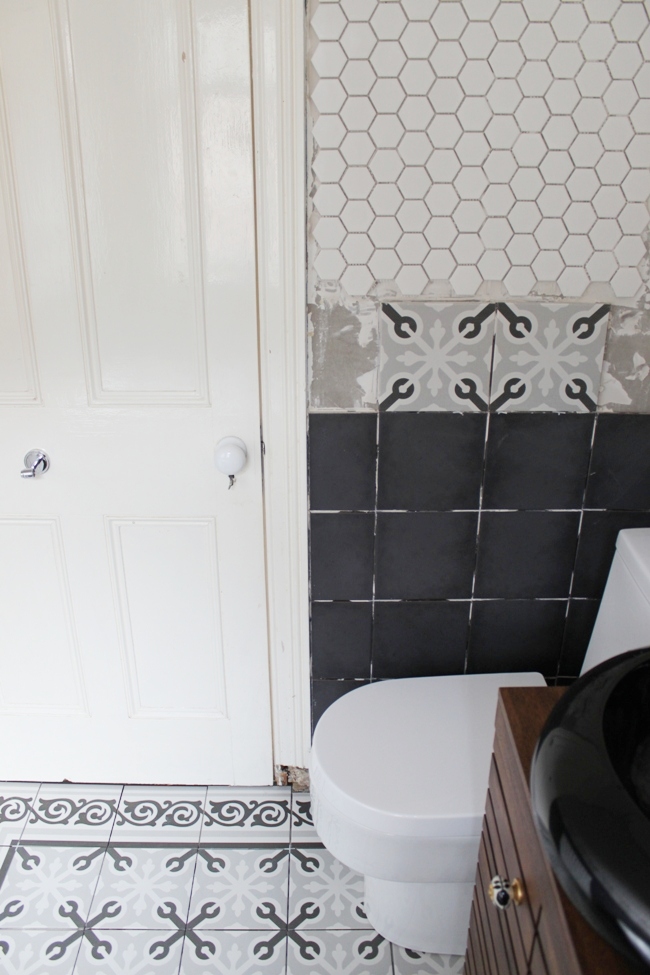
After this wall was complete, we moved on to tiling the wall where the door is.
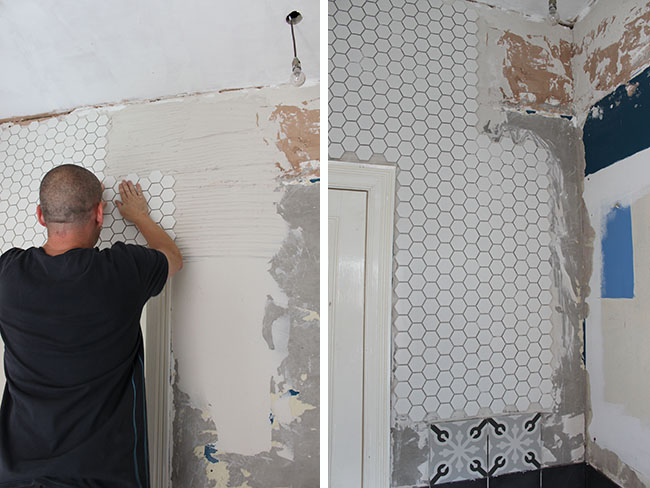
It’s obviously not done and there will be a lot of tile cutting that we’ll have to do to fill in where we couldn’t put a whole hexagon tile and everything still needs grouting (including the floors) but we just wanted to get something up there so we didn’t have to keep looking at bare walls!
You can see how it pulls everything together with the flooring…
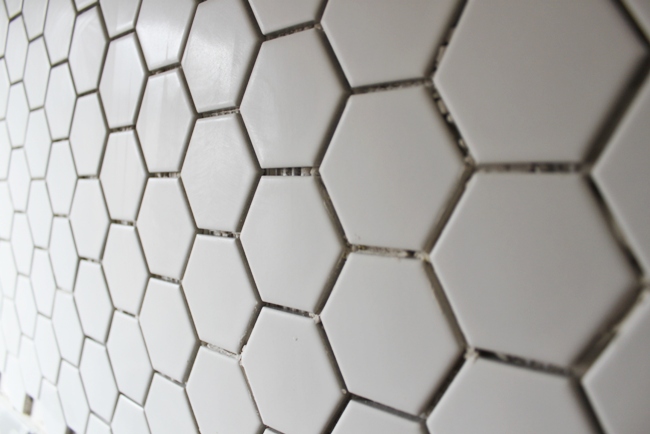
The hex tiles were purchased from eBay. I struggled to find hex tiles in this size and in white but found that this seller had loads and they were a reasonable price (which was necessary as we ordered A LOT of them). They come as a 30cm x 30cm mosaic so the whole process was very fast! (Of course, cutting all those tiny pieces to fit into the gaps won’t be as much fun but let’s concentrate on the positives, right?)
I love the pattern and I’ve debated using a black grout to make them really stand out but I think it might be just that bit too much. So I’ve decided to use a light grey grout instead so that you can still see the pattern but its not as stark as what you can see here.
So those were our tiling adventures this weekend! Do you love a good hex tile as much as I do?


I was only wondering yesterday whether we'd get a bathroom update this weekend! The tiles look fab and the instant gratification must be welcome after so much work. <br />I agree with you on the grey grout, black might be just a bit too much.
I loooove them! Hex tiles are my favourite and they look amazeballs with that floor.
You both have done an amazing job!! Cheers to you, it looks fantastic!! And I think the gray grout is going to look perfect. Love it!!
Wow! It's all coming together so nicely. The finish room is going to look amazing~
The tile is so, so gorgeous!! Amazing what a difference it makes!
The tiles are lovely, so stylish! You quite literally ooze style in every room – swoon worthy indeed. Oh, to have just an ounce of your imagination, style and bravery!! Def my favourite house blog so far, so thanks for visiting mine and bringing me here! Jude x
Awww thanks so much Jude!! *blush* So sweet of you to say! Can't believe your house was on the market for 3 years – obviously people just don't have the vision that you guys did ;) xxx
Thanks so much for all the lovely comments! You guys rock my world! I'm so pleased you like it, now to get the bloody thing done ;) xxx
Amazing pics!!….These hex tiles also make my bathroom looks luxurious, so i definitely try this..Can you tell me about its cost? Thanks in advance!!
Oh my goodness, I love those tiles! The hexagonal shape is definitely fun. I love the black and white theme you have going on in your bathroom. It's really elegant. Following you on Bloglovin'! <br /><br />May the Force be with you.<br />Emily
looks fabulous my dear!! I've got honeycomb tiles on my bathroom floor and I LOVE them. So clearly I'm a huge fan of your walls ;) Keep up the great work, it's going to be sooooo fab when it's all finished!
Love love love love love love love. That is all. Ha, no it's looking gorgeous, can't wait to see the finished product!
You're getting closer! We have smaller white hex tiles on the floors in our bathrooms and laundry room, because they were common in 1920s Craftsman bungalows like what we built. I have never seen them on a bathroom wall, and I love when things are different than the norm! You two are experts at tile by now, between your bathroom and your kitchen, no?
I love the idea of making a dramatic design statement with tile. Covering a bath area in tile from floor to ceiling. Creating a room with a uniform interesting surface.To see more visit. <a href="http://www.adrianscarpets.com/" rel="nofollow">Tile</a> Adrian's Carpets – Flooring Carpet, Wood and Tile in all of Orange County California.<br />
Great Bathroom Ideas. I hope you are very happy with the finish of the work. Though the bathroom looks small, its looks neat and well maintained.